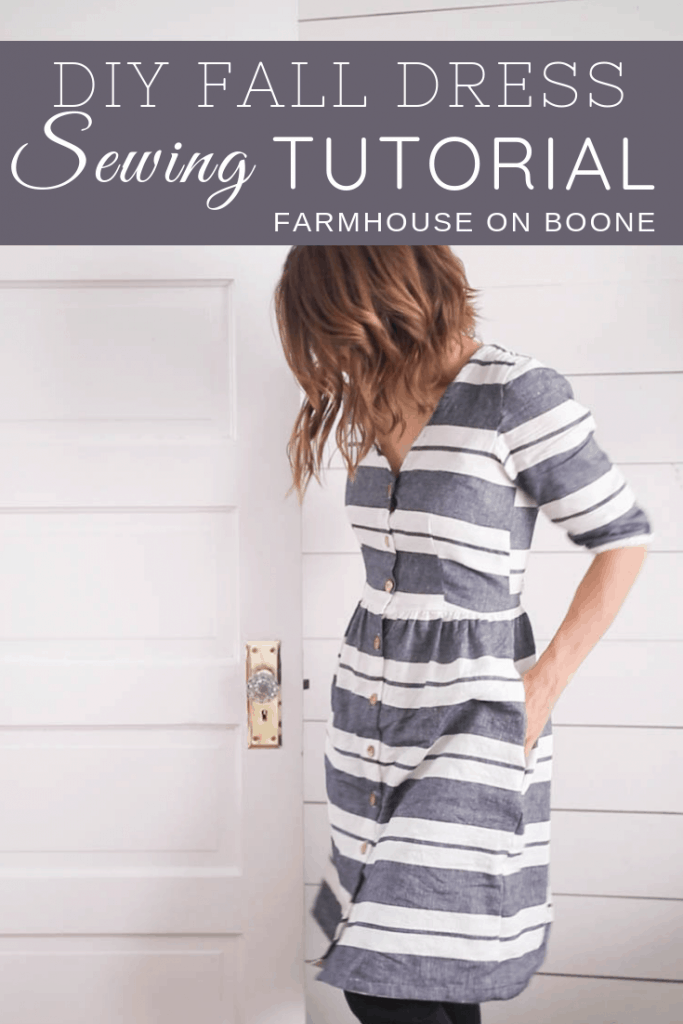
Learn how to make a simple linen DIY fall dress from the Megan Nielsen Darling Dress Pattern.
This post may contain affiliate links, which means I make a small commission at no extra cost to you. See my full disclosure here.
Collab with The DIY Mommy
I am collaborating with my friend Christina from over at The DIY Mommy. She is going to show you how to make her version of the Megan Nielsen Darling Dress. You can check out her version of the Megan Nielsen Darling Dress HERE. She does all kinds of wonderful DIY projects and tutorials and home decor. She is a super awesome person to follow. You can check out Christina’s YouTube channel HERE.
Excited for this dress
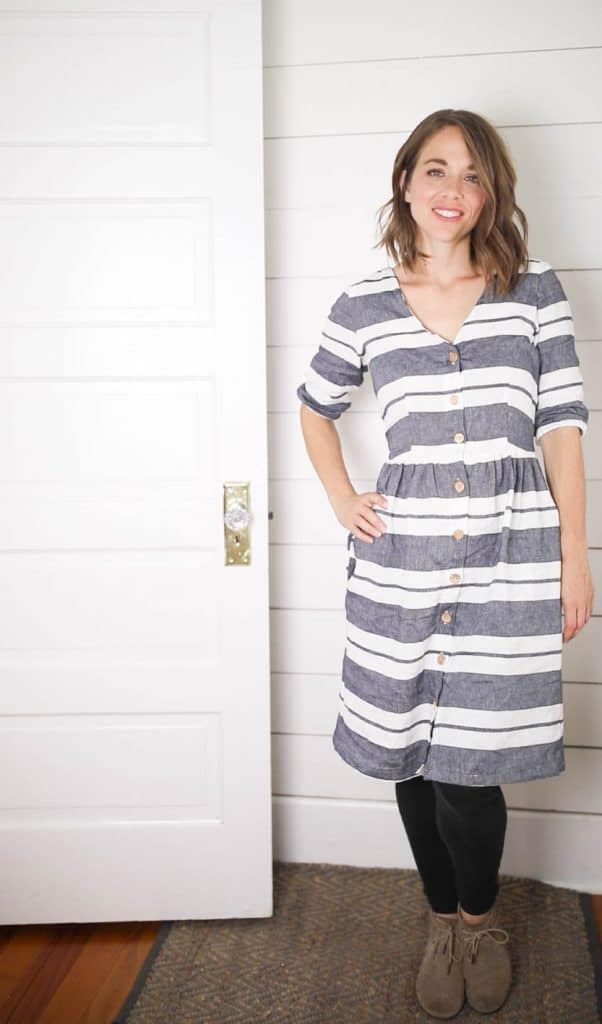
I am so excited about this project because it is something I have been wanting to do for a while. As a nursing mother, its hard to find dresses that provide easy access. This one is perfect because it has buttons. I also love that it is perfect for fall because of the quarter length sleeves. I am kind of picturing myself pairing this dress with a jean jacket or something to go with it. And I really just want to make it over and over again. I just love this dress and how it fits. It was super simple to make, so even if your brand new to sewing, I am going to walk you through all the steps, so that you can make this too.
Simple DIY Fall Dress Sewing Tutorial Video
Simple DIY Fall Dress | Megan Nielsen Darling Dress Supplies
Darling Ranges Dress Sewing Pattern Get 20% off with the code DARLING-DIY-FARMHOUSE at checkout!
Cotton Linen Stripe Navy/White Fabric
Simple DIY Fall Dress | Megan Nielsen Darling Dress Directions
I didn’t follow the pattern exactly
Now, if you have been following along for a while, you know that I am more of a winging it type of person rather than following a pattern, so as you will see in this tutorial I used the pattern for the shape of the dress and mostly after that I kind of go off my own sewing judgment. So, I don’t make all the markings that the pattern requires, but I will show you how I do it.
First wash, dry, and iron the fabric
So, before I started this project, I took lessons from my other projects where I didn’t do this, I washed, dried, and ironed this fabric first that way I won’t be surprised if my dress happens to accidentally make it into the dryer and shrink on me like some of the other clothes I have sewn.
Printing out the pattern
I tried printout out the pattern at home of 11″ x 8″ paper, cutting out the pattern shapes and taping them together, but that didn’t work out. So, I would highly recommend you never try that and unless you are hundreds of miles from the nearest FedEx or Staples or Office Max or somewhere you can get this printed in the large scale format.
The pattern comes in a small scale format where you can print it off on 50 sheets of 8 and a half by 11 paper and then tape the whole thing together or you can just have it printed onto a large piece of paper. I would highly recommend going with the large scale paper.
Find the right size
After I did my measurements, I decided on going with the small size. Some of my measurements didn’t quite line up with the small of the medium, so I just opted to go for small because that is usually what I would buy. So for reference, I am 5′ 5″ and about 130 pounds. So, it does run a little bit big. The ties in the back to help to make it fit better if the dress does end up being a little bit to big. You can tie it tighter.
Cutting out the pattern and fabric pieces
Line up the stripes
Now when the pattern asks you to cut the fold basically what they are showing you is you just fold the fabric in half and then you put that line on the fold and cut around that. And when you open it kind of is twice as big and it is connected in the middle of course. If you are a by the book sewer, make sure to mark all the pattern markings so that you can line everything up just perfectly. You know me, I like to wing it so I did not do that.
When the pattern asks me to cut two, I like to use the fabric as the pattern for the second piece because the fabric sticks to the fabric better than the paper does. But, whenever I am just cutting out the paper on the fabric I will pin the paper to the fabric.
Also, I am pretty particular with the way I lined up the fabric because I used stripes. Now if you are brand new to sewing, this is your first project ever, I would recommend using a calico, a floral, or something that isn’t important to line up.
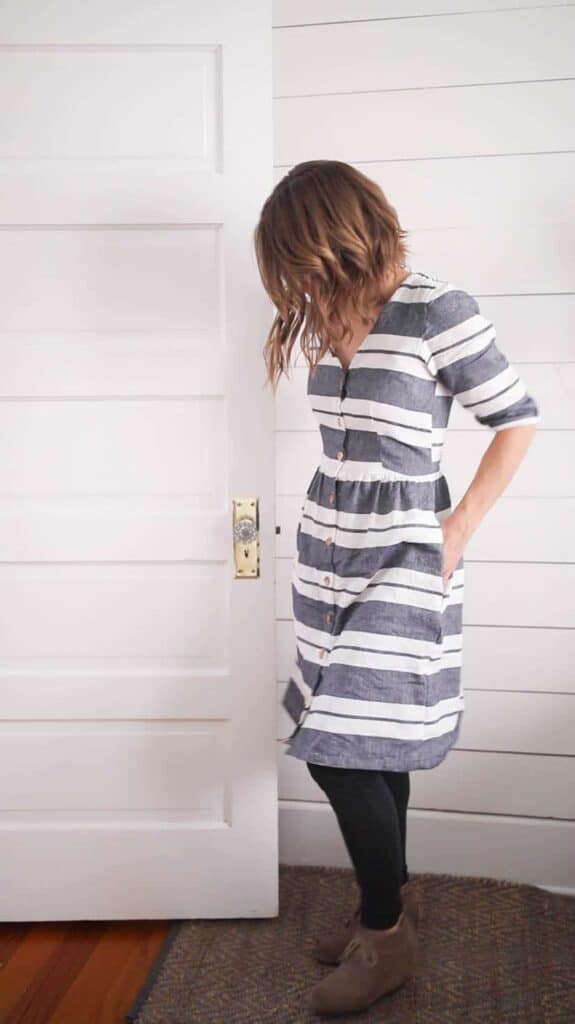
So, on my dress, when I was cutting out the pattern, I made sure to line up all of the stripes so they would line up nicely. With my dress, it is important for all the stripes to line up in the front where the buttons meet, otherwise, it would all kinds of messed up.
Cutting out the neckline and pockets
Now you will notice for the neckline facing in pattern indicates to cut it on the bias. Now I slanted the pattern piece so that the fabric grain, which is just the way the fabric runs, line up with the arrow.
To place the pockets in the dress, I measured down three inches and sewed the pockets in place on all the skirt pieces.
Then whenever I sewed the side seams together I just went around the pockets. I went down the top of the side seams, around the pocket, and then down through to the hemline.
Finishing the seams with a serger or zig-zag stitch
Now, just like every other seam and edge in this tutorial, I finish mine off with a serger. If you don’t have a serger you can use a tight zig-zag stitch. This just helps everything to be nice and clean on the inside. And for the fabric threads not to unravel. My fabric is linen so it has a tendency want to unravel a bit because it is more of a looser weave.
Front dart
For the front darts, use a pencil and a ruler to mark the lines of the size you are making. Make little marks at the bottom and the top and then just connect them with a straight edge to make a triangle. Fold along the middle line and then you sew along the two outside lines. I also ironed my fabric piece down to make it easier to sew.
And then, to make everything nice and flat you press the excess of the dart towards the center front of the garment.
Bodice
Then to finish the bodice, I put the two front bodices pieces onto the back bodice piece with right sides together and sewed down the side seams with a 5 8ths inch seam.
Gathering
Now, if for the gathering stitch in the skirt, you want to put a pin 3 inches from each outside edge of the skirt piece. The reason for that is because you need a spot that is not gathered for the button area in the front of the dress. So, I just put the pins 3 inches from the edge and did a gathering stitch in between the pins.
If you are brand new to gather, what you do is you turn the sewing tension as high as it will go and turn your stitch length as high as it will go and when you push the fabric through it will create a gather. Now when I had to adjust my gathers whenever I laid my skirt down to line up my bodice. My skirt was a little bit smaller than my bodice, so I just pulled my stitches out a little bit and made sure the side seams of the bodice lined up with the side seams of the skirt. Then I pinned the whole thing in place. After that, I sewed it. Now make sure to first re-adjust your stitches. You don’t want to have a long stitch length and a high tension when you are sewing the skirt to the bodice. So instead, just put it back to the usual about 3 or 4 tension and then the normal stitch length.
Shoulder seems
Next, I sewed the shoulder seams 5/8th inches from the top to complete the top of the bodice.
Sleeves
Now for the sleeves. First, you take the sleeve, fold it in half with right sides together sew down the length of the sleeve with a 5 8ths inch seem. And then put a little bit of a gathering stitch around the curve of the sleeve because it never wants to fit in just perfectly. So, you have to put a little bit of a gather. So it is a little of the same kind of stitch you put in for the skirt. You just turn the stitch up as high as it will go and then match up the sleeves at the side seams. Put the sleeve inside the dress so that the right sides are together. ever so slightly so that it fits in and then sew all the way around. Make sure to finish it again with a finishing stitch such as a zig-zag or with a serger so that it is nice and finished off. And then your sleeves are attached.
Finishing neckline and button placket
Alright. At this point, it is really starting to look like a dress. The next step is attaching the bias tape to the neckline and to create the button area in the front.
So, I attached my bias tape at right angles and then folded it in half. I then pressed it flat with my hot iron.
Before attaching the bias tape to the neckline, I pressed the raw edge of the button placket area over towards the wrong side of the fabric about a half-inch and then I pressed it with my hot iron about an inch. I just made sure it lined up with the top-notch. See the video to see what I mean.
After pressing that in place, I attached the bias tape around the neckline with the raw edges all facing up.
After that, I just pressed everything inwards with my hot iron so that the neckline is nicely finished and the button placket is laying flat.
Then I went around stitching very close to the edge of the neckline and button placket all the way around the dress.
Hem
Next, I put a hem in the dress all the way around. I did not really measure. I just kind of like to fold it where I think the placement is nice. So in my dress, the stripe ended right about the perfect place, so I just folded it up towards the wrong side and then folded it again and then went around stitching. So that, stitching the navy line ends at the bottom of the dress.
Sleeve ends
Next, I did the ends of the sleeves. Now there are a few options for this. You can just hem it like usual. You can do a short sleeve or a longer sleeve. I decided to do the elastic version because I like the way it looks nice and fitted. So, I just measured my arm with some elastic to get how tight I wanted it and cut two pieces. Then, I just put the hem in like usual, folding it up about a half-inch and then another half inch, sewing all the way around, but leaving about a half-inch to work in my elastic through. After I worked the elastic through the sleeve, I joined the ends of the elastic and stitched the opening closed.
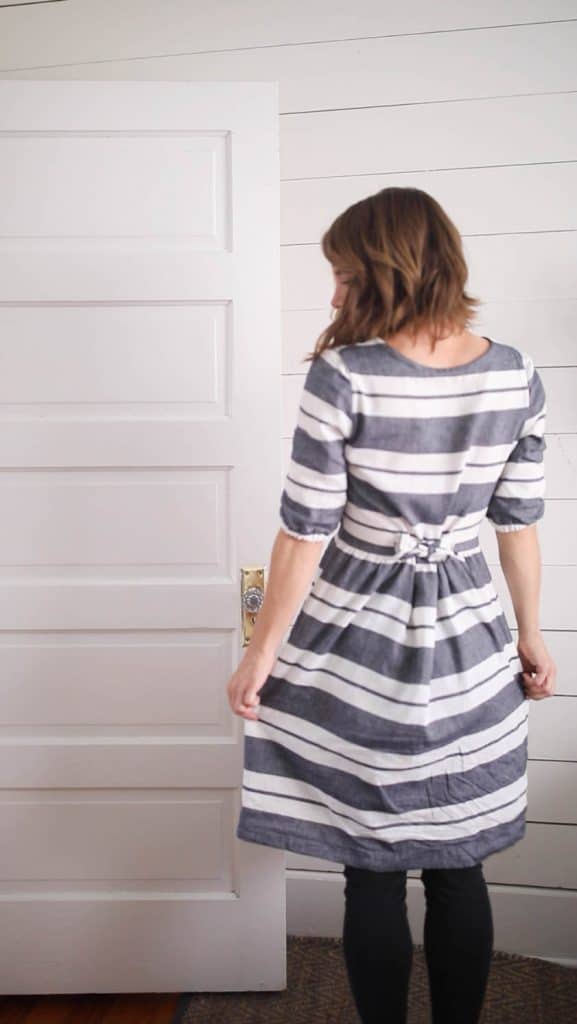
Ties
Next, to create the ties in the back, I just folded the bias tape pieces in half and stitched all the around it with a half-inch seam with right sides together. I turned it right side out, pressed it flat, and then repeated the steps for the other tie. Then I just folded the ends of the bias tape in and pressed again. I topstitched the ties to give them a nice finished look.
And to attach the ties, I placed the ties four inches in from the side seams from the back of the dress and sewed a square with the x in the middle for both ties.
Now, the ties are optional, but I like the way they give the dress a little bit of a better fit around the waistline.
Buttonholes
Okay, next for the buttons, I started by finding the top that I liked for the top button and then I just went from there. For me, the best placement on my dress was every three inches for a button. There are markings on the pattern, again, I just thought I would wait instead until my dress was all done to see where I thought the buttons should go. Because I think the top button was supposed to go a little lower on the neckline, so I just made mine go a little higher.
So, what you do is you use a buttonhole foot and put the button in buttonhole foot. This helps the button maker to know the size of your button, so how big to make the buttonholes. You put it on your machine. You go to the buttonhole setting. Mine was on number 41 for my machine and then you pull down the little plastic thing in the back because that is what hits the ends of the button foot to tell it when to start and stop. And then you just press go, my sewing machine is electronic, and the whole thing happens automatically. Now I like to keep my hands on my machine and kind of guide it through to make sure nothing gets hung up, because if there is a spot where there is a lot of bulky excess fabric the machine likes to get kind of stopped up a little bit. So, I just like to guide it through, but your sewing machine will do it automatically for you.
I cut open the buttonholes with some scissors. It is better to use a seam ripper, but I can never find the right tools in my house and I didn’t feel like running to the store, so I just used scissors. And then making sure that the stripes line up. I put the button kind of underneath the buttonhole to find where would be the best spot for it. Then I hand stitched all of the buttons in place.
Other versions
And that is it! I love the way this dress turned out. It is super nursing friendly. There is a tunic version of this dress. There is a shirt version. And once you make something one time, it is so much easier to make it again and again, because you know all the steps so you don’t even have to think about it. I think I need to stay up late next Friday night and just sew my whole fall wardrobe because this dress is really perfect for fall. I love the way it fits, because its not super precise so you are a new sewer and you are a little bit scared of getting the right fit, adding the ties in the back and the elastic around the sleeves really helps for this to be the kind of dress does not have to be super precise.
I love this dress
I am so glad I took the time to make this simple DIY fall dress. I absolutely love it! It will look adorable with leggings and boots, and maybe even a jean jacket.
See the video tutorial above for the instructions laid out a little more clearly!
Shop the post Simple DIY Fall Dress
Darling Ranges Dress Sewing Pattern Get 20% off with the code DARLING-DIY-FARMHOUSE at checkout!
Cotton Linen Stripe Navy/White Fabric
More Sewing Tutorials
DIY Linen Pinafore Apron for Women Free Pattern
Easy Girls Dress Sewing Tutorial
Pin it for later


How long did this take you to make?
Where can I find the tunic version of this dress that you mentioned?