
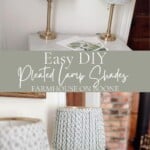
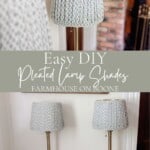
Learn how to make DIY pleated lampshades using hot glue! This easy tutorial will take your plain lampshade and table lamps and turn them into beautiful statement pieces.
This post contains affiliate links, which means I make a small commission at no extra cost to you. See my full disclosure here.
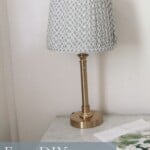
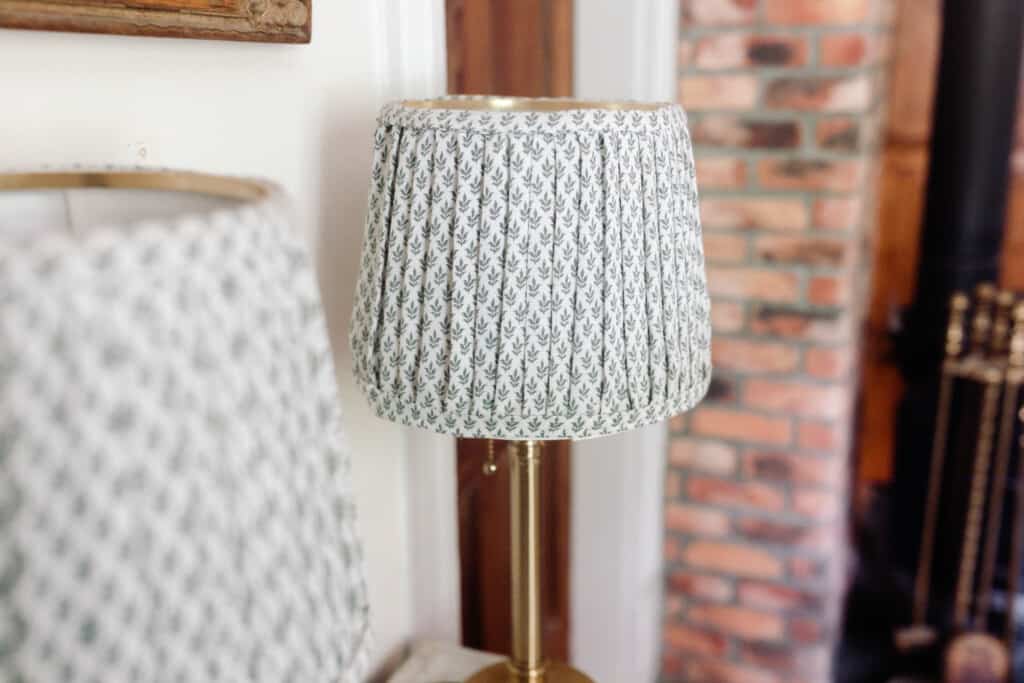
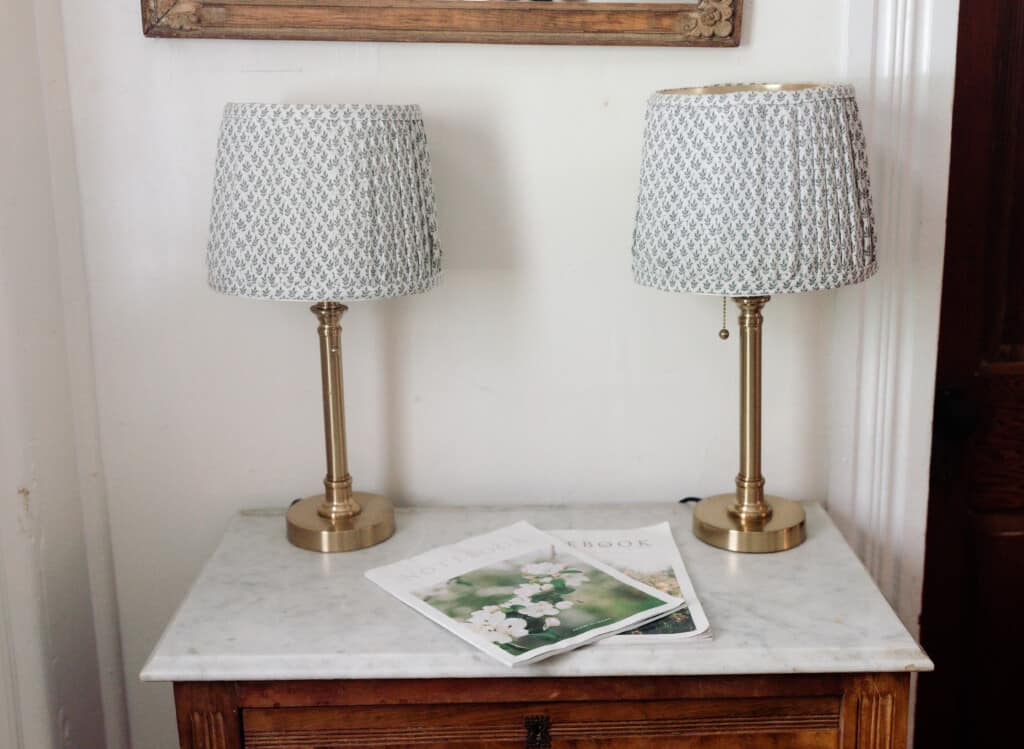
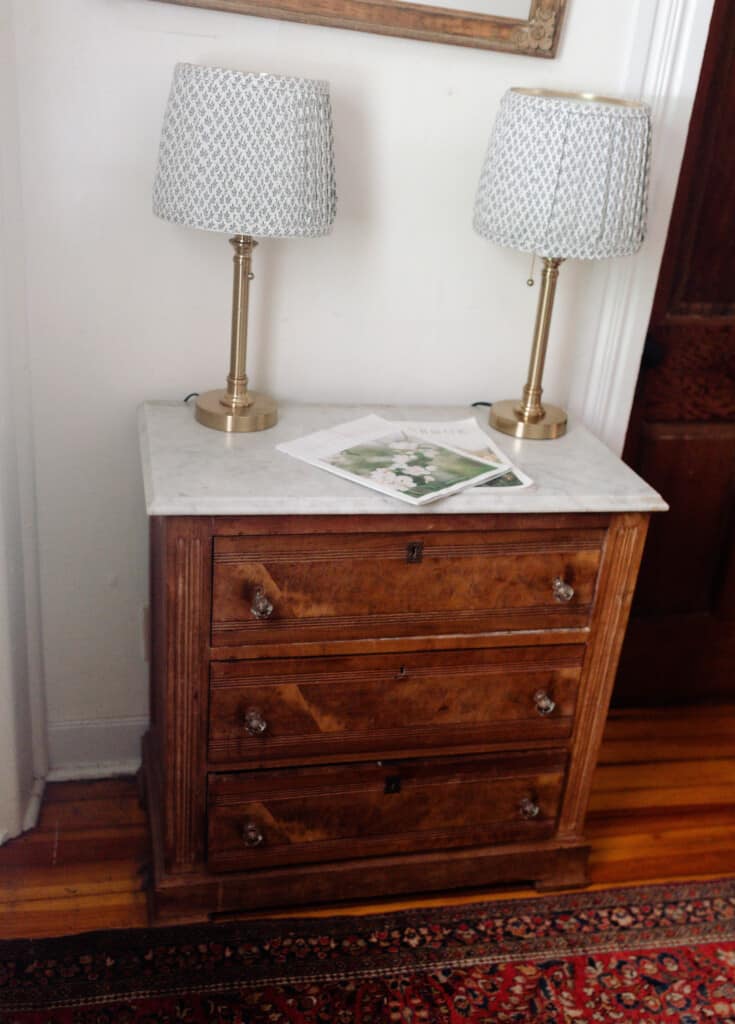
I’ve always loved the look of pleated lampshades, but I could never find any that fit my style. We were in need of a couple of extra lamps, so I purchased two simple ones from Amazon.
The lamps included two shades that were plain white – the perfect opportunity to put my DIY skills to the test!
My dream was to turn these ordinary shades into something fancy and beautiful! And what better way to do that than to make a pleated lampshade.
At first, I debated pleating it by sewing it all. I decided against this method since I had a tapered lampshade to work with, wider at the bottom than the top. I was concerned I would get off a little bit by not making the top as pleated as I needed to to accommodate for the wider bottom.
To avoid that frustration, I searched for different methods of creating the same look.
That is when I decided to get out my handy glue gun to make a DIY pleated shade. Honestly, I had so much fun creating this fabric shade. It really makes an old lampshade turn into a gorgeous lamp!
Now, the good news is you do not need to be an expert seamstress for this project. I did end up using my sewing machine for part of this, but you don’t have to if you do not have a machine or don’t feel comfortable sewing just yet. This truly is a great project for a DIY beginner and expert alike.
It’s also an easy, great way to create an elevated look in your home with beautiful custom lamp shades.
Choosing the fabric for this DIY project
The fabric for your custom lampshade cover should be something that is easy to work with. A cotton fabric is a great choice. Cotton is known for being easy to work with and forgiving.
Of course, feel free to experiment! There is no rule when it comes to what fabric to use. Some fabrics may simply make the process a little easier and less frustrating than others.
Also keep in mind the thickness of the fabric. This is for a lampshade, so you want some light to get through. I’d suggest avoiding any thick fabrics.
For me, I had a few fabrics on hand. One was leftover from the crib curtains I made Theo, which was a block print. I also had a really pretty gingham fabric that would have looked great.
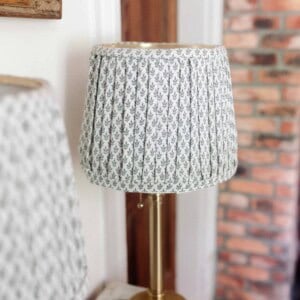
In the end, though, I chose a lightweight fashion fabric that had a really pretty leaf pattern. I had bought the fabric last year in hopes to make a dress for summer. Unfortunately, life got busy and that did not pan out. So, instead I get what looks like a brand new lampshade!
Tools you may need:
Fabric of your choice – How much fabric you will need depends on the size of your lampshade. if you are buying new fabric, be sure to measure your shade first so you purchase enough fabric.
Iron
Sewing machine (optional)
Thread – For the final two pieces needed for this shade, I sew along the long edge of fabric. To do so, you’ll need a thread that matches your fabric.
Lampshades- I chose these!
How to make DIY pleated lampshades
Once you’ve picked your fabric and you have a lampshade to work with, you are ready to get started!
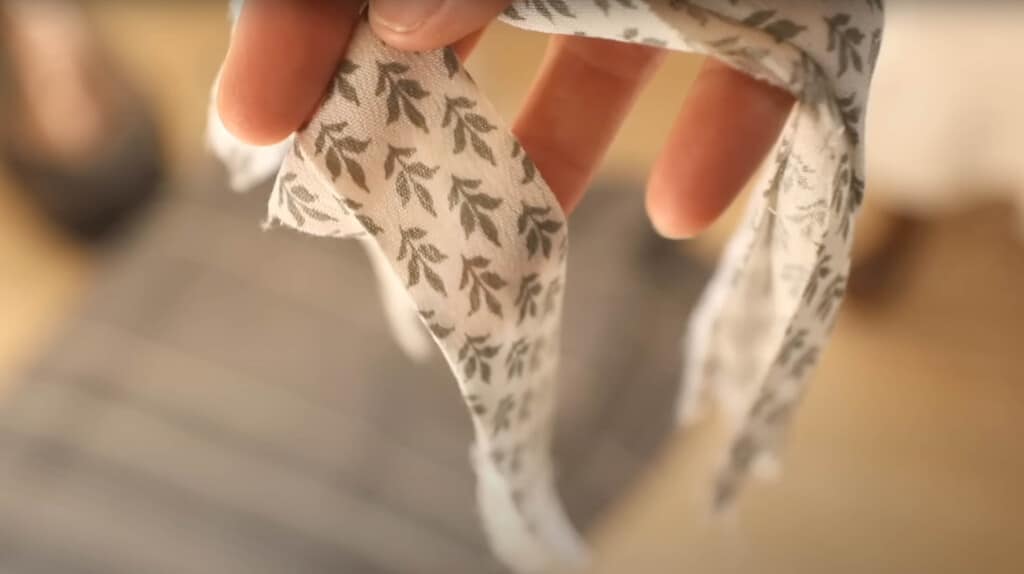
Cut fabric into strips
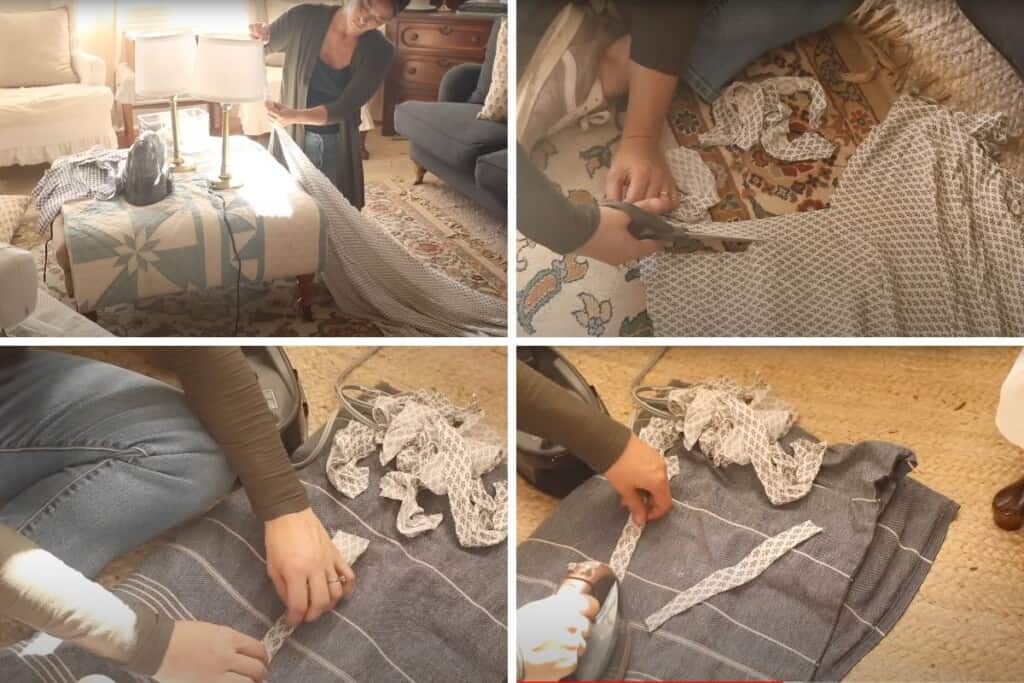
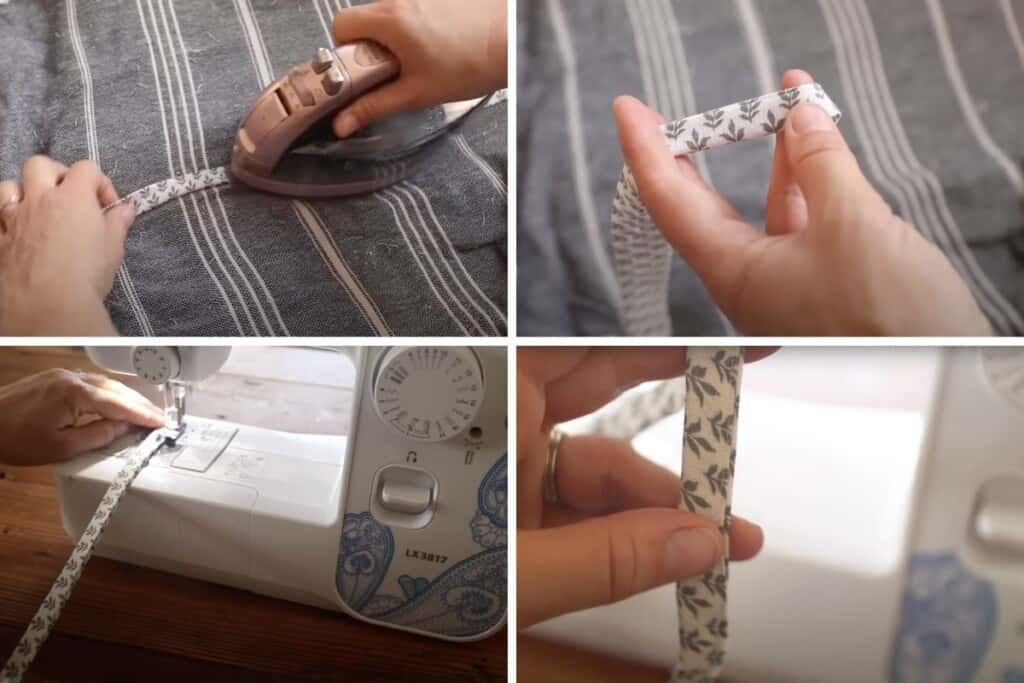
First, you’ll want to cut your fabric into strips that are about 3 inches wide. The strips should be the length of your lampshade from top to bottom.
You’ll need quite a few strips. The amount will depend on how big your lampshades are.
Press the raw edges
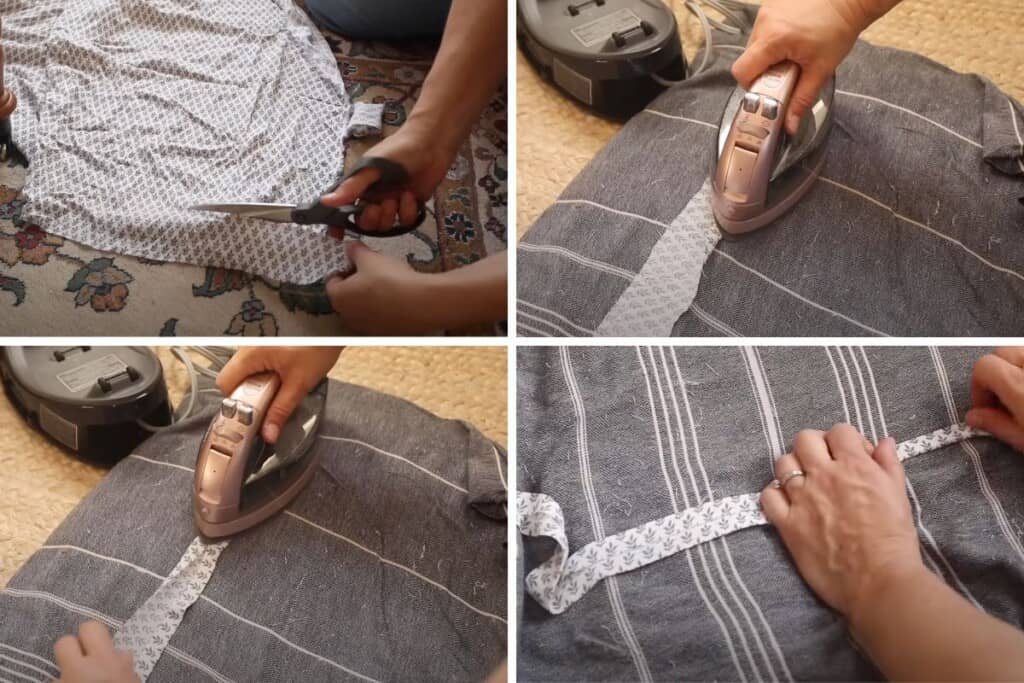
Next, you’ll want to press the long raw edges of each fabric strip in on the back side of the fabric.
It’s similar to making bias tape without that final fold.
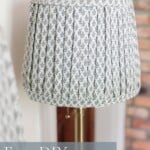
Glue the strips to the lampshade
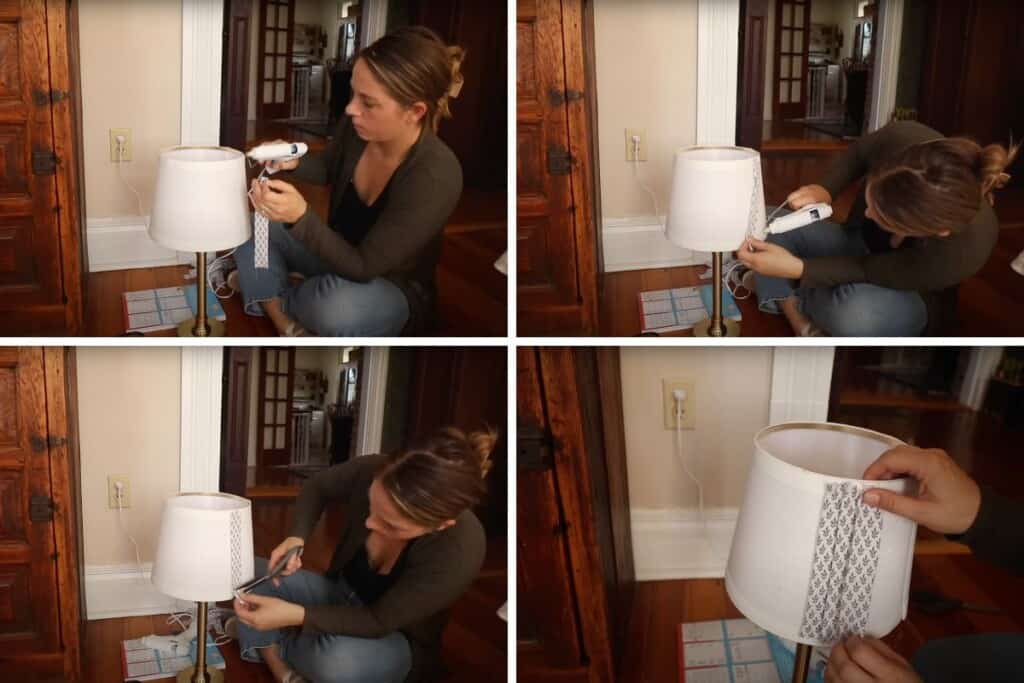
Heat up a hot glue gun and begin gluing each strip to the lampshade.
I did this by adding a little glue to the top of the lampshade, sticking the strip of fabric on. Then adding glue on the bottom and sticking the other end of the fabric strip on. I also used some glue to make sure that the ironed folds stayed in place as I went.
Leave about ½ inch of space from the top of the lampshade and from the bottom. You may need to cut off any extra fabric from the bottom. We will add another piece of fabric around the top and bottom later to give it a finished touch!
Overlap the strips of fabric
As I added strips, I overlapped each one about half way in order to get a pleated look.
This ended up taking a LOT of strips of fabric, even though my lampshades were not super large in diameter. So, make sure you have plenty of fabric for this project.
Because my lampshade was tapered (the top has a smaller diameter than the bottom of the shade), I would overlap the strips a little bit more at the top than at the bottom.
Sometimes I’d start to get off a bit. But as soon as I noticed it, it was really easy to fix. Even with a few imperfections, the end result looked great!
Create the top and bottom strips
Cut two more 3 inch wide strips of fabric to use to cover up the raw edges on the top and bottom of the lampshade.
These strips will be much longer than the previous ones. You’ll want to measure the top and bottom of your lampshade to get the right length.
Like before, you’ll press the raw edges in on the back side of the fabric. This time, you will fold the fabric in half and press.
Sew the long strips
I sewed the fabric strips all the way down on the long side. Hot glue would also work, but sewing was simpler and quicker for me!
Glue the final strips to the top and bottom
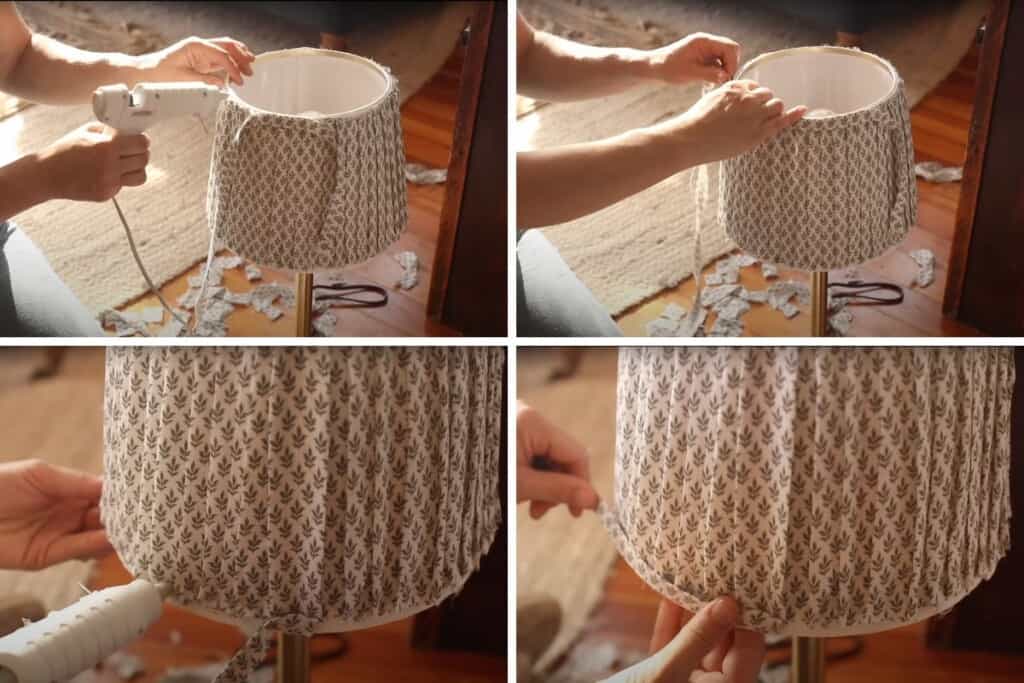
Take your long strips and hot glue them around the top of the shade and bottom edge of the shade.
This should give your lampshade a nice, finished clean edge along the top rim and bottom rim.
Cut off any extra hanging string or hot glue strings. Add it to your lamp stand, and you are done!
FAQ:
Ideally, you want a light weight fabric so the light will still shine through. A lighter cotton should work great, and it is usually easy to work with.
There are multiple ways you can pleat fabric for a lampshade. You can sew the pleats or you can create the the pleats by hot glueing strips of fabric onto your lampshade and overlapping them. The latter is the technique I used, and it worked great!
Find more DIY farmhouse projects:
- Japanese Apron Tutorial With Free PDF Pattern
- How to Make a Scrunchie Bow
- DIY Pot Holders
- DIY Sink From Vintage Bowl
- DIY Farmhouse Window Trim
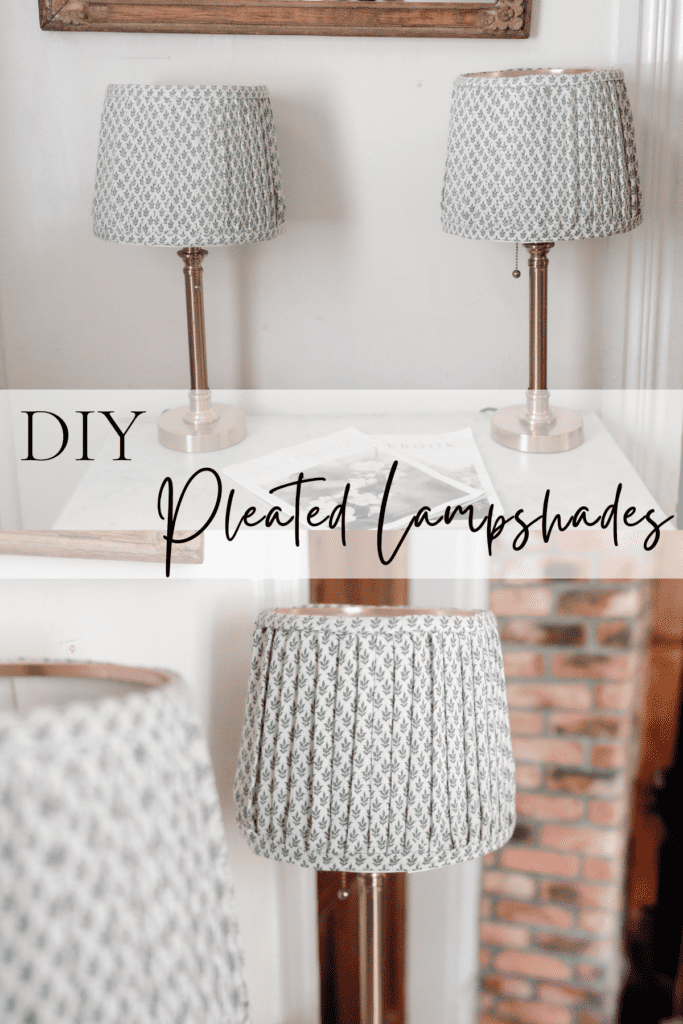
Easy DIY Pleated Lampshades
Equipment
- Glue Gun
- Iron
- Sewing Machine (optional)
Ingredients
- Lampshade
- Fabric
- Thread
Instructions
- Cut strips of your fabric about 3 inches wide and the length of whatever lampshade you are using.
- Press the long raw edges of each fabric strip in on the back side of the fabric.
- Use a glue gun to glue on each strip of fabric to the lampshade. I am gluing the top and the bottom, leaving about ½ inch from the top and bottom of the lampshade to add a finishing touch later.
- Overlap the strips about half way to get that pleated look. Keep in mind, pending the size of your lampshade, you’ll need quite a few strips
- Cut two more 3 inch wide strips for covering up the raw edges on the top and bottom of the lampshade. Both strips will be fairly long, pending the size of your lampshade.
- Press the long raw edges of each fabric strip in on the back side of the fabric like before.
- Once pressed, fold the fabric in half lengthwise. Press again.
- Sew it all the way down the long side. You could also hot glue it down if you do not have a sewing machine.
- Hot glue the strips along the top and bottom of the lampshades to create a finished look.
Notes
- This ended up taking a LOT of strips of fabric, even though my lampshades were not super large in diameter. So, make sure you have plenty of fabric for this project.
- Because my lampshade was tapered (the top has a smaller diameter than the bottom of the shade), I would overlap the strips a little bit more at the top than at the bottom.
- Sometimes I’d start to get off a bit. But as soon as I noticed it, it was really easy to fix. Even with a few imperfections, the end result looked great!
Nutrition information is automatically calculated, so should only be used as an approximation.


Thank you! Your new shades are lovely.
I have metal lamp shade frames where the cloth coverings rotted away years ago. But I could use one long continuous strip of new fabric and wrap it around the top & bottom circles, right? I’d be using twice as much fabric as you since the inside of the shade would also be covered – but I’ll use thin fabric and that should be fine, right?
I have these horrid looking lampshades i have been wanting to change out for YEARS! but they are like, square… do you think this same concept would work/ look okay?
They should!
Hi Lisa,
Where is your fabric from? I would love to know where it’s from and/or what it is called. Thank you!
I think you can find a similar fabric at Hobby Lobby!
I’m so glad you’re posting your projects. The variety of posts is what drew me to your blog. I look forward to your videos as well.