


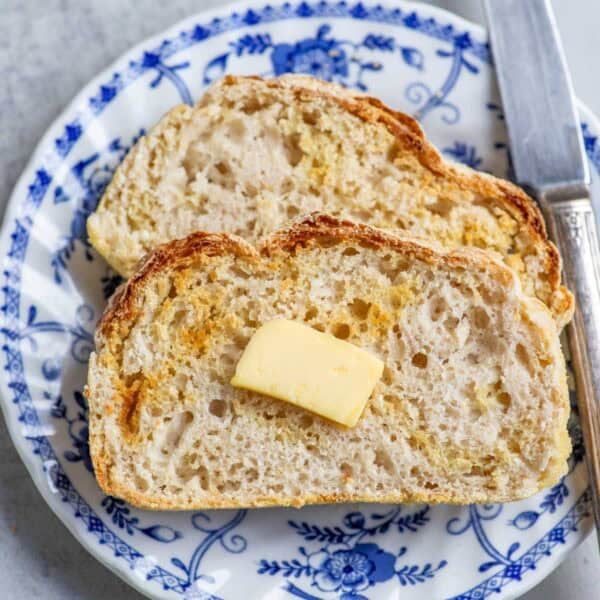
Soft, chewy, and tangy, this sourdough pizza dough is the perfect recipe for those family pizza nights. Start the dough in the morning and it will be ready to bake up with your favorite toppings in the afternoon.

Pizza is so great because it is quick to throw together and it makes the perfect base to be topped with whatever you desire. This sourdough pizza crust recipe puts you just a few ingredients away from the most delicious bubbly pizza with a chewy crust. Whether you choose to cook it in an outdoor pizza oven, your home oven, or even a grill, it is sure to come out amazing!
Top your pizza with tomato sauce, mozzarella cheese and fresh basil for a classic taste, or skip the pizza sauce and use homemade pesto as the base. Make a chicken Alfredo pizza by topping your crust with Alfredo sauce, chicken, cheese and any veggies you like. You can also get a little fancy and try an olive oil, goat cheese, and date sauce pizza. Serve a fresh salad with homemade dressing on the side to round out the meal.
No matter how you choose to adorn your perfect pizza crust, it’s sure to be a crowd pleaser next time you have a pizza party!
Why You’ll Love This Recipe
Tasty – The sourdough in this recipe adds so much flavor and tanginess. This crust also has the best chewy consistency. There is just something about making your own pizza at home, it’s fun and tasty!
Crowd pleaser – Homemade pizza is so delicious, plus being able to customize it with your own topping preferences makes it great for picky eaters.
Make ahead – Make this dough days or weeks ahead and have pizza dough ready for a quick and easy meal.
Ingredients
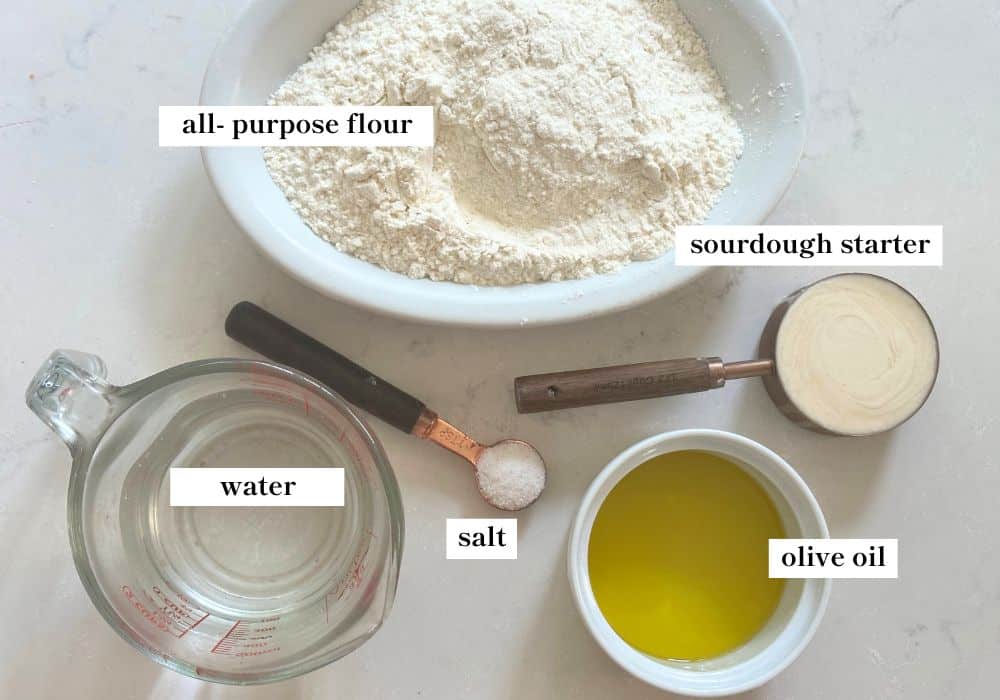
Active sourdough starter – Active starter is sourdough starter that has been fed within 4-12 hours, and it’s active and bubbly. You want to use starter that is at the peak of its bubbling in order to give the dough the most rise.
A full ingredient list with exact amounts can be found in the recipe card below.
Tools You May Need
How to Make Sourdough Pizza Dough
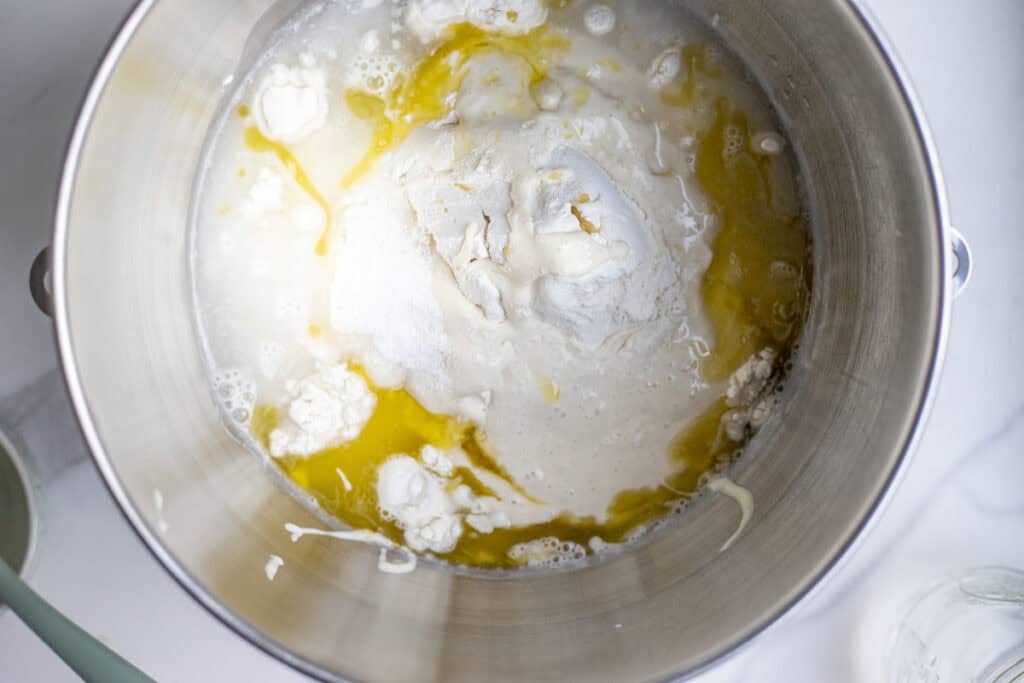
Step 1: The morning of pizza night, add the ingredients to a stand mixer bowl, using a kitchen scale if you choose to weigh the ingredients.
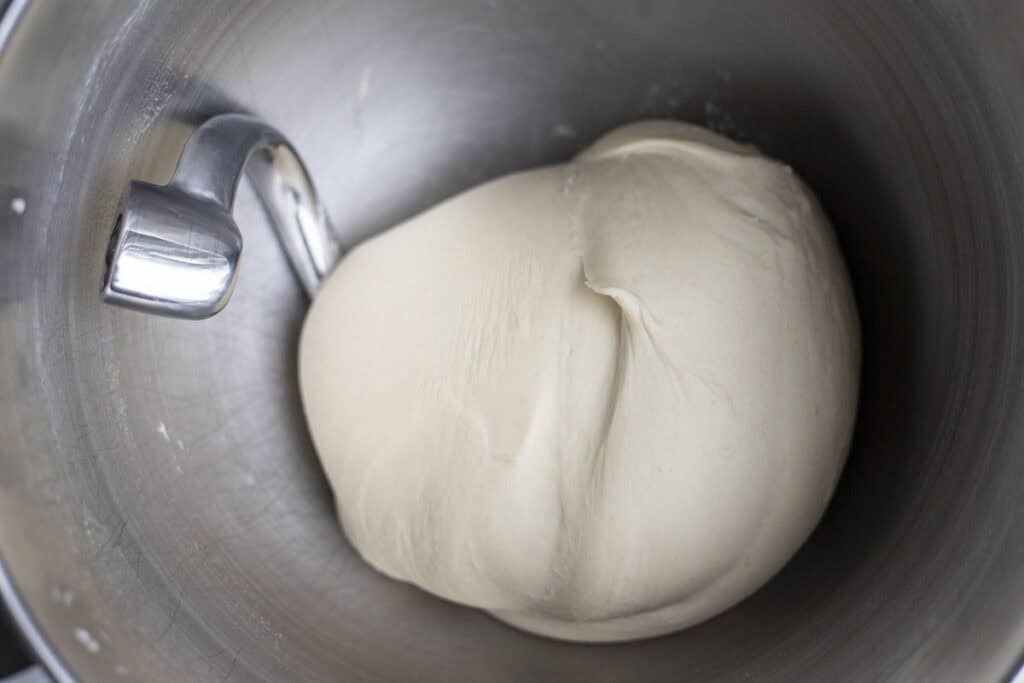
Step 2: With a dough hook attachment, mix the dough on medium speed until the dough passes the windowpane test, which might take up to 10 minutes.
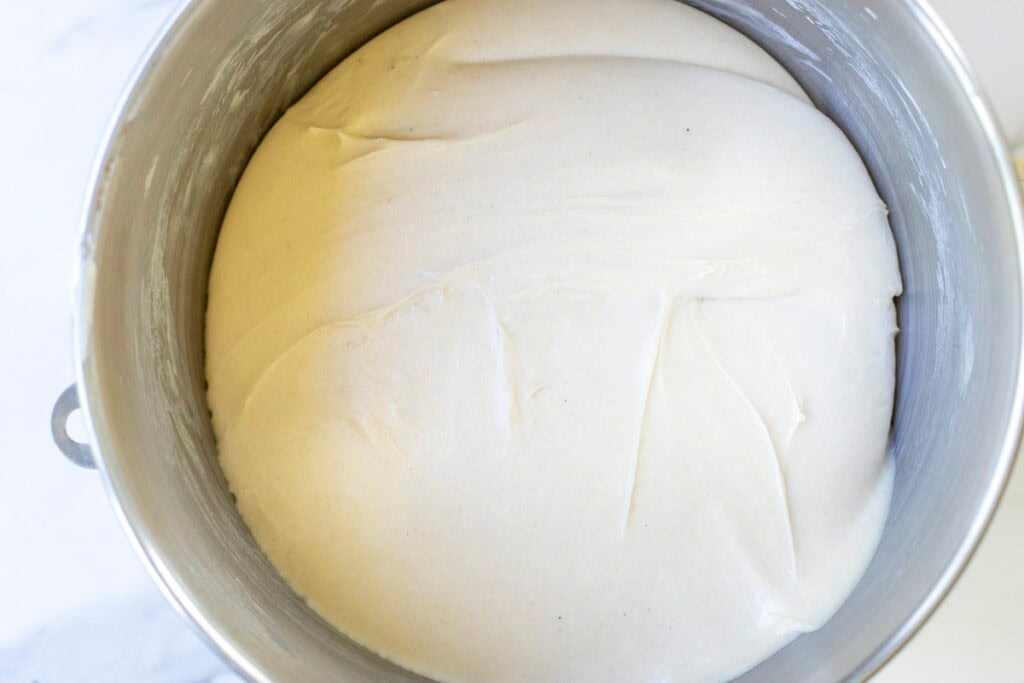
Step 3: Place in an oiled bowl and cover with a lid, plastic wrap or a plastic bag. Rest at room temperature for about 8 hours or until the dough has doubled in size.
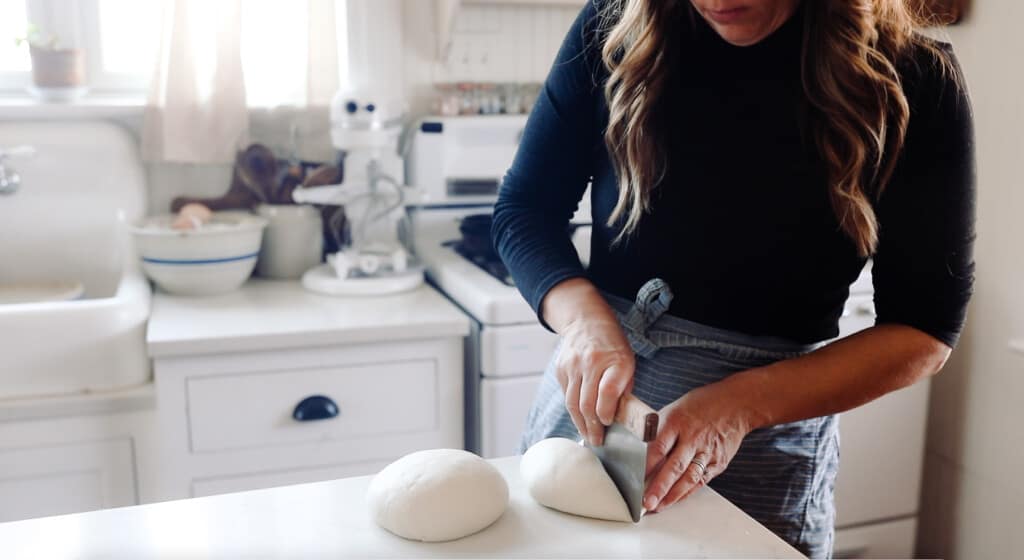
Step 4: Preheat oven to 475. Divide dough into 4 equal portions and allow to rest while you prepare your toppings.
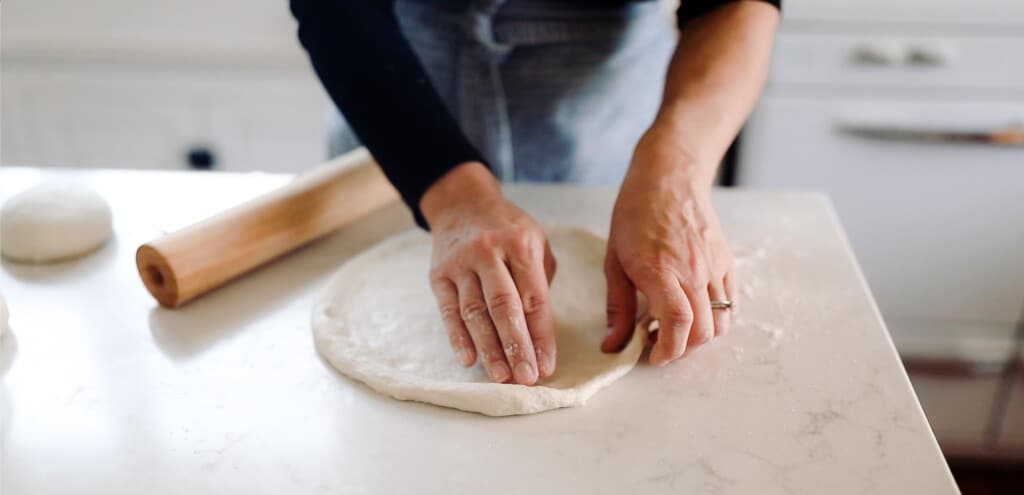
Step 5: Roll out on a lightly floured work surface with a rolling pin. I like to create a bit of a ridge around the outside for hand stretched thickness.
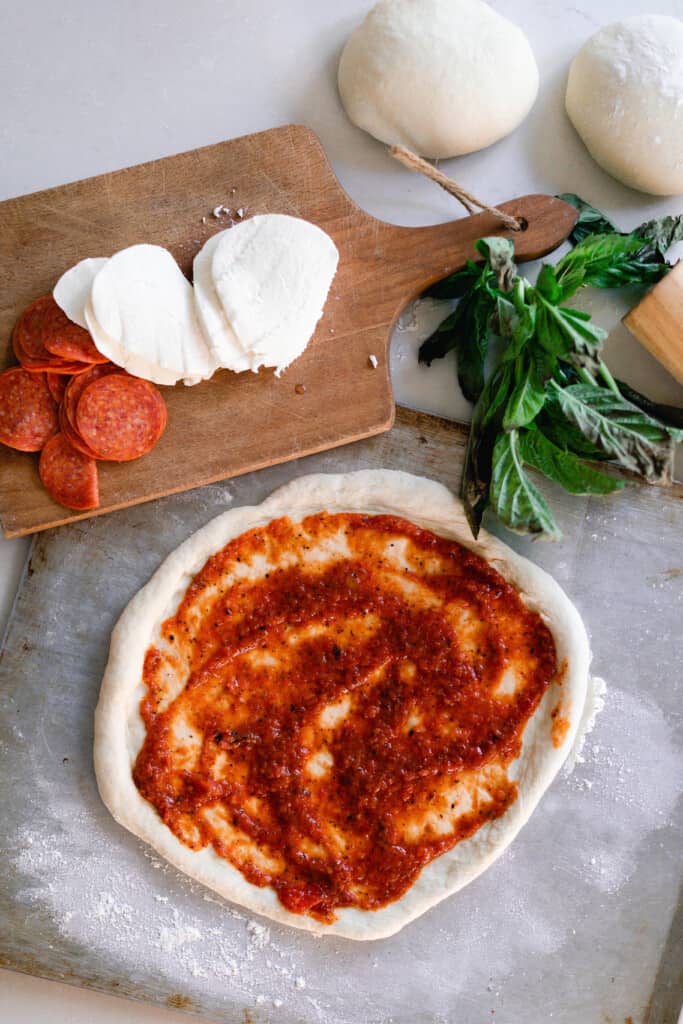
Step 6: Spread pizza sauce on top of the dough and top with your favorite toppings.

Step 7: Bake for 13-15 minutes. (I like to use a preheated pizza stone or cast iron skillet but you can also use a pizza pan). Finish off with a 3 minute broil to achieve the browning on top of the crust.
Tips
- Be careful not to over-ferment the dough. This will leave you with a sloppy mess.
- This dough can be made days or even weeks in advance. If you are planning to use it within a few days, place in the fridge in an airtight container until ready to use. You can also freeze for later.
- Make sure that your dough is at room temperature before rolling. The correct dough temperature allows the dough to relax, and makes it easier to shape and roll.
Recipe FAQs
Yes. Sourdough starter and the fermentation process adds another layer of flavor to pizza dough and makes it easier to digest
Most dough uses conventional yeast like instant yeast to give it rise. Sourdough is made with a sourdough starter, which uses wild yeast and bacteria to leaven the dough.
This could be caused by a few different things, such as over baking, over working the dough, or adding too much flour.
Store dough in the fridge up to a week, or place in the freezer after it has risen and has been divided. Wrap with plastic wrap and then store in a freezer plastic bag.
Pre bake crusts for about 8-10 minutes and then allow to cool. Wrap in plastic wrap and store in the freezer for up to 3 months.
More Sourdough Recipes from the Farmhouse
- Sourdough Pumpkin Bread
- Sourdough Sandwich Rolls
- Easy Sourdough Dinner Rolls
- Sourdough Cheese Bread
- Sourdough Cornbread
If you try this recipe and love it, I would love it if you could come back and give it 5 stars! Tag me on Instagram @farmhouseonboone.
Easy Homemade Sourdough Pizza Dough Recipe

Equipment
- 1 Kitchen Scale optional
Ingredients
- 1/2 cup starter
- 4 cups flour
- 1.5 cups water
- 2 teaspoons salt
- 2 tablespoons olive oil
Instructions
- The morning of pizza night, add the ingredients to a stand mixer bowl.
- With a dough hook, mix the dough on medium speed until the dough passes the windowpane test, which might take up to 10 minutes.
- Place in an oiled bowl and cover with a lid or plastic wrap. Rest at room temperature for about 8 hours.
- Preheat oven to 475.
- Divide the dough into 4 equal sections and allow to rest while you prepare your toppings.
- Roll out on a lightly floured surface. I like to create a bit of a ridge around the outside for hand stretched thickness.
- Spread pizza sauce and top with your favorite toppings.
- Bake for 13-15 minutes (I like to use a preheated pizza stone or cast iron skillet but you can also use a pizza pan.). Finish off with a 3 minute broil to achieve the browning on top of the crust.
Notes
- Active starter is sourdough starter that has been fed within 4-12 hours, and it’s active and bubbly. You want to use starter that is at the peak of its bubbling in order to give the dough the most rise.
- Be careful not to over-ferment the dough. This will leave you with a sloppy mess.
- This dough can be made days or even weeks in advance. If you are planning to use it within a few days, place in the fridge in an airtight container until ready to use. You can also freeze for later.
- Make sure that your dough is at room temperature before rolling. The correct dough temperature allows the dough to relax, and makes it easier to shape and roll.
Nutrition
Nutrition information is automatically calculated, so should only be used as an approximation.


Great pizza crust! It’s a family favorite.
Made this sourdough pizza dough with “00” Pizza Flour. Light crust with a soft chew, excellent. My favorite!
You say you can use a scale, but is there a recipe in grams?
Yes, below the ingredients you can toggle from US Customary to Metric measurements.
Hi, Lisa! I followed the measurements exactly, however, my dough is super sticky and does not come together in a ball no matter how much or little I knead it in my stand mixer with the dough hook. It remains incredibly sticky and formless. Do I just need more flour/less water? (For reference, I live in Southern Florida and my home is always at around 73-75 degrees. I do typically adjust slightly down for water, but I’ve never seen something so dramatic like this with your other sourdough recipes during the mixing/kneading phase). Thank you!
I would add a little extra flour! Sometimes humidity can make a difference.
When refrigerating the dough, do you refrigerate before or after allowing it to rise?
After!
This pizza crust is so great because it is delicious when you make it in a day, but it gets even better after a few days in the fridge. The last time I made it, I accidentally forgot I had some extra dough in the fridge for 5 days, and it made the best sourdough crust! I have a family of 11 and I usually triple the recipe and make 6 large crusts. We will have 4 pizzas for supper (we usually have leftovers) and I save 2 for breakfast pizza sometime during the week.
I would like to use the sour dough starter and replace the flour with fresh milled. I saw the recipe using Einkorn flour, but I noticed it uses yeast as the rising agent. I currently have Soft white, Hard red, Einkorn and kamut. Which would you suggest I use with my starter and how much? Thank you I love your sandwhich bread fresh milled sour dough I make it weekly 🙂
I like hard red!