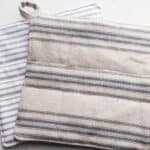
DIY Pot Holder
DIY pot holders are not only a great tool for your kitchen, they are also a beautiful gift for loved ones.
Servings 1 potholder
Cost 5
Equipment
- Sewing machine
- Sewing sheers
- Pins
Ingredients
- 10” fabric scraps - Almost anything goes here: heavier fabric options are more ideal. Avoid any super lightweight fabrics as they will transfer heat.
- Insulation material - Quilt batting or Insul-Bright (a heat resistant batting, which is the best option). You could also use old dish towels, flannel, or other heavy duty fabric like drop cloth or scrap denim.
- Coordinating thread
Instructions
- Measure and mark your fabric. Cut two 10” squares of fabric. For the loop, cut one piece of fabric 1½” by 4”. Lastly, cut 2-3 10″ squares of insulation material.
- Before you sew the layers together, test the heat protective properties by stacking them all up and grabbing a hot pan (be careful of course). If it becomes hot quickly, rethink the fabric configuration or increase the layers.
Create the Loop:
- Fold the loop piece in half lengthwise with right sides together. Sew the long side with a very narrow seam about 1/4″.Using a safety pin, turn the loop you just created right side out.With an iron, press the loop piece flat, then top stitch along the seam.
Stack the Layers:
- Stack your 10” pieces of insulation material on your work surface.
- Situate one 10” fabric piece on top of the insulation pieces, with right side facing out.
- Fold the loop in half and lay it on one of the corners of the fabric, with the raw edges facing the corner.
- Place the other piece of fabric on top, right side facing the other piece of fabric and the wrong side facing out. Pin all of the layers together, making sure the loop is secured in place well.
Sew:
- With a 1/2″ seam, sew all the way around the pot holder. Leave a 4” opening on one side.
- Remove some of the bulk on the corners by trimming the excess insulation material. Turn the pot holder right side out using the opening you left. This will hide all of the insulation material inside.
- Using a 1/4″ seam, top stitch all the way around the potholder. Sew a few lines, evenly spaced, down the middle to hold the layers together.
Notes
- Make sure to sew a few lines of stitching down the center to secure the fabric and insulation together and to ensure it doesn’t bunch up.