


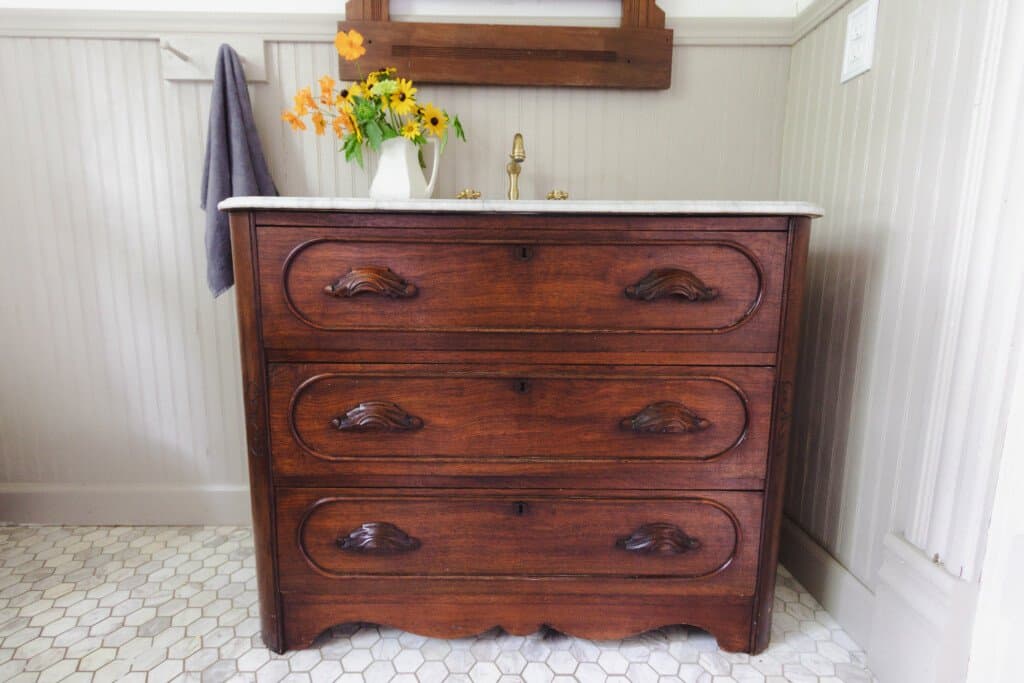
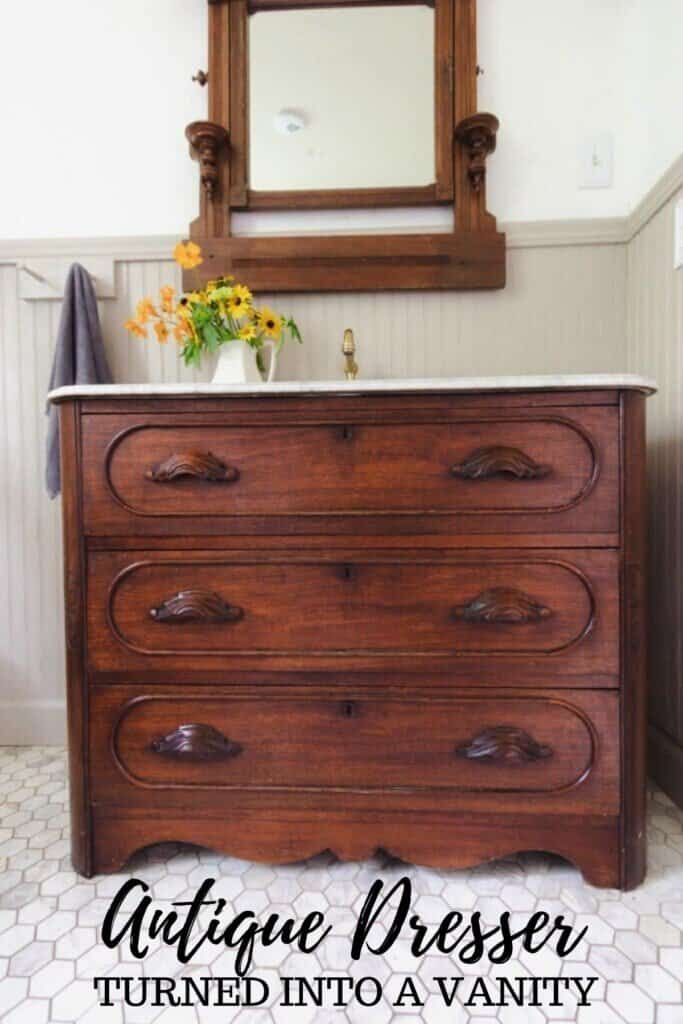
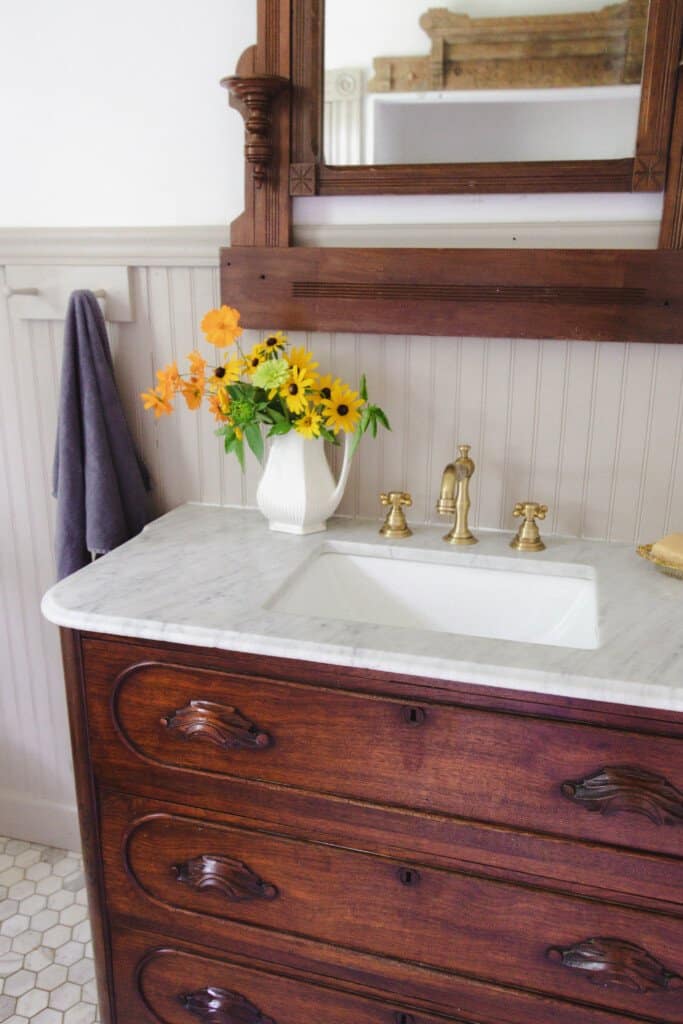
Learn how we transformed this antique marble top dresser into a bathroom vanity for our Victorian farmhouse bathroom remodel!
This project is one that I knew I wanted to do for at least one or two bathrooms in this house. We may do it in more, but it can be challenging to find the right size piece for each space.
For this particular bathroom – our downstairs bath that we will be using as our master bath – the antique dresser was around $250 and was in my town. I figured it was worth a shot, and if it didn’t work, then this piece could be used in another spot in our farmhouse.
I had looked in so many places for antique-inspired vanities, and there was nothing that looked authentic or had the character that I was trying to bring to our bathroom renovation.
It did end up costing us a bit of money, but for the look, it is totally worth it. They just don’t make things like they used to.
This project was actually inspired by my friend Sarah at She Holds Dearly. Not terribly long ago, I got to visit her beautiful farmhouse and saw her dresser-turned-vanity and just loved it. I knew something similar would fit perfectly in our farmhouse, staying true to the character of the home. The dresser I found was almost identical to hers and adds so much charm and warmth to the space.
It ended up turning out better than I thought, and it was honestly a lot easier than I thought. It is definitely a DIY project you can pull off.
Find the whole bathroom reveal here.
Tips:
- The first thing that we had to figure out was how to get the marble cut to size. I called multiple places in my area, but many won’t cut an antique piece of marble and will only cut marble you buy from them. So, it may take some digging to find. I have seen some tutorials online where people cut it themselves, so that may be an option.
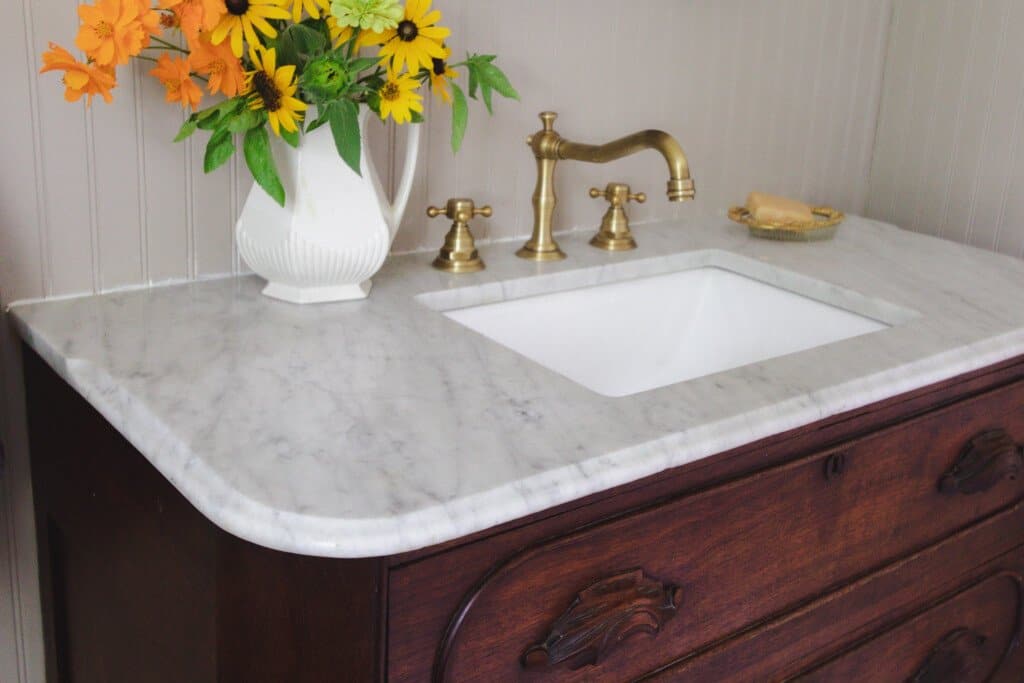
- Know the dimensions of your marble top so you can find a sink that fits. The guy that was going to cut our marble said he had sinks, but after further discussion, all of the sinks were too wide and would not work. I had two options: find a smaller sink that would fit with enough space around it for the counter, or choose a vessel sink. I chose a smaller sink. Marble requires so many inches on each side of the cut to ensure the marble doesn’t crack.
- If you find a dresser that just has a wood top, you could still create a bathroom vanity by using a vessel sink and making sure to seal the top of the dresser with multiple coats of waterproof sealer.
This post contains affiliate links, which means I make a small commission at no extra cost to you. See my full disclosure here.
Materials Used For This Project:
Antique Brass Bathroom Pop up Sink Drain with Overflow
Widespread Bathroom Sink Faucet
How To Turn An Antique Dresser Into A Vanity
Find a dresser that fits the space needed. I like to search antique stores, thrift stores, and Facebook Marketplace. Make sure it is wide enough to fit a sink whether it be an undermount, vessel, or top mount.
Source a sink and faucets. You will need all of this ahead of time, as your stone fabricator will use them ahead of time to measure and cut out all of the holes.
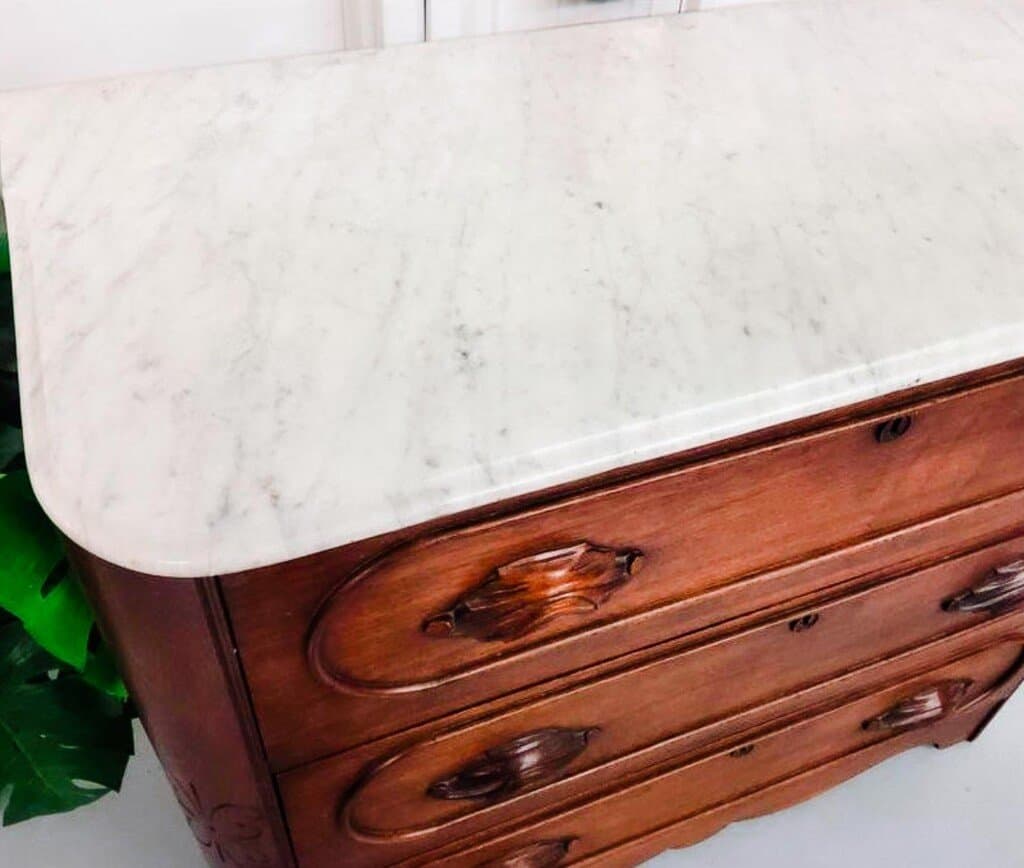
Get marble cut to fit the sink and faucets.
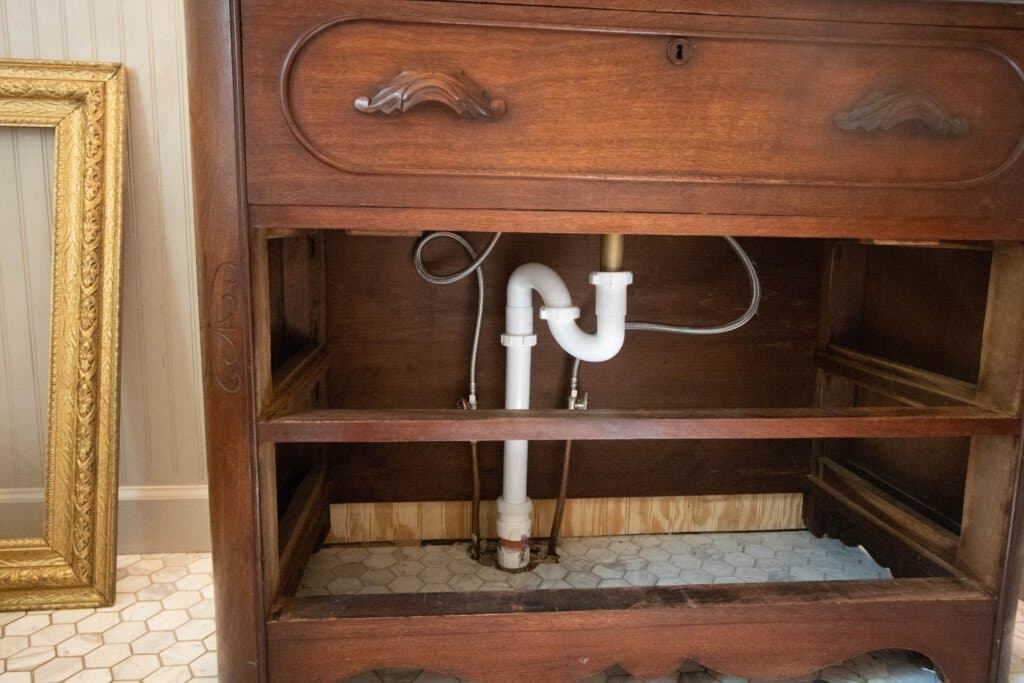
Install the dresser where it is supposed to be placed, and plumb it in. We hired a plumber to do this.
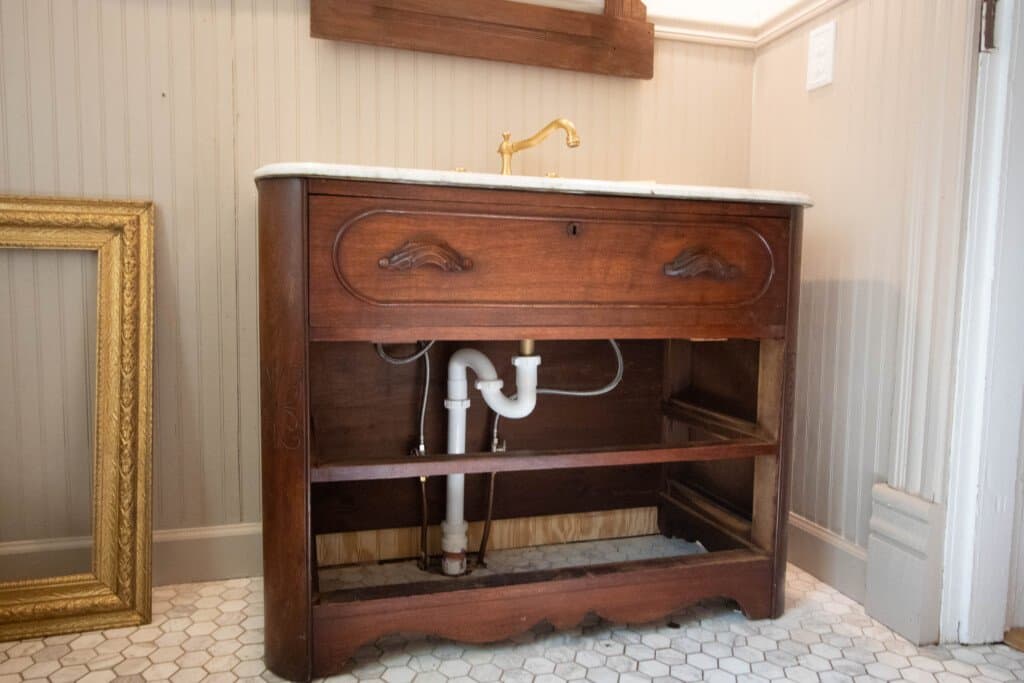
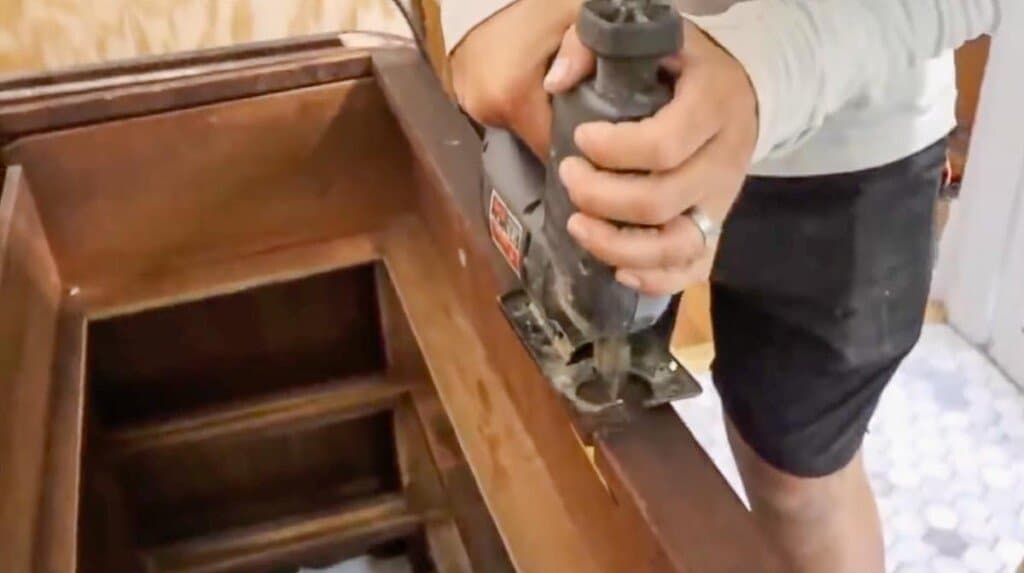
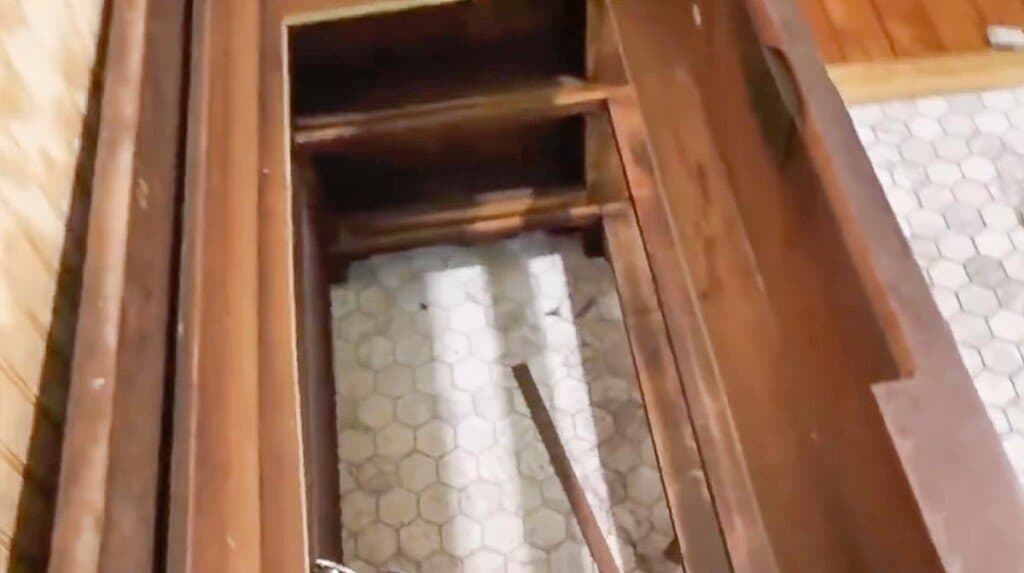
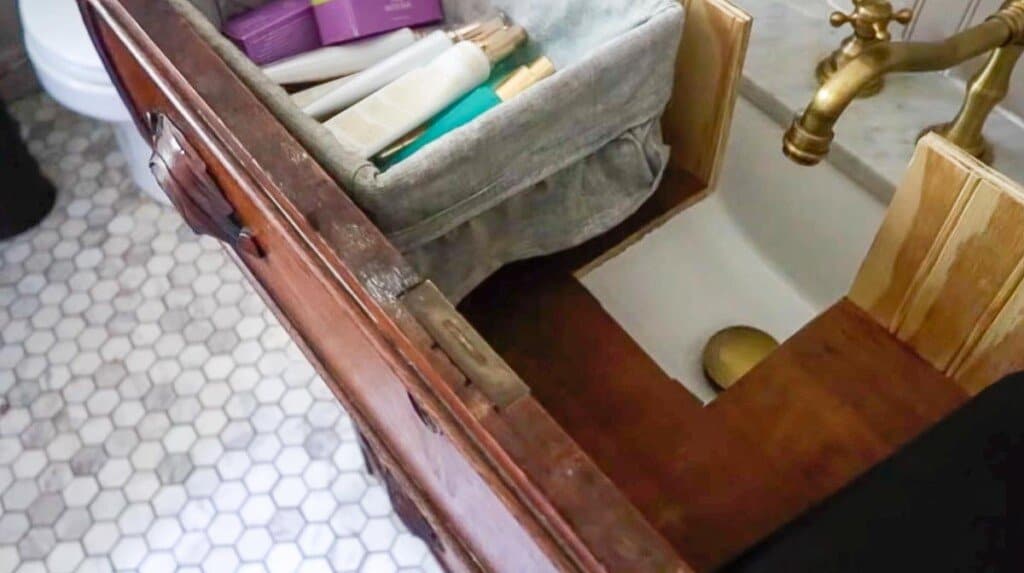
We removed the two bottom drawers to accommodate all of the plumbing. For the top drawer, we knew it wouldn’t be functional due to the sink. Luke cut out a large rectangle from the bottom of the drawer. So the drawer frame was still there, but the bottom removed.
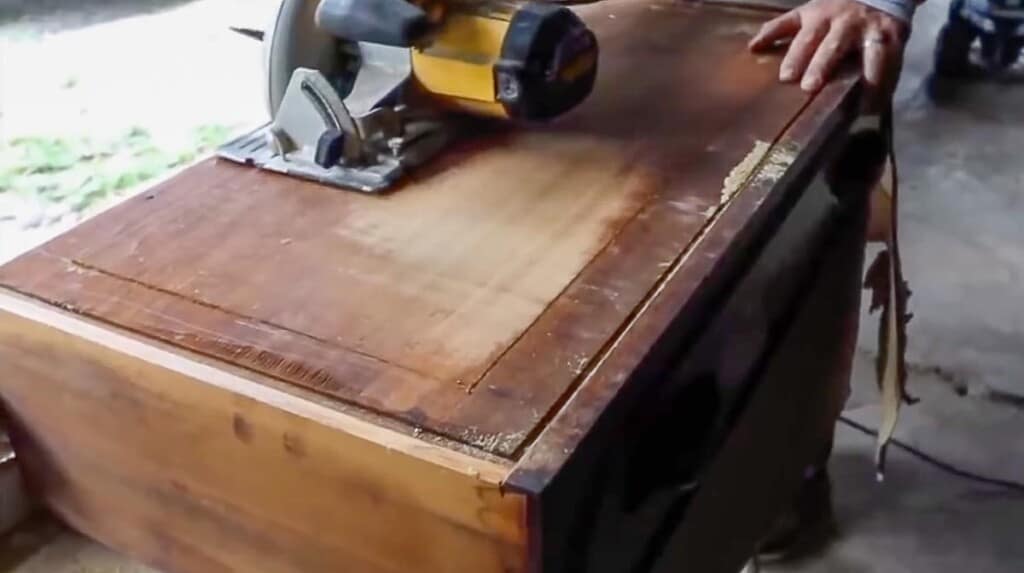
He also notched out a little more from the top front of the dresser to accommodate the sink.
The top drawer was then placed into the dresser, the marble secured on top, then the plumber installed the undermount sink. Since we only cut out the bottom of the drawer, the plumber was able to use the frame of the drawer to help reinforce and support the sink with 2x4s.
Faucets and drain plug were installed, and the vanity was then caulked in the back where the marble and wall met.
For the drawers:

For the bottom drawer. we measured from the front of the drawer to where the “main” plumbing was. Then we cut the back of the drawer off to that measurement and added a piece of plywood cut to size of the back of the drawer and nailed it in place.
For the middle drawer, we had to accommodate for the p-trap. We followed the same directions as above. Then we cut out a large notch where the p-trap goes. We could have just cut the back of the drawer off to the p-trap and made a super small drawer, but this wouldn’t have left us with much storage space. Eventually, we plan to build 3 walls where the notch was taken out so nothing will fall through the hole.
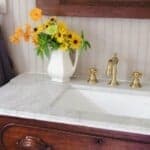
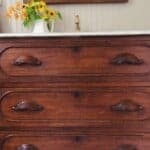
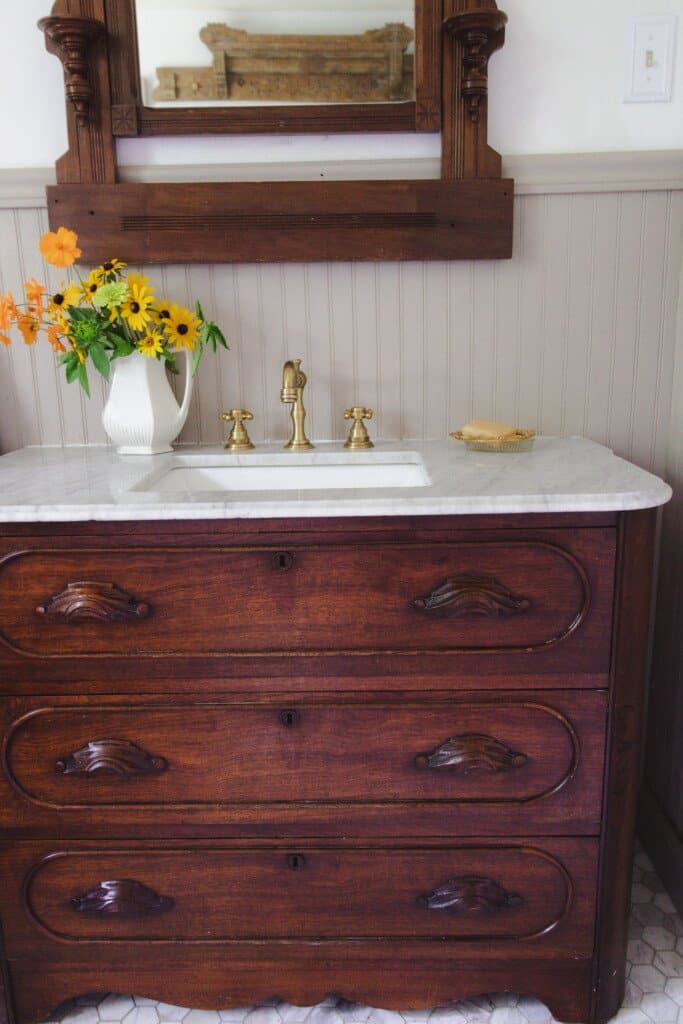
Drawers were put back in place. The vanity was then styled with fresh flowers in a vintage pitcher, and an antique brass soap dish.


Hi Lisa! Beautiful project. Have you had any problems with the bead board backsplash?
No problems yet!
What is the dimension of the sink hole? I have an antique table with a marble top. It’s curved at the front and the widest part has a depth of 20 inches. Not sure if we will be doing a drop in sink or an under mount, but I’m assuming as long as the circle we cut leaves a few inches around the edges it will be okay?
Love this! I am getting a vanity to do this with I’ve found on FBMP. However, the width is just 14”. I’m concerned about a sink being too small. What was the width if your dresser?
Thank you!
Mine is 40” wide 19” deep.
I have been looking for a dresser to replace a pedestal sink. Some dressers seem to “short”. What height is your dresser? It looks so nice. Thank you for sharing.
Hi Karen! It’s 32”.
Question for you. Wanted to know if you put polyurethane on it to protect it from moisture?
No I did not. We kept the original finish on the dresser
How did you fit the back of the dresser on the bottom to sit flush against the wall?
Lisa,
This is just beautiful!
Beautiful! I have been watching your YouTube videos and decided to follow your blog. You are doing a great job.