With spring fast approaching (although not really fast enough) I wanted to make a blanket cozy enough for the end of winter, but also light enough to go with my spring and summer decor.
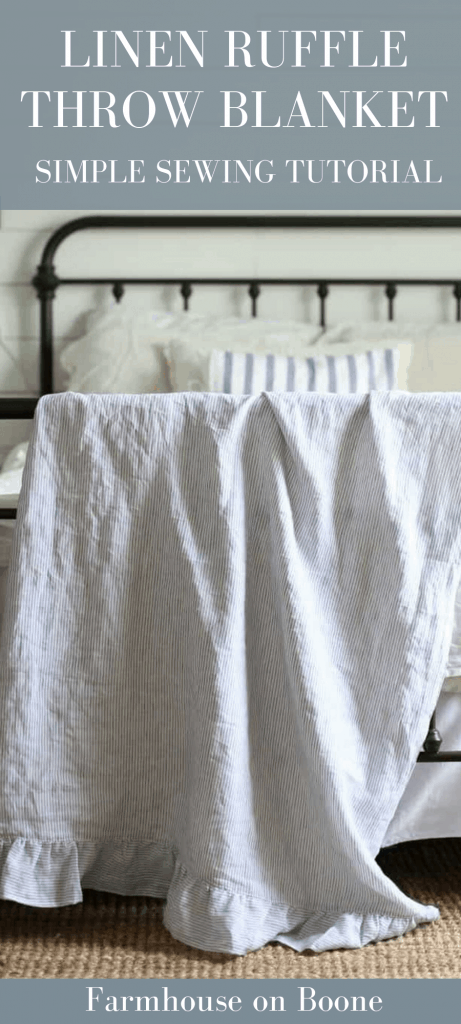
I decided a combination of linen and flannel would be perfect together.
I love the soft look of 100% linen and how it drapes so beautifully across a bed or chair.
And flannel is, of course, cozy.
![]()
![]()
![]()
Linen and Ruffle Throw Blanket Sewing Tutorial Video
For this project, I bought three yards each of this striped linen fabric and this white flannel.
![]()
(You wouldn’t really need a full three yards, but you can get it cheaper if you buy more, and I have a hard time passing up a deal! I also have my heart set on making something else for a future tutorial.)
Since two yards measures 72″ inches in length, you can definitely get by just fine with two yards. You could also make this project for a lot cheaper by purchasing plain old cotton, but I love the lightweight drape of this 100% linen.
Cut list:
46″ by 70″ piece of linen
46″ by 70″ piece of flannel
2- 6″ by 70″ pieces of linen (for the ruffles)
The linen fabric is 58″ wide, so you will have a 12″ by 70″ strip left after cutting your 46″ by 70″ piece. Cut that long leftover piece in half down the middle and you will have your two ruffle pieces.
![]()
So, first things first. I pressed the long side of one of the ruffle pieces down 1/4″.
Next, to hide that raw edge inside, I pressed it down again another 1/4″.
![]()
I then sewed that seam down for the entire length of the long side of the ruffle piece.
Next, I pressed both short ends over 1/4″, and then another 1/4″, to hide the raw edges inside.
![]()
I sewed the seams down on both short ends, so I had three of the four edges hemmed.
Next, I put a gathering stitch* in the long side of the ruffle piece that wasn’t hemmed.
*A gathering stitch is just sewing down the length of the fabric with the longest stitch that my machine allows. Since the stitch is long, it will be loose enough to allow me to pull them, and create the ruffles.
![]()
I tugged the strings gently from both ends to create a 46″ ruffle, the length of the short end of my large linen piece.
![]()
Tips for making ruffles:
Set the tension on your machine to as high as it will go. The combination of the high tension and loose gathering stitch will cause your machine to pull the fabric and create perfect ruffles, without any effort on your part.
Just make sure to set the stitch length and tension back to normal before actually sewing your ruffle onto your main piece.
When sewing ruffles to your main piece that you are working on, make sure to sew as close to the gathering stitch as possible, to keep the ruffle looking nice.
The rule of thumb for cutting a ruffle piece is one and half times the length of the piece you will be attaching it to. So, for example, if you want to sew a ruffle onto a 10″ piece of fabric, you should cut your ruffle piece to 15″ in length.
![]()
Next, I pinned my ruffle to the 46″ end of my linen piece, with right sides together. (I had the backs of my hems facing up.)
I made sure to pin the ruffle at least 1/4″ away from the edge of the fabric.
I will need that extra space to sew the flannel to, later in the tutorial.
Just be sure to leave 1/4″ on each side.
![]()
Next, I sewed the ruffle to the 46″ end of my linen, being careful to sew closely to the gathering stitch, to keep my ruffles looking nice.
![]()
And this is how the ruffle looked all sewn on.
![]()
Next, I repeated the whole process to sew the other ruffle onto the other 46″ end of the linen fabric piece.
After that, it was finally time to sew the flannel to the linen.
To keep the ruffles away from the edges while sewing, I folded them over, and placed a few pins to keep them there.
![]()
Next, with the linen piece on the floor with the right side facing up and the ruffles facing down, I laid the flannel piece on top.
It was basically a linen, ruffle and flannel sandwich.

I pinned the whole thing all the way around.
Then, I sewed around the entire thing, being sure to not sew too far away from my original ruffle stitch, to keep my ruffles from getting wonky.
![]()
I made sure to leave several inches not sewn at the end, so I could turn the blanket out and hide all the seams inside.
![]()
To close up the spot that I left not sewn, I folded the flannel under and pinned it in place, making sure to keep the ruffle edge tucked inside.
![]()
I sewed that spot closed.
Then, I topstitched* around the entire blanket.
A topstitch is just a stitch sewn close to the edge all the way around. It is “on top” so it will be seen in the finished product.
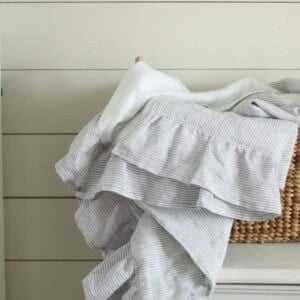
I couldn’t wait to get it down to our room to see how it would look on our bed, in a basket, draped around me (I may have swirled around in it in front of the mirror) and my kid…LOL
I absolutely love the way it turned out!
The flannel makes it so cozy and warm and I love the subtle gray color of the linen. It looks so beautiful paired with ruffles.
I have always been a ruffles girl. When my girls were smaller, I was able to get away with putting three or four layers of ruffles on their dresses and skirts. Two baby boys later, and it has been a while since I have had an excuse to sew ruffles.
![]()
Turns out linen is the best material ever to sew ruffles with. They just drape so beautifully.
![]()
![]()
![]()
![]()
I hope you try this blanket out for yourself. It was super simple to make. Now I want one for every room!
This post contains affiliate links. Get my full disclosure here.
Linen and Flannel Ruffle Throw Blanket Tutorial
Video
Ingredients
- linen fabric
- flannel fabric
- sewing machine
Instructions
- Cut fabric as listed below.
- So, first things first. I pressed the long side of one of the ruffle pieces down 1/4″. Next, to hide that raw edge inside, I pressed it down again another 1/4″.
- I then sewed that seam down for the entire length of the long side of the ruffle piece. Next, I pressed both short ends over 1/4″, and then another 1/4″, to hide the raw edges inside.
- I sewed the seams down on both short ends, so I had three of the four edges hemmed. Next, I put a gathering stitch* in the long side of the ruffle piece that wasn’t hemmed. *A gathering stitch is just sewing down the length of the fabric with the longest stitch that my machine allows. Since the stitch is long, it will be loose enough to allow me to pull them, and create the ruffles.
- I tugged the strings gently from both ends to create a 46″ ruffle, the length of the short end of my large linen piece.
- Tips for making ruffles:Set the tension on your machine to as high as it will go. The combination of the high tension and loose gathering stitch will cause your machine to pull the fabric and create perfect ruffles, without any effort on your part. Just make sure to set the stitch length and tension back to normal before actually sewing your ruffle onto your main piece. When sewing ruffles to your main piece that you are working on, make sure to sew as close to the gathering stitch as possible, to keep the ruffle looking nice. The rule of thumb for cutting a ruffle piece is one and half times the length of the piece you will be attaching it to. So, for example, if you want to sew a ruffle onto a 10″ piece of fabric, you should cut your ruffle piece to 15″ in length.
- Next, I pinned my ruffle to the 46″ end of my linen piece, with right sides together. (I had the backs of my hems facing up.)I made sure to pin the ruffle at least 1/4″ away from the edge of the fabric. I will need that extra space to sew the flannel to, later in the tutorial.Just be sure to leave 1/4″ on each side.
- Next, I sewed the ruffle to the 46″ end of my linen, being careful to sew closely to the gathering stitch, to keep my ruffles looking nice.
- Next, I repeated the whole process to sew the other ruffle onto the other 46″ end of the linen fabric piece.After that, it was finally time to sew the flannel to the linen. To keep the ruffles away from the edges while sewing, I folded them over, and placed a few pins to keep them there.
- Next, with the linen piece on the floor with the right side facing up and the ruffles facing down, I laid the flannel piece on top.
It was basically a linen, ruffle and flannel sandwich. - I pinned the whole thing all the way around. Then, I sewed around the entire thing, being sure to not sew too far away from my original ruffle stitch, to keep my ruffles from getting wonky. I made sure to leave several inches not sewn at the end, so I could turn the blanket out and hide all the seams inside.
- To close up the spot that I left not sewn, I folded the flannel under and pinned it in place, making sure to keep the ruffle edge tucked inside.
- I sewed that spot closed.Then, I topstitched* around the entire blanket. A topstitch is just a stitch sewn close to the edge all the way around. It is “on top” so it will be seen in the finished product.
Notes
- 46″ by 70″ piece of linen
- 46″ by 70″ piece of flannel
- 2- 6″ by 70″ pieces of linen (for the ruffles)
- The linen fabric is 58″ wide, so you will have a 12″ by 70″ strip left after cutting your 46″ by 70″ piece. Cut that long leftover piece in half down the middle and you will have your two ruffle pieces.
Nutrition information is automatically calculated, so should only be used as an approximation.
Pin it for later
![]()


Hey! The fabric linked here has been currently unavailable for the longest time. Is there another fabric with the right dimensions on Amazon you could link? I’ve had half the materials for this project in a box waiting for about a year for the linen piece to come back in stock, but it just hasn’t. Whatever you think is comparable would be great, please! I’d like to finally tackle this one. Thank you!
Do you the selvage of the linen?
This is a fantastic tutorial & made up just great! I made one for my mother in laws 90 th birthday then another for my daughter who is expecting twins!! I have 2 more cut out. They make up quickly & make a great gift!! Love love love using natural fabrics THANK YOU so much for this wonderful pattern & tutorial!!!
Great pattern. I’m guessing I will make more than one. My granddaughter was here from San Francisco visiting and fell in love with red and black plaid flannel. For Christmas I made your blanket pattern up in the same flannel. It’s so cute!
So glad you enjoy the pattern! Merry Christmas!
I just want to say, what a lovely blog! It’s beautiful! I’ve seen you on Youtube but this is my first time to visit your blog.
Thank you so much! Have a great day!
New to sewing…I love to do it just intimidated. I absolutely love this, but the striped material is unavailable, what would you suggest as comparable? Also, what would the conversions and materials needed be to make this into a King-size bed cover?
Any 100% linen fabric should work okay.
I have learned so much about sewing from your tutorials. I have made this throw about 6 times now. It’s such a great gift! Thank you for posting all your DIYs!
That’s awesome! So glad you enjoyed the tutorial!
I love this blanket!! I know you are showing how to make this but wondering if I could purchase one? Do you know if anyone sells the blankets? Thanks, Kathy
I do not unfortunately, but I’m sure you could find someone local to make it. Maybe a quilter or seamstress.