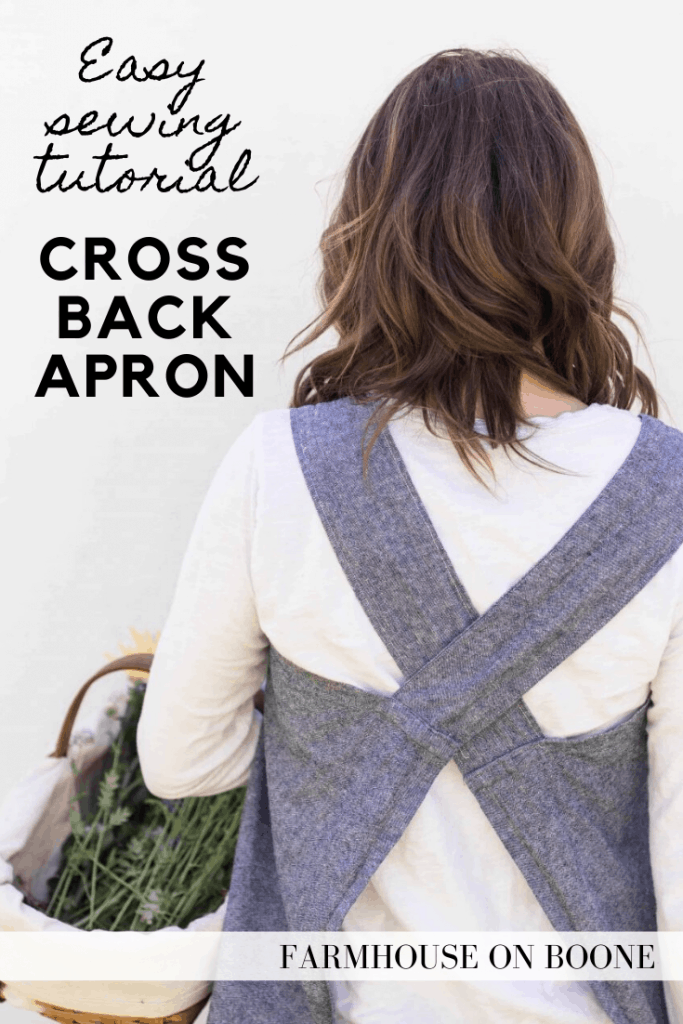
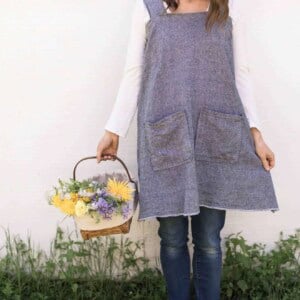
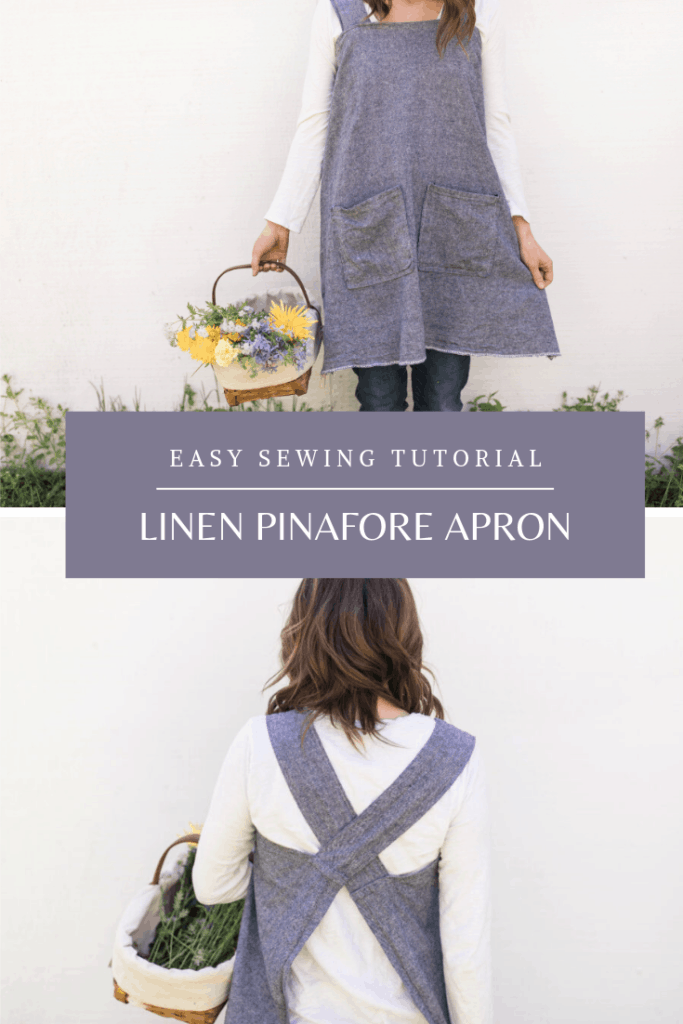
Learn how to sew a cross back apron for women. Cut list, pocket placement guide and video tutorial give you everything you need to make this simple sewing project.
This sewing tutorial is on my list of ‘waiting for spring’ projects. I don’t know about you, but I am dreaming of gardens, pools and bare feet.
This cross back apron pattern has been a highly requested project. I showed you how to make the same cross back apron for girls and I had so many people say, “But, what if I want one for myself?”
So, I got to work on getting some measurements together to make a pattern for women.
I didn’t know if I wanted to add the ruffle for the adult version, so I did a little poll on my Facebook page. An overwhelming majority said they wanted the ruffle. A few didn’t, and a few said to make it optional. So, that’s what I did! Below you will find measurements for a ruffle option and a no ruffle option.
Linen Fabric
When I did the tutorial for the DIY cross back apron for girls I bought a 55% linen 45% cotton blend. Prior to making that I only ever used 100% linen, like for this dress and this blanket. I decided that I can hardly tell a difference between the two. Since the blend is so much less expensive, I decided to go that route again for this adult pinafore apron tutorial.
I like the Kaufman Essex Yarn Dyed Linen on Amazon. It is available in every color you can imagine, and for a great price.
I bought two yards and still had some leftover.
Cross back Apron pattern Cut List
You will need two yards of fabric to make this apron.
Ruffle Option
Main piece 41″ wide by 28″ long- Cut 1
Ruffle 62″ long by 8″- Cut 1
Straps 21″ long 7.5″ wide- Cut 2
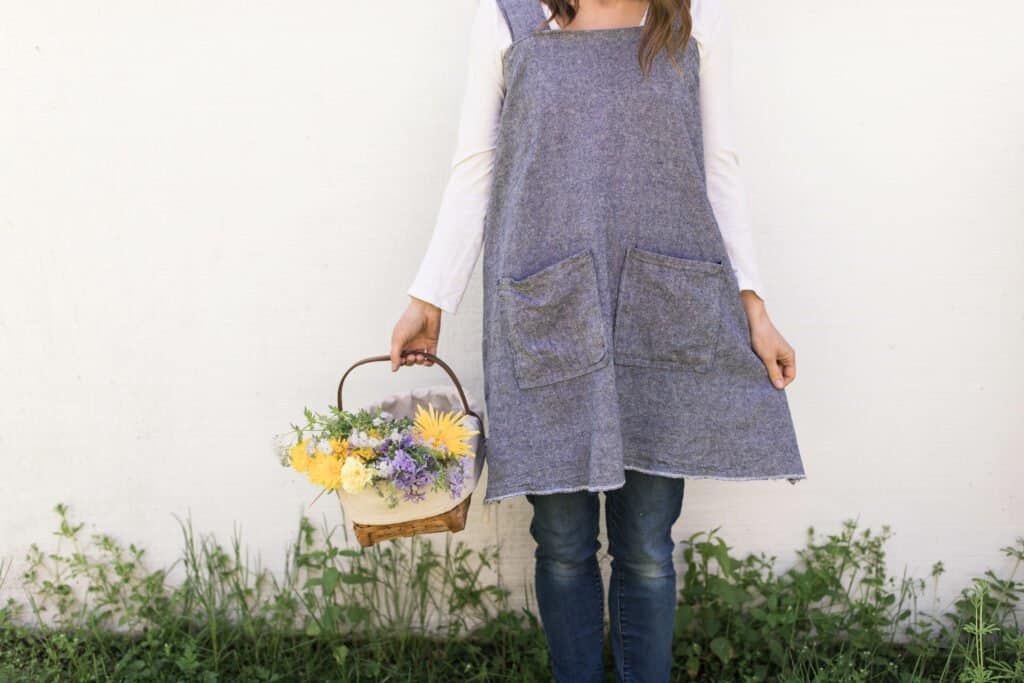
Pockets 10″ by 10″- Cut 2
No Ruffle Option
Main piece 41″ wide by 35″ long
Straps 21″ long 7.5″ wide- Cut 2
Pockets 10″ by 10″- Cut 2
Cross Back Apron for Women Sewing Instructions
Start by cutting the pieces from the cut list.
Prepare the straps
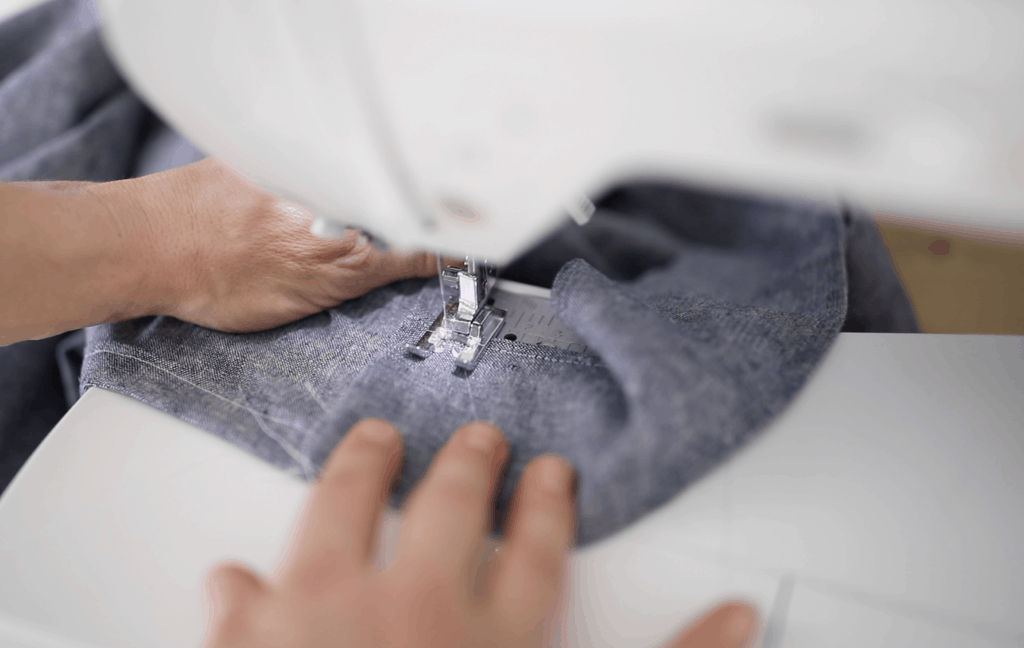
Take one strap piece (21″ by 7.5″) and fold it in half long ways. Sew the raw edges together all the way down the long edge with a half inch seam.
Turn the strap piece out, so that the raw edges, and seam, are hidden inside. Do this by placing a large safety pin on one end and fishing it through to the other end.
Press the strap flat with an iron to make the seams lay flat.
Topstitch on both long edges of the strap (the folded edge and the side with the seam).
Repeat with the other strap piece.
WHAT IS A TOPSTITCH?
A topstitch is a stitch that is sewn close to the original seam. It is on top of the garment, or project, and visible when it is complete. Its purpose is to make a seam lay flat. Watch the video tutorial for instructions that show this more clearly.
Prepare the pockets
Press one edge of a 10″ by 10″ piece one half inch, and then another half inch, to hide the raw edge inside. For the other three edges of the square piece press them over one inch.
Sew the spot that you pressed over twice, to create a hem. This will be the top of the pocket. Leave the other three edges un-sewn, as these will be sewn directly onto the main piece of the apron.
Repeat with the other pocket piece.
Prepare the main piece of the apron
Ruffle Option
Press the two short (28″), and one long edge (41″), over one half inch, and then another half inch, to hide the raw edges inside.
Do not press one long edge, as this will be where the ruffle will attach.
Sew down the two short sides with a half inch seam.
Leave the top (pressed edge) open for now, as this is where the straps still need to be placed.
No Ruffle Option
Press all four sides over one half inch, and then another half inch, to hide the raw edges inside.
Sew down the two short sides, and one long side, with a half inch seam.
Leave the top (pressed edge) open for now, as this is where the straps still need to be placed.
Prepare the ruffle (if adding)
Adding the ruffle is optional. If you plan to add it, press one long edge of the ruffle piece over one half inch, and then another half inch, to hide the raw edge inside.
Sew the area you pressed with a half inch seam, to create a hem.
Sew a gather stitch along the other (non-hemmed) long edge.
We will work on attaching the ruffle later.
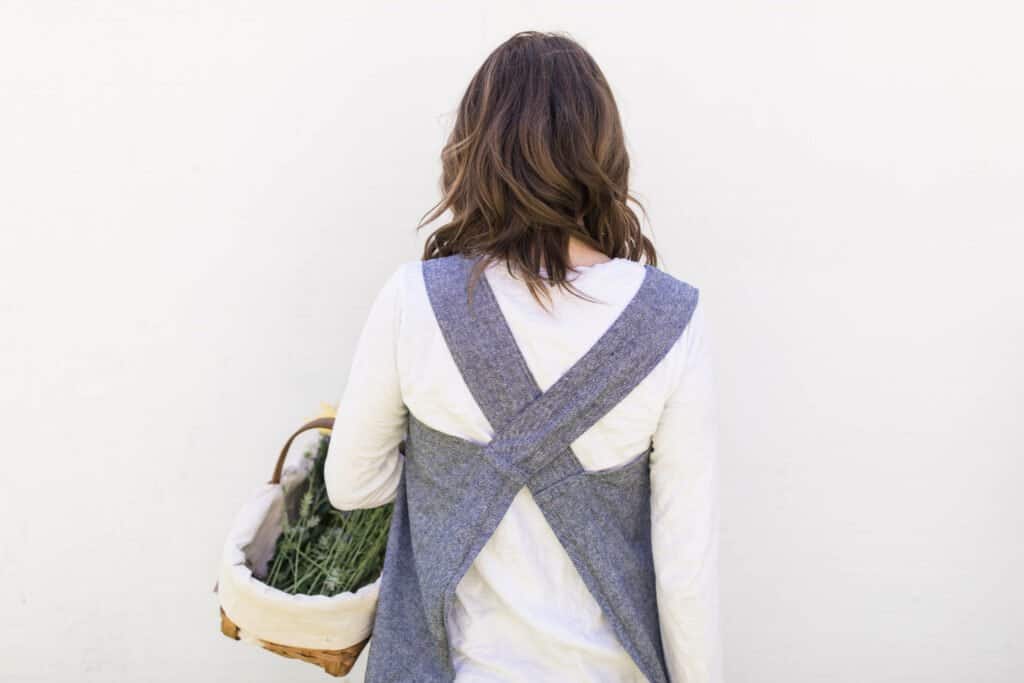
Strap Placement
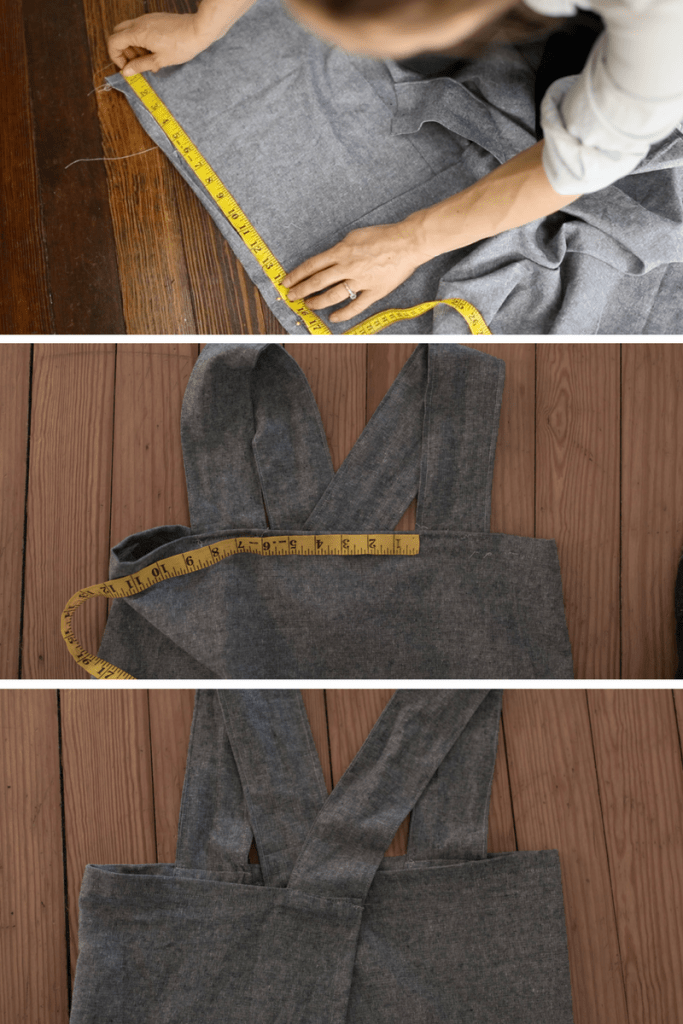
Take one strap and pin it 13.5″ from the side hemmed edge of the main apron piece. Put it underneath the pressed top edge of the main piece. This is the one that you left un-sewn earlier.
Take the other strap piece and pin it 13.5″ from the other edge of the main piece.
The two strap pieces should be about 6″ apart.
Sew the strap pieces in place. You will notice that the straps face down toward the main apron piece. To make them face up, away from the apron, flip them up and then sew close to the top of the apron to make them stay put. (Refer to the video for more clear instructions on this.)
Turn the apron over. Take the strap on the left and crisscross it over to meet the outside edge of the main apron piece on the opposite side (like in the photo above). Pin the strap in place.
Repeat with the strap on the right, crisscrossing it over to the other outside edge.
Sew the straps, that are lined up with the outside edge, in place. Flip them up, away from the main apron piece, and sew along the top to keep them up (see photo below).
Pocket Placement
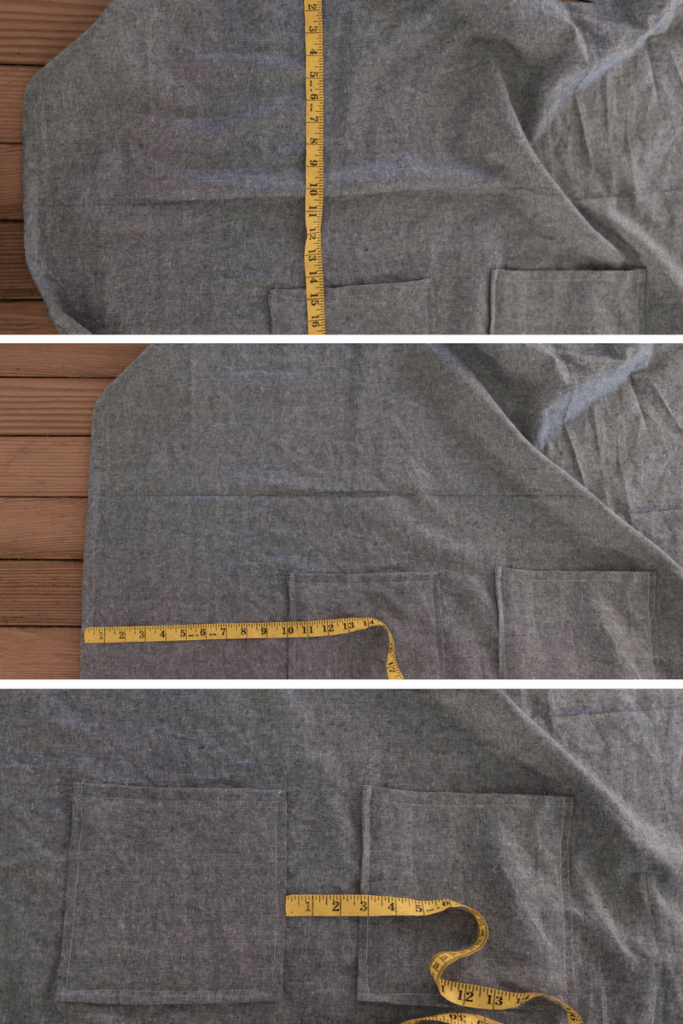
Place the hemmed top of the pocket 14″ from the hemmed top of the main apron piece.
Line up the side of the pocket 10″ from the hemmed outside edge of the main apron piece.
Repeat with the other pocket.
The two pockets should be 2 and 3/4″ apart.
Sew around the three sides, leaving the hemmed edge (the top of the pocket) open.
Attaching the ruffle (optional)
If you chose the ruffle option, it is time to attach it to the bottom (raw edge) of the apron.
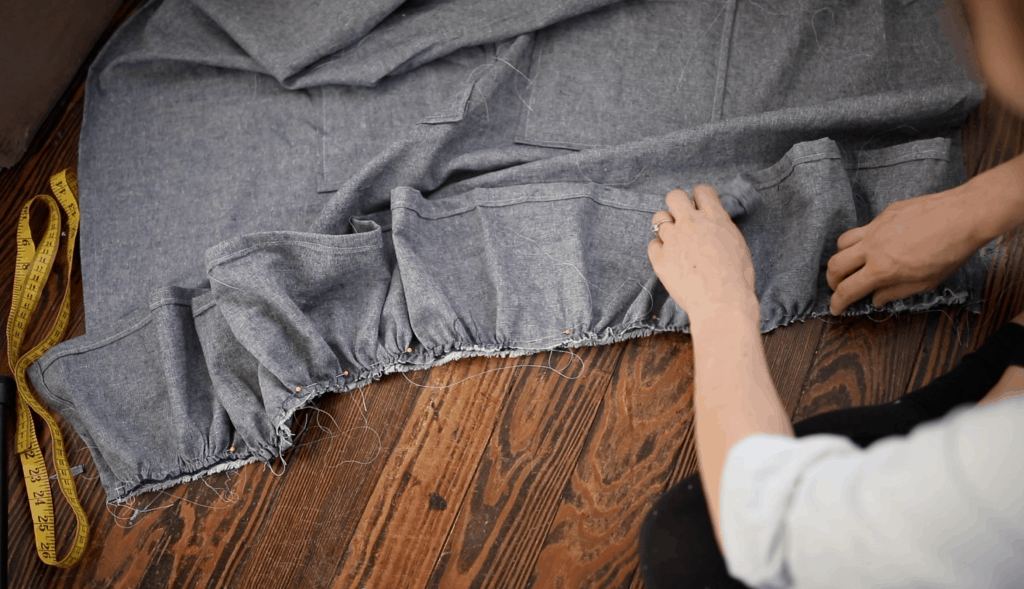
Pull the gathering strings, that you put into the ruffle piece earlier, until the length of the ruffle matches the width of the apron.
Pin the ruffle in place, right sides together.
Sew all the way down, to attach the ruffle to the apron.
Finish the raw edges with a serger or zigzag stitch.
For more details on making ruffles, if you are a beginner, see THIS VIDEO.
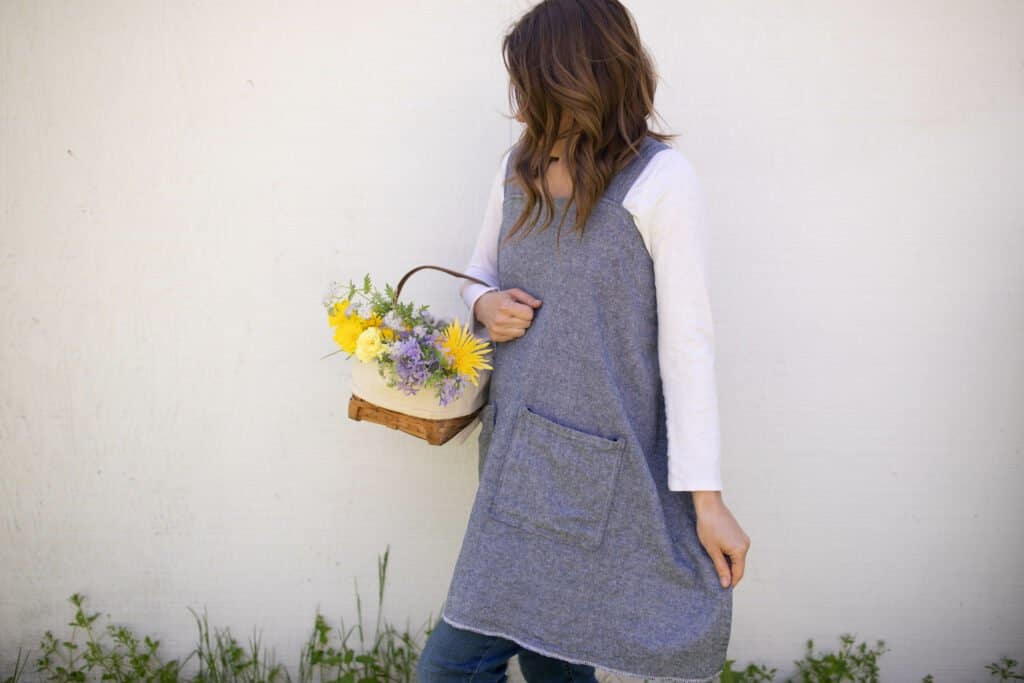
And that’s it!
Enjoy your new apron.
Be sure to subscribe to my Youtube channel to always be the first to see new videos from the farmhouse!

This post contains affiliate links. See my full disclosure HERE.
Get more apron patterns from the farmhouse
DIY Pinafore Apron For Girls Free Pattern
Cross Back Apron Pattern for Women- with video!
Equipment
- Sewing machine
Ingredients
- 2 yards linen fabric
Instructions
RUFFLE OPTION
- Main piece 41″ wide by 28″ long- Cut 1Ruffle 62″ long by 8″- Cut 1Straps 21″ long 7.5″ wide- Cut 2Pockets 10″ by 10″- Cut 2
NO RUFFLE OPTION
- Main piece 41″ wide by 35″ longStraps 21″ long 7.5″ wide- Cut 2Pockets 10″ by 10″- Cut 2
CROSS BACK APRON FOR WOMEN SEWING INSTRUCTIONS
- Start by cutting the pieces from the cut list.
PREPARE THE STRAPS
- Take one strap piece (21″ by 7.5″) and fold it in half long ways. Sew the raw edges together all the way down the long edge with a half inch seam. Turn the strap piece out, so that the raw edges, and seam, are hidden inside. Do this by placing a large safety pin on one end and fishing it through to the other end.
- Press the strap flat with an iron to make the seams lay flat. Topstitch on both long edges of the strap (the folded edge and the side with the seam). Repeat with the other strap piece.
PREPARE THE POCKETS
- Press one edge of a 10″ by 10″ piece one half inch, and then another half inch, to hide the raw edge inside. For the other three edges of the square piece press them over one inch.
- Sew the spot that you pressed over twice, to create a hem. This will be the top of the pocket. Leave the other three edges un-sewn, as these will be sewn directly onto the main piece of the apron.
- Repeat with the other pocket piece.
PREPARE THE MAIN PIECE OF THE APRON
RUFFLE OPTION
- Press the two short (28″), and one long edge (41″), over one half inch, and then another half inch, to hide the raw edges inside. Do not press one long edge, as this will be where the ruffle will attach. Sew down the two short sides with a half inch seam. Leave the top (pressed edge) open for now, as this is where the straps still need to be placed.
NO RUFFLE OPTION
- Press all four sides over one half inch, and then another half inch, to hide the raw edges inside. Sew down the two short sides, and one long side, with a half inch seam. Leave the top (pressed edge) open for now, as this is where the straps still need to be placed.
PREPARE THE RUFFLE (IF ADDING)
- Adding the ruffle is optional. If you plan to add it, press one long edge of the ruffle piece over one half inch, and then another half inch, to hide the raw edge inside. Sew the area you pressed with a half inch seam, to create a hem. Sew a gather stitch along the other (non-hemmed) long edge. We will work on attaching the ruffle later.
STRAP PLACEMENT
- Take one strap and pin it 13.5″ from the side hemmed edge of the main apron piece. Put it underneath the pressed top edge of the main piece. This is the one that you left un-sewn earlier. Take the other strap piece and pin it 13.5″ from the other edge of the main piece. The two strap pieces should be about 6″ apart. Sew the strap pieces in place.
- You will notice that the straps face down toward the main apron piece. To make them face up, away from the apron, flip them up and then sew close to the top of the apron to make them stay put. (Refer to the video for more clear instructions on this.)Turn the apron over. Take the strap on the left and crisscross it over to meet the outside edge of the main apron piece on the opposite side (like in the photo above). Pin the strap in place. Repeat with the strap on the right, crisscrossing it over to the other outside edge.
- Sew the straps, that are lined up with the outside edge, in place. Flip them up, away from the main apron piece, and sew along the top to keep them up (see photo below).
POCKET PLACEMENT
- Place the hemmed top of the pocket 14″ from the hemmed top of the main apron piece. Line up the side of the pocket 10″ from the hemmed outside edge of the main apron piece. Repeat with the other pocket. The two pockets should be 2 and 3/4″ apart. Sew around the three sides, leaving the hemmed edge (the top of the pocket) open.
ATTACHING THE RUFFLE (OPTIONAL)
- If you chose the ruffle option, it is time to attach it to the bottom (raw edge) of the apron. Pull the gathering strings, that you put into the ruffle piece earlier, until the length of the ruffle matches the width of the apron. Pin the ruffle in place, right sides together. Sew all the way down, to attach the ruffle to the apron. Finish the raw edges with a serger or zigzag stitch.
- Enjoy your new apron!
Notes
- I like using a linen blend because I think it feels great and works just as well as pure linen, but is much more affordable.
Nutrition information is automatically calculated, so should only be used as an approximation.
Pin it for later


I absolutely loved this Cross Back Apron Pattern! The video was super helpful for visual learners like me. Can’t wait to try making one for myself. Thank you for the clear instructions and fun design tips!
I absolutely love the Cross Back Apron Pattern! The video tutorial was super helpful and made the sewing process so much easier. I can’t wait to try it out with some fun fabric. Thanks for sharing such a lovely pattern!
I absolutely love this Cross Back Apron pattern! The video was super helpful in following along with the instructions, and the fabric choices you showcased are gorgeous. Can’t wait to make my own and add some personal touches. Thank you for sharing such a fantastic project!
I made this pattern for a gift. After the apron was finished I wanted to try it on, but the straps were far too short. I couldn’t get it over my head and get my arms through the openings. Is the pattern considered an XSmall size? Is the 21” x 7.5” strap designed for a child? If I were to make this apron again, I would add at least 10” to the length of each strap.
I absolutely love this cross back apron pattern! The video tutorial makes it so easy to follow along, and I can’t wait to try making one for myself. The design looks both stylish and practical—perfect for my kitchen adventures. Thank you for sharing!
I absolutely loved the Cross Back Apron pattern! The video tutorial made it so easy to follow along. I can’t wait to make one for myself and maybe even a few as gifts. Thank you for sharing such a wonderful project!
I absolutely loved the Cross Back Apron Pattern! The video made it so easy to follow along, and I appreciate all the little tips you shared. Can’t wait to make one for myself and maybe even a few for gifts! Thanks for such a great post!
I loved this cross back apron pattern! The video instructions made it so easy to follow along. Can’t wait to try it out in some farmhouse fabric! Thank you for sharing!
I absolutely loved the Cross Back Apron Pattern! The video was super helpful and made the process so much easier to follow. I can’t wait to try it out with some fun fabric. Thank you for sharing such a great pattern!