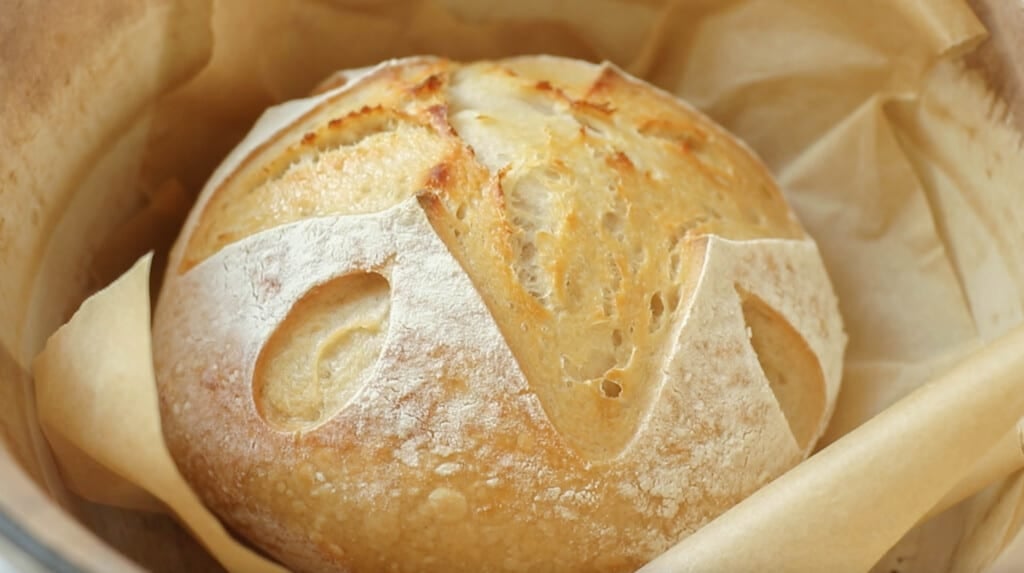
The best classic sourdough boule recipe with a crusty, delightfully chewy exterior with a light, porous texture inside. Flour, water, sourdough starter and salt are combined together, fermented, and baked in a Dutch oven to make a perfect loaf.
What’s better than freshly baked, crusty, artisan, sourdough bread?
You guessed it. Nothing. Nothing is better.
Especially when it’s sliced up and served with butter, cozied up alongside skillet pork chops or a roasted chicken.
Once you have the flavor of sourdough, it’s hard to go back to its unfermented counterparts. Except, I highly recommend this easy einkorn sandwich bread.
The flavor from the fermented grains adds an extra dimension: sour. Hence, the name sourdough. Yet, somehow, this dimension is absolutely mouthwatering and addictive.
When I’m kneading and folding the dough between my hands, I like to imagine the generation of mothers before me creating bread to feed their own children.
These days, there is such a disconnect from our food. Most people are entirely unaware of how our food is grown, raised, or otherwise made. Little is known of even the ingredients used.
Recipes like this artisan sourdough bread seem daunting or complicated. But many of the best things in life take time, love, and nurturing.
I promise this isn’t as hard as it may seem. You simply need a little time and patience.
This is just like my whole wheat sourdough loaf recipe, but without the oil and honey, and it’s baked in a Dutch oven. I eliminated the oil to step up the crispiness, and I used a proofing basket to make this a more artisan-style loaf.
Benefits Of Sourdough
Sourdough has many benefits. From better digestion to better nutrient absorption, it’s easy to see why it has become a popular ‘trend’.
Sourdough is the process of fermenting grains, allowing the natural yeasts to raise the bread and break down the anti-nutrients.
The anti-nutrient, phytic acid, breaks down with fermentation, increasing nutrients like folate, while helping other nutrients to be more bioavailable.
The fermentation process in sourdough bread and other sourdough products helps lower the amount of gluten present, and helps increase the digestibility of the grains. (source)
This post contains affiliate links, which means I make a small commission at no extra cost to you. See my full disclosure here.
FAQ:
Due to better digestibility and more bioavailability of naturally-occurring nutrients in the grains, sourdough is a better choice than typical bread.
This can be made with all-purpose flour, bread flour, and also freshly milled whole grain.
If you use whole wheat flour, you may need to use a little less flour.
You can even use einkorn flour, but you may need more flour and make sure to follow the einkorn baking rules I discuss here.
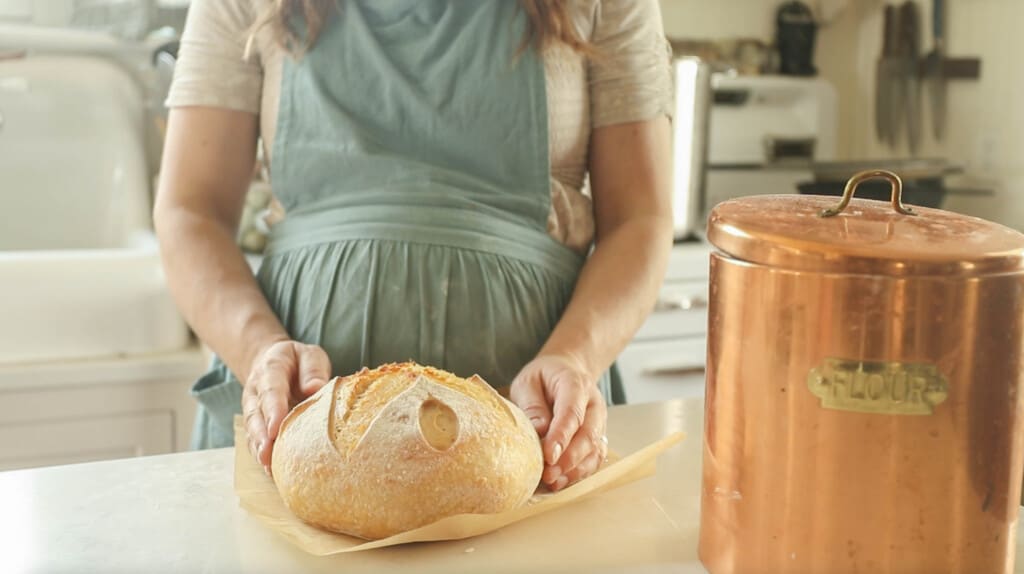
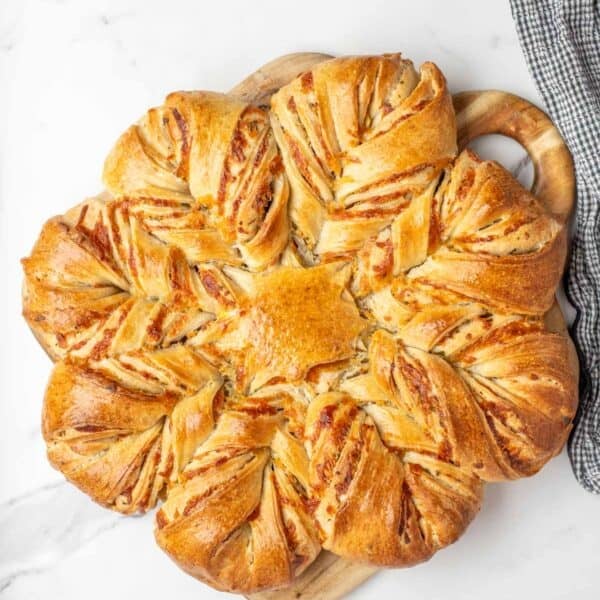
‘Artisan’ bread refers to fresh, small batch bread – crafted using traditional methods and natural ingredients.
A boule refers to a round loaf of crusty bread (source)
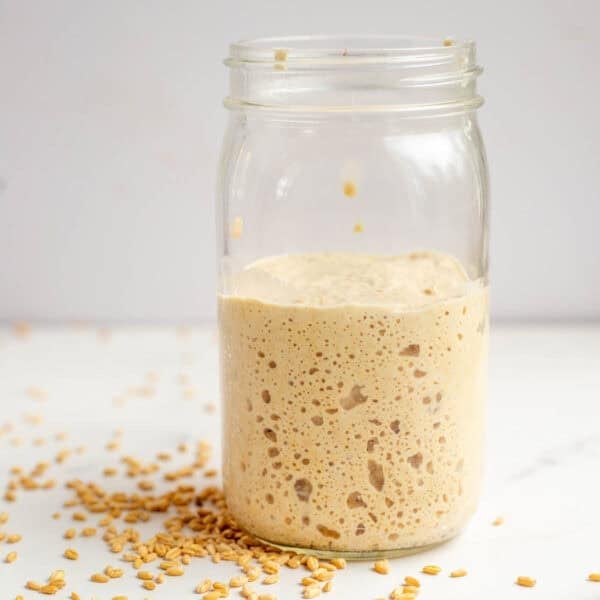
In order to make a delicious loaf of sourdough bread, you need to use an active starter that has been fed within 4-12 hours before using. When you feed your starter, it should double or triple in size. It should also pass the float test.
Take a spoonful of your active starter and drop it into a cup of water. If it floats, then it is ready to use for bread.
Wrap the bread with beeswax wraps, or in a plastic ziplock bag, and store for up to two weeks at room temperature.
Fermented whole grain bread keeps longer than unfermented whole grain bread at room temperature. This is because the fermentation process makes the bread less susceptible to mold and fungus. The same scientific principles that make sauerkraut and lacto fermented salsa keep for several months are at work in the sourdough bread.
For longer storage, you can also keep it in the fridge or freezer.
Sourdough Boule Ingredients:
Active sourdough starter – This is a sourdough starter that has been fed 4-12 hours before starting the dough. It has about doubled in size and will pass the float test.
Water – Preferably filtered water.
Salt – I like to use sea salt or pink Himalayan salt. I try to stay away from regular table salt. Iodized salt may leave a bitter taste in the bread.
Unbleached all-purpose flour – I like to use organic all-purpose flour since it doesn’t contain folic acid, a synthetic form of folate that may not be beneficial for a good portion of the population. It’s a whole thing. Bread flour can also be used.
Tools you may need:
Large mixing bowl
Scoring tool – such as a lame, razor blade, or sharp knife.
Banneton basket (optional) Could also use a basket or bowl lined with a tea towel.
Large glass bowl
Measuring cups and spoons
Bench scraper
How To Make Artisan Sourdough Bread
Knead all the ingredients in a stand mixer until stretchy and pulling away from the sides of the bowl. The original recipe called for this method. I now use the stretch and fold method, which is included below.
- It should pass the ‘windowpane’ test. This is when you can take a small piece of dough between your fingers and stretch it out. If the gluten is formed properly, you should be able to stretch it out into a thin layer that you can see through.
- If it doesn’t pass this test and is breaking apart, then place it back into the stand mixer and knead for a few more minutes. You could also do this by hand, but it takes a little more time.
If you do not have a stand mixer, you can use the stretch and fold method.
Add dry ingredients to a large bowl. Add in the sourdough starter and water. Mix until a shaggy dough forms. Cover and let the dough rest for 15-30 minutes.
Grab the edge of the dough and pull up stretching it out as you pull upwards.
Place dough that is in your hands back into the center. Turn the bowl about a quarter turn and complete another stretch and fold. Repeat the stretching and folding two more times. Cover.
First 3 stretch and folds – every 15 minutes.
Last 3 stretch and folds – every 30 minutes.
Cover with a tight lid, damp towel, or cling wrap.
Bulk Ferment
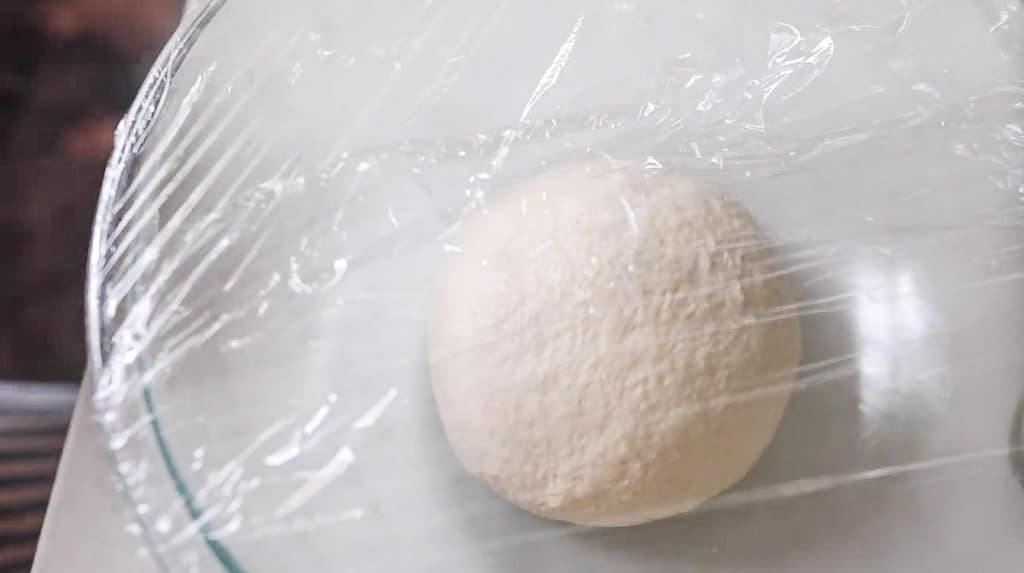
Place the dough in a large, oiled bowl (I like to use olive oil) and cover bowl. Cover with plastic wrap, beeswax wraps, or something that is airtight to prevent the dough from developing a hard crust.
Allow to ferment for 8 to 24 hours in a warm place. If you are gluten sensitive, you may need that extra fermentation for digestion. This is a delicate balance as you don’t want the dough to ferment too long causing an over-fermented mess. It should at least double in size.
Shaping A Boule
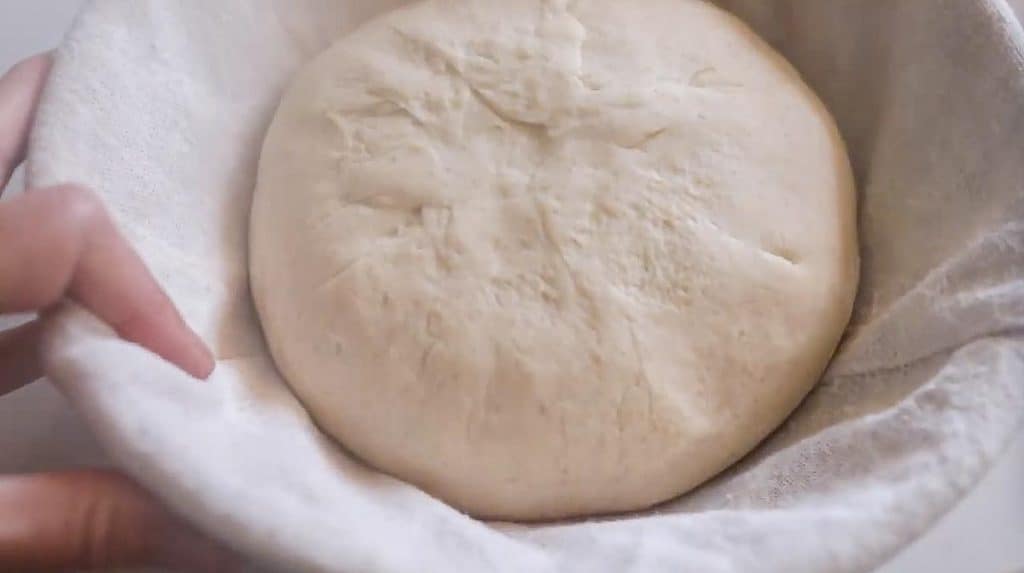
The next day, punch down the dough, turn the dough onto a clean and lightly floured work surface.
Shape it into a round shape, by spinning it towards you and pulling against the counter. Turn over and pull the edges into the center pinching together. This creates tension which gives you a springier final loaf.
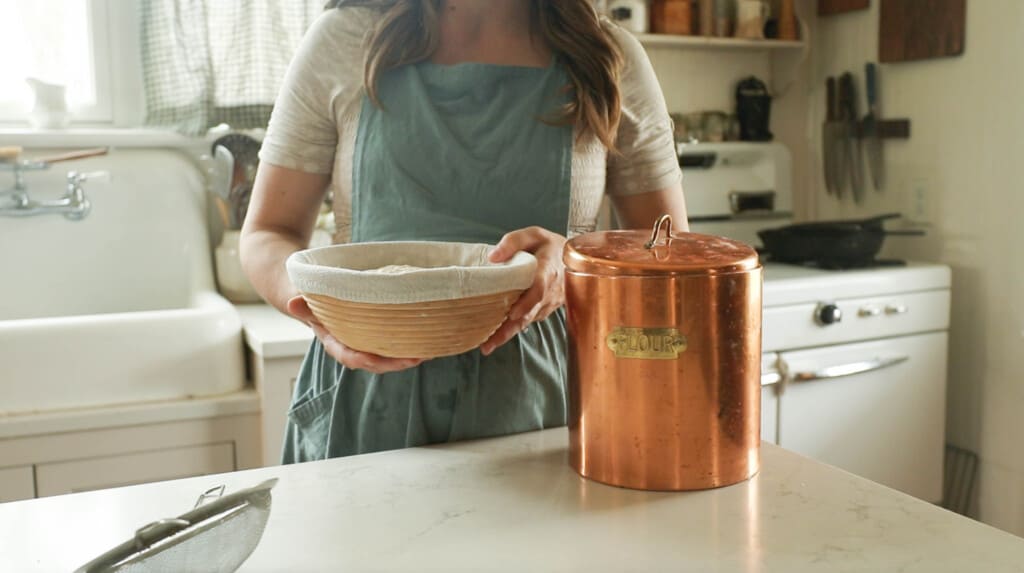
Place the dough ball in a banneton basket seam side up.
Allow to rise a second time until doubled – about two to four hours, depending on temperature of house and the maturity of your starter. Or 12-15 hours in the fridge (it will not look like it has risen much, but I promise it will still work).
Preheat oven to 500 degrees with a cast iron Dutch oven inside for an hour.
Sourdough Boule Scoring
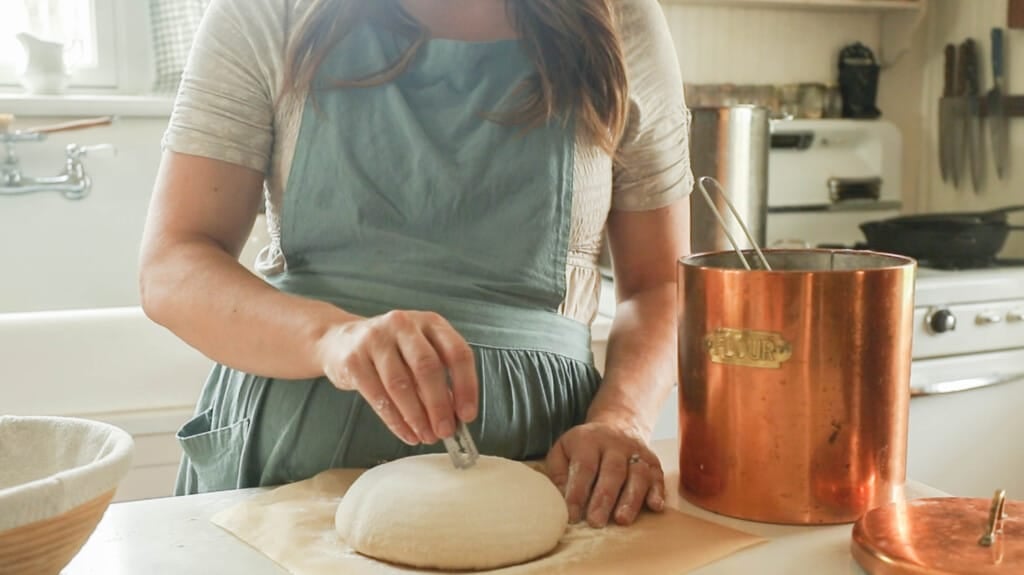
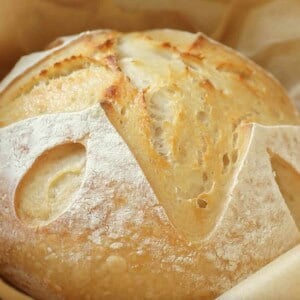
Turn the dough out onto a piece of parchment paper. This just makes it so much easier to lift into the Dutch oven and prevents any sticking.
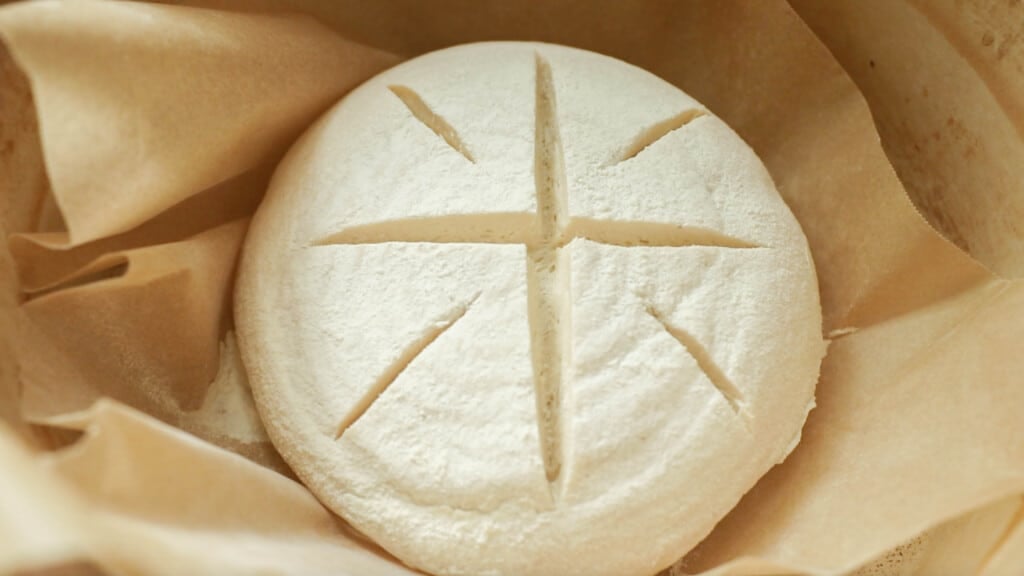
Sprinkle with flour (use rice flour if you cannot tolerate unfermented grains) and score with a pretty scoring pattern or just a simple slash on top of your loaf to give the bread room to expand. Find my favorite scoring patterns here.
Place into the preheated Dutch oven (parchment paper and all).
Optional: Add steam and spray top for a crustier exterior. If you do not have a dutch oven, you can bake your boule on a baking stone, pizza stone, or sheet pan, but in order to achieve that crusty exterior, you will need to add a lot of steam.
This can be done by spraying the top with water, and/or adding a couple of ice cubes to a baking dish in the bottom oven rack of the oven.
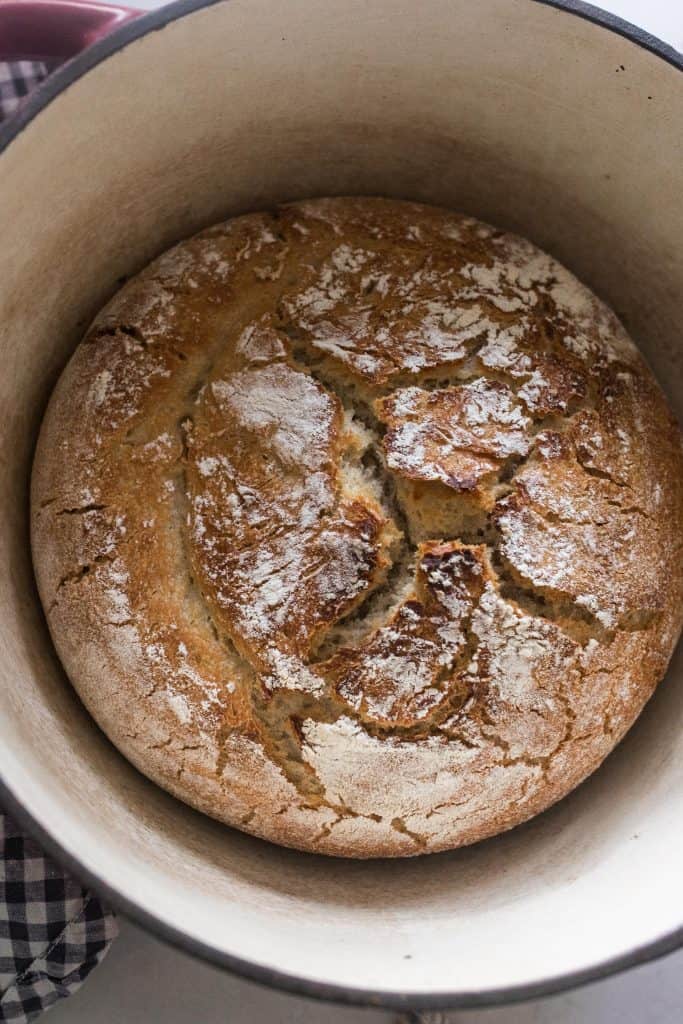
Bake 20-30 minutes with the lid on. Remove the lid, reduce heat to 450, and bake for an additional 20 minutes.
Examples Of Baking Time
10 am: Feed sourdough starter. If your sourdough starter is in the fridge, you will want to feed it at least two times before baking bread.
3-9 pm: Check if the sourdough starter is ready for use. It should be bubbly and at least double or triple in size. If you take a small amount and drop it in a glass of water, it should float.
3-9 pm: In a stand mixer with a dough hook, place flour, salt, active sourdough starter, and water. Knead for 5-10 minutes until the dough is stretchy and pulls away from the side of the bowl. Place in a large oiled bowl and cover. Or start the stretch and fold method.
8 am the next day: Punch down dough, shape in the glass bowl, and place in a banneton basket. Allow to rise until doubled (about 2-4 hours depending on temp of house). Or place in the
10 am: Preheat oven to 500 degrees. Place a Dutch oven, with a lid on it, inside the oven while it preheats.
11 am: After the Dutch oven has been preheating for 1 hour, place sourdough bread dough onto parchment paper, dust with flour, and score.
12 pm: Place dough in a Dutch oven and cover with a lid. Place it in the oven and bake for 20 minutes. Remove the lid, reduce heat to 450, and bake for 20 more minutes until the bread is golden brown.
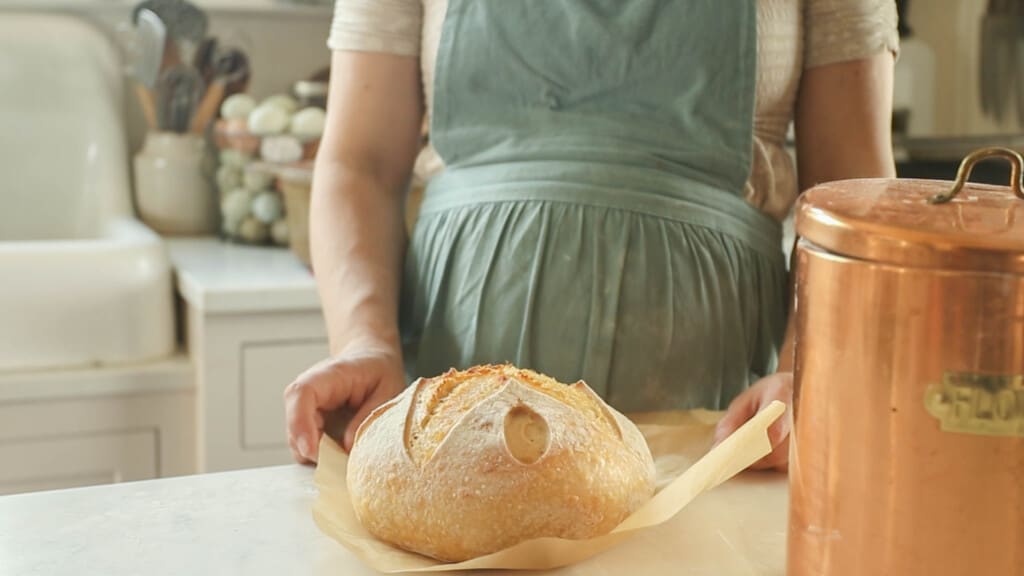
Allow it to cool and then slice.
Find More Of My Sourdough Favorites:
- Sourdough Banana Bread
- Sourdough Chocolate Rolls
- No-Wait Sourdough Recipes
- Sourdough Ciabatta Bread
- Sourdough Buns
Artisan Sourdough Boule
The best crusty artisan sourdough boule has a delightfully chewy exterior with a light, porous texture inside.
Ingredients
- 1 cup sourdough starter
- 1 1/4 cup water
- 2 teaspoons salt
- 4 cups all-purpose flour
Instructions
- Knead all the ingredients in a stand mixer until stretchy and pulling away from the sides of the bowl. It should pass the ‘windowpane’ test. Or start the stretch and fold method.
- If it doesn’t pass this test and is breaking apart, then place it back into the stand mixer and knead for a few more minutes.
- Place in a large, oiled bowl and cover with plastic wrap, beeswax wraps, or something that is air tight.
- Allow to ferment for 8 to 24 hours in a warm place or until doubled.
- The next day, punch down the dough, shape it, and put in a banneton basket. Allow to rise until doubled (about two to four hours, depending on temperature of house). Or place in the fridge for 12-15 hours.
- Preheat oven to 500 degrees with cast iron Dutch oven inside for one hour.
- Turn the dough out onto parchment.
- Optional: Sprinkle with flour and score with a pretty scoring pattern.
- Place into the preheated Dutch oven (parchment paper and all).
- Optional: Add steam and spray top for a crustier exterior.
Bake 20 minutes with lid on. Remove lid, reduce heat to 450, and bake an additional 20 minutes.
Notes
If you are gluten sensitive and you need that extra fermentation for digestion, then I suggest letting it ferment for 24 hours.
I highly recommend baking the bread on parchment paper. It just makes it so much easier to lift into the Dutch oven and prevents any sticking.
Make sure to cover the dough with plastic wrap or beeswax wraps, something air tight to prevent the dough from prematurely developing a crust.
Stretch and fold method:
Grab the edge of the dough and pull up stretching it out as you pull upwards.
Place dough that is in your hands back into the center. Turn the bowl about a quarter turn and complete another stretch and fold. Repeat the stretching and folding two more times. Cover.
First 3 stretch and folds – every 15 minutes.
Last 3 stretch and folds – every 30 minutes.
Cover with a tight lid, damp towel, or cling wrap.
Nutrition Information:
Yield: 10 Serving Size: 1 sliceAmount Per Serving: Calories: 225Total Fat: 1gSaturated Fat: 0gTrans Fat: 0gUnsaturated Fat: 0gCholesterol: 0mgSodium: 426mgCarbohydrates: 47gFiber: 2gSugar: 0gProtein: 7g
Meg says
I love this recipe and it’s the only one I’ve had success with…new to sourdough baking here…
I do have a problem with the bottom of my bread getting over cooked…sometimes almost burnt. I bake it in a cast iron dutch oven with parchment paper and still run into thos problem.
Any thoughts?
Morgan says
I’m no pro but maybe just try 450 for the whole time? I have another artisan bread recipe that does 450 for 40 minutes, 20 with lid on and 20 with lid off, so very similar but there’s not the change in temp. I wonder if that would help?
Catherine Mc says
I have always slipped a large canning ring under the parchment paper after removing the lid during baking. Raising the loaf has prevented my loaves from over browning on the bottom.
Lisa says
That’s a wonderful tip. Thanks for sharing Catherine.
Carole says
Might be a good idea to test your oven temperature. Also, I find that if I use the middle rack, it helps with this problem.
Evan says
Try putting an empty tray or a pizza stone on the shelf below. Thanks Evan
Marissa says
I’m late but in case anyone else runs into this problem. I like to put little cornmeal or rice underneath my parchment paper to coat the bottom of the pan. It raises the loaf above the bottom of the Dutch oven just enough to not burn it seems!
Andrea says
Is this recipe only for Dutch oven?
Rebekah says
Hi, I also had the same problem with any bread baked in a Dutch oven. I slide a flat cookie sheet on the rack below in 15/20 minutes into baking. I hope this helps!
Vicki says
In you sample time schedule above, you said you might need to “feed” the mixture two times before baking the bread if the sourdough starter is in the fridge. Does that mean that you take a cup of starter out at 10:00A.M., feed it with 1 cup flour/water, then in a couple hours, take another cup out, feed it, then 3-9 check to see if starter is ready?
thank you!
Carole says
Feed your sourdough twice a day with at least 8 hours between feedings. This means you may have to do this over a couple of days until your starter is ready. You want your starter to almost double and be nice and bubbly.
Vicki says
Right….BUT do you take out a CUP of the starter out each time you feed it? Take a cup out, put a cup of flour in, wait til it doubles, take a cup out, feed it with a cup of flour.
Thanks
Carole says
Actually, the more your starter increases in volume, the better. Reread the post as the author suggests a “test” to check if it’s ready.
Linda says
Hi Vicki, I just wanted you to know that I have made this recipe several times and I only feed my starter once before I make it. I pull it out of my refrigerator and feed it in the morning and then mix the ingredients in the late afternoon or evening. Once in awhile, I will do the float test to make sure it is viable, but usually I don’t and I haven’t had any trouble with this or any other recipe. I think the float test is applicable when you are first making your sourdough starter in the first week because you need to test it to make sure it is ready. After that, your starter should be viable.
I don’t preheat the dutch oven either. I’ve done lots of research on that and many websites say it doesn’t matter and I’ve found that to be true. I do preheat the oven, and use the parchment paper, but I bake this loaf at 450 degrees and then lower it to 400. If I bake it at 500, like this recipe and a few others suggest, the bottom burns. Lowering the temperature produces a beautiful loaf for me, both on the top of the loaf and the bottom. It looks like a professional loaf of artisan bread. I sure hope this helps!
Meg says
Newer to sourdough baking but loving it. This recipe is the only artisan bread that I’ve done that rose well and had a good shape. Love this recipe!
I do have a problem with the bottom of my bread getting over cooked. I use a dutch over and parchment paper. Any suggestions?
Linda says
Hi Meg,
I agree…this is an amazing recipe!
I was having that “burning on the bottom” trouble too, but now I preheat the oven to 450 (instead of 500) to begin with and then lowered the temperature to 400 and my loaves have come out beautifully. I do use the parchment paper, but I do not preheat the dutch oven. I found that it didn’t make a difference and I wondered if it was because the dutch oven was so hot when I put the bread in that it burned it??
I don’t know if my success is because I live at a higher elevation (6,000 ft.) or not, but give it a try. The bottom has come out perfectly and the top looks like a professional loaf. Hope that helps!
Eliza Christianson says
I was just wondering what the process of feeding the starter twice before baking bread looks like, how long do i need to wait between feedings? Is it once per day, or can I feed it twice in the same day?
Thanks!! 🙂
Cristina says
I think that if you do 100% hydration you can feed it 8 to 12 hours apart. Good luck!
Jessica says
I made the Sourdough starter as instructed and all went well. When I made the Sourdough bread dough, however, after 24 hrs, it hasn’t risen at all. Any suggestions? Thanks so much. Love your blog – so much great information
Jo g says
Same here. Starter was bubbly, doubled, floated in water. Everything looked good, placed in warm room, but after 18 hours, I haven’t seen much if any activity. I’ve decided that if still nothing after 24 hours, I’m going to knead in some yeast and see what happens. I’ve never been successful with straight levain bread. I’ve always had to add yeast. I was hoping this recipe would be different.
Lisa says
Did you check it before 18 hours? There is a chance that it could have over fermented which could be why it didn’t look like it rose at all. Mine is usually doubled by 8-12 hours. I’m sorry this recipe is giving you trouble.
Mary says
HiLisa! Love your blog! Can I use sprouted spelt for sourdough and for this recipe?
Patti says
What do I do if my dough overferments? I still baked it and it didn’t rise as much 🙁
Lisa says
That is such a bummer. You can use it in recipes like bread pudding, French toast casserole, turn it into croutons, or breadcrumbs.
Dana says
I’m new to making sourdough and finally got my starter ready for my first bread! Do I need to use a banneton basket?
Stacy says
I’ve used a colander with a tea towel and it’s turned out exactly the same!
Lisa says
Thanks for sharing that tip!
Bev says
I’ve made the bread now on my 3rd try. The trick is keeping a wetter dough; however, I’m finding that the end product presents a little gummier than regular breads…Has anyone experienced this and have any solutions? Thanks so much
Jeannie says
Are you waiting long enough to cut into it? I’ve found if I’m too anxious to cut into it, it’s not done cooking and gets gummy.
Gabriela Gierke says
Hi I’m new. I made this loaf twice and yes both times my loaf came out dense and yea gummy. If by gummy you mean it looks doughy but it’s still cooked. How long should I wait to cut into it? I did the 500 to 450 also with a bottom burnt. How do I get my sourdough too look more fluffy with air pockets inside? Thank you in advance
Bev says
Can someone answer please if their end result bread turns out more moist than regular type breads. Thanks
Mary says
Awesome recipe! Very easy to follow and beautiful results!
Natalie says
My bread did not pass the “window pane” test even after adding more flour and mixing it longer. Is it my starter or I didn’t mix long enough?
Really looking forward to the bread!
KatieS says
I had this issue too. The dough did not seem the right consistency at all
Maria says
Hi Lisa!
My husband and I are huge fans and we love watching your videos and growing family! You’ve inspired me to grow a starter and make all kinds of recipes. Yesterday I made your no-knead sourdough and it turned out great! I really want to try this recipe but I have a 9 qt dutch oven and I was wondering if this will affect the baking process? Will the bread maintain its shape or flatten out?
Best of luck with this pregnancy! You’re in our prayers!
XO,
Maria
Crystal says
This recipe turned out amazing. We had it tonight with your potato soup, which was also yummy.
I have a question about the starter you keep on your counter. I would like to keep 2, maybe 3 cups of starter on hand. How much do I feed that daily?
Janae says
I had a fed starter that I put in the fridge over night. Used to make pancakes that morning put back in the fridge and then made the bread tonight. I did that last time and it worked fine. I think if your starter is healthy and you make sure it’s bubbly and happy before in the fridge it works
Sam says
I’m really curious about the kneading and punching down. Wouldn’t this result in a very dense loaf as this is sourdough and not a traditional yeasted dough?
Elizabeth Friesen says
I am so new to using sourdough. But I’m excited that I started. My sister asked me if I put fresh flour in the bread or other recipes, if it’s still true sourdough. I said I don’t know. Can you answer that for me? Thanks in advance. (You probably have addressed it before already but need to know where to find it)
Amy says
Hi Lisa! I’m learning how to use my sourdough starter and I’m having so much fun!! Question: does it work well to double this recipe? I’m used to making more than one loaf at a time. Thank you and I love your blog!!
Lisa says
Yes! I often double it.
Anonymous says
On your Instagram page, you recently put up this exact same recipe, but said that it makes two loaves. Here, it seems to be just one loaf. Could you please clarify? Thanks so much!
Lisa says
I totally made a mistake! When I posted it on IG, I copied and pasted the original recipe from the blog, forgetting that I doubled it. I just changed my IG description. Thanks for bringing this to my attention!
Gabriela says
What if the starter doesn’t pass the float test?
Janet Hayes says
I love this recipe thank you. So I do have one problem that persist My bread does not rise as much as i would like and the center is not cooked all the way, or dense this is for any of the Artisan and the Sandwich loafs. So what am I doing wrong??? Pretty much boat anchors that we eat anyways. LOL The sandwich loaves almost turned out good, but still doughy in the center ugh!!! I made sure my starter was freshly fed 8 hours prior to using it looked and smelled perfect. I wonder if I did not kneed enough in the mixer? it was pulling away from the sides and handled well. Or the Artisan Bread just did not rise a lot and I did put both in a warm oven since our house was cold over night, Down into the 50’s so maybe not warm enough?? Thanks for any tips you can give me Jan
Lisa says
Oh no! Do you check for the windowpane test after kneading? You should be able to stretch the dough between four fingers enough to be able to see through it without it baking. Also, is your oven the right temperature when baking? The temperature in your home could definitely be a factor as well.
tierney says
hi!! could you convert this to grams? i’m having mixed reviews on google. thank you! 🙂
Lisa says
I created this chart Baking Conversion Chart that may help.
Anonymous says
Must it proof for a full 8-24 hours? Or is this purely for extra fermentation ?
Lisa says
I find that sourdough just takes a little bit longer. 8 hours would be a minimum it would need to ferment.
Sarah Young says
Hi! I’m new to sourdough, and am loving all the inspiration on your blog! For doing the bulk fermentation of 24 hours, won’t that over prove the dough? Is that supposed to be done in the fridge?
I made this recipe once so far with a 12hr bulk ferment and it was great, and I’d love to try a 24hr one but I’m scared I’ll kill the dough!
Lisa says
It can, depending on the temperature of your house. I normally place mine in the fridge overnight after letting it bulk ferment.
Vanessa says
I’m going to buy a ceramic coated Lodge Dutch oven and am curious if the 4.5 qt or the 6 qt is better for artisan bread?
What size do you use?
Thank you for your content. I’m spending lots of time reading and trying recipes.
Vanessa
Lisa says
I have the 6 qt. It’s the perfect size for bread making or a pot of soup.
Hillary says
I had a question. I did the first ferment for 24hrs then I punched down to rise. But I forgot about my dough, is it okay that the second rise was for 12 hours? Or do I need to trash and start again?
Lisa says
I would still bake it up. It may (or maybe not) be over fermented and not rise well during baking, but you could always turn it into sourdough strata, stuffing, or croutons. All recipes are on the blog. That was you are not wasting your time and food.
Hillary says
Thank you SO much!
I truly appreciate it 🙂
You’re the best.
I tell everyone about your website.
It’s my favorite place to get recipes and you’ve helped me soooo much with having success with my sourdough. My favorite is the Brioche!
Happy Holidays!
Lisa says
Thank you for such wonderful compliments and for sharing!!! Glad you enjoy the recipes.
Tashena says
Lisa,
I have been watching your vidoes a VERY long time and decided to jump in!
I have made a few different things with my starter, but using this recipe, I never “pass the windowpane test.”
What do I need to try to remedy this????
Thank you for sharing with all of us.
Lisa says
It all has to do with length of kneading. The longer you knead the more the gluten strands develop, the stretchier the dough gets, which then allows the dough to be stretchy enough to pass the windowpane test. So my guess is that is just needs to be kneaded longer.
Amber says
This is my case. I ended up kneading for 30 minutes before it passed.
Fran says
I’m curious…when beginning this journey, must you always discard when you feed the starter?
Lisa says
In the beginning yes, but you can use the discard in discard recipes rather than just throwing it away. I’m at the point now that I do not discard. Just feed and use.
Andrea says
What kind of flour should I use for the artisan sourdough breadrecipe?
Catherine B. says
First of all, thank you so much for providing a sample schedule for making the bread. That is so helpful! I would love to see a sample schedule for the sourdough sandwich recipe, which I’ve made a few times, but it is difficult for the timeline to line up with my schedule so that it doesn’t overproof!
Secondly, is a banneton a must with this recipe, or is there a substitute one can use? Would love to not have to store one more thing in my small space that would only get used for making bread.
Thank you!
Lisa says
You can use a small tea towel lined bowl or a tea towel lined bread pan for shaping instead. I do this all the time!
Shelby says
I don’t have a Dutch oven, is there any sourdough recipe I can make to still get a good loaf like this??
Lisa says
Yes. So the key to get that crusty crust is steam. You can place your loaf on a parchment lined sheet pan and then add steam to the oven. This can be done with pie weights, and a dish with rolled up towels and water in them. Check out my video on YouTube titled Beautiful Winter Foods for the exact tutorial.
Courtnee says
What is the difference in this artisan loaf and regular crusty loaf of sourdough?
Lisa says
Most likely the same. This one does include kneading, whereas other crusty loaves (like my no-knead bread) use the stretch and fold method.
Felicia Prevatt says
I would like to say thank you for answering questions. You are making this sourdough beginning journey so much easier. Sorry for another question but if I bulk ferment during the day on this one and then place this in the refrigerator overnight would I punch it down and let it rise again at that point and then? or would I place directly in the oven? Thanks
Felicia prevatt says
If I bulk ferment this and then place in fridge would I need to punch it down and let it rise again at this point? Thanks for answering questions you are very helpful when starting out on this journey. Sorry for yet another question
L. Col says
Your recipes often state the type of flour to use, like all-purpose or provide information if use other flours. This artisan bread recipe states just “flour”. Would using bread flour which has 12-14% gluten forming proteins, rather than using
another flour which contain less gluten forming proteins, like all-purpose flour which contains 10-12% (per foodnetwork.com) help the dough form “window panes” and deter doughy uncooked centers???
(I do use all-purpose flour mainly to feed my sourdough starter.)
Shantel Cameron says
I make this recipe on a weekly basis. I’m high altitude so I add 1 1/2c water to my loaf and it’s perfect every time. Thank you for this recipe!
Lisa says
That is great to hear! Thank you for sharing that tip.
Bonnie Deering says
What if half of your starter floats in water and half falls to bottom? Do I refers and wait another 12 hours?
Holly Nash says
I use this recipe ALL THE TIME. In fairness, I’m a once a week, lazy baker. I feed my starter on Thursday night and Friday morning. Friday night I mix my dough, let it rise overnight. I put in a banneton for 12? Or 24? Hours in the fridge. I bake cold in an oven set at 500 for 25 minutes in a covered cast iron Dutch oven. Reduce temp to 450 and bake an additional 20 minutes.