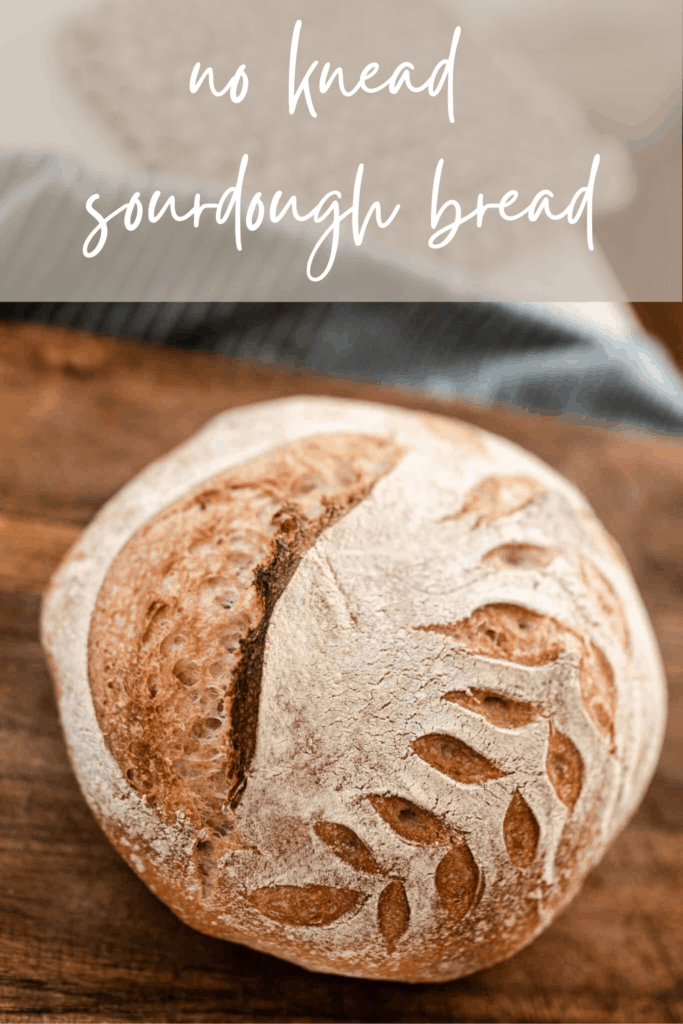
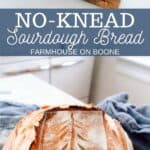
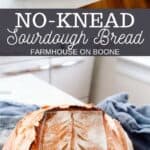
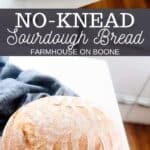
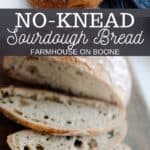
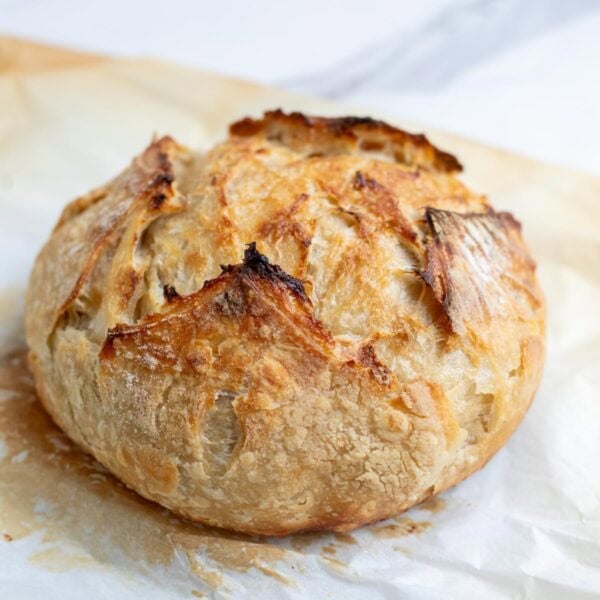
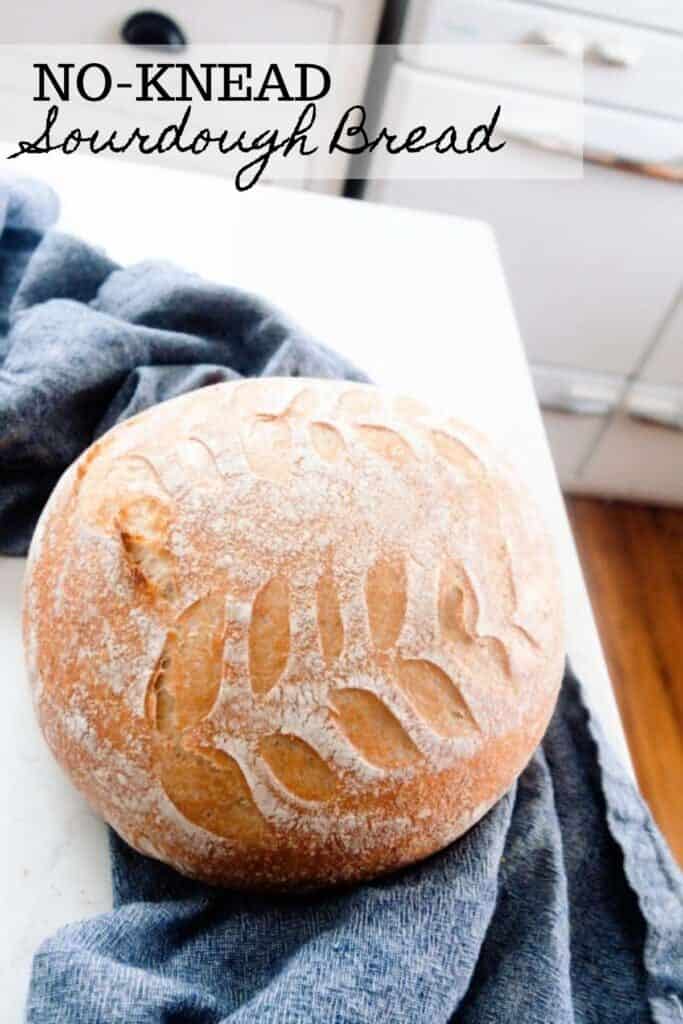
A crusty, no-knead, sourdough bread with a delightfully soft texture and deliciously tangy flavor. The dough is mixed one day and baked the next, giving it an elevated taste and texture.
Crusty loaves of sourdough bread are an absolute staple in our house. This is an art I continue to work at mastering, but I also think of it as a hobby. I enjoy working on my sourdough recipes, fine tuning and perfecting them.
I’m hoping this will also become a passion for my children one day, as they reflect back on the memories of fresh bread and time spent in the kitchen. How fortunate to find a hobby kind of joy in a simple, everyday kind of task!
Learning makes me happy, and learning how to make the perfect loaf and mastering beautiful designs can be incredibly satisfying. I continue to find that the extra special attention to detail makes all the difference, especially with sourdough.
See, sourdough can be fickle. Sometimes a loaf doesn’t turn out just right. Don’t get me wrong, we still eat it.
We might turn it into a breakfast Strata, stuffing, or cut it in half and make pizza bread, but we still eat it.
After experimenting for weeks to create the perfect, artisan-style, no-knead bread, I finally feel like I nailed it.
This process and recipe has given me consistently good loaves, so that’s why I’m excited to share it!
What is sourdough bread?
Sourdough bread is a fermented bread that uses natural wild yeast to rise, rather than relying on commercial yeast.
It is a healthier choice, plus many people who are sensitive to gluten (not celiac) can tolerate sourdough products, due to the fermentation of the grains.
Phytic acid (that is naturally present in wheat), which is an anti-nutrient that blocks absorption of the nutrients found in wheat, gets broken down during the fermentation process. This breakdown, in turn, makes the nutrients more available for your body to absorb.
How do you make a sourdough starter?
Creating a sourdough starter is actually pretty simple. It is the process of mixing water and flour together for multiple days until yeasts are captured and the flour bubbles. You can find the tutorial on how to make a sourdough starter here.
Is it necessary to knead sourdough?
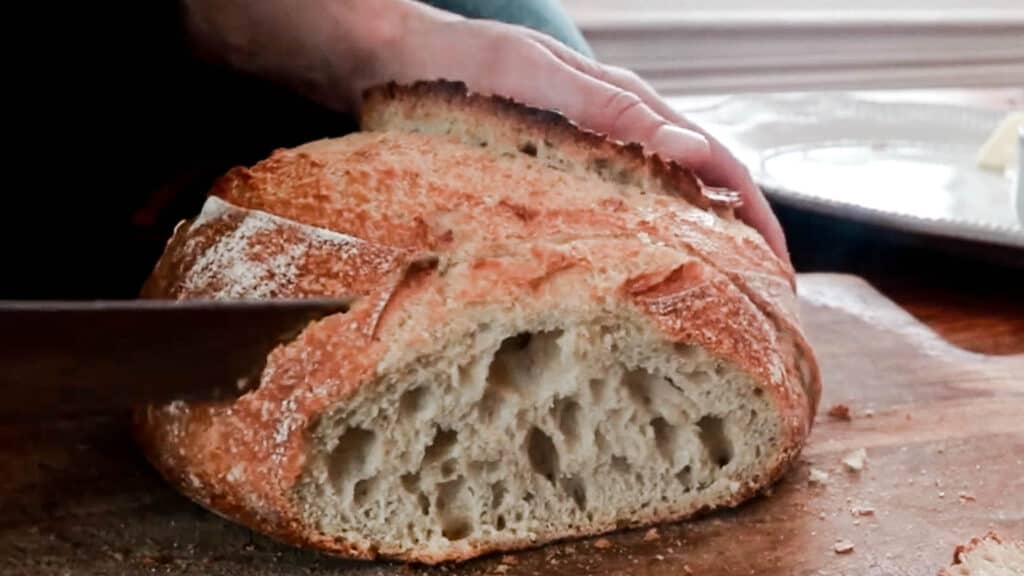
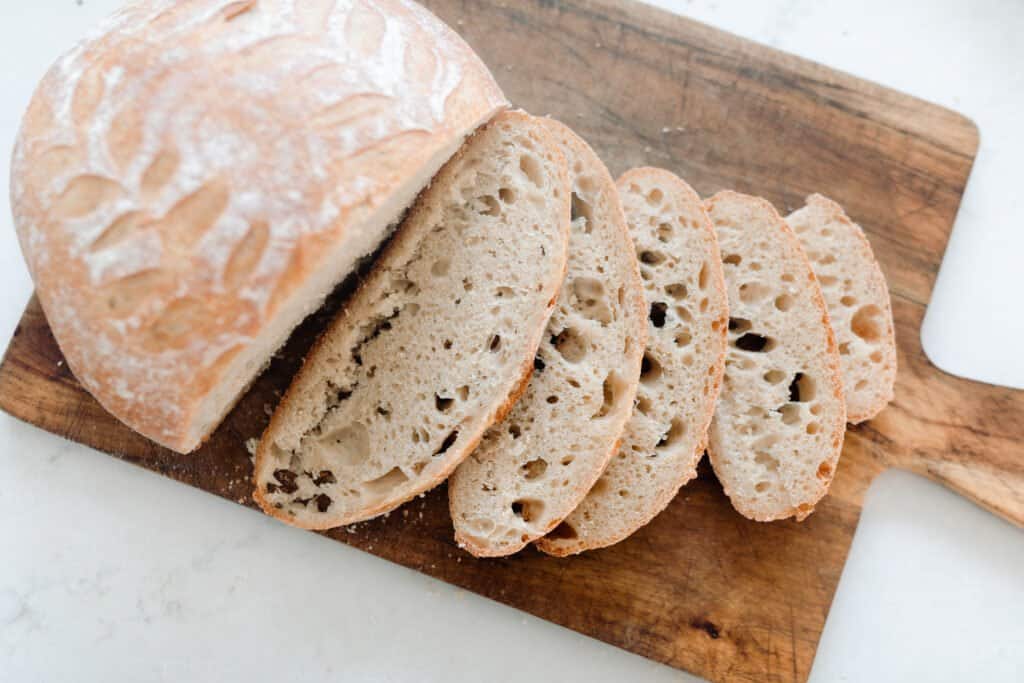
Not necessarily. The act of kneading is supposed to help create gluten formation in the bread, which can then help create a good texture and air pockets in the bread. But no-knead sourdough bread uses other methods to develop the gluten.
How does no-knead sourdough work?
In no-knead versions, the gluten develops during the stretching and folding process, as well as during the bulk fermentation process, which helps create those glorious air pockets.
This post contains affiliate links, which means I make a small commission at no extra cost to you. See my full disclosure here.
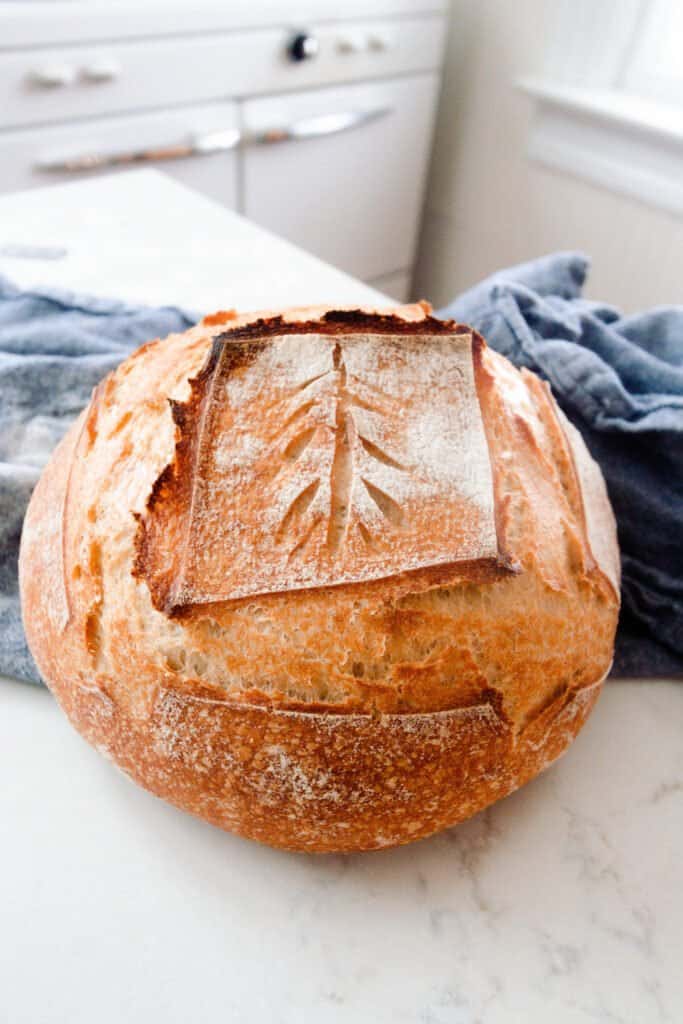
Tips For Success:
- You will need an active sourdough starter to create a well-risen bread. Check out how to make a sourdough starter and how to care for one.
- Cover the dough with a damp towel, beeswax wrap, or plastic wrap to ensure that an unpleasant crust doesn’t develop.
- The amount of time it takes for your dough to double can be determined by many environmental factors, such as the temperature in your home, the maturity of your starter, and the hydration status of the loaf.
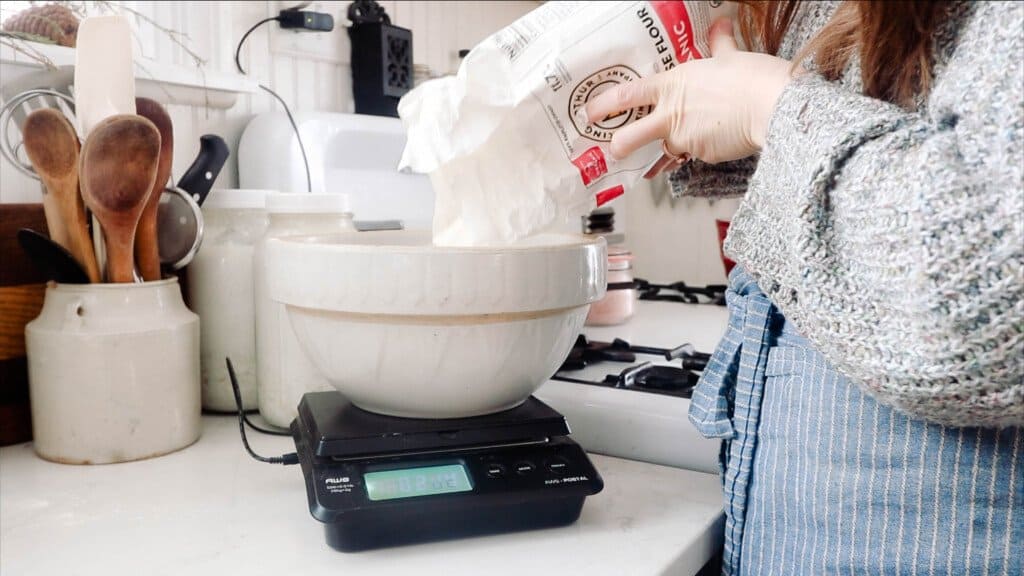
- The most accurate way to get the best loaves of bread each time is to measure your ingredients with a kitchen scale.
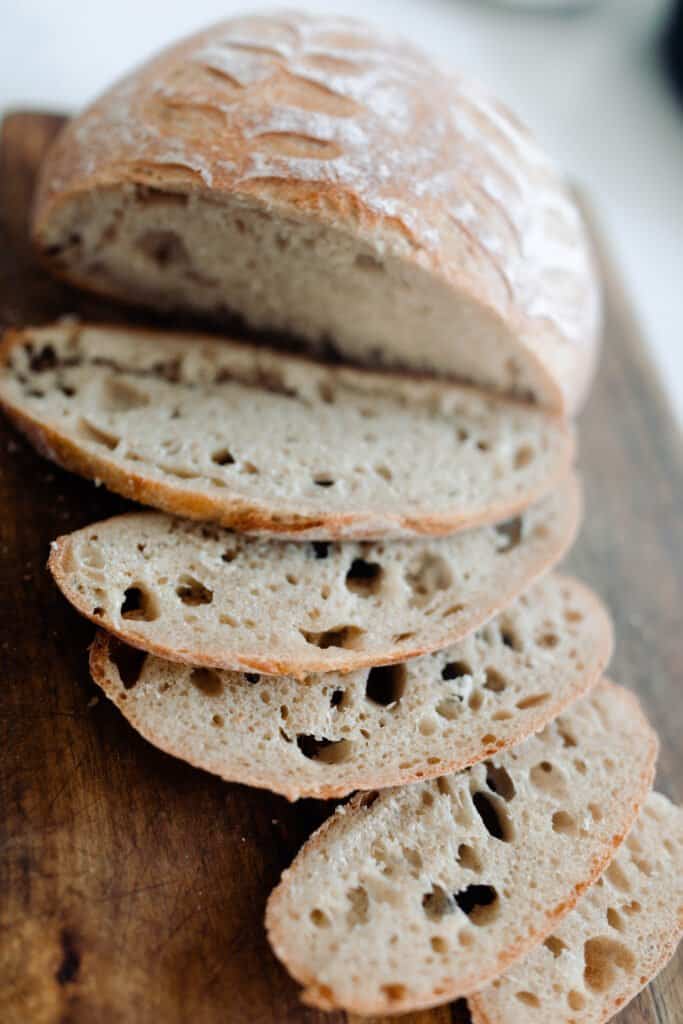
Tools you may need to make this recipe:
Large bowl
Kitchen scale
Banneton (optional)
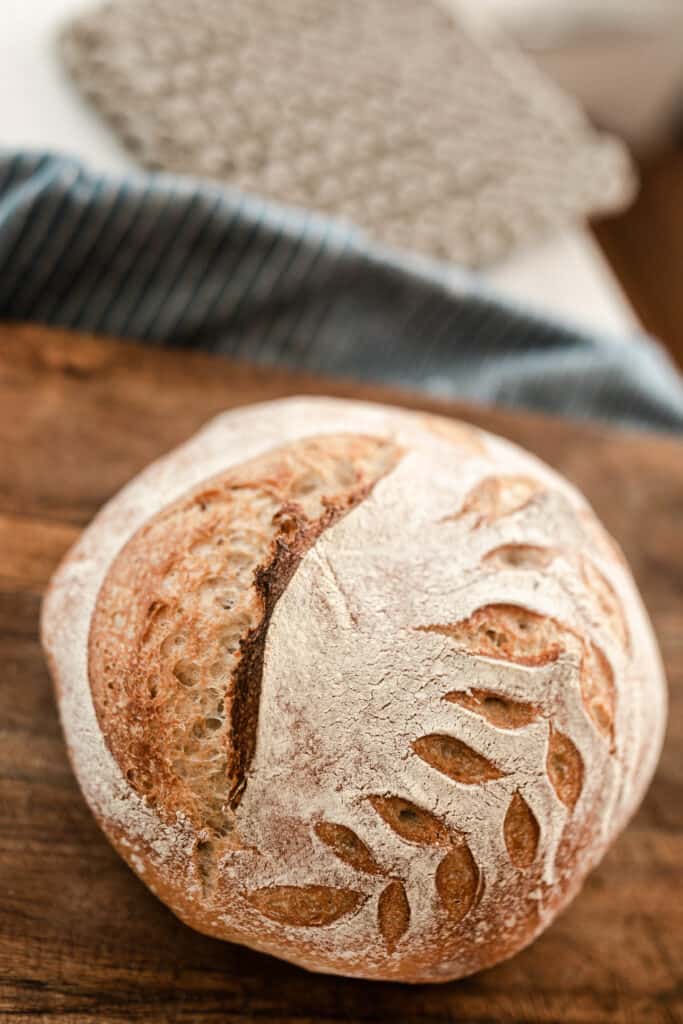
How To Make No-Knead Sourdough Bread
Feed a sourdough starter 4-12 hours before starting the bread, ensuring it is active and bubbly.
Combine warm water and flour. Allow to rest for 30 minutes for the water to hydrate the flour. This process is called autolyse.
Add sourdough starter. Dimple in with wet hand.
Sprinkle salt on top.
Mix the dough with your hands for about 5 minutes to bring the dough together. Cover with damp towel or plastic wrap while resting.
Cover with plastic wrap or damp towel and let rest for 30 minutes.
Stretch And Fold
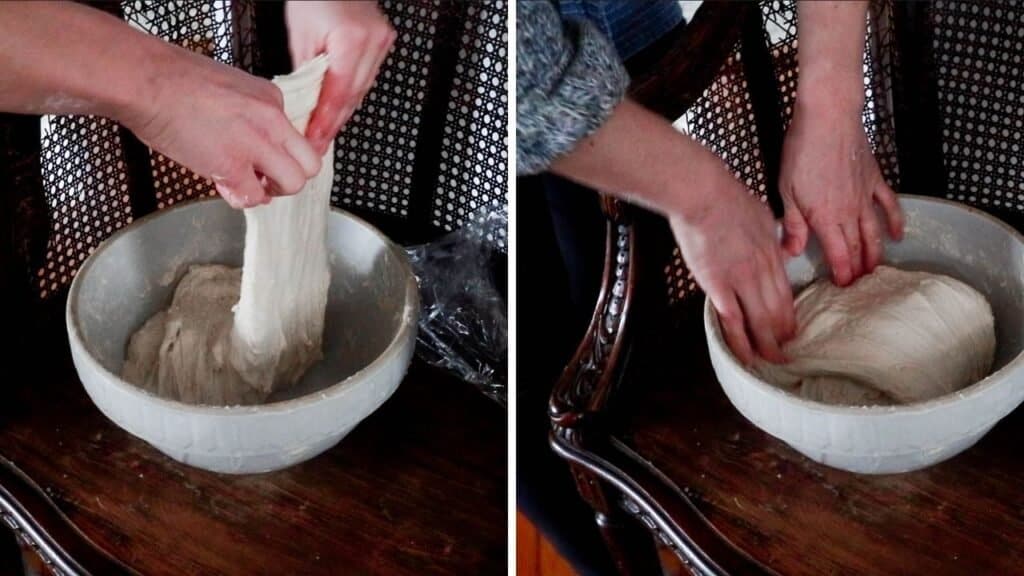
To develop the gluten and obtain a nice rise, you will want to do 6 rounds of stretching and folding.
While the dough is in the bowl, grab the edge and the dough firmly and pull up, stretching it upwards. Then place the dough in your hands into the center. Turn the bowl about a quarter turn and do this stretch and fold again, and again one to two more times. This is considered one stretch and fold round. Repeat according to the directions below. Dip your hand in water if the dough is too sticky.
First 3 stretch and folds – every 15 minutes.
Last 3 stretch and folds – every 30 minutes.
Cover with a wet towel or plastic wrap and allow the dough to bulk-ferment until doubled.
The timing for this will vary depending on temperature, hydration, and maturity of your starter. You could also let this step go longer for further health benefits. I do this in the morning and then let it go all day.
When it’s done, there will be bubbles all over the surface.
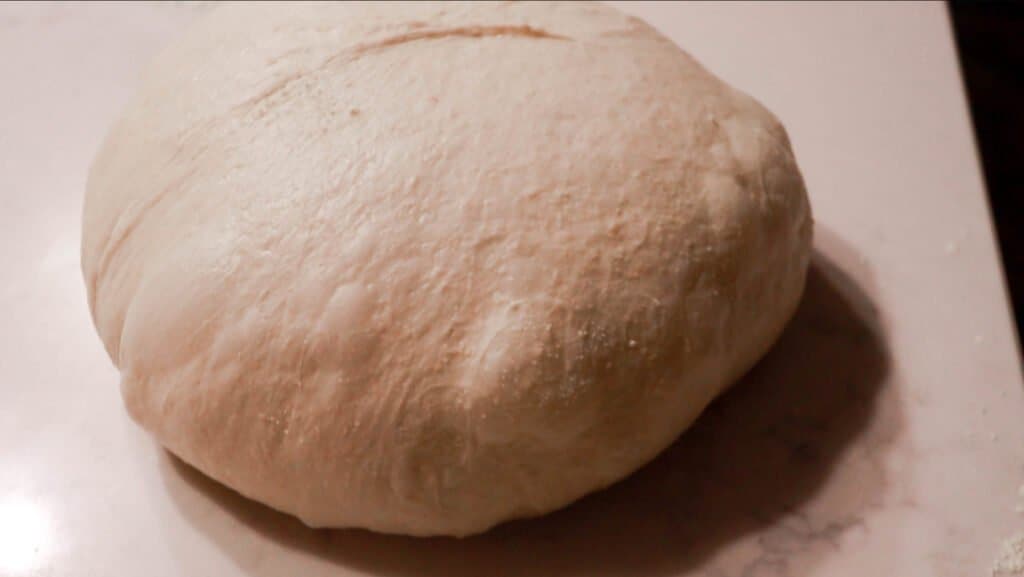
Split the dough in half down the middle with a dough scraper. Be really careful not to break any of those precious bubbles.
Shape into a ball by gently spinning it toward you.
Set out 15-20 minutes uncovered. This allows the surface to develop a skin, so that it doesn’t stick to the tea towel during the overnight rise.
Turn over and shape. I do this by folding the two sides over to meet in the middle, and then the other two sides.
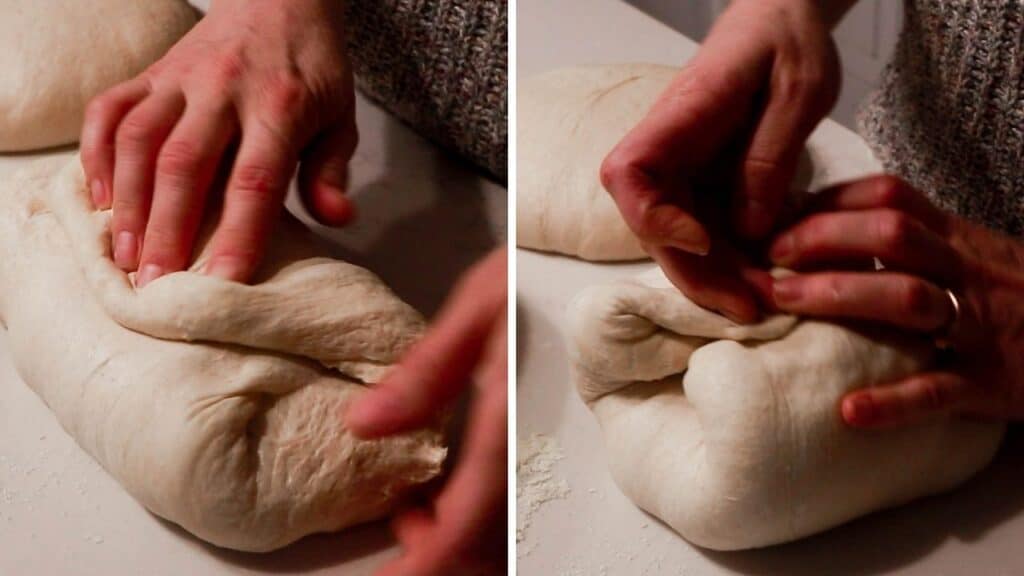
Repeat with the other half of the dough. This recipe yields two loaves.
Transfer to flour banneton or bowl with tea towel, seam side up. Cover with plastic and proof 12-15 hours in refrigerator.
Bake
Preheat dutch oven to 500 degrees for 1 hour.
Remove dough from the fridge immediately before scoring and baking.
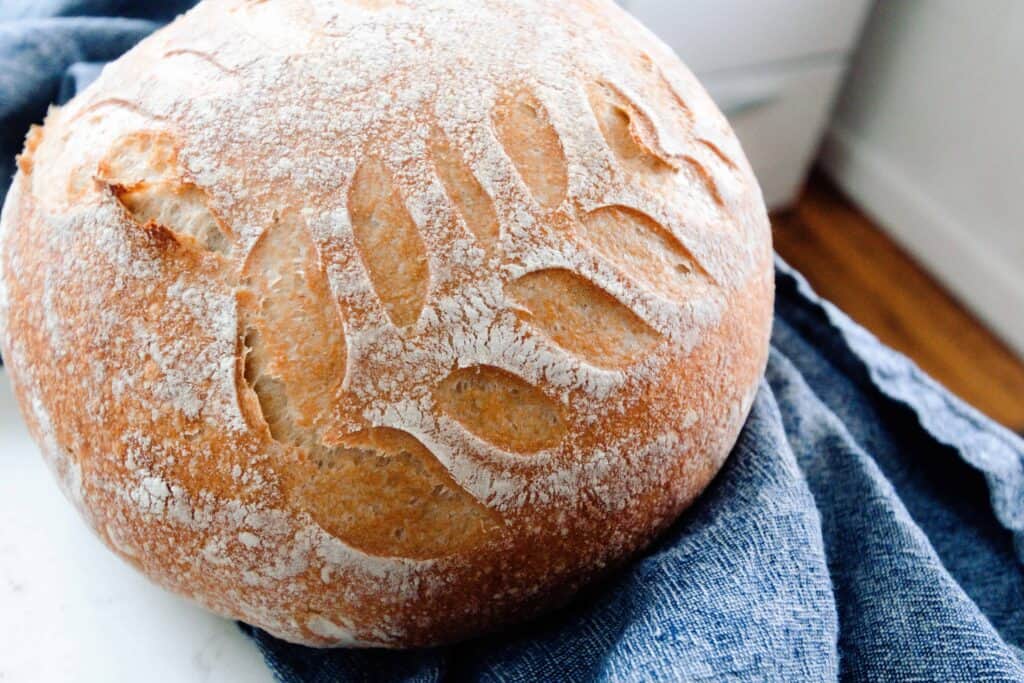
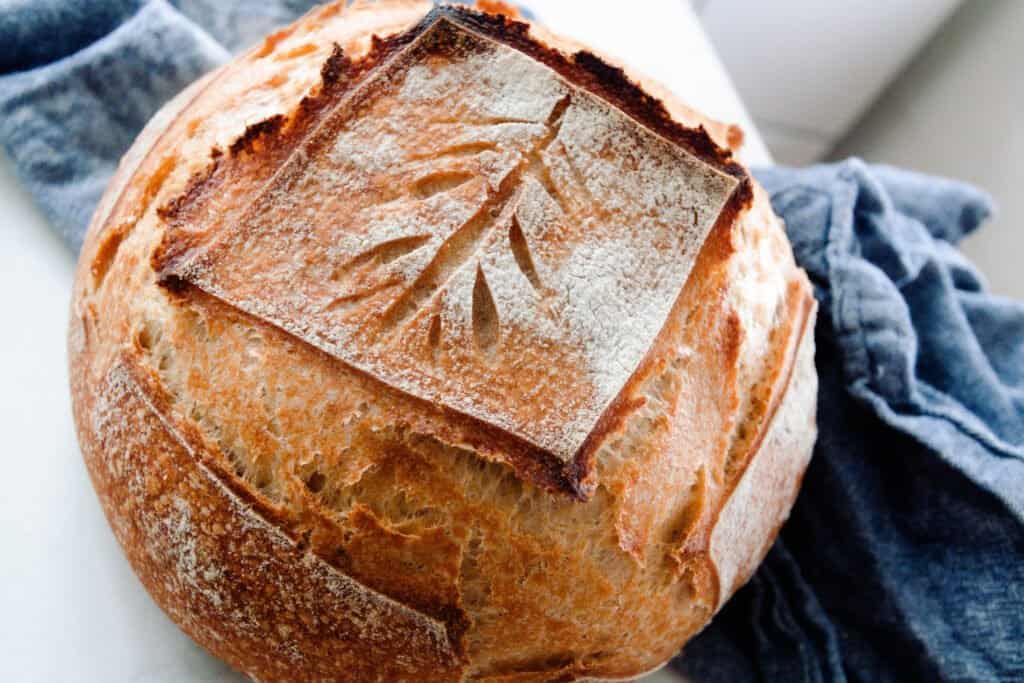
Dust with flour on top to make the scoring pattern stand out more.
Score with a razor.
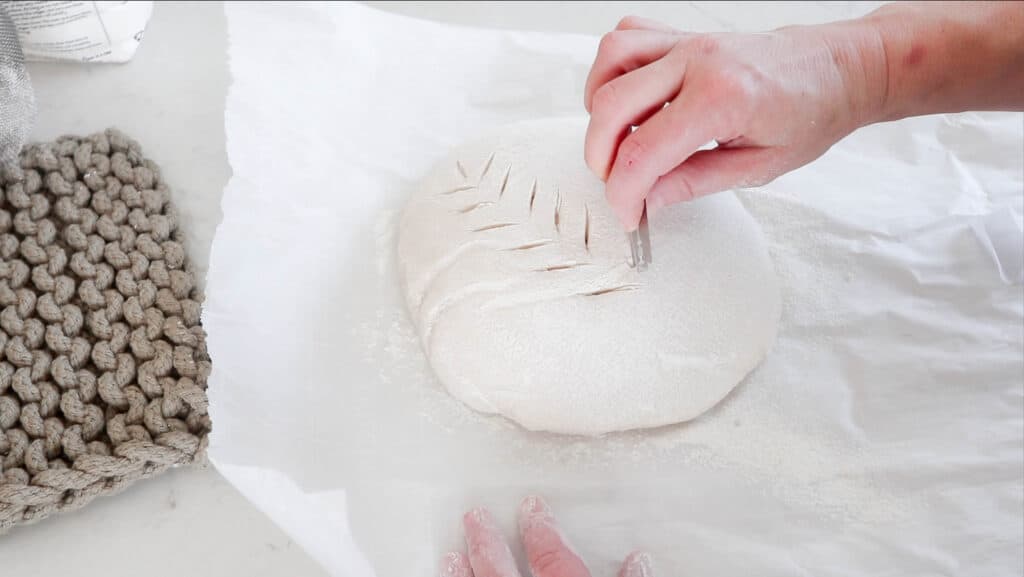
Add a little flour to the bottom of the dutch oven (or parchment paper) and transfer dough to it.
Bake for 20 minutes at 500 with lid on.
Take lid off, turn the oven temperature down to 475, and bake an additional 25 minutes or until browned.
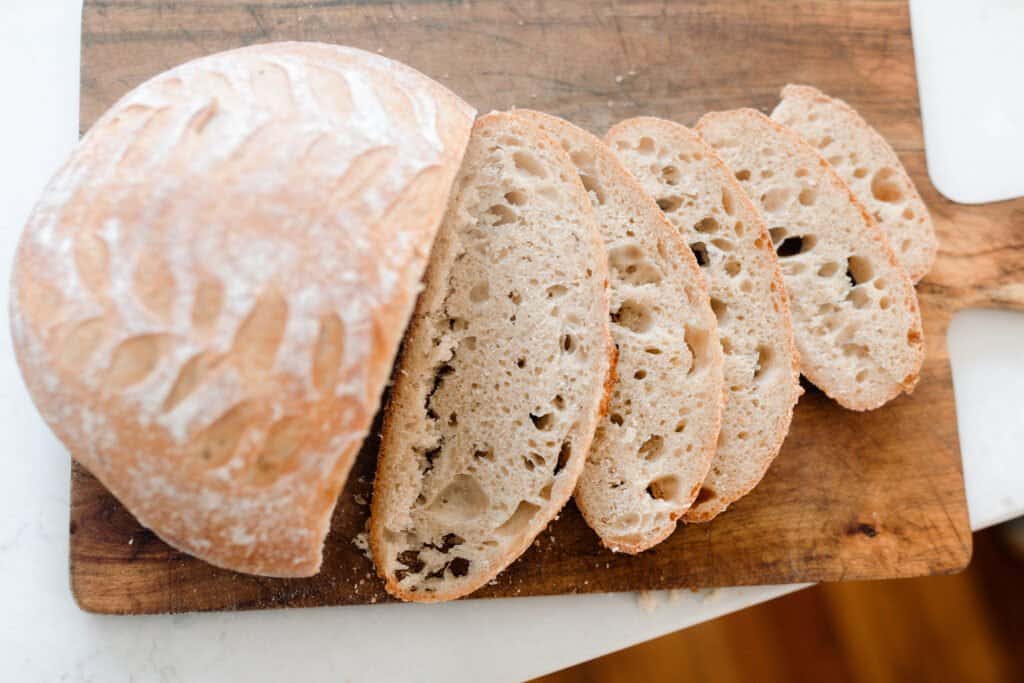
Tips for making your sourdough bread pretty
- Don’t skip the long rising time in the refrigerator. Bread dough takes forever to rise in the refrigerator, but this chilling process does make the final scoring pattern prettier. I’ve never had success with a beautiful scoring design when skipping this step.
- Dust a bit of flour over the surface before scoring. This will allow the design to stand out better.
- Use a razor. I know it’s tempting to just grab a sharp knife to score your bread, but proper bread scoring razors do yield a more beautiful result.
- Do an online image search for scoring patterns, and try your hand at a few tried and true designs before getting creative with your own.
- Practice, practice, practice. You will figure out just how deeply you need to cut, and how the design spreads during baking, by trying over and over again. The good news is you’re just going to eat it no matter what. We’ve eaten many an ugly loaf of bread, and they all tasted great.
Bakers Timeline For No-Knead Sourdough Bread
8 am: Feed sourdough starter with flour and water.
12 pm: If sourdough starter is mature, then proceed to creating the dough.
Combine the warm water and flour. Rest for 30 minutes.
12:30-ish pm: Add in sourdough starter and dimple in with wet hand.
Sprinkle salt on top.
Mix the dough with your hands for about 5 minutes. Cover with damp towel or plastic wrap. Rest for 30 minutes.
1:00ish pm: Stretch and fold.
First 3 stretch and folds – every 15 minutes
Last 3 stretch and folds – every 30 minutes
Cover with a wet towel or plastic wrap and allow the dough to bulk ferment until doubled.
8:00pm (may be much sooner): Split the dough in half down the middle with a dough scraper.
Shape dough.
Sit out 15-20 minutes, uncovered.
Turn over and shape.
8:30pm: Transfer to flour banneton or bowl with tea towel and cover with plastic. Place in the refrigerator for 12-15 hours.
The Next Day
9:00am: Preheat dutch oven on 500 for 1 hour.
Take dough out of fridge, dust with flour, and score.
10:00am: Bake the sourdough bread and allow to cool.
Find More Delicious Sourdough Recipes:
- Homemade Sourdough Bagels
- Sourdough Coffee Cake
- Sourdough Chocolate Chip Cookies
- Einkorn Sourdough Bread
- Sourdough Chocolate Cake
If you try this recipe and love it, I would love if you could come back and give it 5 stars! Tag me on Instagram @farmhouseonboone
No-Knead Sourdough Bread
A crusty, no-knead sourdough bread with a delightfully soft texture and deliciously tangy flavor. The dough is mixed one day and baked the next, giving it an elevated taste and texture.
Ingredients
- 500 g unbleached all purpose
- 200 g freshly ground whole wheat
- 250 g bread flour (can omit and just add more to the unbleached all purpose)
- 200 g mature starter (active and bubbly)
- 650 g water
- 20 g salt
Instructions
Feed a sourdough starter 4-12 hours before starting the bread, ensuring it is active and bubbly.
Combine warm water and flour. Allow to rest for 30 minutes for the water to hydrate the flour.
Add sourdough starter. Dimple in with wet hand.
Sprinkle salt on top.
Mix the dough with your hands for about 5 minutes to bring the dough together. Cover with damp towel or plastic wrap while resting.
Cover with plastic wrap or damp towel and let rest for 30 minutes.
STRETCH AND FOLD
First 3 stretch and folds - every 15 minutes.
Last 3 stretch and folds - every 30 minutes.
Cover with a wet towel or plastic wrap and allow the dough to bulk ferment until doubled.
Split the dough in half down the middle with a dough scraper. Be really careful not to break any of those precious bubbles.
Shape into a ball by gently spinning it toward you.
Set out 15-20 minutes uncovered.
Turn over and shape.
Transfer to flour banneton or bowl with tea towel. Cover with plastic and proof 12-15 hours in refrigerator.
Bake
Preheat dutch oven on 500 for 1 hour.
Remove dough from the fridge immediately before scoring and baking.
Dust with flour on top to make the scoring pattern stand out more.
Score with a razor.
Add a little flour to the bottom of the dutch oven (or parchment paper) and transfer dough to it.
Bake for 20 minutes at 500 with lid on.
Take lid off, turn the oven temperature down to 475 and bake an additional 25 minutes or until browned.
Notes
Make sure your starter is very active and bubbly.
Depending on temperature, hydration and maturity of starter will determine the amount of time it takes for it to double in size.
To increase the health benefits you could allow the bread to ferment longer. I start the bread in the morning and then let it ferment all day.
Nutrition Information:
Yield: 8 Serving Size: 1Amount Per Serving: Calories: 195Total Fat: 1gSaturated Fat: 0gTrans Fat: 0gUnsaturated Fat: 1gCholesterol: 0mgSodium: 973mgCarbohydrates: 40gFiber: 4gSugar: 0gProtein: 8g
Bo Self says
I do some sourdough bread also and I am going to try your recipes as I like the looks of your loafs.
Thank You Very Much
Bo Self
Shari says
Thanks for the recipe! I’m confused though about splitting the dough in half. Does this make 2 loaves? Or do you then combine the 2 halves back into one ball?
Jenn says
I wondered that myself, but then noticed in the recipe card for printing it mentions that this yields 2 loaves.
Lindsey Dicken says
I watched the video and this recipe makes two loaves!
Tim says
Tim
Do I use 950 g of the mix of flour that is the three kind.
Or just 450 g of the two flours.
Annette Swift says
I followed your recipe and liked the idea of 200 fresh ground flour as there is more goodness in it. I’m grateful for the e book snd will follow it closely
Thank you very much
Anonymous says
Yes it makes 2 loaves.😊
Natasha says
Hi Lisa,
I tried your recipe and the best sourdough loaves I’ve made so far have just come out of the oven! Great recipe =)
Natasha
David A Champagn says
To be clear, you mention splitting the dough in half but never state whether this recipe is for two loaves. Is it?
Andree says
Yes it is for two breads. You should watch her video it’s easier 🙂 she explains it very well
Jenna says
I’ve been making lots of your sour dough recipes! Wow! I love them all so far. I do have a question on the amount of time your supposed to do the kneading and stretching step? It says every 15 minutes 3 times then every 30 minutes 3 times but what’s the duration of time your supposed to work the dough? Thank you for your amazing recipes and all your time and effort! May God bless you and your family ❤️
Andree says
She has a youtube channel where she explains it really good 🙂 so you just stretch all four side. You take one side stretch it as far as you can and then fold it on top and do the same for every 4 sides every 15 minutes and then every 30 minutes
Kaila says
Hi Lisa, just wondering does this recipe make one or two loaves? When you split the dough down the middle then shape it does that mean you have two separate loaves? Thanks!
Ashley says
Yes… 2 loaves or one? I split mine in two like u said and it is resting…. do i put it back together now? Help! ❤❤❤❤
Thanks Lisa!
Lisa says
This is for 2 loaves! Sorry for the confusion!
Donna LeBlanc says
Do you have to cook both loaves of bread when done or can one be saved? Thank you for making the video! It helps so much – I was in near panic mode reading recipes 🙂
Kathy Thomsen says
Lisa… any chance you could help us achieve such beautiful porous results with einkorn flour?
C.H. says
I use einkorn as well, but also add bread flour, and it never quite gets the same bubble holes, but that is okay, as it is still tender inside with the lovely crust.
Stacey says
I make a similar recipe every week. It’s me weekend tradition and we love it so much!
I have experimented with mixing several ways, and I’ve come to the conclusion that it makes zero difference if I just mix everything together from the start and then start my stretch and folds after resting for 30 minutes. Saves the extra step of autolyse. If you are weighing your ingredients anyway, there isn’t a need for autolyse before adding the remaining ingredients.
Lisa says
This is good to know! I really dislike unnecessary extra steps! I’ll give it a try, and see how it goes.
Kate says
Did you decide if the autolyse portion is necessary or can we just mix it all together?
Lisa says
I skip it most of the time!
Eva says
Have you tried this recipe with all einkorn flour?
Kathy Thomsen says
Lisa could you please explain the “dimple” move? I’ve never heard of that!
Emily Schlegelmilch says
I really wish I could get this recipe in cups instead of weight. I don’t have a scale and I want to make this bread now! 😫 looks amazing! Can’t wait to try my hand at the bread art
Linda says
There’s a conversion table where you can convert the grams to cups, etc. Just put “conversion table grams to cups” in your search
engine on Google or which ever one you use. It is easy. You can make your bread!!!!
Stacey Smith says
I’m going to make this week but I’m going to lower the degrees in the preheating at 500, my old glass top Whirlpool oven can’t take 500/ I do envy your beautiful stove and oven ! 👍
Joanna says
Hey Lisa, was wondering if there’s a specific reason why your measurements are in grams? not something I usually see in your recipes. I’m printing to try this recipe as it looks delicious! Thank you!
Lisa says
Hey Joanna! UI don’t normally do that, but I read several methods online and this seems to yield the most consistent result. Turns out they’re right! I’ve never had better sourdough bread. I just use my postal scale for this.
Diane Starbuck says
You do not have to preheat your oven or your cast iron. You can put your loaves into a loaf pan or cast iron, cover them with a lid (I use 2 same size bread pans, 1 bottom, 1 lid) and then place into a COLD oven, and bring heat up to 500 degrees. This takes 25 minutes, depending on your oven. At that point, you can turn down the oven to 450 degrees, uncover your pan(s) and bake another 25-40 minutes depending on size of loaf. The loaves will be nice and brown. This works so well. Trust me, I have been baking bread this way for the past 5 years. Also, less dangerous, no burnt hands.
C.H. says
If you skip the preheating step, you do not get the same lift upon the beginning bread baking, nor the steam created to cook it correctly. Yes, it is bread, but not the same as what people are after when doing this process.
Alicia says
Can I use einkorn flour?
Tara says
I don’t have a Dutch oven. Can you do this in a cast iron or bread pan and just leave uncovered? Thanks! I love your recipes!
Lisa says
Can I freeze this bread before or after baking?
C.H. says
It won’t be traditional to say the least. The lid helps capture steam to cook the bread a certain way.
Emily Anderson says
I find that I am deflating too many of the holes/bubbles when I cut the dough in half post stretch/fold and rise. Will it still turn out alright (and possibly better) if I cut the dough in half before the stretch and fold process begins so as not to deflate so many of them? Otherwise incredible recipe and bread!
Allie Braddy says
Would like to know also..
Marilena says
Will try this recipe for sure. Just made a loaf of sourdough bread today using the Dutch oven and despite it having lots of air pockets during the long fermentation process, it came out hard as a rock! I used freshly ground einkorn.
Abe says
I’ve been making no-knead sourdough for several months now. I’ve only been making one loaf at a time but I use the same 200 grams of starter with 390 grams of flour, 265 grams of water and 10 grams of salt. I feed my starter in the morning. Then I make by dough around supper time. I don’t touch it again until the morning. I dump the dough onto a well floured board, sprinkle the top generously with flour and then flatten it out and fold in into the center by grabbing the edges and stretching them out and folding in on itself around the outside…roughly 6 or 8 folds. Then I shape it into a ball and let it rest for one hour before baking…comes out perfect every time.
Whitney Wiggins says
What temp and how long do you bake it? Thank you!
Julie says
Would appreciate it if you put the recipe on the top of page, had problems finding it with all the adds. thanks for the recipe, I have a post surgical hand right now and cannot knead dough.
Siobhan says
Can you use only fresh ground flour and get the same results? Also you didn’t answer the question about how long to stretch and fold the dough, could you? Thanks
Siobhan
Trixie Woodard says
I have created a new starter!! Woohoo! Now…. I downloaded your sourdough ebook and this recipe is different than the one on YouTube. Which is the one to do? I’m confused. To stretch and turn. To not. To add starter to water and then flour or after…. I’m having a moment. Sorry. I’m just really struggling and tried the recipe here you posted in February. Fail! So… maybe another video on this recipe. Slowed down and step by step? Idk.
Becca Karner says
Hi Trixie! In one of her YouTube videos she mentions that if her blog posts and her videos are offering different info it’s because she’s able to update her blogposts with the most current/accurate info, whereas one can’t really update a video without creating a new one. So, when there is conflicting information, go with what her blog posts say. 😊
Becca Karner says
With that said, though, watching her video on the No-Knead Bread, combined with reading this blog post, gave me the most comprehensive information for making my two loaves each time.
Sarah says
CAn I just half everything to make one loaf?
Julie-Anne Strivings says
I was wondering the same thing 🙂
Sierra Hardwick says
I did and it turned out great!
Rachel says
Lisa
I’ve pinned this. It looks delicious. I’m also sharing a link to this post on my Sunday, Dirt Road Adventures.
Gabriela says
It just doesn’t work. I am in the UK and this is the 2nd bread recipe of yours I have tried and the dough is just batter. The only conclusion I have reached is that maybe it’s the flour…? But that’s what I thought last time and I changed the flour…
Every step of this recipe worked wonderfully. The dough doubled in size and it was nice and bubbly, but it was just slack batter… couldn’t form two loaves for the life of me. I even tried doing some more careful stretches… as per a different bread recipe I use that works amazing. A little bit more hydration and I could have just made pancakes. I just tipped them both over in two bowls, no tea towel because they would have just soaked through, wrapped them and put them in the fridge… I’m convinced I’m making foccacia tomorrow as I do not anticipate this batter turning into dough overnight.
It’s so frustrating because I have no idea what I’m doing wrong… maybe I should stick to bread flour only? Rather than plain (all purpose)? I just want a nice bubbly sourdough. 😭
I have a go to bread recipe… but yours is so much more intriguing…
Andrea Wiebe says
I’ve had issues with dough becoming too loose if I let it ferment for too long, or if your starter is too acidic.
Beth says
I noticed that the King Arthur all-purpose flour had as much protein as bread flour. You do need a higher protein flour.
Marion says
When I had problems with a too wet dough, I was to told by a more experienced baker, that if the dough is too wet to hold its own shape, pour it into a baking tin and make a sandwich loaf instead. It will still taste great! Marion
Jan Levine says
Here is another great baker>https://www.youtube.com/c/TrevorJWilson
It’s good to see the different techniques.
WGI says
Do you need to bake the sourdough bread in a Dutch oven? I don’t own one. Would a pizza stone work; maybe cover with foil the first half hour or so?
Kember Anne Beaupré says
I have used normal bread pans and cover with foil, then remove after 20-30 min. It works as long as your dough doesn’t rise above the edges and stick to the foil 🙂 !
Nike says
Hi Lisa, thank you for this recipe. My breads turned out great. Sourdoughbaking is definitly a journey but your post surely helped me a lot.
I will be trying some of the other recipes too 🙏
Kate Rivera-Noel says
Can you use bleached flour instead?
Lisa says
Yes, you sure can!
Schoen says
I’ve been using my sourdough starter for everything but bread, during the pandemic, in fear it wouldn’t turn out very well. IDK why I hesitated! Your recipe was simple and easy to follow which resulted in picture-perfect loaves. My only warning would be you really have to pay attention to the browning. I had to remove the top and stop cooking sooner than directed. But I’m very proud and pleased with the results.
Mila says
Thank you for this great recipe as well as your free e-book which is very much appreciated.
Greetings from Canada and looking forward to trying all of your recipes.
Joanne says
I love your no knead recipe. My entire family loves this recipe! My starter seems to have lost some of its tangy flavor. Can you suggest anything to add that might perk it up?
** I did post in reviews by accident. 5 stars to you! well deserved. Thanks!
Brittney says
Will this recipe work with fresh ground einkorn?
Renee Wallace says
Hi, Lisa,
Thanks for your recipe! I too, as others stated, didn’t realize it made two loaves. Is there a way to save the second uncooked loaf in the fridge or freezer? Also, how do you recommend storing cooked loaf? Thanks!
Olivia says
Can I skip the time in the fridge?
C.H. says
You can, but the longer ferment has been well worth it!
Gaile says
I noticed that in this video your starter seemed to be thicker than it was in another video. My question is mine is more like the consistency in the other video where it is thinner and it made the dough wetter to the point where it didnt rise much would that be the problem? My starter had lots of bubbles on the surface. I followed the directions. Do you have any recommendations or should a start with a new starter. Thank you. Gaile
Gillian Whaites says
You just need to do a 1 to 3 to 1 next time you feed your starter. It will be a lot stiffer. Mix really well to incorporate the flour thoroughly.
Dennis says
I have been working with sourdough for several months. My starter is very active. I have had great results making discard pancakes, English muffins and crackers. My first loaf became croutons. my second, bread crumbs. My third attempt was meh, ok. Last night, I tried finishing a loaf that I think was over proofed. It was a soupy mess! Attempt #6 shows promise. However, I dont like the super hard bottom. Can I forego heating the dutch oven and still get a nice oven spring?
Veronica Hundley says
You could try setting the Dutch oven on a cookie sheet to help prevent the hard dark bottom
C.H. says
I keep my broiler pan on lowest shelf in the oven, and that has helped me a lot! Plus parchment paper in dutch oven under bread dough.
Kyle says
This is my first time using this recipe. I am using all white flour (standard american). Did I need to reduce the water amount? I am looking at a very sticky dough. 4 flour and 2.75 water cups
Kyle says
This is my first time using this recipe. I am using all white flour (standard american). Did I need to reduce the water amount? I am looking at a very sticky dough. I translated the amounts to 4 flour and 2.75 water cups
kyle says
Hi Lisa, great video. I am using your recipe for the first time. What if I use all-purpose American flour, do I I need to change the amount of flour or water? Do I just combine the weight of the flour? Thank you!
kyle says
Hmm, I go too impatient and used all all-purpose white flour with same amount of water (4 cups flour and 2.75 cups water). My dough during the stretch and fold is very wet (or softer than yours). Is it too late to add more flour? Hopefully it will turn out OK.
Christina says
Hi Lisa,
After my dough doubled in size it was too wet and sticky to work with. I followed your recipe and measured everything with a scale. Is there anything I can do to salvage it at this point? Should I just decrease the amount of water next time?
Any advice is appreciated! Thanks!
H says
could you recommend a dough scoring tool? so many options to choose from
Mark Roberts says
Hi Lisa:
Thanks for the recipe. I was wondering about scaling the size of the loaf. I would like to make a slightly larger single loaf. Do you have a general rule for scaling bake times and/or temperatures?
Thanks.
Ashley Rempel says
This turned out beautifully. I only baked one of the loaves, I am wondering if I left the other loaf in the fridge for 2-3 days before baking if that is ok? Thoughts!
Sara says
Dear Lisa,
where I live (Netherlands) we commonly use cast iron pots with enamel on them. Brands like Creuset are very popular here. Can you tell me if these pots can also be used as a Dutch oven? Ironically we do not use the term Dutch oven in The Netherlands 🙂
Lisa says
Yes! I also have one that is coated with enamel.
Katrina Grammer says
Hi, Lisa,
I usually fail at least two to three times with recipes. Especially these homemade from scratch ones but I finally have your sour dough starter down and it is very bubbly and I keep it well maintained. But to use it in actual recipes has been a little more intimidating, I have made your sourdough pancakes and they turned out really good. I have always cooked home meals, but I am really trying to cook more natural and coming across your YouTube has been very inspirational for me!! We have had a gardener the last two years, I am trying to learn about herbs. And your recommendation of other sites are very helpful resources for natural living as well! Anyway, back to my point. Yesterday I attempted the sourdough bread and had to restart it over after I messed up following the measurements and then I was doing really well up to the last 30 minutes apart stretch times and somehow thought I read that it needed to sit for about 8 hours covered with plastic wrap in a warm place! Well it was 10:30 at night so, I thought I would just go to bed, and I woke up I would do the rest of the recipe but when I woke up my well shaped dough was a goey warm batter like mixture!! I again read your recipe and could not find anyplace in it where it said to have it sit for 8 hours after the last stretches!! Nothing even close to it! I even try to make it easy for myself! Watching your YouTube while I am actually making the recipe, pausing through each step, as well as scrolling down to read the recipe!! Oh well! Here is hoping 3rd time is a charm!! My dear husband has gone to buy more ingredients to have on hand just ion case, because I am frying chicken today too so we need plenty of flour on hand😁
Oh boy! So now I will start over and look much more closely at the directions! It is hard to cook for those who are challenged!! But I’m trying!! I sure hate wasting ingredients!! I assume this mixture I have awaken to is worthless, so down the drain it will go, because I surely don’t think there isn’t a use for it now🙃
Sincerely,
Katrina
Melanie Shaw says
Hello
I have a 7 year old starter that I was gifted on 10/20. It’s due to be fed again 10/27. It is in the fridge of course. I have no idea how to get started. Can I even make bread, or start the process today? I’m clueless. Do I take out what I need before the weekly feeding?
I appreciate any advice you can give me.
Thank so much
Melanie
Kasia says
Hi Lisa! I just got done creating my sourdough starter and will bake my first loaf this weekend. I made the starter from einkorn flour. May I use that starter in this recipe or do I need to create a different one with all purpose flour?
Jessica says
Tried this for the first time yesterday and today we finally ate it, and it was DELICIOUS! My family loves it! This is SO huge to me because we have come such a LONG way from eating unhealthy boxed “food”, candy, chips, and the like. And the truth is, as I walked closer to God, He has shown me the way to a better healthier lifestyle and how to feed my family, my children. THANK YOU SO MUCH, for sharing this amazing recipe. This was a huge success and is definitely a keeper in our home. By my husband’s words “this is the best bread I’ve ever tasted”.
Lastly, how can I store it once it is baked and cooled? =)
Donna says
Stand it up on your cutting board with the cut side down. Works great for about 2 days. Any longer and it gets pretty hard, but makes great croutons or french toast casserole.
Kelly says
I bake 2 sourdough loafs every Sunday. Once completely cooled I slice the loafs and freeze the slices. When I want to use them I just pull out a piece or two or however many an popes in the toaster. Taste as fresh as the day I baked em
Chelsea says
First time I tried this recipe the crust was so hard it was like eating a rock. I’ve tried some other artisan style breads with the same result I was about to give up on a round loaf just deciding I didn’t like artisan bread but I gave it another shot and WOW the most amazing sourdough bread I have ever had! I only cooked for about 8 mins with the lid off and it made the most perfect crust and the sourdough flavor was very strong. Now I know my oven must cook a lot hotter. Even my husband is reaching for the bread plain. Can’t wait to make this again and try a new design.
Sarah says
Can you bake this right after you form it into loaves instead of the overnight ferment? Also, if baking in loaf pans, what degree to bake it on as it won’t be covered? I have loved making this recipe! I love the stretch and fold process! I am new to baking and am looking forward to baking this in the morning! Everything looks great so far!
Pat Sheehy says
I used your recipe and methods to make my first sourdough loafs. Overall very successful. However, bottom crusts we’re a bit burnt.
what’s your suggestion, lower temperatures or less time?
SCmom14 says
Simple. Just halve the recipe. Easy enough, if you just need one loaf. LOL Math. The lost art in American.
Marilena says
After neglecting my sourdough starter in the fridge for more than 6 months, I brought it back out and started feeding it. A little over 2 weeks later, I was able to bake a beautiful loaf of bread. Very crunchy on the outside and light a fluffy on the inside. As I can’t seem to post a picture, I cannot show it. I was making pancakes a week after pulling it out of the fridge.
Paula says
Hi Lisa!
You’ve inspired me to try my hand at making sourdough bread! I just started my starter today!
But, before I make it, I had 2 questions I was hoping you could answer.
1. Your recipe calls for whole wheat flour. Can I substitute the same amount of AP flour for the whole wheat?
2. I only want to make 1 loaf. Can I half the ingredients in this recipe to make only 1 loaf?
Thanks for your insight! I love your content! You make it look sooo easy!!
Lisa says
Yes, you can sub AP! I haven’t tried halving the recipe but I’m sure you can.
Johanna says
Hi Lisa,
I´m trying it the second time. But if I´m using this amount of water my dough is so wet.
I´m not able to get it into shape. What do you think is the problem? I tried it with more flour but it doesn´t work as well.
Annie says
Do you feed your starter equal parts water and flour? It may be your starter is a little more runny. You can try reducing some of the water first in the recipe, but you want the dough to be wet. Try adding most of the water and see how well it’s working for you, then add water a little bit as needed. As you want a wet tacky dough. It won’t be super easy to shape toward the beginning, it will be easier when it’s had time to proof and after it’s been in the cold. (Your environment may also play a role. So if it’s more humid you may want to reduce the water for that reason in recipes)
Kember Anne Beaupré says
Hello ! Thank you for this recipe, I am enjoying it and several from your site, which I share with my friends !! I am wondering what you do as a mom of a large family to make bulk batches. I triple and quadruple this and other sourdough recipes but have not found a large enough bowl for that, so I use two 4-6 quart size glass bowls. Do you have a large bowl, where do you find it???
thanks!
Lindsay says
I checked the bottom of the bread at 15 minutes during the lid off baking phase and it was nearly burnt so I took it out. I used the temperatures in the recipe exactly. For the second loaf, I decided to start at 475, then 450 for the lid off phase. Any other suggestions? I used a cast iron dutch oven with parchment. Otherwise the first loaf looks great. Its still cooling so I hope its cooked inside since I took it out at 15 minutes. Second still in the oven.
Thanks!
Donna says
If you have a meat thermometer, use it to check – completely baked bread should be 200 degrees interior temp. I have a temperature guage in my oven that I purchased, and have found by using it that my oven is pretty consistently 25 degrees lower than the setting. Yours might be hotter.
Angela Hoskyn says
Excited to try this recipe! I love your blogs!
Sara says
My dough is still very tacky/sticky after the bulk ferment. Not entirely sure if it doubled, but it had lots of bubbles. I’m going to let it sit on the counter for 20 min before the next shaping.
Any ideas as to why the dough is still tacky? I made my own starter last week and this is my 3rd go at making a loaf. My starter passed the float test, so I’m not sure where I’m going wrong! Please help!
Tara says
Hello, I made this loaf before and my family loved it. I wanted to make this loaf again but a smaller one. How do I calculate how much flour, water, sourdough starter and salt I would need? Thanks Tara
Grace says
If you give me this recipe with American standards of measurements I will try to make it. NOT interested in grams nor any measurements that I have to convert to American standards. Otherwise not interested in any recipes that need to be converted.
Marie says
I don’t have a scale can you print by cup measurement for those who don’t have a scale? would be so helpful
Karen Spadaccini says
Hi Lisa, I think I watched your sourdough bread recipe like ten times !! lol
I got my starter to work after ten days and the third try. My daughter cooked the first two that were on my stovetop where it’s the perfect temperature after starting the oven. 🙁
I made my first two loaves of bread yesterday and I am overly thrilled at how they came out. I think they are a tad to dark and not sour enough. I’ll try lowering the oven or a tad less time maybe ? I’d like it a bit more sour so maybe my “new” starter is the issue ?? I love your videos and I think I’ve watched all of them now. I also made your pickles which came out wonderful. Sauerkraut is next !! Thank you for sharing your beautiful family and your recipes with all of us.
Rozelyn says
The longer your first proof is seems to affect the sour taste. The longer the proof the more sour the taste.
Chrissy says
I do not have a Dutch oven, can I use bread loaf pans?
Sheila says
My starter gets a gray liquid on top of it when storing in the fridge between feedings. Do I pour it off or mix it in? I have been pouring it off but just wondered if it would be stronger if I stirred it in.
Chrissie says
Ike love to know the answer to this too, my dough, when I tip it out of the banetton is like Jabba the Hutt in Star Wars, it practically runs off the work surface!
Donna says
The liquid is called Hooch. Just stir it in.
Jeannie Lokemoen says
I made this bread a few weeks ago. It turned out amazing! Thank you for sharing your recipe!!
Jeannie Lokemoen says
I made this recipe a few weeks ago. It turned out wonderful!!! Thank you for sharing your recipe!!
Dana says
Have made this bread maybe about 10x now. 4 of which were for Christmas gifts which everyone loved. It is the most approachable and straightforward sourdough loaf I’ve made. It is a very forgiving recipe. My last loaves I was only able to do 4 sporadic stretch and folds and it still turned out beautifully. A tip I learned is to put your Dutch oven on a cookie sheet to help disperse the heat. I was finding the bottoms of my loaves to be browning a little too much for my liking. Thank you for this recipe!
Annie says
Would this same recipe work with rye flour instead of whole wheat? Do you recommend a different ratio if rye flour is used instead of whole wheat?
Alena says
Hello, I have used rye flour instead of whole wheat and kept the ratio the same and the bread turned out great!
Alena says
Hello, I have used rye flour instead of whole wheat before and kept the same ratio and the bread turns out great!
Melissa says
Hi! We live full time in our RV and do not have room in our refrigerator to bulk ferment in there. Can I just do it on the counter instead?
Donna says
While it’s cold, cover it well and set it in a box outside, or in your car. The cold really helps it to get nice and firm, so that it scores easily. But you can experiment and see what happens when you leave it that long at room temp!
Kira Schlappi says
I’ve been making this recipe every weekend for a couple months now and as long as you follow all directions exactly it is absolutely incredible and so beautiful! Don’t skip the The 14 hour rise in the fridge! Definitely helps for beautiful scoring !
MJ Hestilow says
Is there a place to access your recipes, a master list? I thought I heard you mention a recipe lost in one of the sourdough videos I watched on you tube this morning. I’ve jumped both feet into making sourdough items and really enjoy your content – it is easy to follow and very detailed.
Donna says
She has an ebook with sourdough recipes that you could search for on her blog, or just on your search engine.
Marie Reeves says
I love, love, love the timeline you included. Your step-by-step is so much easier to follow this way. As soon as I am sure my starter is active, I will be trying this recipe.
Nicole says
I do love watching your youtube. I came here for the recipes and they are pretty confusing. for the Cinnamon Rolls, I printed the recipe, and then had to go back and print all of the steps because it does not give a step by step in your recipe print section. It seems the same with your bread. is there a way when you give directions, to also include the measurements, or where you have the measurements, also include the directions?! I feel like I am looking in multiple spots to figure this out while trying to battle all the ads popping through. For this sourdough, in step one, you say feed the starter, and then mix warm water with flour and let it rest for 30 min. is that still talking about the starter? because once that was fed, I thought you were supposed to let that happen for at least 4 hours? Sorry I am so confused and also very much a newbie at this if you couldn’t tell! 😉
valerie says
Love your info. How do I get the book I can download
Hannah says
I’ve made this recipe twice now and both times I’ve had issues with the bottoms burning. This past time I lowered the temp by 25 degrees since I thought maybe my oven was too hot. I also took it out 5 mins earlier than called for but it was still burnt. I was afraid to take it out any earlier because I didn’t want the center to be undercooked. I’m a newbie so any suggestions for it to come out better?
Thanks
Donna says
Because of your detailed instructions & video I decided to jump in and finally bake sourdough bread!! Although it’s no where near as pretty as yours – it’s yummy!! Thank you the details!
Marigrace says
Lisa, I am trying to find a way to store my bread without using plastic wrap or plastic bags. Do you have any suggestions?
Jenn says
What size Dutch oven do you recommend? Thank you!
Charisa says
I have made many loaves of Sourdough bread these last 3 months and I have finally succeeded! Thank you!! Both loaves turned out beautiful!
Melissa says
Holy Cats!! turned out perfect! I could not be more excited… just baked the 2 loaves this morning… after growing a starter for a week. I’m hooked!
Blessed Mama of Many says
Thank you so much! First successful loaves!
Lisa says
Awesome! I’m so glad to hear that!
Joseph Redd Uszakiewicz says
I’ve been baking sourdough bread for about a year now and I still look for all kinds information to get better at it. Hands-down everything you have talked about and showed everybody is the best instruction I’ve ever seen to this date very informative very to the point and obviously well practiced by you to come up with all this. There is so many videos on Instagram and YouTube about sourdough bread as you know and yours is by far the best I’ve ever seen so easy to understand and very heartfelt at the same time thank you for your time and for your easy to follow directions love it thank you Joseph.
Joseph Redd Uszakiewicz says
Hands down the best information I’ve ever seen on sourdough baking I love your informative way but yet straight to the point. I’ve been baking sourdough bread for about a year now and watched thousands of videos on Instagram and YouTube just trying to better myself I watched a bunch of your videos now I love your technique you really are on top of your game thanks for all your information Joe Redd.
Rozelyn says
My first attempt was successful and turned out beautiful, my second attempt was overproofed on the first rise and I had a soupy sticky mess. But as I was told bake it anyway I did. I slopped it up and put it in the Banneton basket and out it in the fridge for 14 hours. Baked it and was surprised that it wasn’t bad. A little dense but the sourdough flavour was fabulous. My third attempt was a catastrophe- but I am going to try and rescue it tomorrow. This was a mother doing to many things at once, kids in and out of the kitchen and I accidentally mixed my sour dough bread with my sourdough biscuit ingredients. Gonna let them ferment tonight and then see what happens. Wish me luck 🤦🏼♀️
adina says
Once the sourdough bread is done, do you allow it to cool in the dutch oven with the lid on or you take it out on a cooling rack?
Rachel says
Can the fridge proofing go much longer? What if bulk fermentation happens sooner than expected? Say by 12pm it is ready for the fridge and 14hr later at 2am it is not ideal to bake the bread lol
Curious if the fridge portion can be extended without losing quality… Thank you!
Lisa says
Yes! You can actually leave it for days in the fridge, I have found.
Lina says
Thanks
Great info
Love learning about sour dough bread
Naomi says
Tried sourdough bread for the first time and decided to use this recipe. Thank you for an easy to follow and delicious loaf of bread.
Brandy Kelley says
Hi! Looking at the nutrition info- it says the yield is 8. Does that mean 4 servings per loaf?