


It is surprisingly easy to start baking with whole grains in your kitchen. Learn how to convert any recipe to freshly milled by applying some tips and techniques to all of your favorites.

I started baking with freshly milled flour over fifteen years ago. It is more nutritious, but it is also cheaper. I could pick up a 50 pound bag of wheat berries from a local Amish community for a lot cheaper than milled flour from the store. The only price of entry was a grain mill, which I happily purchased, knowing it would serve me well for thousands of loaves in the coming years. It paid for itself over time!
Not only is freshly milled whole grain flour more nutritious, but it also adds robust flavor, and texture.
I think most people think switching to whole grains is going to be a steep learning curve, but I actually found the opposite to be true. You only need to make small adjustments to the recipes you already love. If you are already an experienced baker with all purpose flour, you have all the skills you need to start bulking up the nutrition in your baked goods with whole grain flour.
All Purpose Flour vs. Freshly Milled
Commercial mills process white flour until only the endosperm remains, creating a light, airy, smooth flour with little to no nutrition. They are convenient for manufacturers and grocery stores, because they keep for a very long time. The parts of the grain that easily spoil are removed. That is at the expense of your health, because those parts of the grain are full of nutrition. Once milled, the nutrients break down rapidly. That’s why we are talking about freshly milled flour at home, not whole wheat flour from the store. Processing and long-term storage strip and degrade the nutrients in store-bought white flour and store-bought whole wheat flour.
Because all purpose flour has the bran and germ removed, the resulting baked goods are light and fluffy. Since our culture is so used to baked goods made with all purpose flour we’ve come to expect a certain taste and texture. More on expectations in a bit, because the end result with freshly milled is most certainly different!
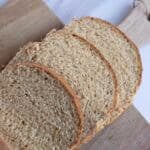
Milling flour at home uses the entire wheat berry – bran, germ, and endosperm. The fiber-rich bran, offering B vitamins and antioxidants, is the berry’s outer layer, providing flavor and texture. The germ contributes protein, healthy fats, B vitamins, and trace minerals. The starchy endosperm, the largest component, supplies carbohydrates and some protein. Preserving and using all parts of the wheat berry yields a product that offers superior nutrition, richer flavor, and a heartier texture.
Freshly Milled Baked Goods are Delicious but Different
Baking with freshly milled whole grains will yield a different result in the end, so we need to keep our expectations in check. You can make absolutely beautiful and delicious bread, cookies, pancakes, muffins and all of your family favorites, but they will have a different taste and texture than you may be used to with all purpose flour.
Keeping the bran and germ creates a denser, heartier product – enjoyable, but sometimes unexpected. I might even argue that in some cases freshly milled whole grain flour makes for a more delicious baked good!
Certain recipes lend themselves to whole grains, and are easier to work with. We’ll talk more about that in a bit!
Recipes modified to use freshly milled flour need a few adjustments and considerations; weighing your grains as opposed to measuring with cups, recipe-specific grains, a generous autolyse, and careful handling.
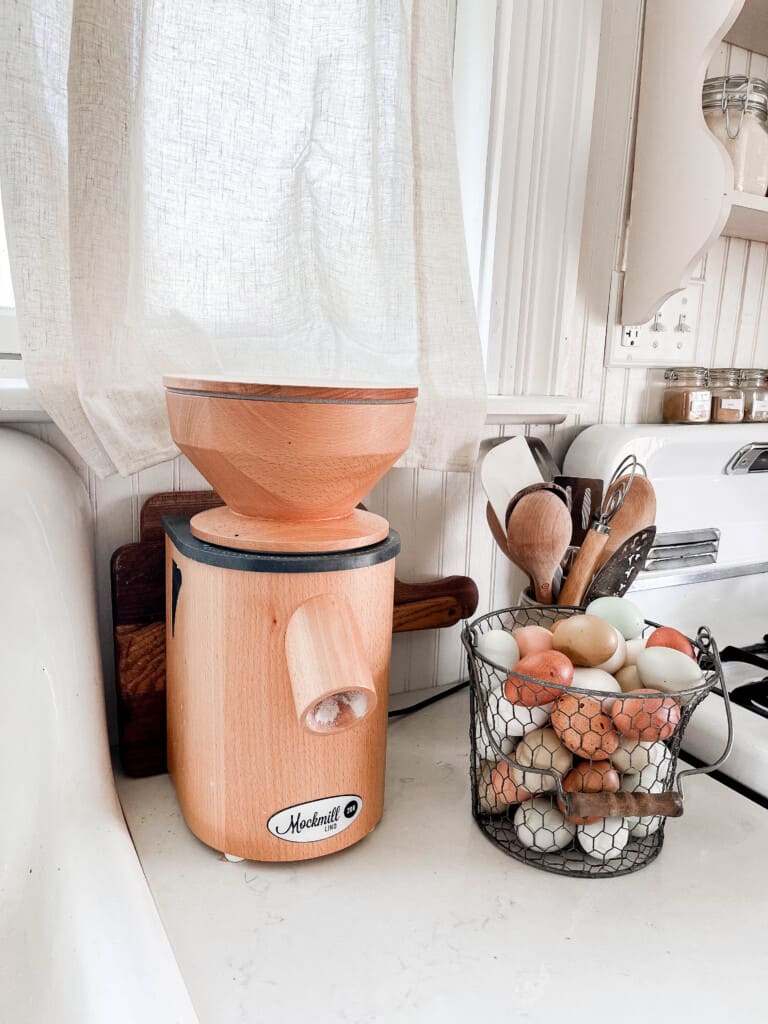
If you’re just beginning, you’ll want to invest in a good grain mill, find a place to purchase wheat berries, and learn how to mill your own wheat berries at home.
Why Would You Want to Convert to Freshly Milled?
Full flavor – Fresh-milled flour bursts with nutty, mildly sweet flavors that shine through in recipes. The taste is full and robust.
Hearty texture – Whole grain flour adds wholesome texture to your bakes, giving the crumb a heartier, chewier bite than typical white flour.
Increased nutrition – Whole grains milled at home retain their nutrients, providing protein, antioxidants, healthy fats, fiber, vitamins, and minerals.
Choosing the Right Grain
Choosing the right type of grain for your recipe matters. Many different grains exist, and there are reasons why you may choose one over the other. There are soft and hard berries, red and white berries, ancient grains like einkorn, kamut, and spelt, and the robustly flavored rye (among others).
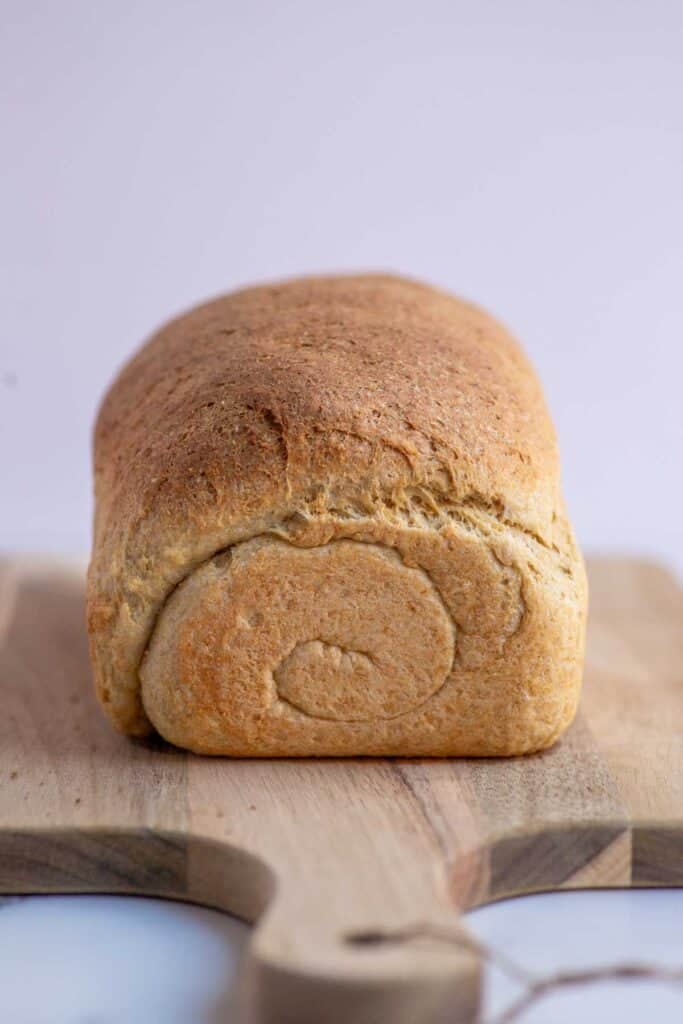
For beginners, I recommend soft wheat berries for recipes like chocolate chip cookies, brownies, blueberry muffins, and whole wheat cakes, while hard wheat works better for sandwich bread, dinner rolls, homemade tortillas, and freshly milled sourdough bread.
Think of this way. If you would normally knead a dough, or perfrom stretch and folds, use hard wheat (red or white). For other baked goods, where you aren’t trying to develop those stretchy strands of gluten, use soft wheat.
You can use hard wheat for anything, but the reverse is not true. No matter how much you knead a soft wheat it will not pass the windowpane test. It will barely stretch at all.
You will like the end result better if you use soft white wheat in your non-stretchy-gluten baked goods, but it is fully possible to substitute hard wheat. Do not I repeat DO NOT try to bake bread with soft wheat. You will end up frustrated.
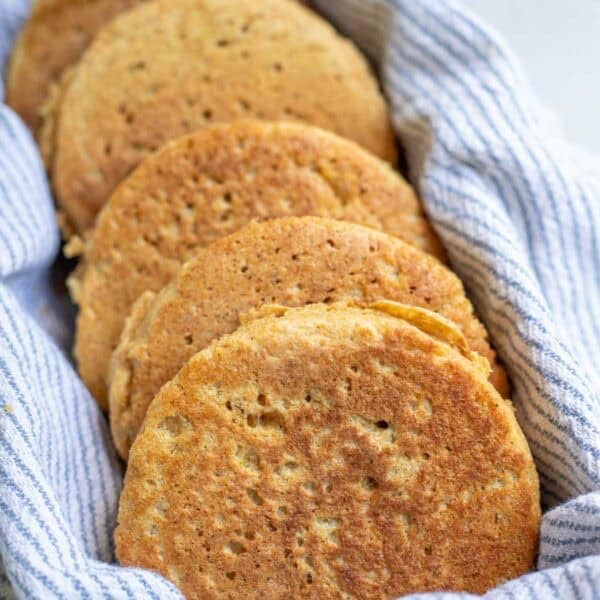
Generally speaking, soft wheats work best for softer bakes, such as cookies, cakes, and muffins. Hard wheats, like hard red or hard white, work well for more structured bakes, such as artisan loaves, sandwich breads, buns, rolls, bagels, and baguettes. You’ll still find some overlap, with hard white wheat working surprisingly well for many cookie recipes, and ancient grains like einkorn and spelt working well for nearly all recipes.
Pastries: soft white wheat, einkorn, kamut, spelt
Loaves/rolls: hard wheats, kamut, einkorn, kamut, spelt, rye
Tortillas/flatbreads: hard wheats, einkorn, kamut, spelt, rye
Cookies/cakes/quick breads: soft wheats, einkorn, kamut, spelt
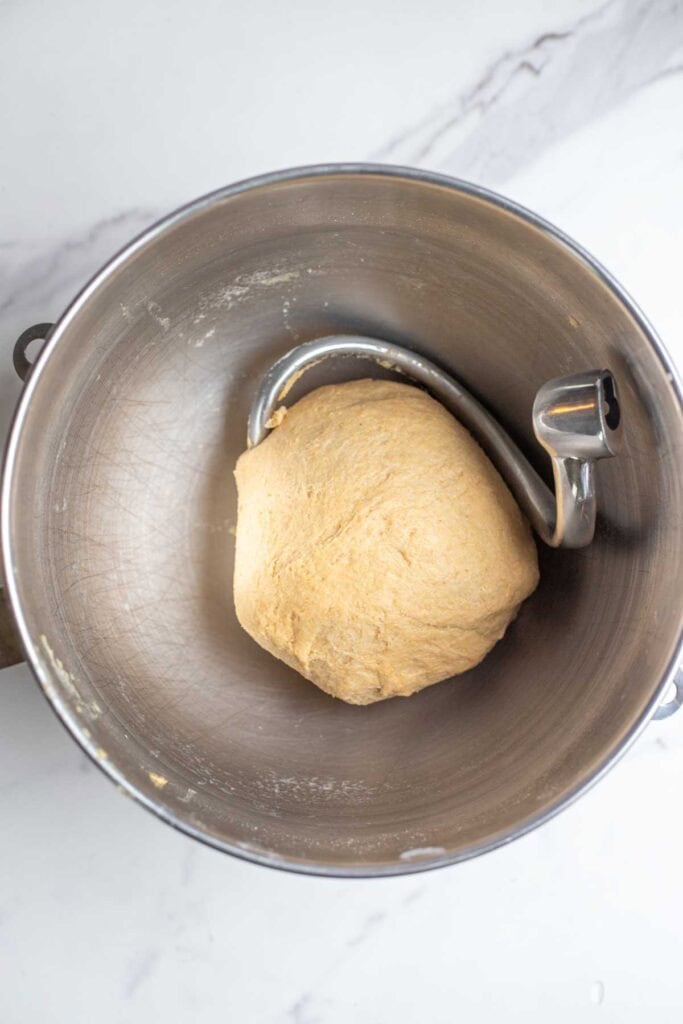
Autolyse (Resting your dough)
For recipes that require a rise, freshly milled flour requires more time to be hydrated than your usual flour. Mixing the water and flour and allowing it to rest at room temperature softens and hydrates the grains, absorbs the liquids, forms gluten structure, and yields a more workable dough – all before any kneading even takes place.
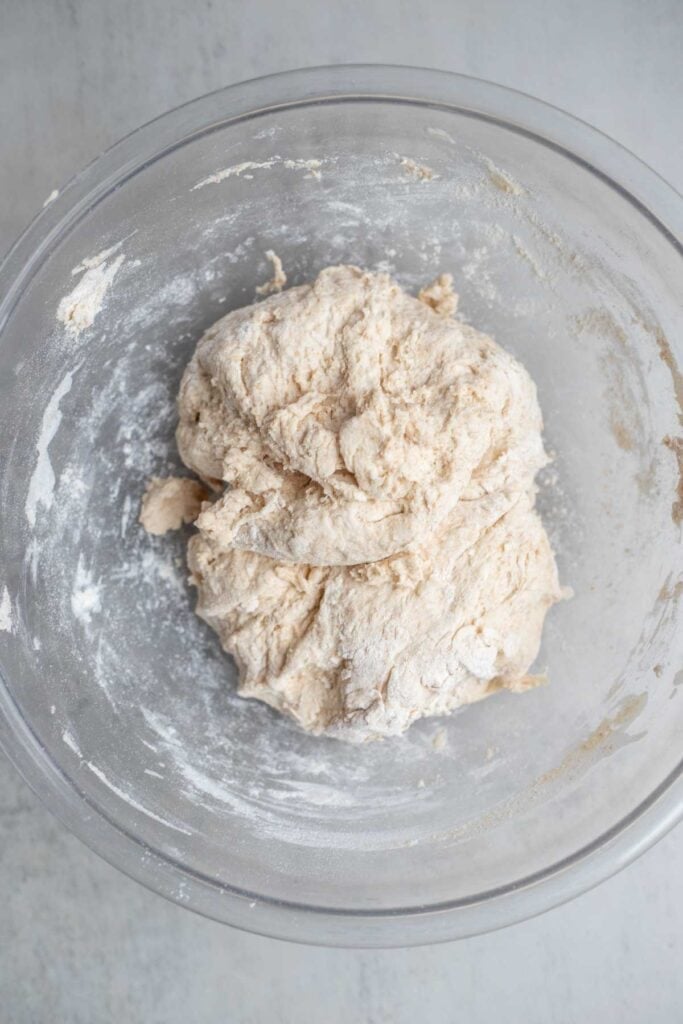
The process is called autolyse, a rest lasting anywhere from 1 to 3 hours at room temperature. This gives the bran ample time to soften and build gluten structure. A more coarsely milled grain needs more time to autolyse, while fine-ground flour goes more quickly. Visually, you usually can’t tell if the dough is where it needs to be. Working the dough with your hands, stretching it and pressing it, you’ll be able to determine if the gluten is developing.
Note: A short autolyse may cause a dense bake, since the flour did not fully hydrate, soften, or develop gluten structure. If you autolyse for too long, you risk the dough becoming overdeveloped and weak, leading to a poor rise and dense texture. For a longer autolyse, set your dough in the refrigerator to slow enzyme activity while still hydrating the grains.
I only do an autolyse for breads and baked goods that require gluten development and a rise. There is no need to do it for quick breads, cookies, biscuits, muffins, etc. I just weigh my 140 grams of soft white wheat per cup and move on with the recipe as usual!
Less Handling
Before it has an opportunity to soften, bran is sharp, and kneading can cause it to cut through the gluten structure, reducing development. For this reason, I reserve kneading, or stretch and folds, for after the autolyse. After autolyse, the softer bran can be kneaded with less complication, and because it has already begun developing its gluten structure, you will need less kneading to build your dough.
For muffin, quick bread, or cake batters, be careful not to overmix. Stir just until combined to avoid a dense result.
Tools You May Need
Grain mill – The Mockmill is my favorite mill.
Kitchen scale – A digital scale is the most accurate way to measure your ingredients.
How to Convert Any Recipe to Freshly Milled

Step 1: With your chosen recipe in hand, choose the grain that suits the product. Hard wheat flour works best for breads, while soft wheat flour suits lighter bakes such as muffins, cakes, and cookies.
Step 2: I like to mill my flour on demand to keep it fresh. Mill your wheat berries based on weight, using a digital scale and weighing 140 grams of unmilled grains per one cup. Fresh flour is airy and fluffy, so measuring with a cup is less accurate than measuring by weight.
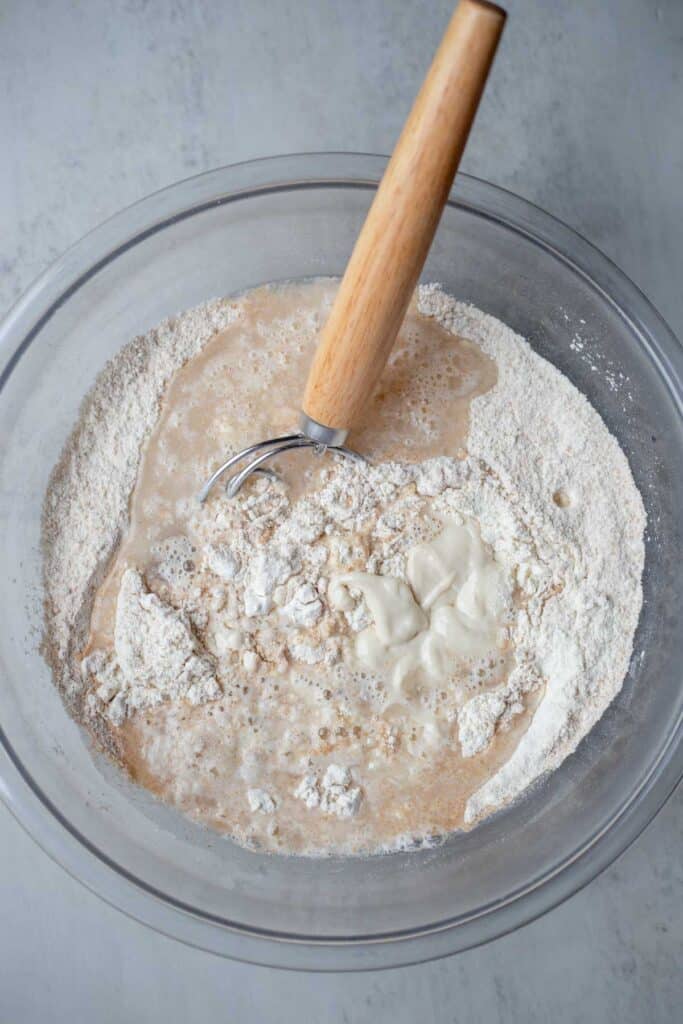
Step 3: Combine the ingredients according to the recipe directions. For cookies, I add the dry ingredients in one bowl and cream the butter and sugar in another, as directed. Depending on the recipe, the dough or batter may feel wetter and stickier, or sometimes very stiff and thick, than an all-purpose flour recipe. For breads and baked goods that require developing gluten (kneading or stretch and folds) move on to step 4. For quick breads, cookies, muffins, biscuits, etc. I skip the autolyse and just follow the recipe as directed.
Step 4: With the flour and liquids combined, cover your bowl and let it sit at room temperature for as little as 30-60 minutes, though preferably between 1-3 hours to autolyse. Autolyse is the process of the liquids hydrating the grains, softening the bran, and yielding a more workable, developed dough.
Step 5: If your recipe requires gluten development, such as an Italian loaf, kneading must be adjusted to account for the bran. The bran is sharp, cutting through the gluten and hindering proper gluten formation. To manage this and avoid a dense loaf, autolyse before kneading, then knead for 3-4 minutes, rest another 15-20 minutes, and knead again for 4-5 minutes.
When making sourdough, begin stretch and folds after a long autolyse. This is a gentle way to develop gluten. I perform 3-6 rounds of stretch and folds for most recipes, usually about 30 minutes apart.
If your recipe is a batter that requires mixing, stir gently to incorporate without overmixing.
Step 6: Freshly milled flour recipes tend to be denser, needing longer bake times. Bake as directed, monitoring for doneness and adding time to the end, if needed.
Tips
- The weight remains the same across different wheat varieties, even when their volumes may not align. Measure 140 grams of unmilled grains per cup of flour, no matter the flour. You’ll read different things all over the internet, but this conversion has never failed me!
- Right out of your mill, fresh flour is warm. This works well for bread recipes, but let the flour cool in the fridge before use in recipes like this all-butter pie crust or these whole wheat biscuits, where the ingredients need to be cold.
- Leftover flour can be kept airtight in the refrigerator for a few days, but it should be stored airtight in the freezer for longer storage.
- Flour blends of hard and soft wheat mimic all-purpose flour remarkably well.
- For bread recipes, you may find it easier to sift out the bran for a better rise. Bran cuts through the gluten, inhibiting the formation and rise. Keep the bran and add it to oatmeal, smoothies, or other recipes for its nutritious qualities.
- With sourdough, expect a much faster fermentation with fresh milled flour. The presence of bran, germ, and endosperm gives the yeast and bacteria more nutrients that lead to more rapid fermentation.
- If you are using freshly milled grains for this recipe, I recommend weighing the flour instead of using volume measurements. Grain mills vary greatly – some create very fine and fluffy flour, while others are a little more coarse. This makes volume measurements unpredictable. Using a kitchen scale and calculating the grams is much more reliable, ensuring you end up with a delicious end product.
To see all of this in action, follow me over on Youtube. I make almost all of my recipes from this blog with 100% whole grain, and share exactly what the looks like in real time, here in my kitchen, for my large family.
In our family, we think freshly milled whole grain cookies and whole grain pancakes taste better than all purpose. Hamburger buns, dinner rolls and sandwich bread also do excellent swapping whole grain 100%. For breads where we want a crusty exterior/chewy interior like beginner sourdough bread, baguettes and ciabatta we prefer mostly whole grain with just a little all purpose. I usually do about 2/3 hard white wheat and 1/3 all purpose.
We’re all about the 80/20 rule over here!
If you want the TLDR on this topic, here it is! Use hard wheat for breads and baked goods where you want the dough to stretch. Use soft white for the rest. If you aren’t sure, use hard. Always weigh the grains first, 140 grams per cup of flour the recipe calls for, no matter which grain you choose. If it’s a hard wheat recipe that you want the gluten to stretch, do a longer autolyse than usual. That’s what I would tell a friend if I had 5 minutes to explain swapping to freshly milled whole grains!
Recipe FAQs
I use the same amount of cups of freshly milled flour that the recipe calls for, though measuring by weight rather than volume. For every one cup of flour, I use 140 grams of grains measured on a scale.
Yes, freshly milled flour may be used in any recipe, though some adjustments should be made for the best results. Increasing hydration, using the right grain for the recipe, adding a rest period, handling gently, and a longer bake time.
I generally only mill what I use at that time, but if I have extra flour, it’s best to freeze it. Store flour in an airtight bag and freeze for up to one year. Freezing preserves the flavor, smell, and quality. Refrigeration is an option, but does run the risk of condensation being introduced to the flour, which may lead to mold.
Freshly milled flour does not have to be sifted, but it can be. Sifting allows for a lighter texture, milder flavor, and allows breads to rise more fully and easily.
No, baking does not diminish the nutrients. While intact wheat berries have a long shelf life with proper storage, fresh flour loses nutrients within hours of milling. If baked promptly, however, the remaining nutrients are considered to be locked in and preserved as the heat halts enzymatic activity and oxidation.


Hi. Just got a grain mill and wondering if you feed your starter with fresh milled or a combination of fresh and all purpose?
I feed my starter with freshly milled flour!