

Create beautiful and timeless farmhouse window trim with just a few simple materials. It’s much easier than you think and makes a much larger impact than you’d expect!
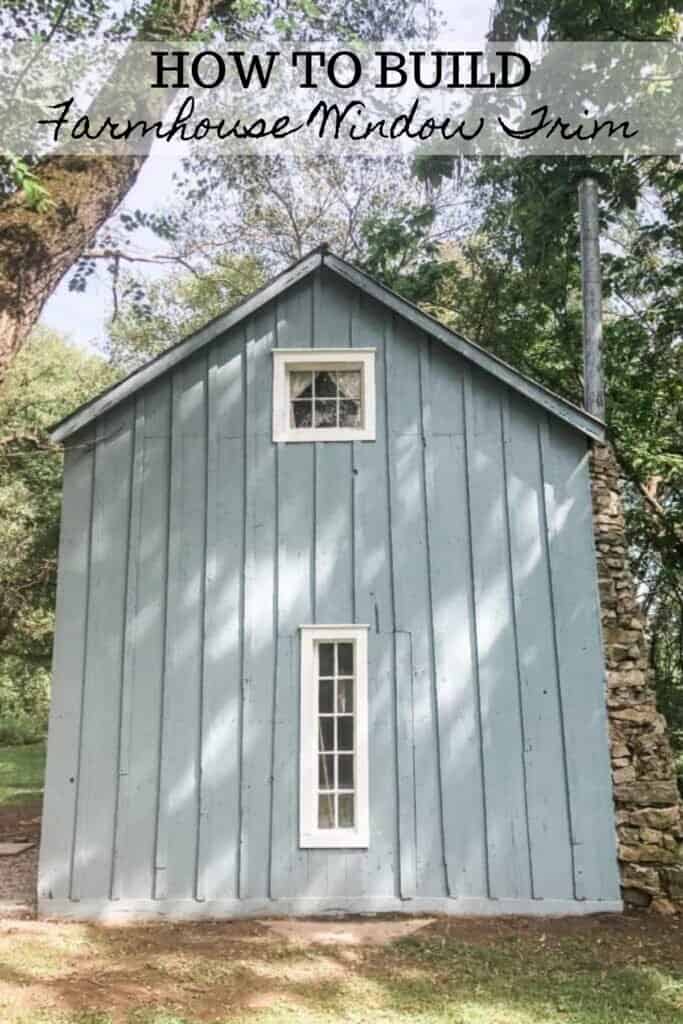
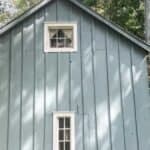
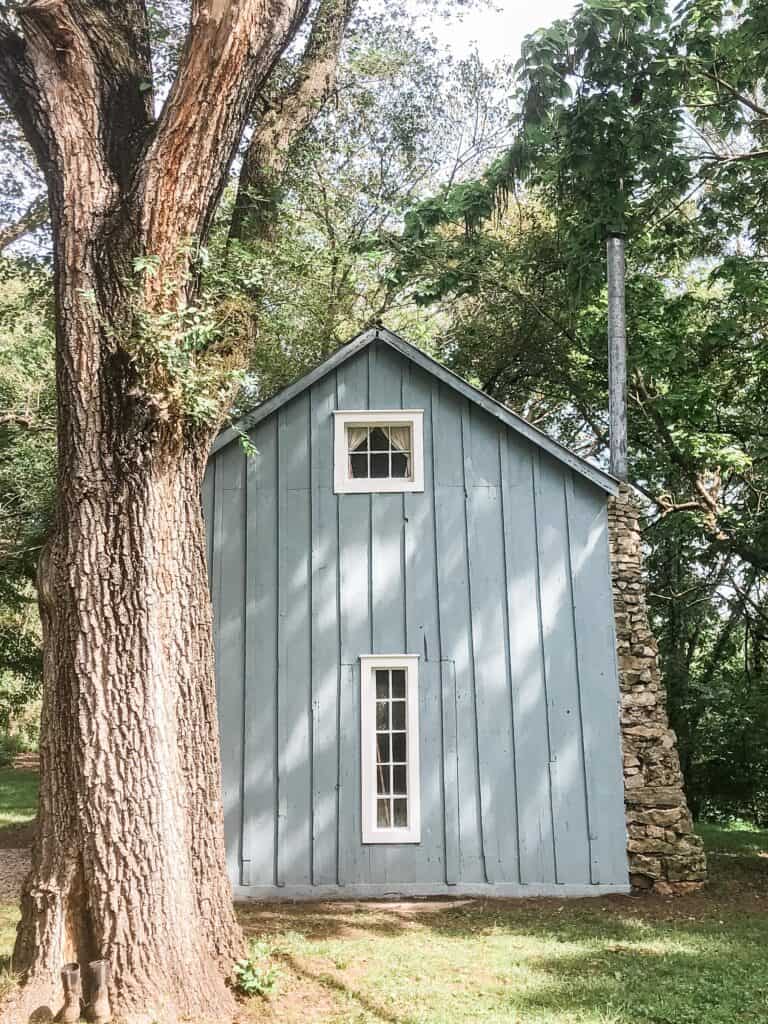
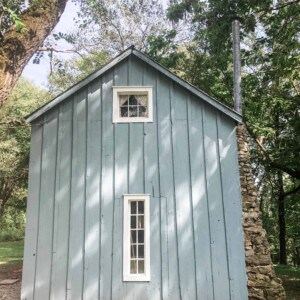
This farmhouse window trim could be used inside or outside. Since we are currently redoing the little red cottage – which is technically the little blue cottage now – I’m showing you how to do it as exterior window trim.
We wanted to match the cottage trim to what our current farmhouse has. It will really provide a more cohesive look.

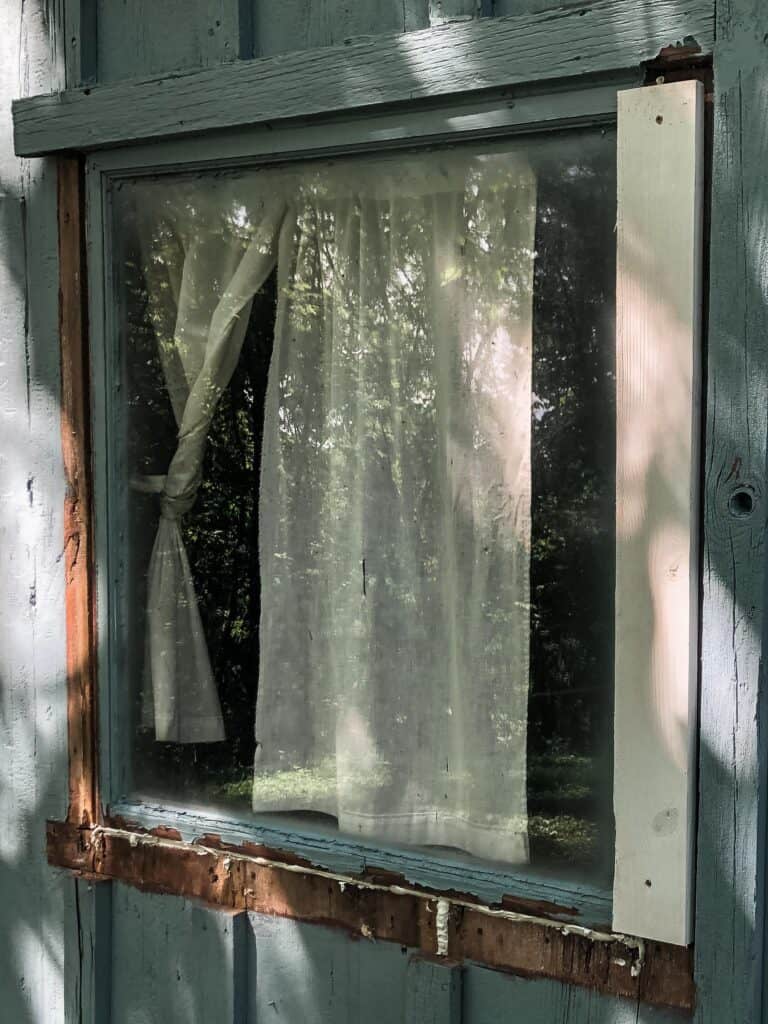
It’s amazing what a little bit of work will do. We removed the cottage awning first. Not only was it looking not so pretty, but it also blocked the view from the kitchen window.
Personally, I would much rather see the rolling hills and sunrise than a rickety old awning.
I’m pretty sure I will replace it with something pretty and less obtrusive to keep the view, while also adding some shade to the cottage.
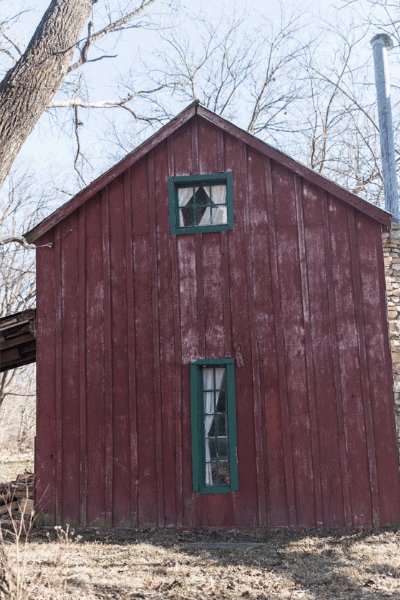
After the awning came down, we were really able to determine what needed to be repaired. Upon completion, the little red cottage went blue. Here is a little before picture.
And finally, it was time to make some trim for the windows.
Now that the outside is mostly complete, I will try to turn my attention to the inside sometime this winter. Don’t worry, I’ll bring you along for the ride.
Tips For Making Farmhouse Window Trim:
- You could do this same process and swap out cove moulding for a 1×2, adding another piece of top trim that is a 1×3.
- Assemble the top moulding section on a table, and then nail in place.
- You could also make this into matching door trim. The top piece would essentially be the same (just a different width), and you would skip adding the bottom 1×4.
How do you cut trim around a window?
You can use a simple miter saw. Measure twice, cut once. You can make it as difficult or as easy as you would like.
Make it as simple as adding 1×4’s all the way around with straight cuts.
I’m going to show you how to make it a little fancier than that.
Watch The Tutorial
This post contains affiliate links, which means I make a small commission at no extra cost to you. See my full disclosure here.
Get The Design
Tools you will need
Table saw (or purchase 1×2)
Brad nailer and compressor (you can also use this cordless version)
Measuring tape
Caulk
How To Install Farmhouse Window Trim
Remove old window trim with a pry bar and a hammer.
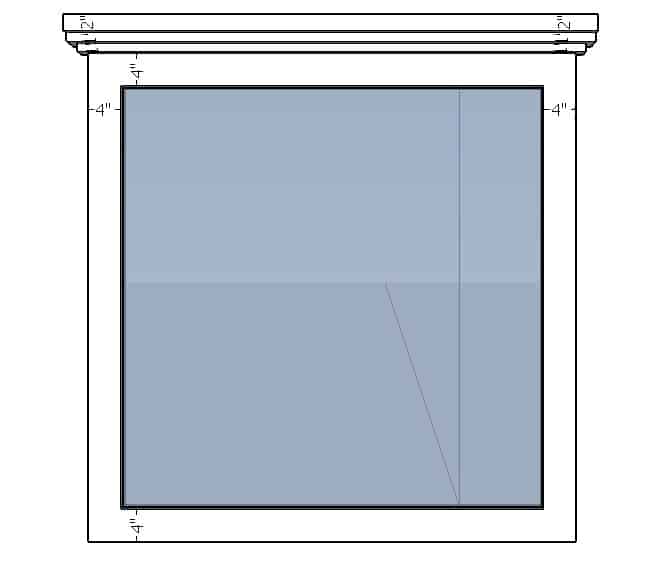
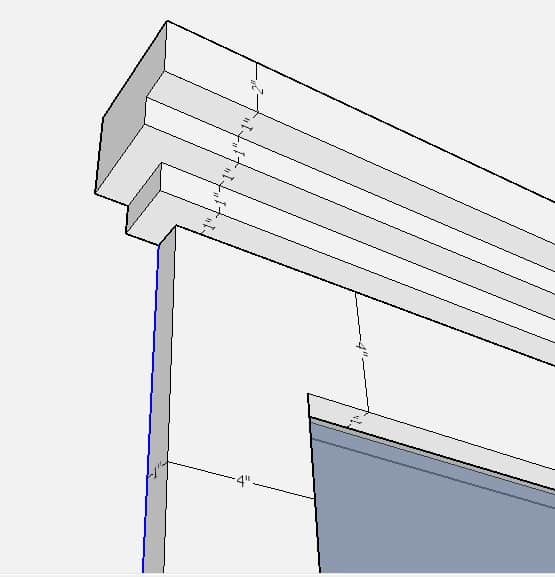
Measure the length of each side of the window from the top to the bottom. Cut two 1×4’s to length, and nail on each side.
Measure the top and bottom of the window from the outer edge of the 1×4 on one side to the outer edge of the other side.
Cut two 1×4 pieces of wood to size.
Nail one 1×4 to the top of the window area, right above the window. Nail the bottom 1×4, as well.
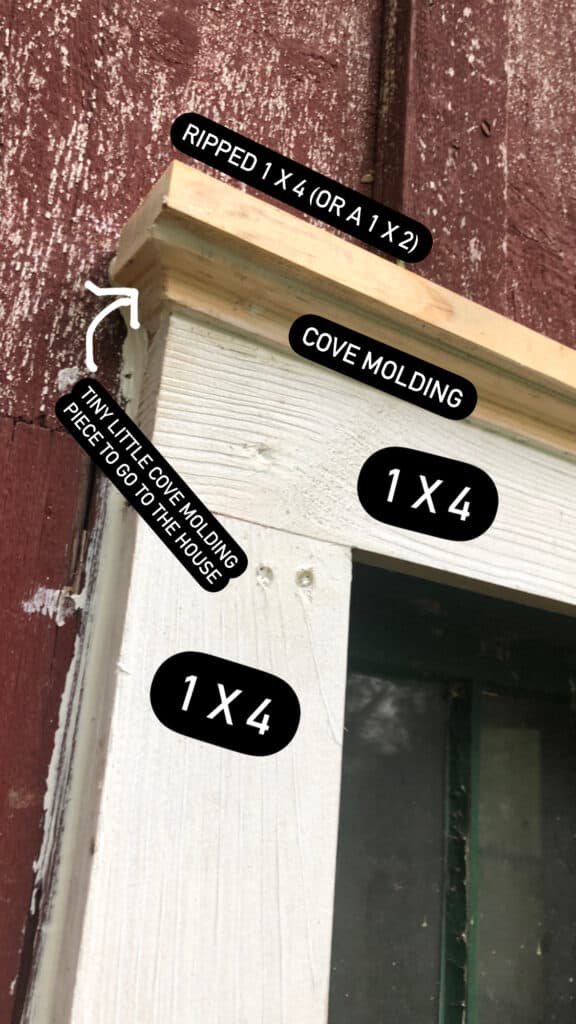
Measure and cut cove moulding for the top piece using a miter saw at a 45-degree angle.
Cut small pieces for each side, with one side flat that is going up against the siding, and a 45-degree angle on the other side to coordinate with the 45-degree angle of the long piece. The piece will probably be around an inch long.
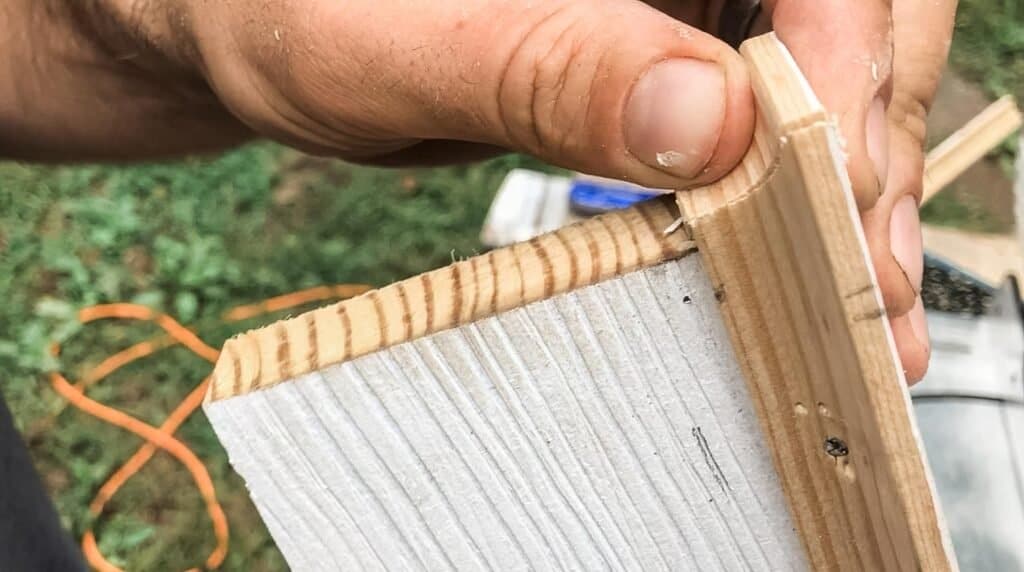
Nail cove moulding into place.
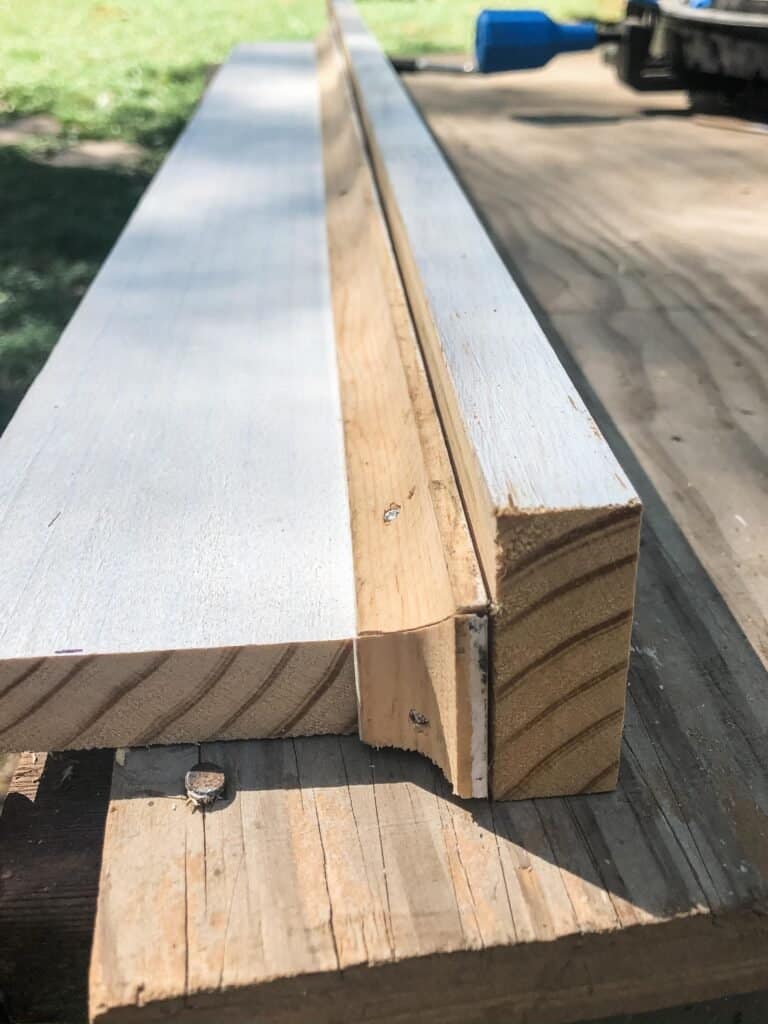
Rip a 1×4 in half (or use a 1×2).
Measure the cove moulding from the outside of one side to the outside of the other end. Cut 1×2 to that length.
Place the 1×2 on top of the 1×4, and cove moulding at the top of the window trim.
Nail in place from the top.
Side note: If you want to make this without the cove moulding, thus avoiding the 45-degree cuts, you could swap it out for a 1×2 laying on top of the 1×4, and then a 1×3 on top of that. Cut the 1×2 slightly larger than the width of 1×4, and the 1×3 slightly larger than the 1×2.
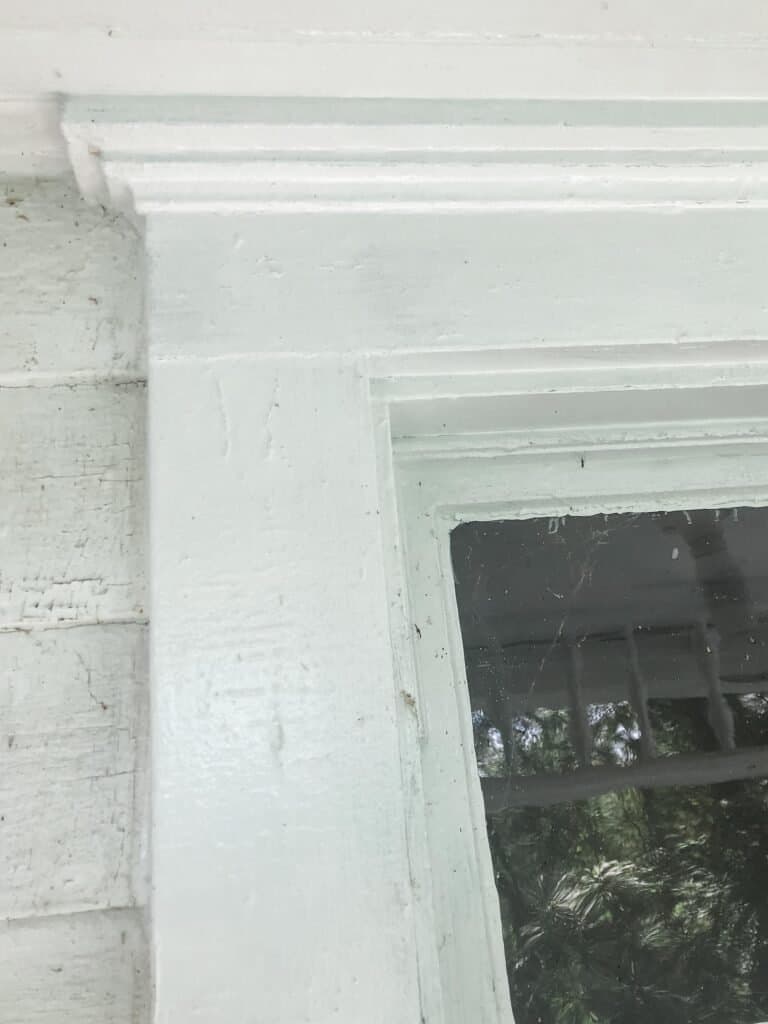
Caulk nail holes and all seams with a paintable exterior caulk.
Prime and paint.
Find More DIY Tutorials From Around The Homestead:
- DIY Arbor Plans
- How To Build A Window Box
- How To Build A Goat Milking Stand
- Macrame Plant Hanger For Beginners
- A-Frame Chicken Tractor
Farmhouse Window Trim
Equipment
- Tape Measure
- Miter saw
- Table saw
- Brad nailer
Ingredients
- 1x4s
- Cove moulding
Instructions
- Remove old window trim with a pry bar and a hammer.Measure the length of each side of the window from the top to the bottom. Cut two 1x4s to length and nail on each side.
- Measure the top and bottom of the window from the outer edge of the 1×4 on one side to the outer edge of the other side.
- Cut two 1×4 pieces of wood to size. Nail one 1×4 to the top of the window area, right above the window. Nail the bottom 1×4, as well.
- Measure and cut cove moulding for the top piece using a miter saw at a 45-degree angle.
- Cut small pieces for each side with one side flat that is going up against the siding, and a 45-degree angle on the other side to coordinate the 45-degree angle of the long piece. Nail cove moulding into place. Rip a 1×4 in half (or use a 1×2). Measure the cove moulding from the outside of one side to the outside of the other end. Cut 1×2 to that length.
- Place the 1×2 on top of the 1×4, and cove moulding at the top of the window trim.
Nail in place from the top. - Caulk nail holes and all seams with a paintable exterior calk.
Prime and paint
Notes
- If you want to make this without the cove moulding, thus avoiding the 45-degree cuts, you could swap it out for a 1×2 laying on top of the 1×4, and then a 1×3 on top of that. Cut the 1×2 slightly larger than the width of 1×4, and the 1×3 slightly larger than the 1×2
Nutrition information is automatically calculated, so should only be used as an approximation.


Can you please share the paint color and type. I love that beautiful soft blue, it looks so clean and pretty.
Please share the new paint color! I just love it, it looks similar to BM Coney Island which I have on my garden turrets! Thank you Lisa , love everything you do!