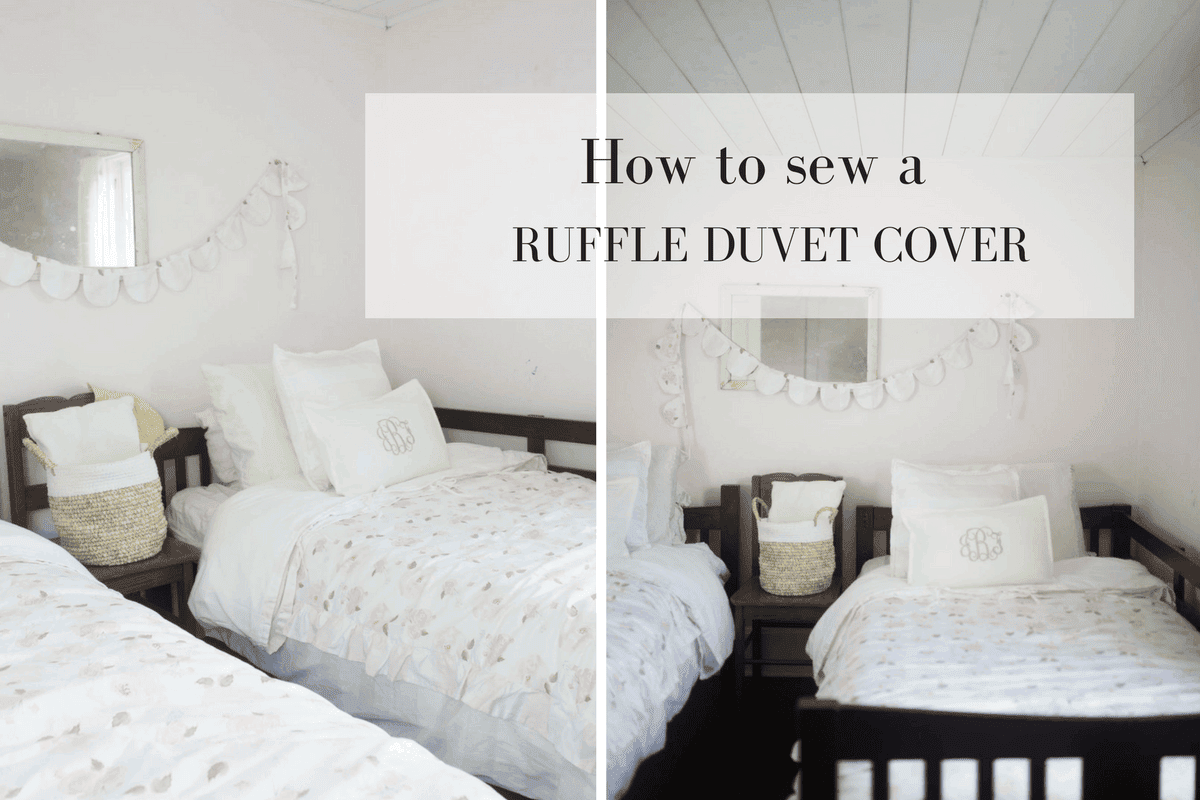
Learn how to make a duvet cover with simple video instructions. I include steps to add ties and use a sheet for the back.
Spoonflower was kind enough to provide the fabric for this project. See my full disclosure HERE.
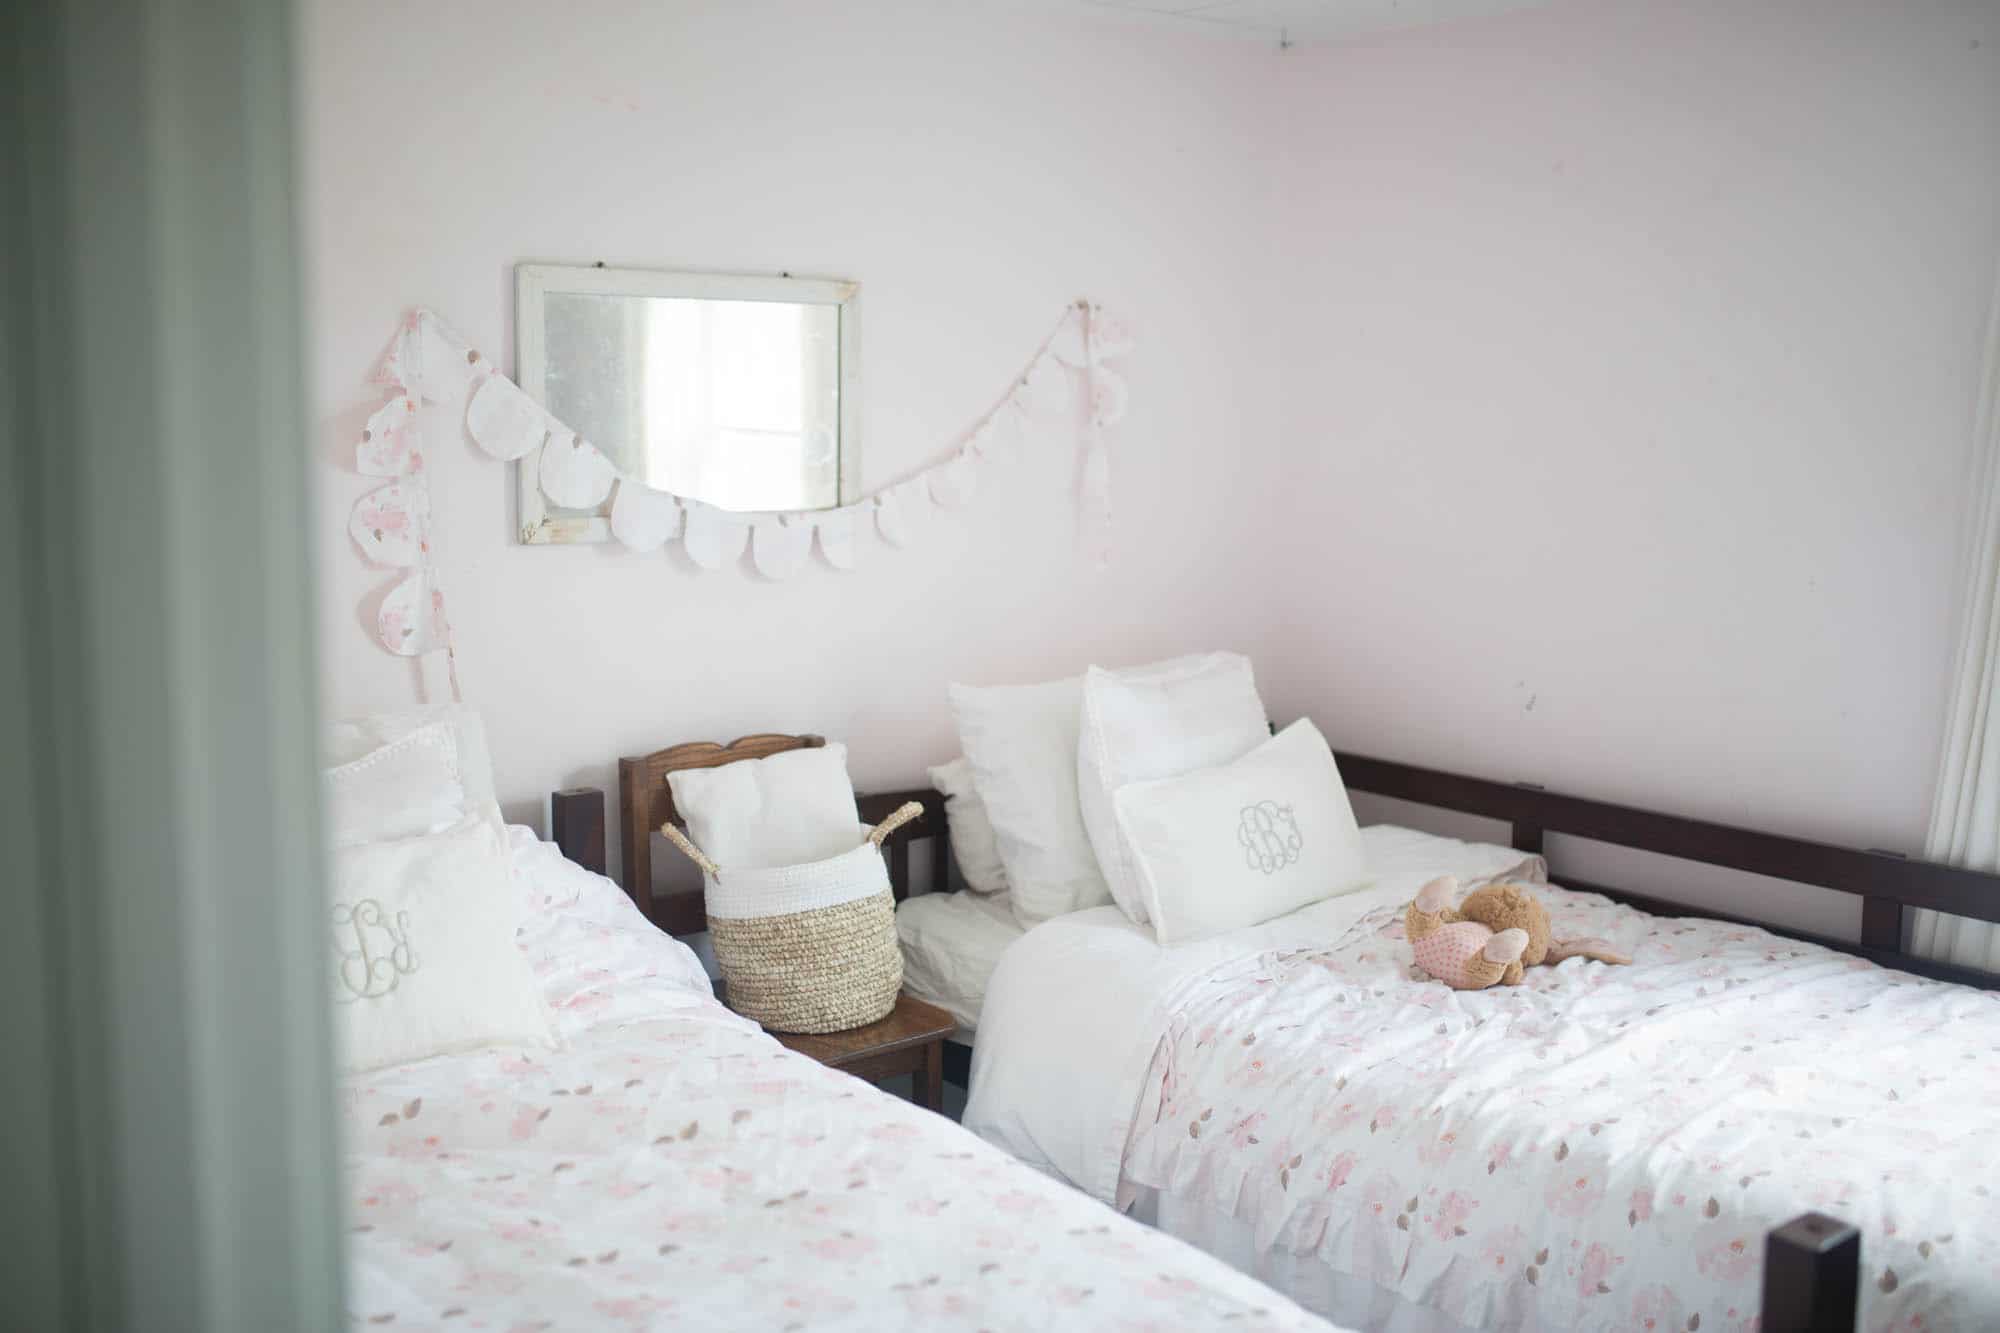
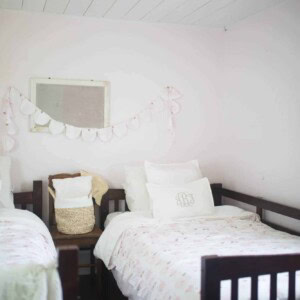
I can’t wait to show you how to make a duvet cover with all the soft details I love in a kids’ room.
Switching things up in my girls’ room has been on the to-do list for a while now. To make it more light and bright, like the rest of the house, I wanted to add soft colors and a little pattern. I had visions of stripes, soft watercolor florals and ruffles. Lots of ruffles.
I have the problem where I often have something very specific in mind for a project and, of course, no one has what I’m dreaming of. I often end up on my favorite fabric website, Spoonflower, to browse through endless of options from fabric designers all over the world.
What is Spoonflower?
Basically, Spoonflower is a community where individuals can design their own prints and have them created on any fabric, from organic cotton knit ultra to faux suede and sports lycra. Whatever your project is calling for, you can get it on Spoonflower.
If you have some graphic design skills, think of all the possibilities this website could provide. You could make a design with your child’s name on it, upload that to Spoonflower, and order it in minky to make a cozy personalized baby blanket.
Custom pillow covers, custom napkins, Halloween costumes…if you can design it you can have it, all printed out on any fabric you fancy.
One time I made custom dress tags for my kids’ dress shop on etsy, by uploading my logo design to Spoonflower and ordering a yard of it on basic cotton. I just cut the logo out from the fabric and sewed it onto my garments. I was able to get hundreds of tags for super cheap this way!
If designing fabric yourself isn’t your thing, you can shop designs from other artists and purchase fabric by the yard. This normally the route I go, because I can find almost any pattern my little heart can dream up.
Oh my, the possibilities! Let me rein it in a minute and discuss the matter at hand. Ahem. Back to the duvet cover.
My Project:
I have been eyeing up the soft watercolor florals on Spooflower for a while. I have a whole design board of favorites on my account.
After seeing the soft linen stripes, I picked a coordinating floral, and decided to do a blog post on how to make a duvet cover.
Get the Video Tutorial Here:
For a text tutorial, keep on reading. However, I highly suggest the video, because I think it is easier to follow along with.
For the Supplies:
For this project I used, Linen Luxe Stripe in Arabesque and White and Indy Bloom Blush Rose B. I ordered them both in the Organic Cotton Sateen Ultra. I love that this fabric is soft and comfy, and has a light weight to it, to allow the ruffles to lay nicely.
For one twin sized duvet cover, you will need two and a half yards each, of two coordinating fabrics, and one queen size sheet for the back.
Cut List:
From the Main Fabric:
One piece- 46″ by 89″
From the Coordinating Fabric:
Two pieces – 10″ by 89″
Two pieces- 5″ by 134″
One Piece- 4″ by 130″ to make casing around the top
Ten pieces 1.5″ by 12″ for the tie closures at the top
After cutting out all the fabric, it is time to make the ruffles.
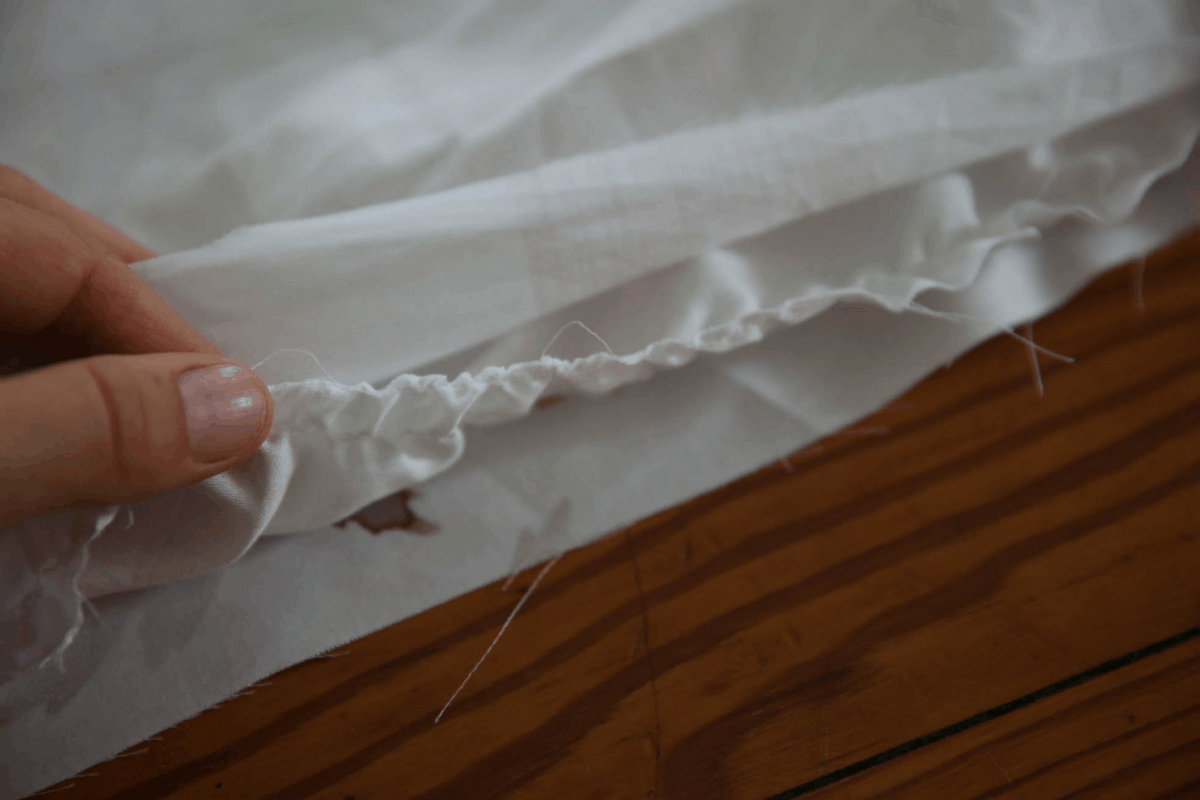
How to Make Ruffles
The rule of thumb for cutting a ruffle piece is one and half times the length of the piece you will be attaching it to. So, for example, if you want to sew a ruffle onto a 10″ piece of fabric, you should cut your ruffle piece to 15″ in length. Since the main duvet piece is 89″ long, the ruffle piece is 1.5 times that, so 134″.
Take your two 5″ by 134″ inch pieces and press the long end over 1/2″ and then another 1/2″, to hide the raw edges inside. On the opposite long side add a gathering stitch. I like to add the gathering stitch halfway down and then start a new one. This way you are less likely to break the gathering strings if you need to do a lot of pulling to make them the same length as the fabric your are pinning to.
The easiest way to gather fabric is to turn the machine’s tension and stitch length all the way up. This will cause your fabric to gather all on its own when you put that gathering stitch in.
If you have never made ruffles before, check out this tutorial.
Repeat this process for the other ruffle piece.
After the ruffles are hemmed and gathered, lay everything out on the floor, the 48″ by 89″ main piece in the middle, and the two 10″ by 89″ pieces on the side, like such.
Pinning in the Ruffles:
Adjust the gather strings in the ruffle until they are approximated 89″, so you can pin them between the main piece and the side pieces.
Lay the ruffle down on the main piece, right sides together.
Next, lay the side piece on top of the ruffle, so that you have a ruffle sandwich, if you will. Make sure all the raw edges are facing the same way, like I have below:
Repeat with the ruffle on the other side and pin everything in place.
Sewing in the Ruffles:
Sew your ruffles in between the main piece and the side piece, going slowly and being careful to catch all three layers.
After the ruffles are sewn in place, topstitch them to make the ruffles lay flat. This will just be a stitch that runs over the top of the ruffles, close to their original seam. The only purpose of it is to make the ruffles lay more flat.
Pinning the Front to the Back:
Next, lay the queen size sheet out on the floor, making sure to eliminate all the wrinkle and creases. Fold the original top hem of the sheet under, toward the floor.
When everything is all smooth, lay the completed duvet top, right sides together, on top of the sheet.
Make sure the top of the duvet top and the top of the folded sheet are lined up. Refer to the video tutorial, if this doesn’t make sense.
Trim the sheet around the sides and bottom, so that it is the same size as the duvet top.
Pin the sheet to the duvet top, leaving the top opening, where the comforter will slide into, unpinned.
Adding Ties in the Corners:
This step is optional.
For my duvets, I wanted to add little ties in all four corners, inside the duvet, to keep the comforter insert in place. To do this, I took a whole package of double fold bias tape. I sewed down the open side of the bias tape, to close it up. Then I cut it in eight parts (two ties for each of the four corners). I pinned two ties in each corner at this point in the project.
For the top part, I put the ties in under the fold, in the two top corners.
See the video tutorial for clearer instructions.
Sewing the Front to the Back:
After the sheet and duvet top are pinned in place (and the ties in each corner, if you are adding them), sew the sides and bottom together.
Make sure to not sew the top shut, since that is where you will be putting in the comforter insert.
Turn everything right side out.
If all has gone well, the top fold (that will be used to hide the insert under) and the ties (if you added them) should all be inside the duvet.
Sewing the Tie Enclosures at the Top:
Next, we are going to make the ties for the top of the duvet cover. I thought these would be a really cute to enclose the comforter insert, and add a pretty detail.
Take your ten 1.5″ by 12″ pieces from the coordinating fabric, and lay them flat on your ironing board, right side down.
Just like bias tape, press both long sides inward, like I have done below:
Fold the tie in half, so that the raw edges are hidden inside, like in the photo above.
Fold one of the ends inward, to hide the raw edge inside and sew it shut. Next, sew down the long side to close it.
Repeat repeat repeat…until you have all ten pressed and sewn.
There is only one more step now! This project is almost done, unless you have two girls like me, and have to do the whole thing twice. 😉
Finishing the Top:
Since the top of the duvet is still unfinished, you are going to make a casing to hide the raw edges inside. The casing will also be used to sew in the ties for the top closure.
Take your 4″ by 130″ piece and press it inward, and in half, like you did with the ties.
Sandwich the raw edge of the top of the duvet cover inside the casing and pin all the way around.
When you get back around to where you started from, fold the end under and overlap your starting point.
Pinning in the Ties:
Find the halfway point of your finished duvet and add the first two ties there, on either side. Divide the two halves in thirds and place your ties in those points also. You should end up with five sets of ties placed evenly across the top of the duvet cover. Mine were 10.5″ apart all the way across, starting the first sets at 10.5″ in from both sides of the duvet.
Sew all the way around the casing, making sure to catch all layers, and your ties.
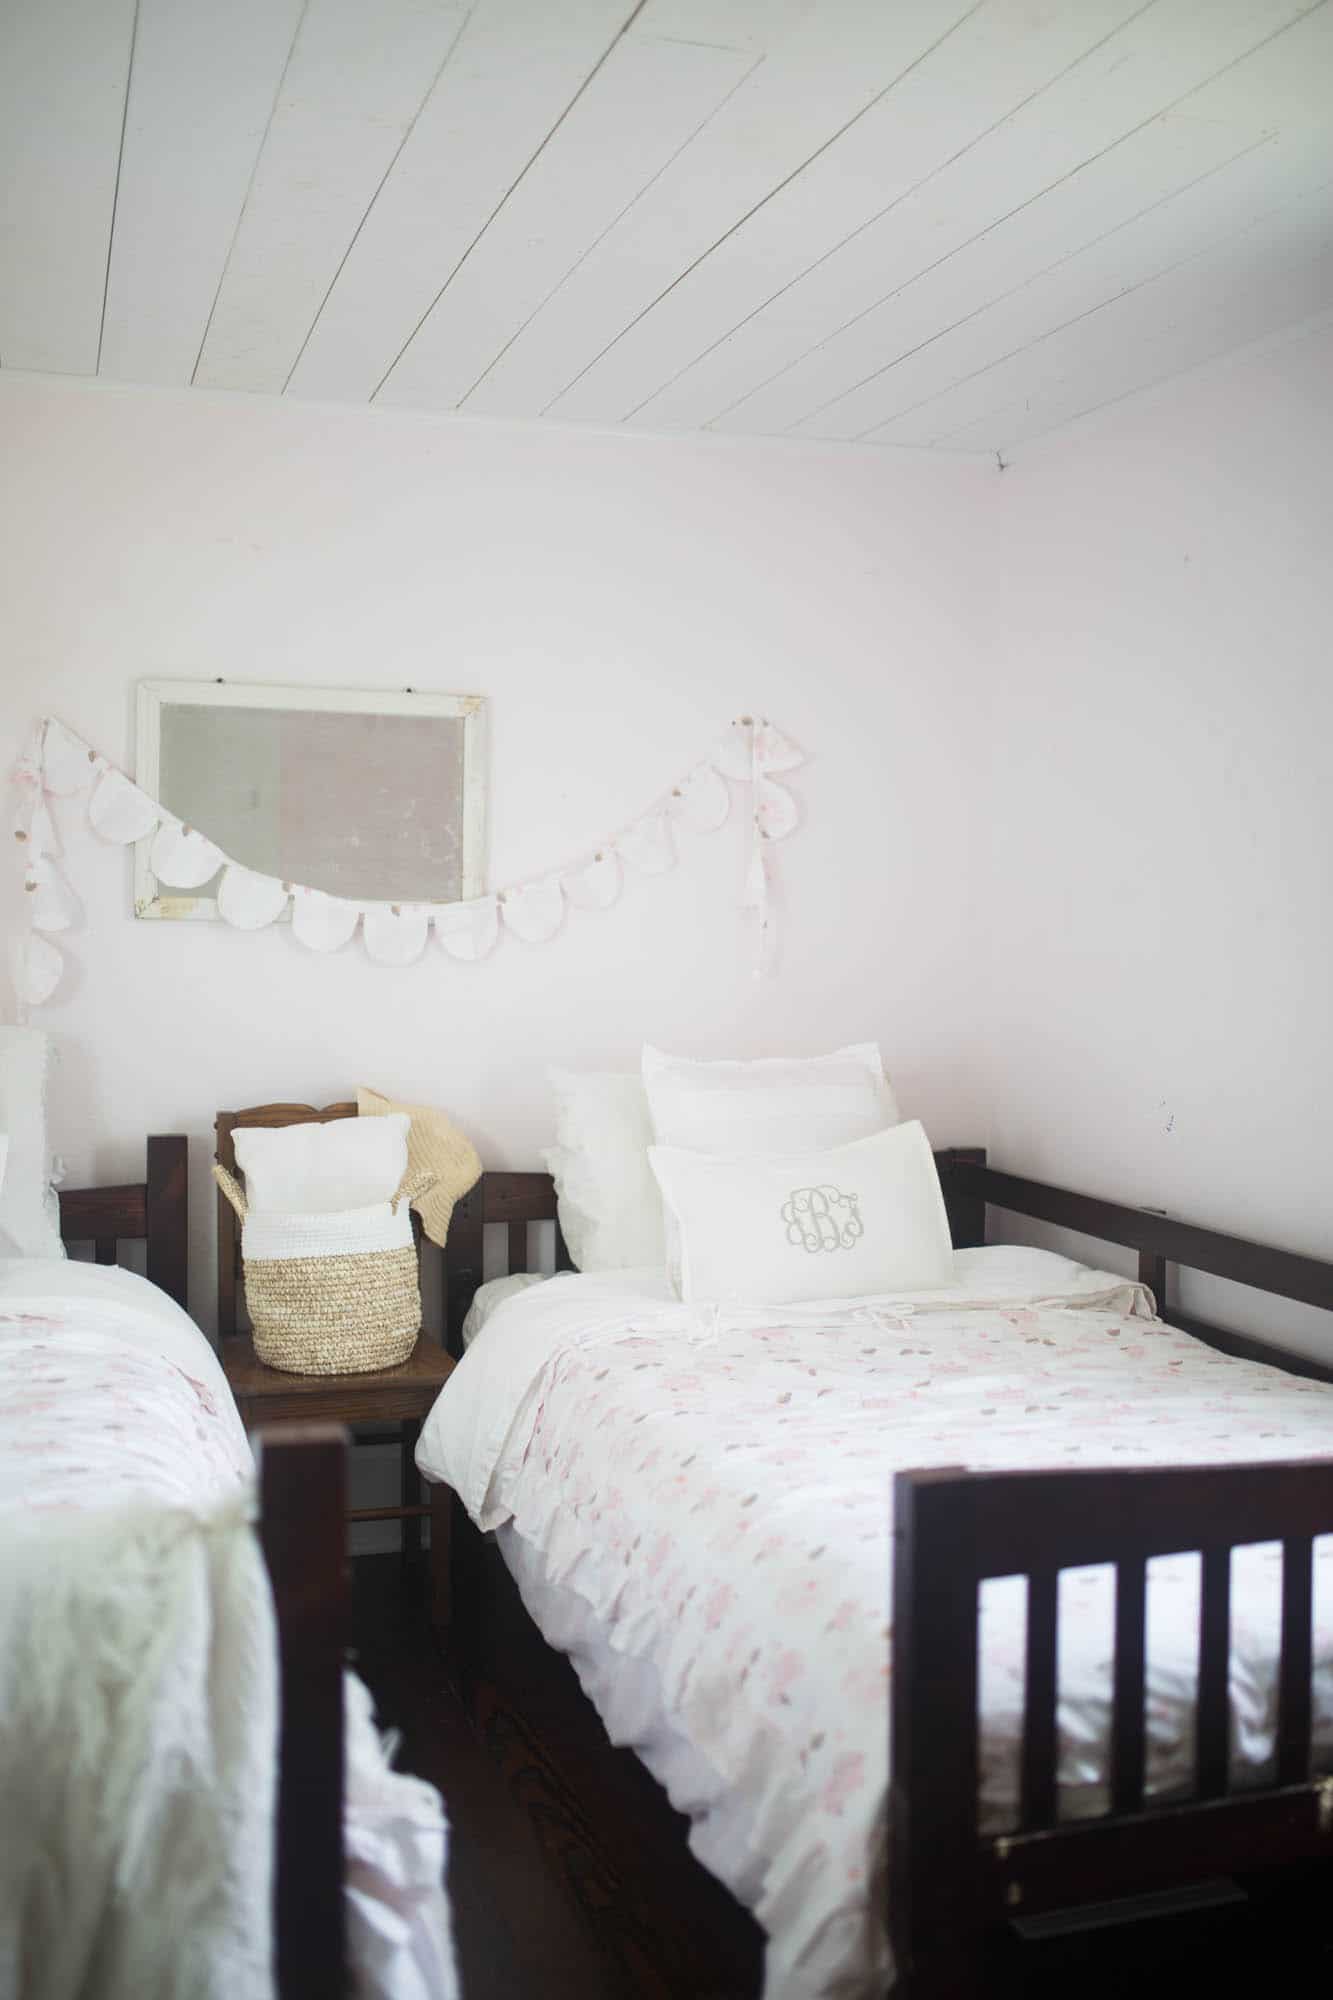
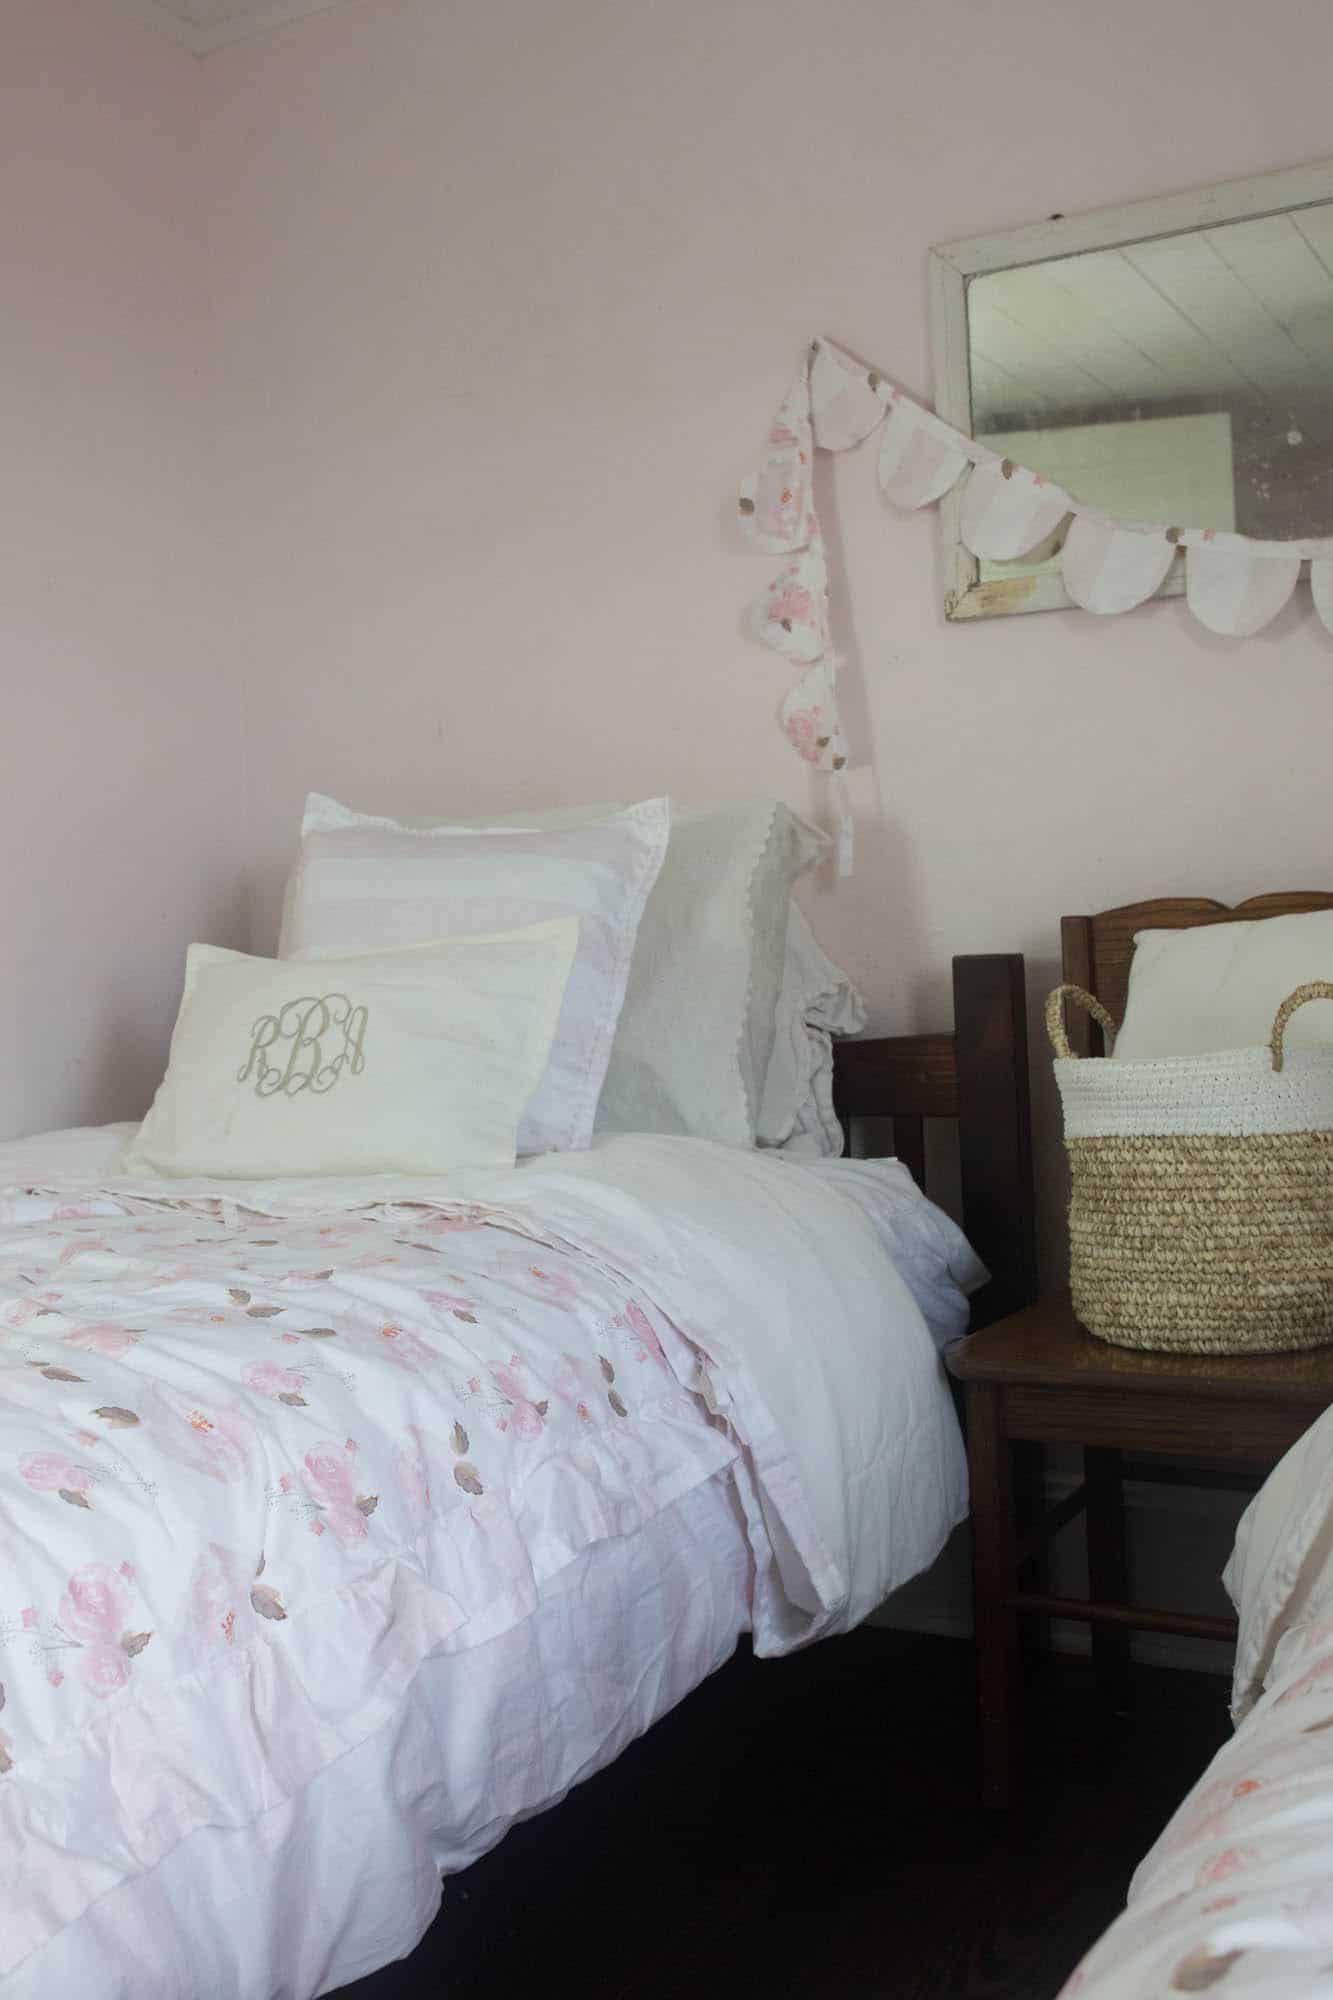
Cut all the strings, and add in your comforter insert. I purchased mine from IKEA.
Give the little girl in your life her duvet, so she can snuggle under the comfy ruffly goodness of it.
Questions people ask when making a duvet cover:
How many yards of fabric does it take to make a duvet cover?
For a twin size duvet cover, you will need approximately five yards of fabric for the front, and a queen size duvet, or five more yards, for the back.
How do you keep a comforter in a duvet cover?
The ties sewn into the four corners of the duvet cover will keep the comforter in place.
You could use this same tutorial to make a duvet cover for a boy’s room, by eliminating the ties and ruffles, and adding Velcro to the top.
You could also make the duvet cover toddler mattress size and use it to make your own custom bedding for a nursery.
For a super simple option, sew two sheets together, right sides together to make a simple duvet cover.
I hope this tutorial show you how easy it can be to customize any room and make your own duvet cover!
If you have any questions, do not hesitate to ask them in the comments.
Pin it for Later:
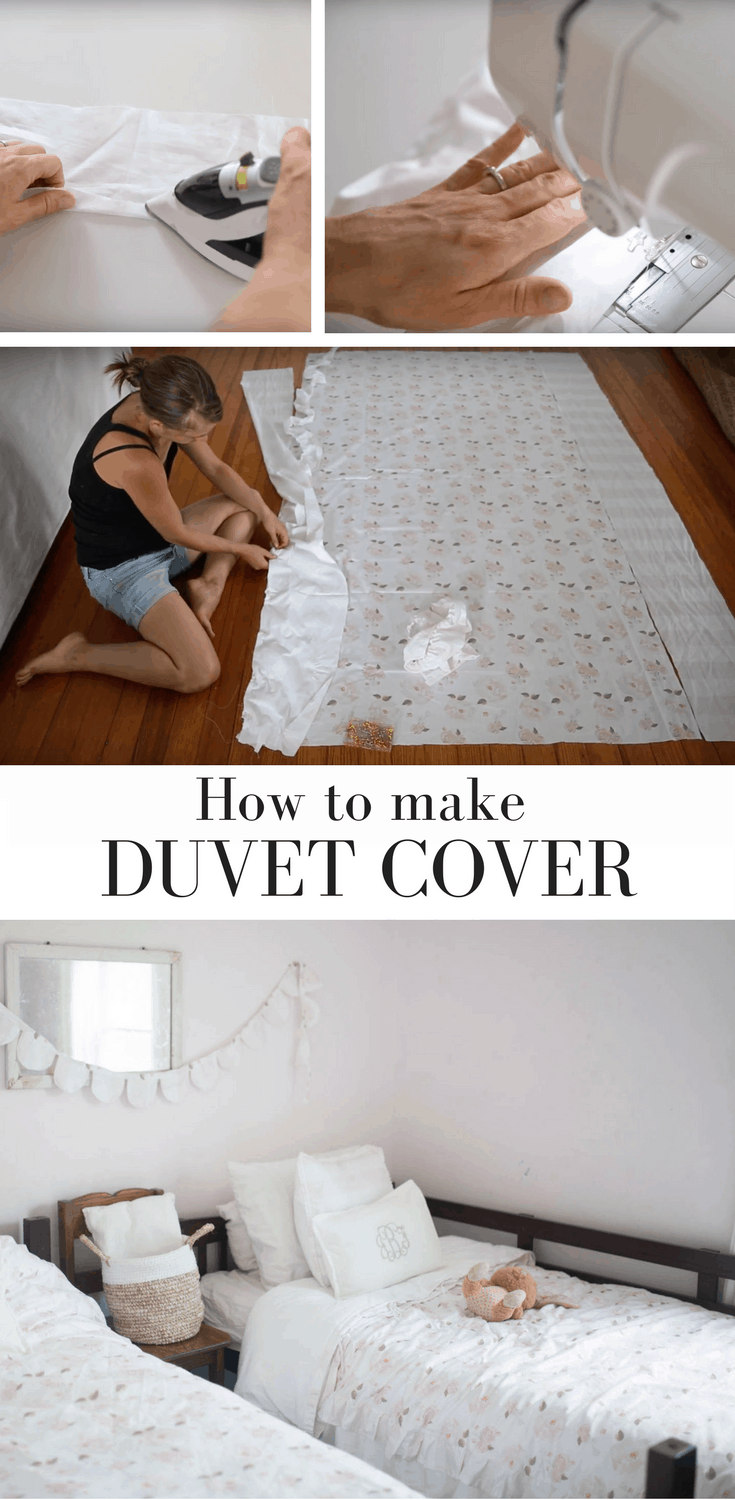
Enjoy your new duvet!
How to Make a Duvet Cover
Video
Equipment
Ingredients
Twin size duvet
- 2 1/2 yards each of two coordinating fabrics
- 1 queen size flat sheet
Instructions
CUT FABRIC:
- See Cut list in Notes
HOW TO MAKE RUFFLES
- The rule of thumb for cutting a ruffle piece is one and half times the length of the piece you will be attaching it to. So, for example, if you want to sew a ruffle onto a 10″ piece of fabric, you should cut your ruffle piece to 15″ in length. Since the main duvet piece is 89″ long, the ruffle piece is 1.5 times that, so 134″.
- Take your two 5″ by 134″ inch pieces and press the long end over 1/2″ and then another 1/2″, to hide the raw edges inside. On the opposite long side add a gathering stitch. I like to add the gathering stitch halfway down and then start a new one. This way you are less likely to break the gathering strings if you need to do a lot of pulling to make them the same length as the fabric your are pinning to.
- The easiest way to gather fabric is to turn the machine’s tension and stitch length all the way up. This will cause your fabric to gather all on its own when you put that gathering stitch in.If you have never made ruffles before, check out the tutorial on my youtube channel.
- Repeat this process for the other ruffle piece.After the ruffles are hemmed and gathered, lay everything out on the floor, the 48″ by 89″ main piece in the middle, and the two 10″ by 89″ pieces on the side, like such.
PINNING IN THE RUFFLES:
- Adjust the gather strings in the ruffle until they are approximated 89″, so you can pin them between the main piece and the side pieces. Lay the ruffle down on the main piece, right sides together.
- Next, lay the side piece on top of the ruffle, so that you have a ruffle sandwich, if you will. Make sure all the raw edges are facing the same way.
- Repeat with the ruffle on the other side and pin everything in place.
SEWING IN THE RUFFLES:
- Sew your ruffles in between the main piece and the side piece, going slowly and being careful to catch all three layers. After the ruffles are sewn in place, topstitch them to make the ruffles lay flat. This will just be a stitch that runs over the top of the ruffles, close to their original seam. The only purpose of it is to make the ruffles lay more flat.
PINNING THE FRONT TO THE BACK:
- Next, lay the queen size sheet out on the floor, making sure to eliminate all the wrinkle and creases. Fold the original top hem of the sheet under, toward the floor. When everything is all smooth, lay the completed duvet top, right sides together, on top of the sheet.
- Make sure the top of the duvet top and the top of the folded sheet are lined up. Refer to the video tutorial, if this doesn’t make sense. Trim the sheet around the sides and bottom, so that it is the same size as the duvet top. Pin the sheet to the duvet top, leaving the top opening, where the comforter will slide into, unpinned.
ADDING TIES IN THE CORNERS:
- This step is optional.For my duvets, I wanted to add little ties in all four corners, inside the duvet, to keep the comforter insert in place. To do this, I took a whole package of double fold bias tape. I sewed down the open side of the bias tape, to close it up. Then I cut it in eight parts (two ties for each of the four corners). I pinned two ties in each corner at this point in the project. For the top part, I put the ties in under the fold, in the two top corners.See the video tutorial for clearer instructions.
SEWING THE FRONT TO THE BACK:
- After the sheet and duvet top are pinned in place (and the ties in each corner, if you are adding them), sew the sides and bottom together. Make sure to not sew the top shut, since that is where you will be putting in the comforter insert.
- Turn everything right side out.If all has gone well, the top fold (that will be used to hide the insert under) and the ties (if you added them) should all be inside the duvet.
SEWING THE TIE ENCLOSURES AT THE TOP:
- Next, we are going to make the ties for the top of the duvet cover. I thought these would be a really cute to enclose the comforter insert, and add a pretty detail. Take your ten 1.5″ by 12″ pieces from the coordinating fabric, and lay them flat on your ironing board, right side down. Just like bias tape, press both long sides inward, like I have done below: Fold the tie in half, so that the raw edges are hidden inside, like in the photo above .Fold one of the ends inward, to hide the raw edge inside and sew it shut. Next, sew down the long side to close it. Repeat repeat repeat…until you have all ten pressed and sewn.
FINISHING THE TOP:
- Since the top of the duvet is still unfinished, you are going to make a casing to hide the raw edges inside. The casing will also be used to sew in the ties for the top closure. Take your 4″ by 130″ piece and press it inward, and in half, like you did with the ties.
- Sandwich the raw edge of the top of the duvet cover inside the casing and pin all the way around. When you get back around to where you started from, fold the end under and overlap your starting point.
PINNING IN THE TIES:
- Find the halfway point of your finished duvet and add the first two ties there, on either side. Divide the two halves in thirds and place your ties in those points also. You should end up with five sets of ties placed evenly across the top of the duvet cover. Mine were 10.5″ apart all the way across, starting the first sets at 10.5″ in from both sides of the duvet.
- Sew all the way around the casing, making sure to catch all layers, and your ties. Cut all the strings, and add in your comforter insert. I purchased mine from IKEA. Give the little girl in your life her duvet, so she can snuggle under the comfy ruffly goodness of it.
Notes
- One piece- 46″ by 89″
- Two pieces – 10″ by 89″
- Two pieces- 5″ by 134″
- One Piece- 4″ by 130″ to make casing around the top
- Ten pieces 1.5″ by 12″ for the tie closures at the top
Nutrition information is automatically calculated, so should only be used as an approximation.


Great tutorial. I so enjoy your YouTube channel. Our bed is a king size, thinking of using a drop cloth, following you softening video, to make a duvet. What is you opinion. thank you
Great tutorial!! Looks so pretty!
You always have the best tutorials! This duvet cover is another hit!
Love your accent pillows as well. Did you monogram them yourself? If so, I would love your opinion on machines available and a tutorial. Thanks!
Yes I sure did! I have a 5 by 8 Brother embroidery machine. I don’t have any tutorials on it at the moment, but maybe in the future I will. 🙂
I love this project, but was confused about amount of fabric, etc. for a queen size. Could you tell me the amount of fabric and cuts for queen, because I would love to try this.
Thank you.
This is so pretty, and what a great idea! Love the fabric. Thanks for sharing the tutorial.
Thank you so much Jennifer!!
This looks so great! I love the pretty flowers against the striped ruffles; so cute and girly 🙂
Best,
Kelly
Thank you so much Kelly for stopping by and commenting on my new project! I really appreciate it!
Very pretty. And you covered the popcorn ceiling with planks! It looks great.
Thank you so much Isabella! Tutorial for the plank popcorn ceiling coming next week!