


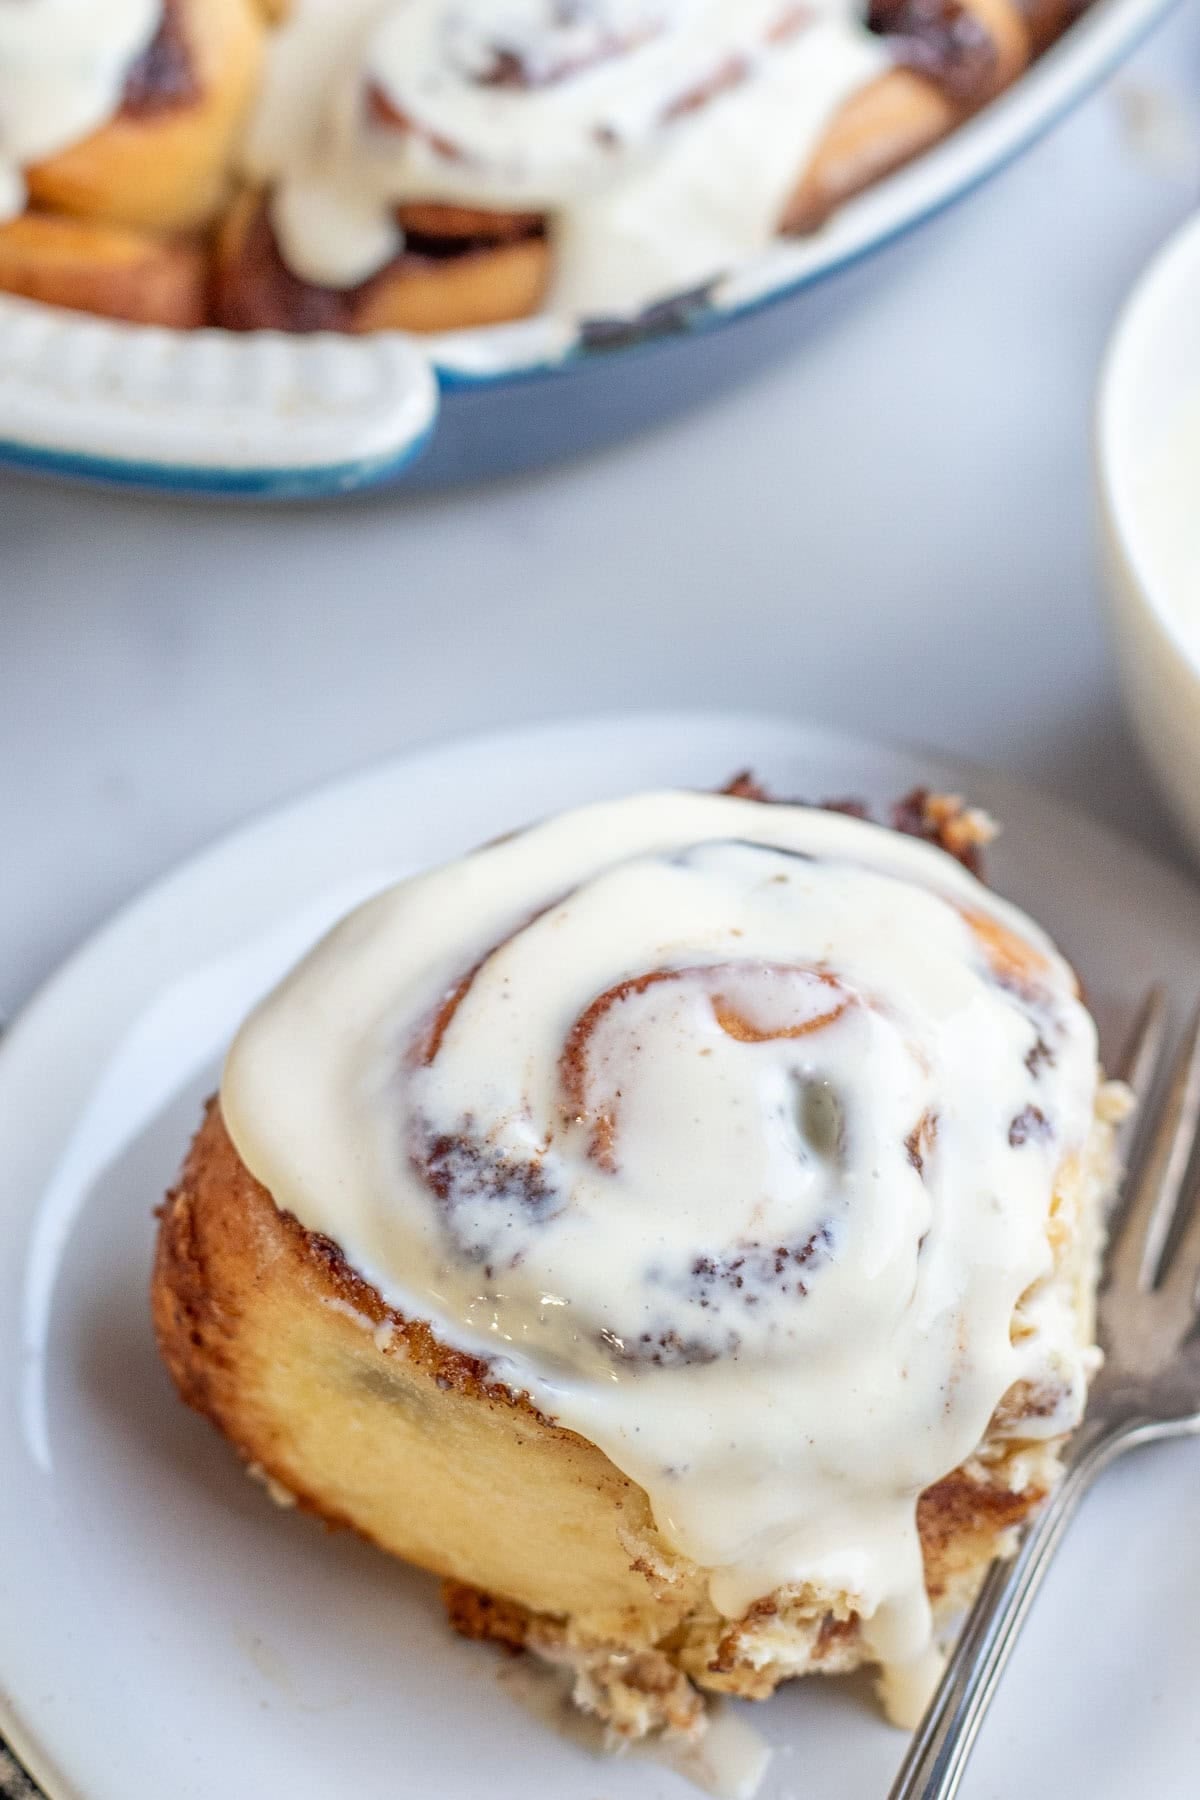
With rich cream cheese icing and a cinnamon-sugar filling, these fluffy sourdough cinnamon rolls deliver tangy flavor, a tender texture, and warm, gooey sweetness.
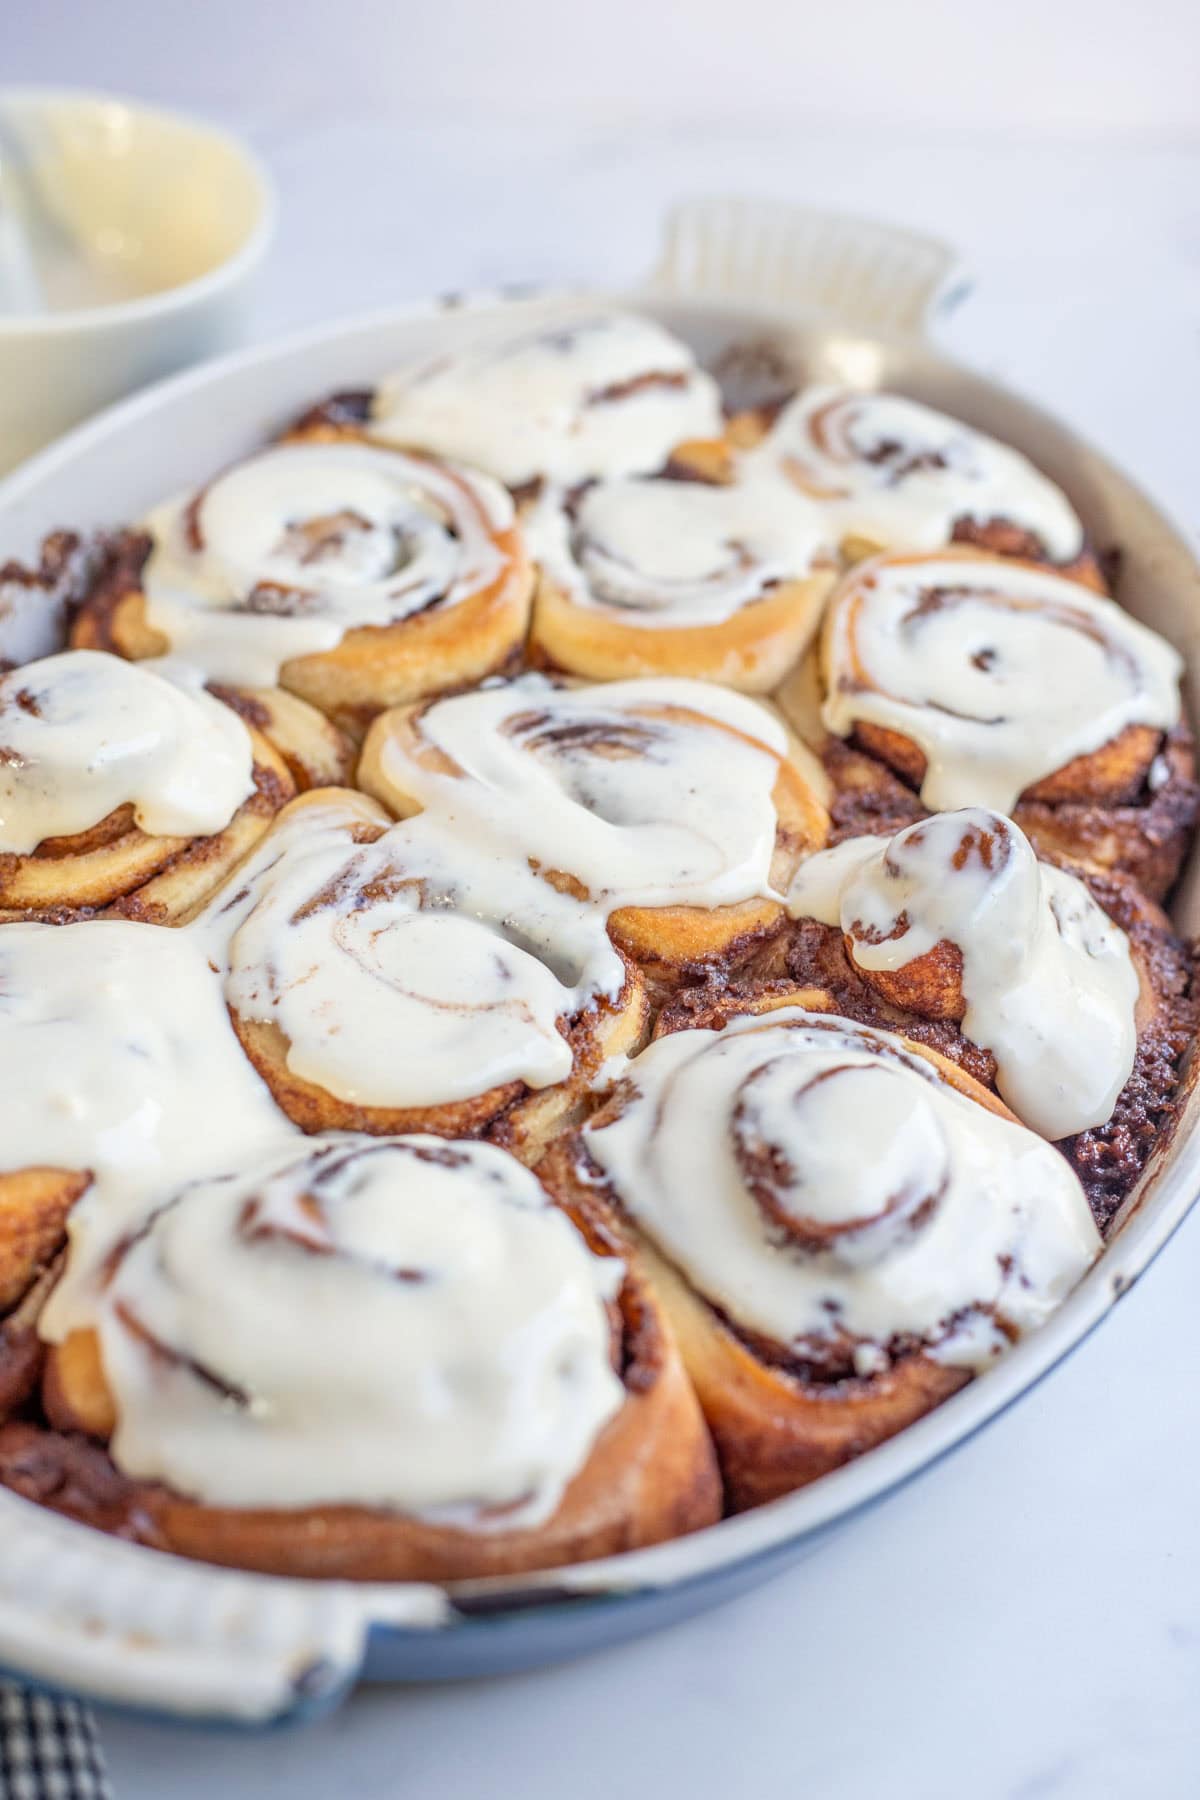
These sourdough cinnamon rolls start with healthy, fermented grains for increased digestibility, incredible texture, and extra flavor. Lightly sweetened sourdough wraps up ribbons of cinnamon sugar filling, adding the warmly spiced flavors to each bite. Baked until golden, each roll is topped with cream cheese icing, which is technically optional but highly encouraged. We enjoy this silky frosting over other sourdough recipes, like sourdough coffee cake, sourdough bread pudding, or sourdough lemon pound cake.
By mixing and fermenting most of the ingredients overnight, this recipe comes together quickly the following morning with basic pantry staples.
These easy sourdough cinnamon rolls serve well for a slow Saturday breakfast or a busy Christmas morning. Make these ahead of time, if needed! Ferment and assemble, then pop them in the refrigerator (up to 12 hours) or freezer (they’ll last months this way) to bake when you need them. Simply thaw, rise, and bake for perfectly fresh rolls!
If you are new to sourdough but enjoy the health benefits and tangy taste, make sure to check out all my sourdough recipes, including how to make your own starter.
Why You’ll Love This Recipe
Tender and sweet – These sourdough cinnamon rolls are soft and fluffy, with layers of brown sugar and cinnamon butter generously spread between the dough.
Long-fermented goodness – The overnight fermentation makes these rolls more digestible and nutritious, not to mention tender and tangy.
Perfect for special occasions – Warm, gooey cinnamon rolls with a decadent cinnamon roll icing elevate any occasion! Plus, they can be started the day before, then baked the day of.
Ingredients
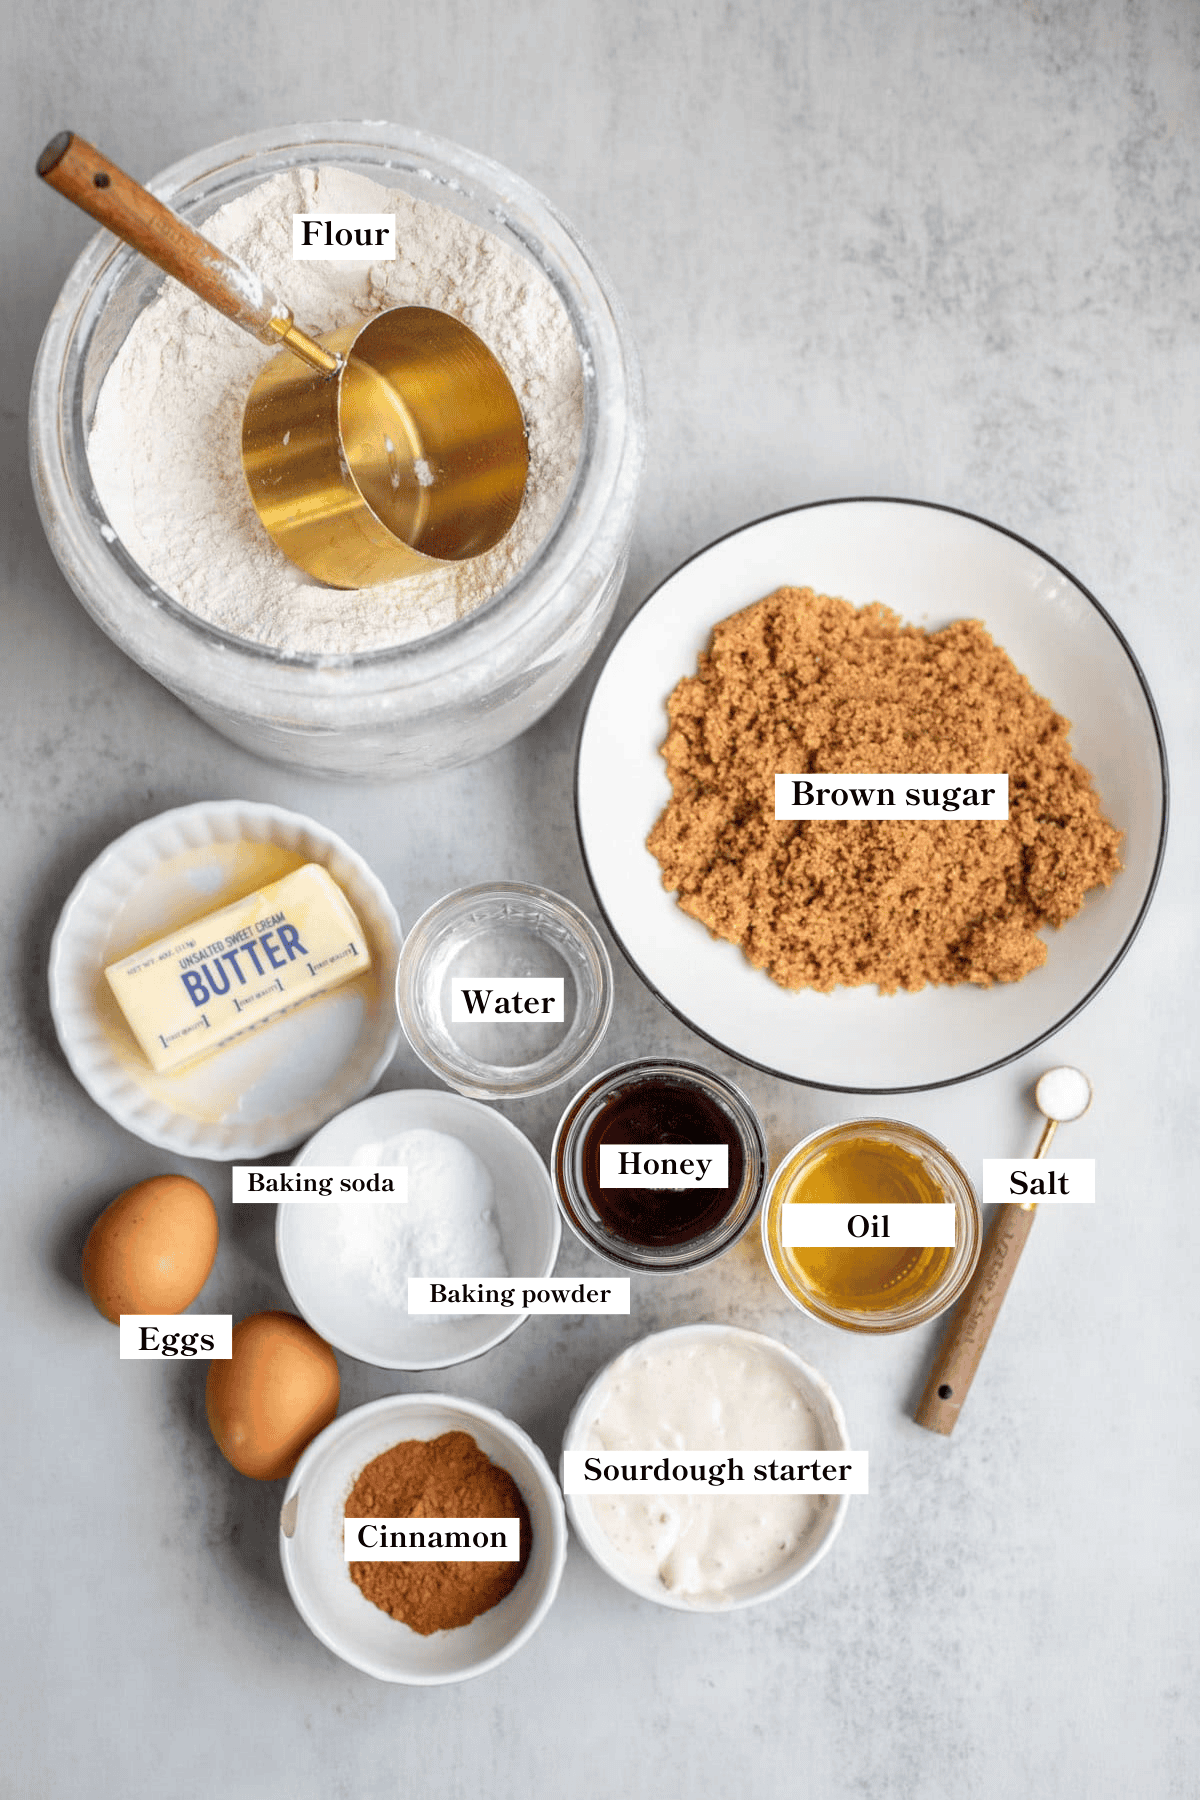
Active sourdough starter – This is a sourdough starter that has been fed 4-12 hours before starting the recipe and is nice and bubbly.
All-purpose flour – I use freshly-milled hard wheat or unbleached all-purpose flour. If you’re interested in working with whole grains, I have lots of information on the blog on milling your own flour at home.
Butter – Use very soft butter for the filling. If it’s too firm, it won’t spread well; if it’s melted, it will seep into the dough.
Oil – Use a neutral oil like avocado oil or melted coconut oil.
A full ingredient list with exact amounts can be found in the recipe card below.
Tools You May Need
Stand mixer with dough hook attachment
How to Make Sourdough Cinnamon Rolls
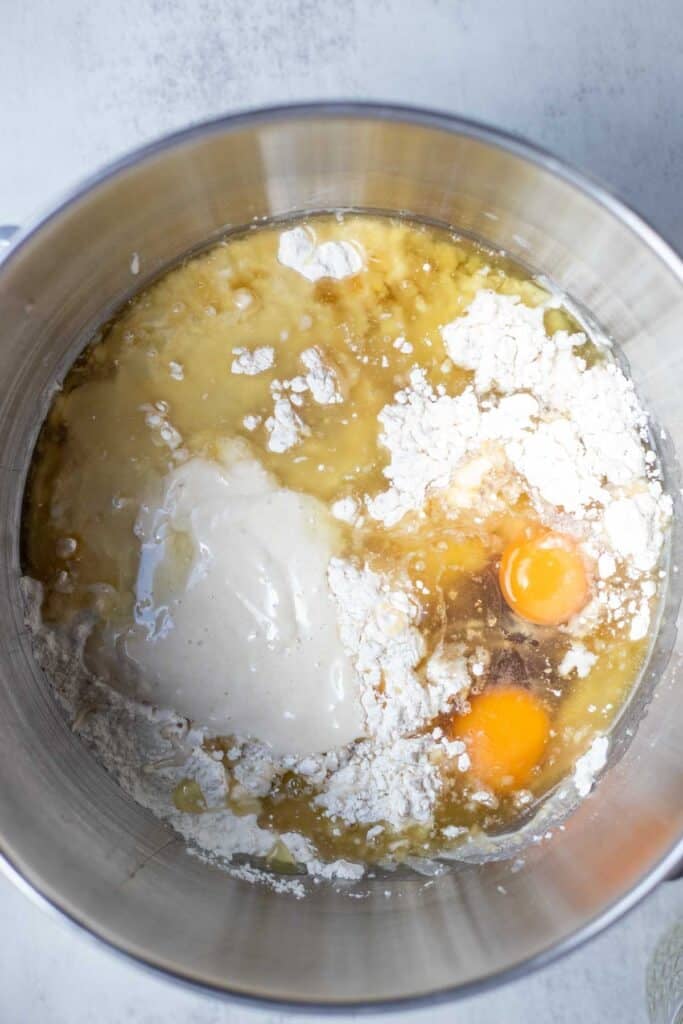
Step 1: Add active sourdough starter, water, flour, oil, honey, and eggs into the bowl of a stand mixer with a dough hook attachment. Mix until the dough forms a ball, then knead for a few minutes on medium speed until smooth and glossy. A pinch of the dough should pass the windowpane test.
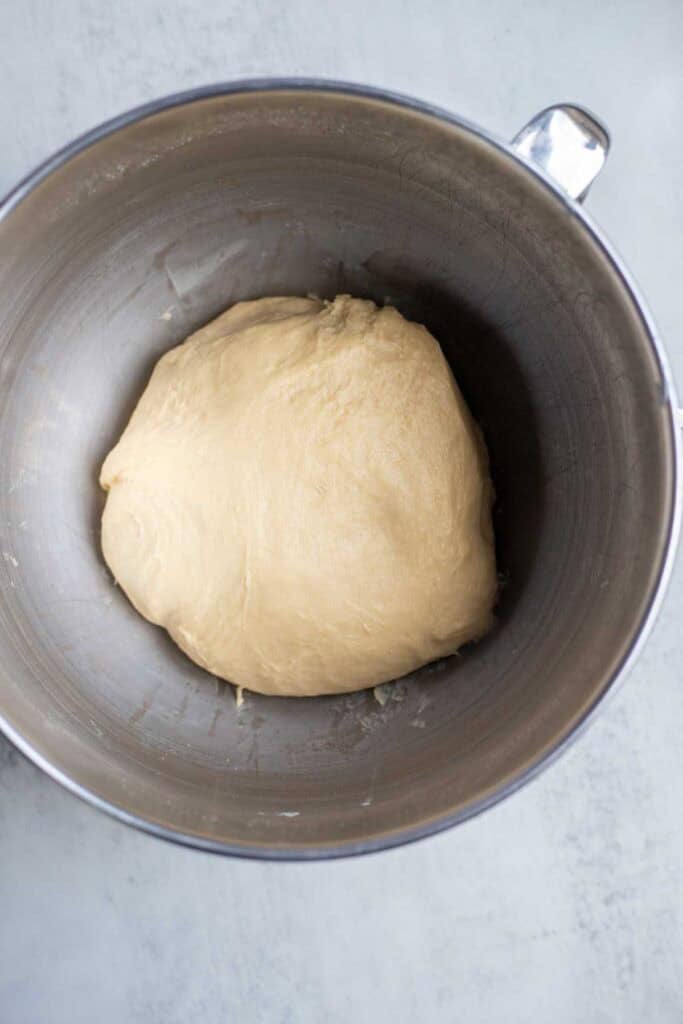
Step 2: Place the dough into a lightly oiled bowl and cover tightly. Ferment in a warm place for 8-12 hours or overnight. Note: I ferment dough with raw eggs for my sourdough brioche all the time without an issue. If this makes you uncomfortable, you can ferment the dough for four hours at room temperature and then refrigerate it overnight.
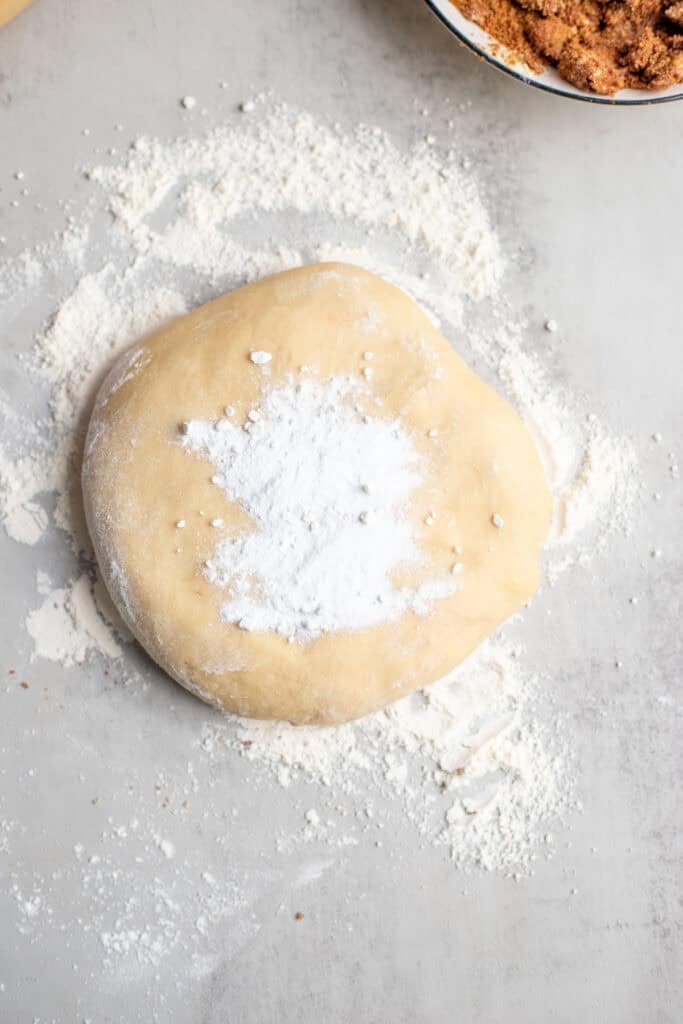
Step 3: The next day, preheat the oven to 375 degrees Fahrenheit. Add baking soda, baking powder, and salt to the dough. Knead in the stand mixer or on a floured work surface for approximately five minutes until all the ingredients are well incorporated.
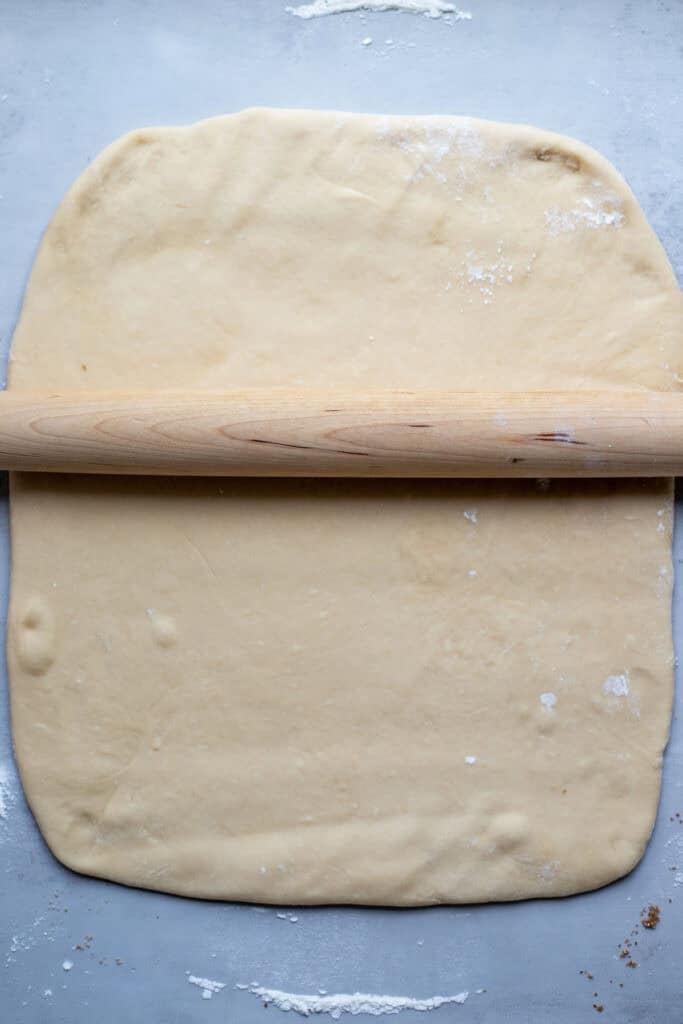
Step 4: Place the dough on a lightly floured work surface and use a rolling pin to roll it into a roughly 12×15-inch rectangle. It should be about 1/4-inch thick. You want the dough to be rolled evenly so that it bakes evenly.
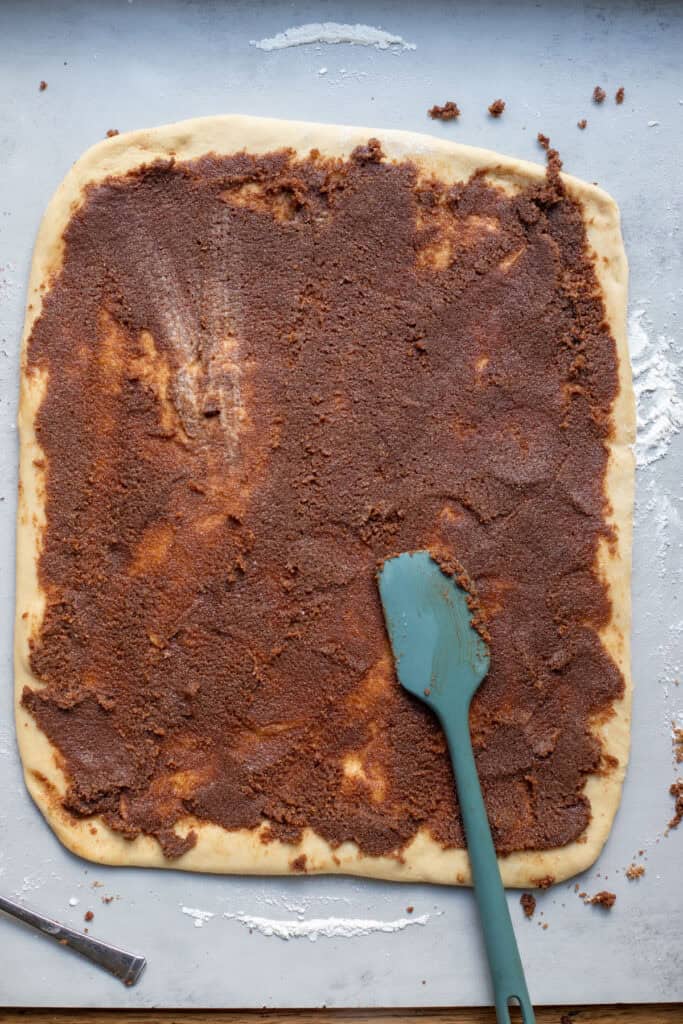
Step 5: In a separate bowl, combine softened butter, brown sugar, and cinnamon. Stir until smooth. Spread the softened butter mixture evenly over the dough.
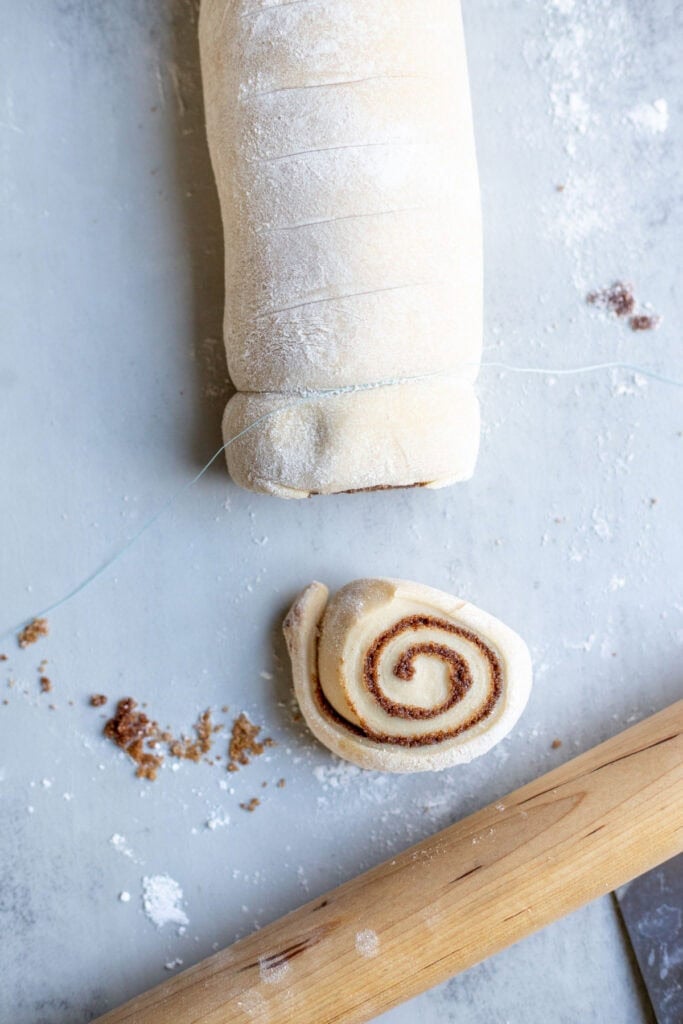
Step 6: Roll the dough up as tightly as you can, starting at the long end. When you get to the end, pinch the edge into the main roll to prevent leaking. Slice the rolls with a sharp knife, bench scraper, or thread. Alternatively, you can slice the rectangle of dough into 12 equal strips, then roll them up individually.

Step 7: Place the unbaked rolls into a greased 9×13 baking dish. Bake for 20-25 minutes or until the rolls are lightly browned and the dough is cooked through. Allow them to cool a bit before applying the icing.

Step 8: While the rolls bake, prepare the cream cheese icing. In a small saucepan over medium-low heat, add 6 ounces of cream cheese, 1/2 cup of heavy cream, 1/2 cup of maple syrup or honey, and 2 teaspoons of vanilla extract. Stir well. I use an immersion blender to get the icing really smooth. Pour over the warm cinnamon rolls and enjoy!
Tips
- Start the night (or up to 24 hours ahead) before you want to bake these sourdough cinnamon rolls, so the dough has a chance to ferment and build more flavor.
- The temperature of your kitchen will affect the fermentation. Find a warm place, such as inside the oven with the light on (heat off), on top of your fridge, or near some mild heat source.
- If you’re avoiding unfermented grains, use einkorn flour to dust the surface of the counter when rolling out the dough.
- I find that string or unflavored dental floss works best for slicing the cinnamon roll dough. A sharp knife also works, but is more likely to smush the rolls and lose some of the shape.
- Grease your baking dish generously or use parchment paper for no sticking.
- Keep the rolls spaced a bit apart so they have room to expand.
- This recipe has been edited to reflect changes made over the years of making this recipe. Some people had issues incorporating the eggs on the second day, so I changed this and started mixing them into the dough the night before. This works very well.
Recipe FAQs
Unfrosted cinnamon rolls can be covered and kept at room temperature for 2-3 days or frozen for several months. Store frosted cinnamon rolls in the refrigerator for up to four days. Let frozen rolls thaw and rise before baking.
Yes. Prepare the dough according to the directions. Form the rolls and place in a baking dish, wrap with plastic wrap, and place in the fridge for up to 12 hours or in the freezer for several months. You don’t want to leave the rolls in the fridge too long, or they may overproof. Allow to rest on the counter for two hours before baking if refrigerated, and overnight if baking them from frozen. Bake according to directions.
If you want to skip the long fermentation process, just use sourdough discard that has been fed recently in place of the active starter. Add all the dough ingredients and knead the dough until it becomes smooth, glossy, and passes the windowpane test. Follow the recipe from Step 4 on.
Yes. If allowed to rise too long, they will overproof and won’t hold their shape.
When making cinnamon rolls, avoid adding too much flour, overproofing the dough, using melted butter for the filling, overfilling the dough, and overbaking the rolls.
Baker’s Timeline:
You can make these or start them at any time. I like to start doughs at night time so they can rise all night. In the morning, they are ready to shape, boil, and bake.
Feed sourdough starter with flour and water.
Add all the ingredients to a stand mixer (minus the baking soda, baking powder, and salt) and knead until smooth and glossy. Cover tightly and ferment overnight.
Add baking soda, baking powder, and salt. Knead well until the dough is no longer sticky. Roll out the dough, prepare the filling, and spread. Form rolls, then bake for 20-25 minutes. Prepare and apply icing.
More Sourdough Recipes from the Farmhouse
- Long Fermented Biscuits
- Sourdough Peach Cobbler Recipe
- How To Make Sourdough Waffles
- Sourdough Chocolate Rolls
- Cinnamon Raisin Sourdough Bread
If you try this recipe and love it, I would love it if you could come back and give it 5 stars! Tag me on Instagram @farmhouseonboone.
Sourdough Cinnamon Rolls

Equipment
Ingredients
- 1/2 cup sourdough starter, bubbly and active 113 grams
- 1/2 cup water, 118 grams
- 4 cups all-purpose flour, 560 grams
- 1/2 cup neutral oil, 113 grams
- 1/2 cup honey, 168 grams
- 2 eggs
- 1 teaspoon baking soda
- 1 teaspoon baking powder
- 1/2 teaspoon salt
Cinnamon Sugar Filling
- 1/2 cup softened butter, 114 grams
- 1 cup brown sugar, 200 grams
- 2 tablespoons cinnamon, 16 grams
Cream Cheese Topping:
- 6 ounces cream cheese
- 1/2 cup heavy cream, 120 grams
- 1/2 cup maple syrup or honey, 168 grams
- 2 teaspoons vanilla extract, 10 grams
Instructions
- Add active sourdough starter, water, flour, oil, honey, and eggs into the bowl of a stand mixer with a dough hook attachment. Mix until the dough forms a ball, then knead for a few minutes on medium-low speed until smooth and glossy.
- Place the dough into a lightly oiled bowl and cover tightly. Ferment in a warm place for 8-12 hours or overnight.
- The next day, preheat the oven to 375 degrees Fahrenheit. Add baking soda, baking powder, and salt to the dough. Knead in the stand mixer or on a floured work surface for approximately five minutes until all the ingredients are well incorporated.
- Place the dough on a lightly floured work surface and roll it into a roughly 12×15-inch rectangle. It should be about 1/4-inch thick.
- In a separate bowl, combine softened butter, brown sugar, and cinnamon. Stir until smooth. Spread the softened butter mixture evenly over the dough.
- Roll the dough up as tightly as you can. When you get to the end, pinch the edge into the main roll to prevent leaking. Slice the rolls with a sharp knife, bench scraper, or thread. Alternatively, you can slice the dough into 12 equal strips, then roll them up individually.
- Place the unbaked rolls into a greased 9×13 baking dish. Bake for 20-25 minutes or until the rolls are lightly browned and the dough is cooked through. Allow them to cool a bit before frosting.
- While the rolls bake, prepare the cream cheese icing. In a small saucepan over medium-low heat, add cream cheese, heavy cream, maple syrup or honey, and vanilla extract. Stir well. Pour over the cinnamon rolls and enjoy!
Notes
- The temperature of your kitchen will affect the fermentation. Colder is slower; warmer speeds things up. Find a warm place, such as inside the oven with the light on (heat off), on top of your fridge, or near some mild heat source.
- If you’re avoiding unfermented grains, use einkorn flour to dust the surface of the counter when rolling out the dough.
- I find that string or unflavored dental floss works best for slicing the cinnamon roll dough. A sharp knife also works, but is more likely to smush the rolls and lose some of the shape.
- Grease your baking dish generously or use parchment paper for no sticking.
- Keep the rolls spaced a bit apart so they have room to expand.
- This recipe has been edited to reflect changes made over the years of making this recipe. Some people had issues incorporating the eggs on the second day, so I changed this and started mixing them into the dough the night before. This works very well.
Nutrition
Nutrition information is automatically calculated, so should only be used as an approximation.


Hello! just saw the video on how to make these and I am so excited! I am brand new to sourdough and the tip about a fed sourdough at the bottom of the recipe card is a great nugget! I now understand what a fed sourdough means. I will be making these tomorrow!
Hey there! This is my families favorite cinnamon roll recipe and i usually use my starter. At the moment, I’m away from home and didn’t bring my starter but I want to make these for my mom while I’m here. Do you think that I can make them with a regular yeast/flour/water mix? If so, what are your recommendations? Thank you!!
I haven’t tried to do this, but you may be able to use my blog on converting yeast breads to sourdough to help you experiment with this! https://www.farmhouseonboone.com/how-to-covert-any-recipe-to-sourdough Hope that helps!
If I don’t have a cast iron skillet what can I use instead?
A large baking dish will work just fine.
A friend of mine told me that when she tried to make these it turned into an “eggy mess” and they never turned out. I’m now seeing what she meant.. just added the eggs, baking powder, baking soda & salt to the dough and there is no way it all incorporates? Not making sense.
It works for me every time. I’m not sure I understand what part isn’t working. Are you meaning it is too liquidy? What type of flour are you using?If you can’t incorporate with your hands, did you try a mixer? I neesd to make a video for this recipe! 🙂
I’m having the same issue. Also, the recipe says 4 cups of flour, but the video says only 2 🤔
Sorry, I made a mistake in the video. 4 cups is correct.
My dough is so stiff it doesn’t rise at all… I was hoping the mistake is that it should be less flour. My dough is dense where yours is a little wet and soft. I tried to make them a 2nd time and it is the same thing. I’m using einkorn flour which is already a wet flour but the dough has not turned out for me either time. I’m not sure what I’m doing wrong. I watched the video and I’m doing the same thing but my dough is too dense and doesn’t rise. It almost looks like a sugar cookie dough. That is how dense it is. So then I have to cook them for a lot longer because they don’t cook through and are extremely doughy.
For almost all of Lisa’s recipes I have to use less flour. About 1/2-1 cup less. I live in Southern California where the environment is a *little* different from Lisa’s.
I ended up using the 4 c. Of flour but realized the dough was to stiff. I think water to flour changes depending on your environment/ altitude. I added a bit more water and it was good to go. I’ve had to do the sand with many bread recipes I’ve made in the past.
Hi Lisa! What I do it I add eggs and then let it run in the mixer for a minute. Then I fold in the egg with my hand a little and allow the mixer to finish the job, so much faster and easier I have found!!
actually there is a discrepancy in the written instructions and the recipe card. I also had the same issue, i skipped straight to the recipe and in that it didn’t say to add eggs in the initial stage before fermenting, it says to add them the next day when adding the soda bicard, baking powder & salt! so i went back and read through your recipe again and saw in the written instructions you’d said to add when doing the first mix of all flour, starter etc.
so i am also wondering which method you use, as mine was also an eggy mess and i had to add a bit more flour so i didn’t waste it all. I’m about to bake them though, and i’m certain they will be delicious as all your recipes are☺️
I’m sorry. The post is currently being updated and the recipe card reflected the updates faster than the post. I have now started adding the eggs to the dough the night before, like my brioche dough. I found this worked a lot better since so many people had issues incorporating the egg the next day. Sorry for the confusion, hope this helps.
Hey there Angel and Lisa,
I had the same thought about the eggy mess scenario. I am just making them for the first time tonight. After the massaging of the egg mixture into the dough and then the hour (plus) rest the dough looked just like Lisa’s in her youtube video so I was super relieved. Then after flouring the surface for rollout pretty well they turned out great so far. Just about to bake for a breakfast for dinner kinda Sunday night. I hope you tried them again.
Best,
Melissa
I was super worried about mine when I first put in the eggs! I used my hands for a bit but eventually used my mixer, and it did gradually mix in the eggs! Turned out great!
These cinnamon rolls are DELICIOUS!!
Especially with the maple cream cheese frosting!!
Yes the dough looks eggy when you add the eggs and allow it to rise!!
But it’s okay trust the process.
The only thing that was hard for me was getting them to cook all the way.
Maybe I cut them to thick.
But they inside was still dough.
Even though I added an additional 10 min.
Maybe next time I will just use a baking sheet.
I’m sure they would be just as delicious.
Mine does the same but it just takes a while for the cold eggs to incorporate into the dough…it doesn’t seem right at first but just let it keep mixing and flip the dough in the mixer every few minutes:)
Mine was an eggy mess at the end of five minutes in the mixer, but then I just let it go for another five minutes or so and it came together perfectly.
Wonderful!
I had the same problem so I added like 3 tsp extra flour, but I also made sure to hand knead the dough like 4 times during the 24 hr proof. After adding the 3 tsp of extra flour, I kneaded in the mixer for another 10 mins and we were good
Just keep mixing with your dough hook! It took 7 minutes for mine to turn from eggy mess to gorgeous dough.
We always love cinnamon rolls in our house, but I’ve never thought of making it as sourdough! These were so delicious, and will become a new staple in our house.
This recipe is divine! The combination of the sourdough with the cinnamon and frosting is just right!
I made these for my son’s birthday and they were INCREDIBLE! My kids are begging me to make them again!
I had never made cinnamon rolls before but I knew that Lisa would have the simplest best tasting recipe to try. The cinnamon rolls tasted wonderful but next time I need to bake them longer than the 15 mins suggested. They were a touch doughy. It may just be that my oven runs cooler. I loved the combo or sweet and sour flavor. I will definitely be making these again!
Amazing cinnamon rolls, and a different take on the recipes I’ve used in the past. My family loved them!
I made them twice in the last three days. They are so delicious and turned out perfect! Everybody loved them.
I made these rolls a week ago and I love the flavor & texture. Just a couple things; the instructions say to divide into 12 rolls (which is fine) BUT all this dough will not fit properly in a standard cast iron skillet. Notice in the picture there are NOT a dozen rolls. With all that dough, and all the filling (almost too much IMO) and the cream, mine overflowed and made a sloppy mess in the oven. Definitely use a bigger skillet, or divide into another baking dish. Also, my dough was so nice and silky smooth, and the filling so runny, that it was a mess trying to keep the dough/roll together and cut it. Next time, I would use softened, not melted, butter.
With a few changes I think this could be a five star recipe. For now I’m only giving it a 4. 😉
I made these several times in my 14″ cast iron skillet. That particular day I took the photo I doubled the batch and put some in my 14″ and some in my 12″. I will note those changes in the recipe.
Lisa is these were awesome. I did all the mixing by hand. First stage came together pretty good. I added my egg, baking,powder and soda.
Took me 20 minu kk by in a circles around like a tumbler. Worked great. Can’t wait to eat them later.
Overall I was happy with the flavor and texture of the rolls. However, I had some issues since the recipe left out some things. I used a cast iron skillet and put all 12 rolls into that skillet. I got a really good rise out of the rolls, but with all the added filling & cream, it overflowed and made a huge mess in the oven, and on the skillet. I went back to the recipe, and see that Lisa says to put in 12 rolls, but in her picture there are NOT 12 rolls in the skillet. If you don’t want to have similar issues, maybe stick to 8 rolls for a skillet and then use a smaller baking dish, or cut down the recipe to make sure it fits. (or use a bigger skillet than standard size)
Another “issue” that I had was that my dough was super silky smooth (maybe I kneeded it longer than Lisa) and with the melted butter in the filling, it caused my dough/roll to be quite sloppy. It was hard to keep it together and I had to reform the rolls. I would use softened butter next time instead of melting it. I like the recipe, and will use it again, but I will definitely tweek a few things to make it work better for me! 🙂