


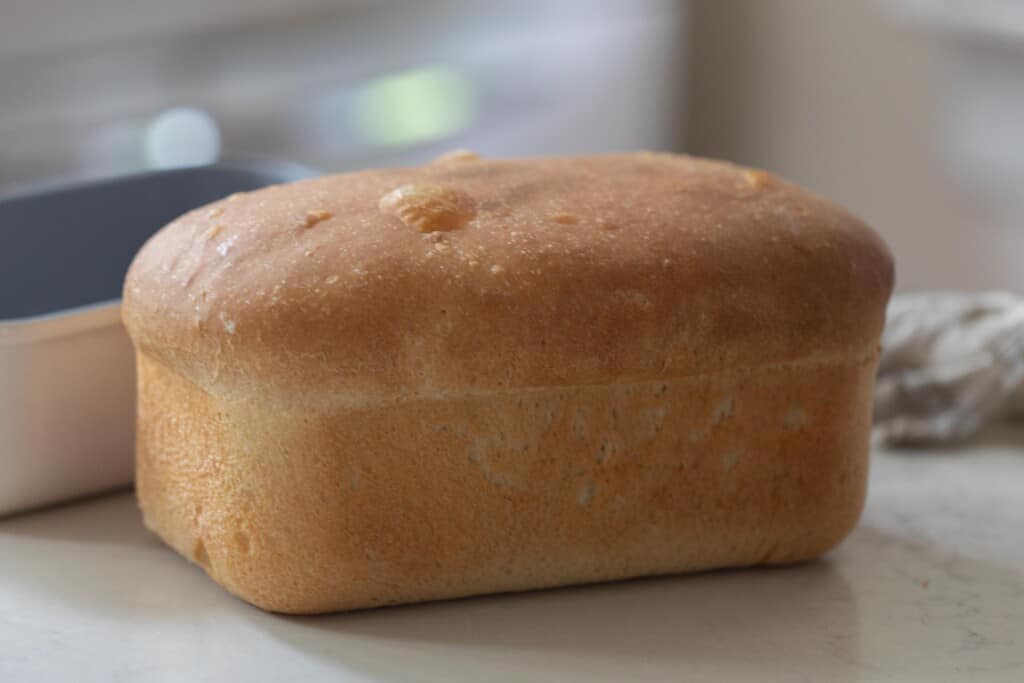
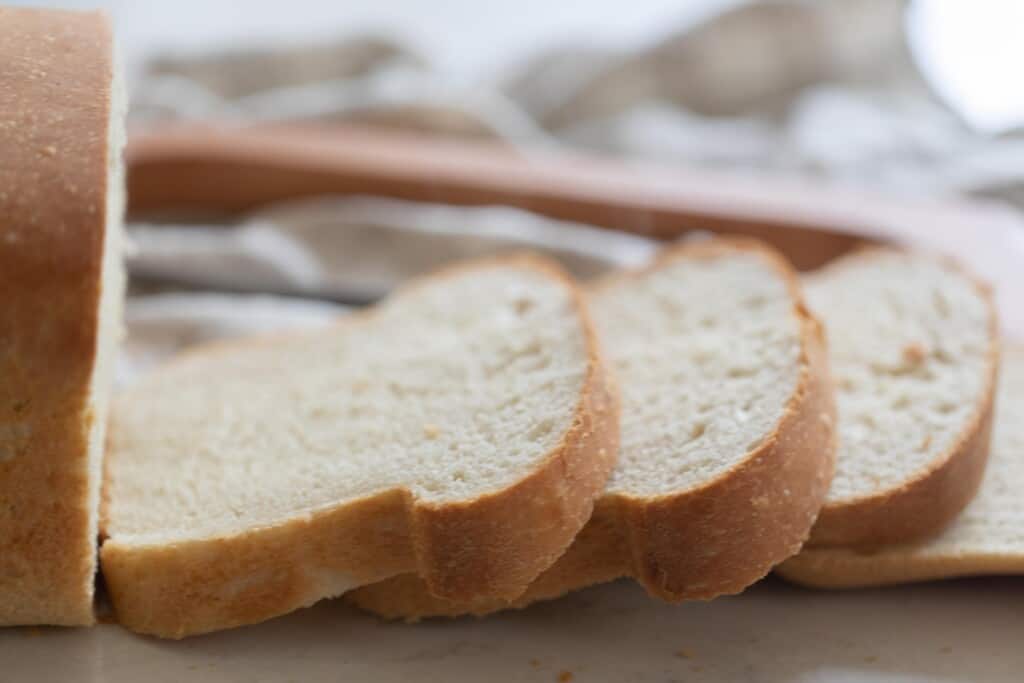
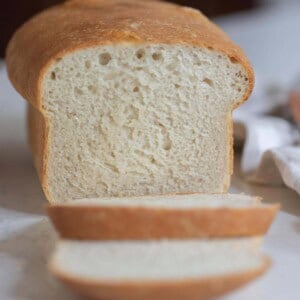
This sourdough discard sandwich bread recipe is perfect for sandwiches and has that classic subtle sourdough tang while only taking a few hours to whip up rather than a day. A soft crust with a fluffy interior, this is the best and easiest recipe.
Sometimes you just need a loaf of homemade bread within a few hours.
Say company is coming over, or you didn’t plan dinner or lunch very well and realize you need some bread for sandwiches. Or maybe you are just getting into sourdough bread making and your starter isn’t mature enough to make bread just yet…
Well this discard sourdough sandwich bread is perfect for that. It uses commercial yeast to give it rise rather than relying on the natural yeast from the sourdough starter. But the sourdough starter still gives it a slight tang.
Is that slightly cheating? Maybe, but sometimes we just need something a little quicker and easier. Plus, there is just no comparing homemade to store-bought bread.
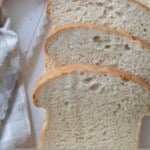
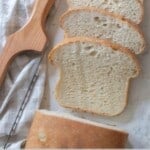
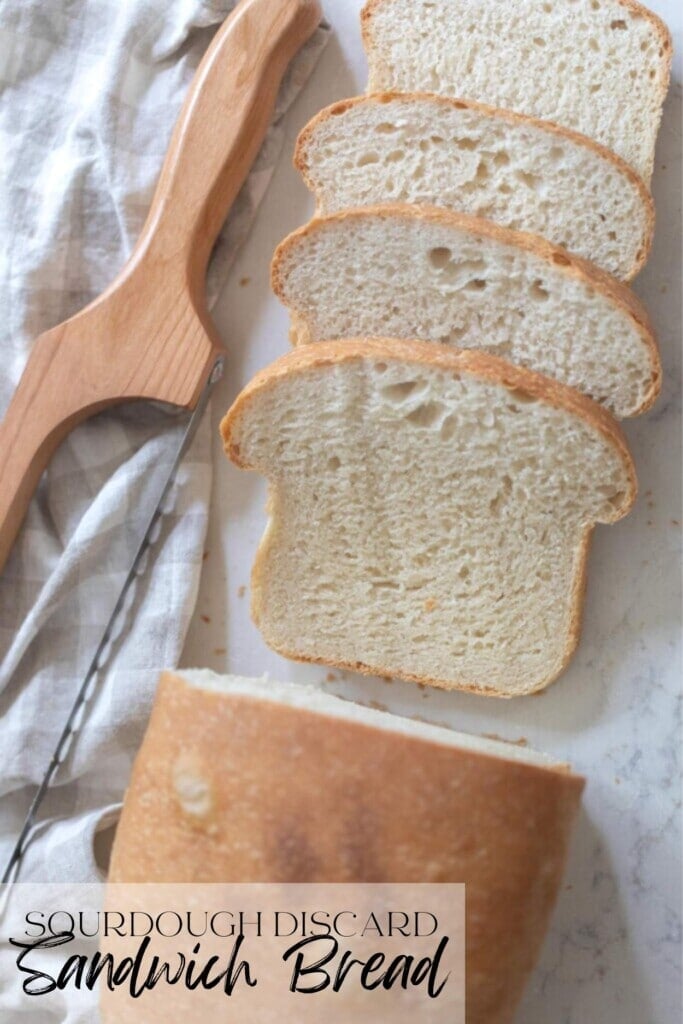
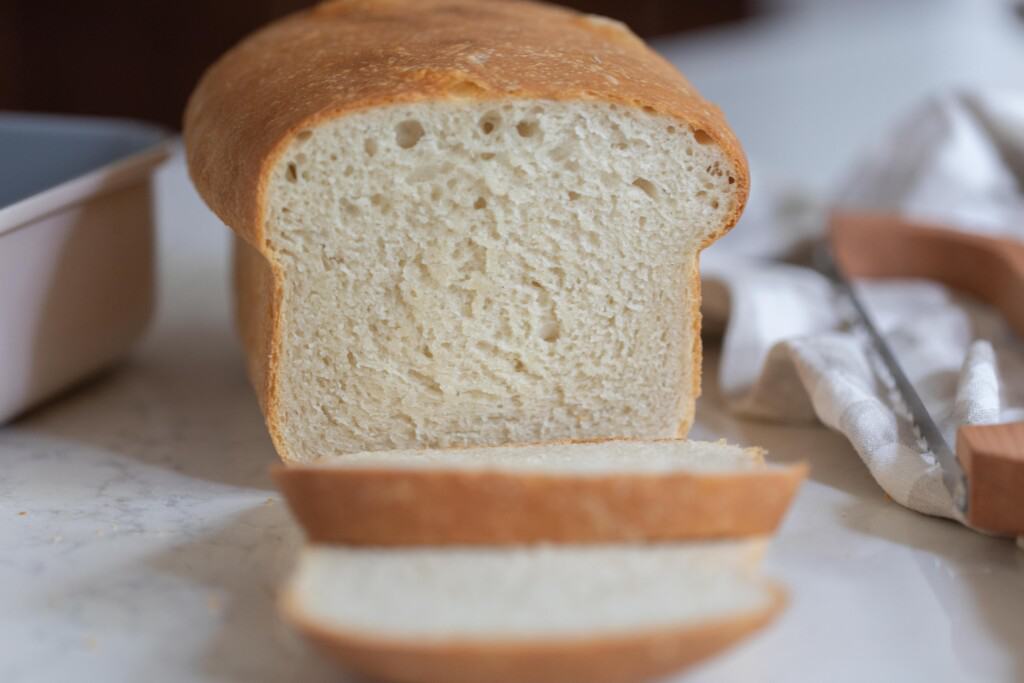
It is soft, buttery, and fluffy with a closed crumb. Perfect for sandwiches, french toast, toast, grilled cheese, bread pudding, and more.
Why you will love this recipe:
Easy recipe: This recipe takes very little hands-on time. After activating the yeasts, you just throw all the ingredients into a stand mixer and let it work its magic.
Quicker: Similar to my soft sourdough sandwich bread recipe, but much less time. Yeast breads just don’t take nearly as long as a sourdough loaf.
Great way to use sourdough starter discard: If you have a new starter and are discarding and feeding a lot, this is a great way to use up that extra discard.
Tips:
- Use really soft butter so it will combine with the rest of the dough ingredients really well and without chunks.
- Don’t let the dough over ferment. It will turn into a wet sloppy disaster that won’t rise well.
- When making the dough, using a stand mixer makes the process much easier and hands off. You can also do this with your hands.
- If you have a Professional KitchenAid stand mixer you can double this recipe. If you have a standard mixer, I would not recommend doubling.
- If you are new to sourdough, you can check out how to make a sourdough starter here.
This post contains affiliate links, which means I make a small commission at no extra cost to you. See my full disclosure here.
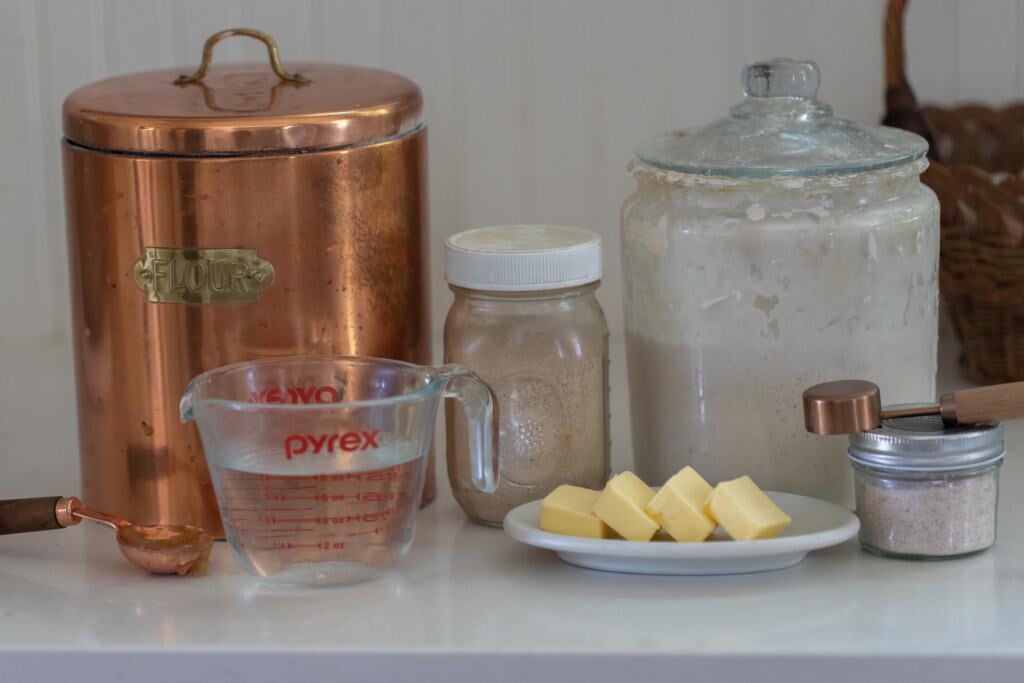
Ingredients:
Active dry yeast – The main ingredient to give this recipe rise, it doesn’t rely on the wild yeasts and bacteria in the starter to give it rise.
Butter – Softened
Honey – Could also substitute with sugar.
Salt – This gives the bread so much flavor and skipping it will leave you with a tasteless loaf.
Sourdough discard – This is a sourdough starter that hasn’t been fed in at least 12 hours. It is the portion you would typically just toss before feeding the starter. Active starter could also be used, but you will have a less tangy flavor. Find more sourdough discard recipes here.
Warm water – Room temperature. Make sure it is not too hot or you run the risk of killing the yeasts. It should be about 100 degrees F.
All-purpose flour – One of the best things about this recipe is it includes all-purpose flour, a pantry staple. If you have bread flour, that will also work.
Tools you may need:
Loaf pan
Large bowl with lid
Stand mixer with dough hook attachment
Rolling pin
Measuring cups and spoons or kitchen scale
Bench scraper: optional, but helpful.

How To Make Sourdough Discard Sandwich Bread
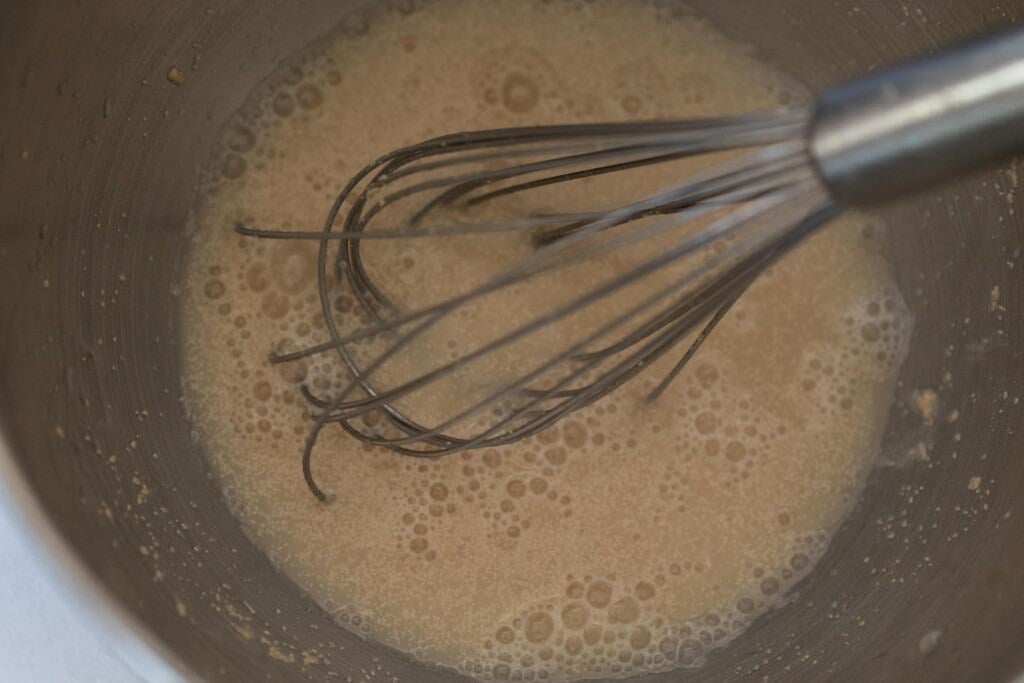
Whisk together warm water, sugar, and yeast. Allow it to sit at room temperature for about 5 minutes. The mixture should get nice and bubbly. Make sure the water isn’t too hot or it will kill the yeast.
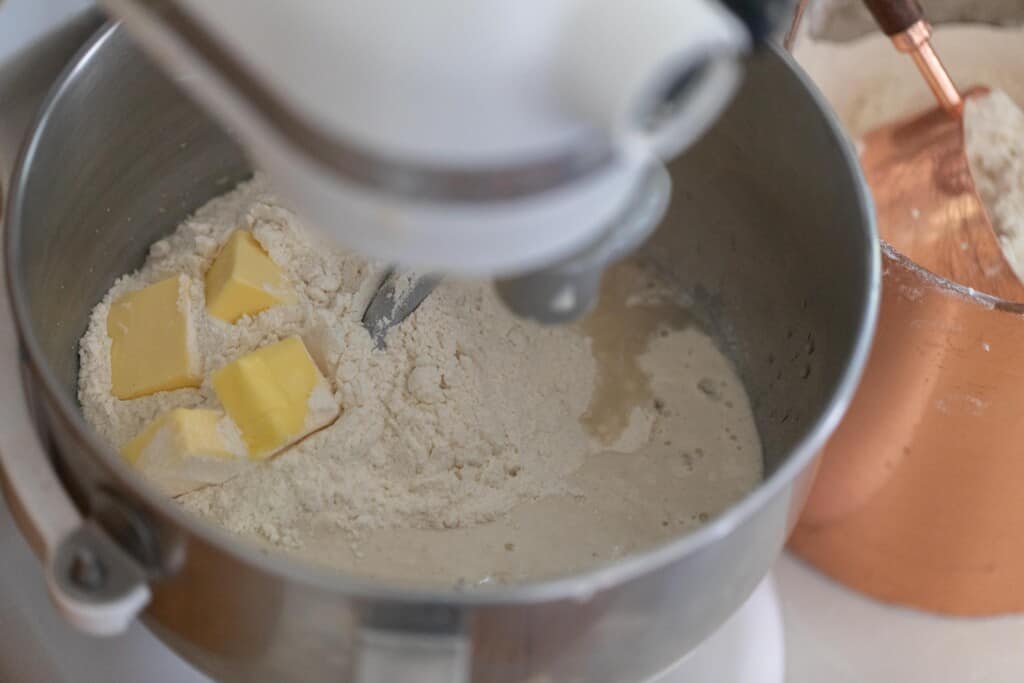
To a bowl of a stand mixer with dough hook attachment, add all of the ingredients.
Knead on low speed until the dough is smooth and elastic – about 10 minutes or so. It may take longer. You can also do this by hand. It shouldn’t stick to the sides of the bowl.
To check to make sure the gluten has developed enough so the bread is nice and fluffy, it should pass the windowpane test. Grab a small ball of the dough and stretch it into a square. It should stretch thin enough to see through without breaking. If it breaks, it needs to be kneaded a little longer.
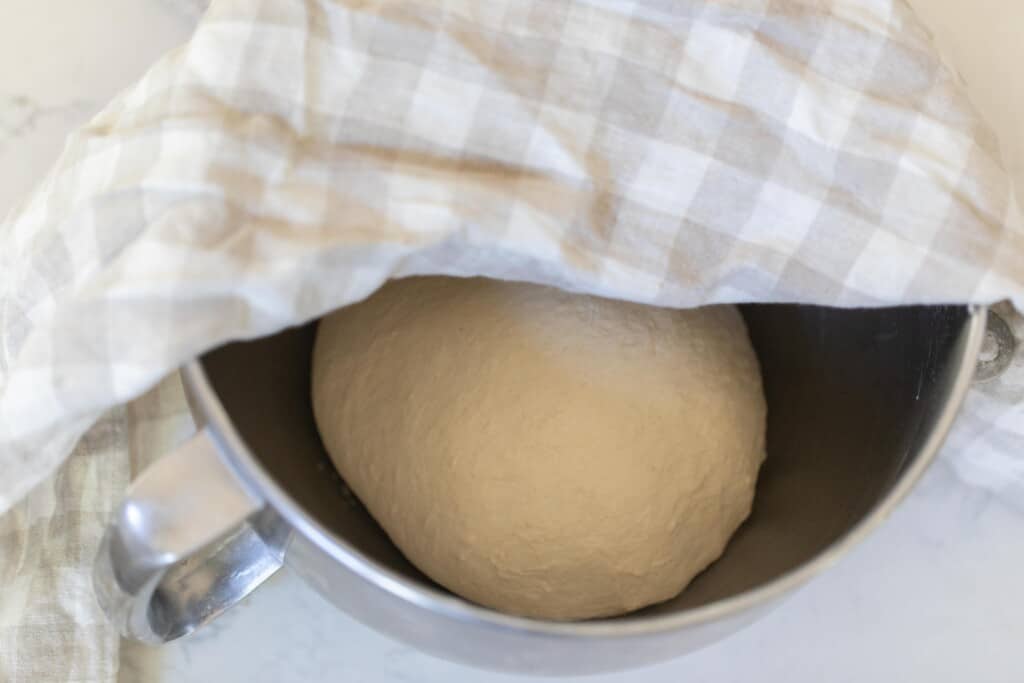
First Rise

Place the dough in a greased bowl with a lid, towel, or plastic wrap.
Let the dough rise (also known as bulk rise) for about 1-2 hours (or until it about doubles in size) in a warm place like on top of a stove or on top of the refrigerator.
Shape And Rise
Grease a bread pan or add parchment paper.
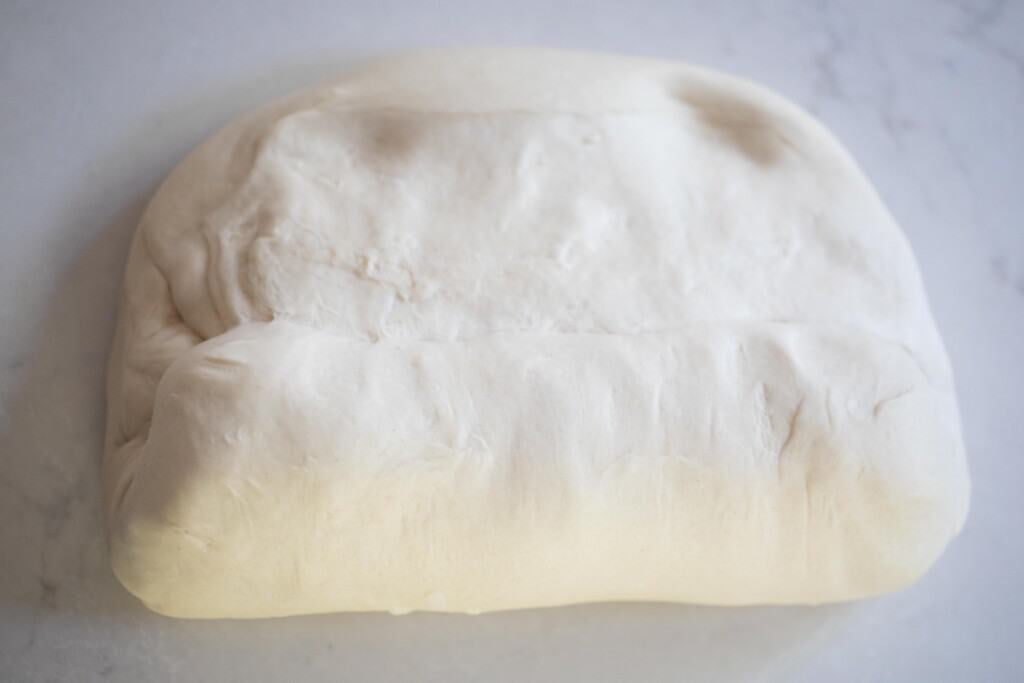
Roll the dough flat into a rectangle and roll it up. Pinch the ends to the rest of the loaf.
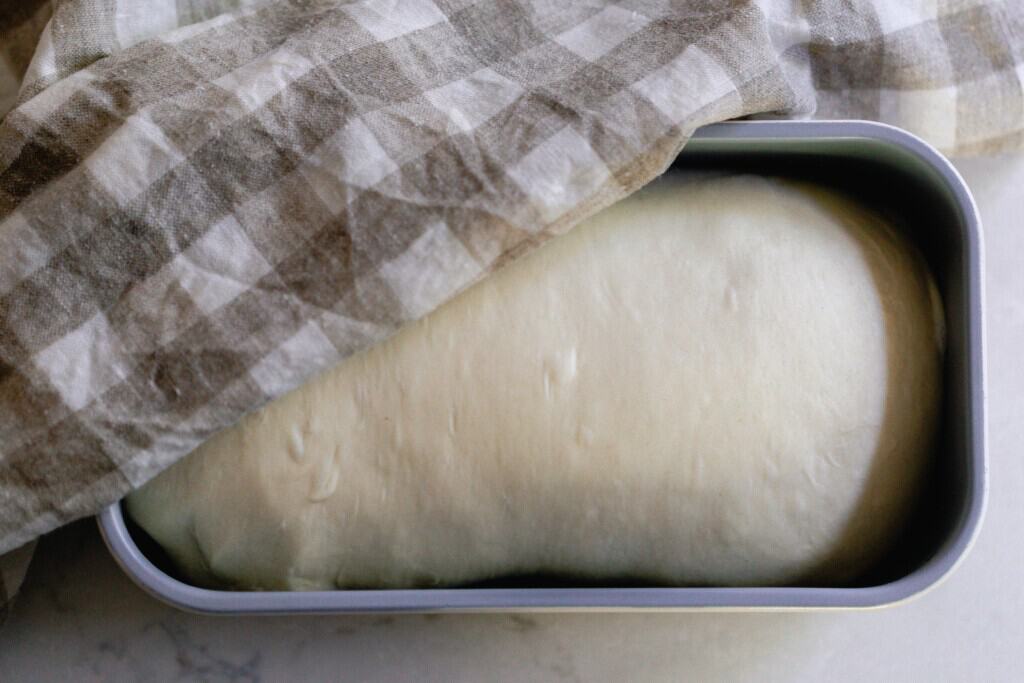
Add the shaped bread dough to the parchment lined or buttered loaf pans seam side down.
Second rise for 30 minutes to an hour at room temperature, or until doubled. Covered with a towel.
Optional: whisk an egg in a small bowl. Brush on top of the dough.
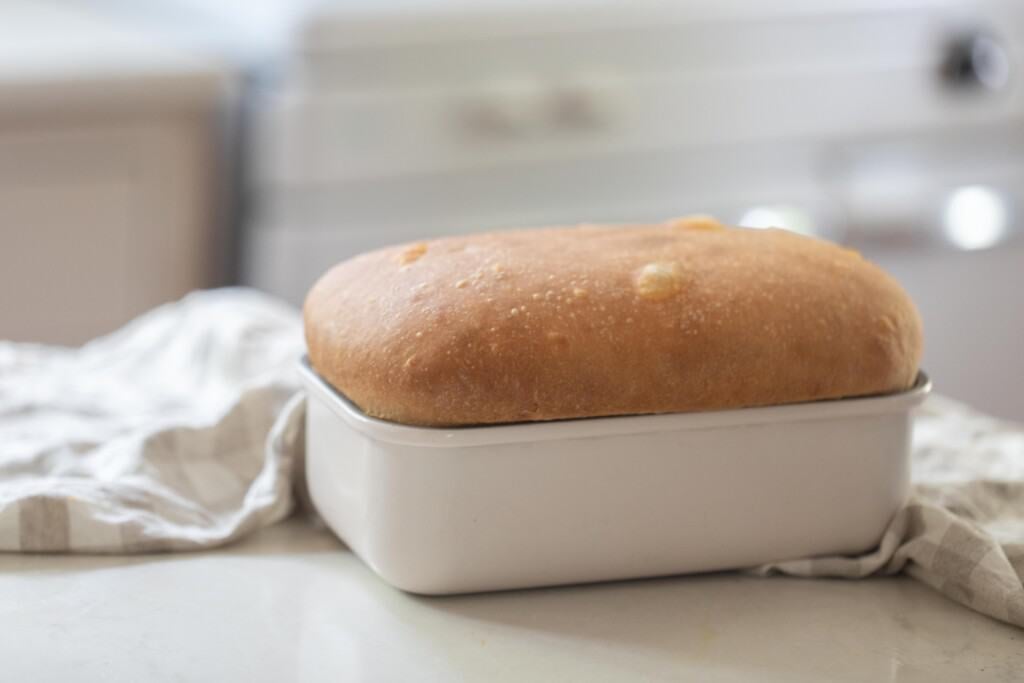
Bake the sandwich loaf at 375 for about 45 minutes, or until a lovely golden brown color on top. The internal temperature should be between 195-210 degrees F.
Allow to cool completely before slicing or storing.
Storage:
Store in an airtight container for up to a week or freeze for up to 3 months. Check out this post all about how to store sourdough bread.
FAQ
Can you do anything with sourdough starter discard?
Rather than throwing away your sourdough discard, you can use it for so many recipes. Especially recipes calling for other leaveners like yeast, baking soda and baking powder.
To learn how to make any recipe in sourdough, check out this post or for all my favorite sourdough discard recipes, check out this post.
Can you use sourdough discard in sourdough?
Yes. As long as the sourdough recipe has another type of leavener like baking soda or baking powder and doesn’t require the wild yeast in an active starter to rise the recipe (like in muffins, cookies, quick breads, cakes, etc.) then you probably can use discard.
What is the difference between sourdough bread and sourdough discard bread?
Sourdough bread relies on the wild yeast in active sourdough starter to give the bread its rise, whereas sourdough discard bread uses discard and relies on commercial yeast.
Is eating sourdough discard healthy?
Sourdough discard is healthy because the grains are already fermented and broken down. It works great in recipes, and if you add it to recipes and let it ferment, it will also ferment the grains in said recipe.
Can I use active sourdough starter for this recipe?
Yes. You can use an active starter for this recipe even though it calls for discard.
Find More Discard Sourdough Recipes:
- The Easiest Artisan Sourdough Bread
- Sourdough Discard Pretzels
- The Best Sourdough Discard Scones
- Easy Sourdough Discard Bagels
- Discard Focaccia
If you make this recipe and love it, I would love if you gave it 5 stars! Tag me on Instagram @farmhouseonboone with your delicious creation.
Sourdough Discard Sandwich Bread
Ingredients
- 1 cup water, 236 grams
- 1 tablespoon honey, 21 grams
- 3 teaspoons active dry yeast, 9 grams
- 4 tablespoons butter, 56 grams, softened
- 4 cups all purpose flour, 560 grams
- 1/2 tablespoon salt, 8 grams
- 1 cup sourdough discard, 250 grams
Instructions
- Whisk together warm water, honey, and yeast. Allow it to sit at room temperature for about 5 minutes. The mixture should get nice and bubbly.
- To a bowl of a stand mixer with dough hook attachment, add water yeast mixture, butter, flour, salt, and sourdough discard.
- Knead on low speed until dough is smooth and elastic- about 10 minutes or so. It may take longer. You can also do this by hand. It shouldn't stick to the sides of the bowl.
- To check to make sure the gluten has developed enough so the bread is nice and fluffy, it should pass the windowpane test. Grab a small ball of the dough and stretch it into a square. It should stretch thin enough to see through without breaking.
- Place the dough in a greased bowl with a lid, plastic wrap, or towel.
- Let the dough rise (also known as bulk rise) for about 1-2 hours (or until it about doubles in size) in a warm place like on top of a stove or on top of the refrigerator.
- Grease a bread pan or add parchment paper.
- Roll the dough flat into a rectangle and roll it up. Pinch the ends to the rest of the loaf.
- Add the shaped bread dough to the parchment lined or buttered loaf pans seam side down.
Second rise for 30 minutes to an hour at room temperature, or until doubled. Covered with a towel. - Optional: whisk an egg in a small bowl. Brush on top of the dough.
- Bake the sandwich loaf at 375 for about 45 minutes, or until a lovely golden brown color on top.
- Allow to cool completely before slicing or storing.
Notes
- The internal temperature of baked bread should be between 195-210 degrees F
- Use really soft butter so it will combine with the rest of the dough ingredients really well and without chunks.
- Don’t over ferment the dough. It will turn into a wet sloppy disaster that won’t rise well.
- When making the dough, using a stand mixer makes the process much easier and hands off. You can also do this with your hands.
Nutrition
Nutrition information is automatically calculated, so should only be used as an approximation.


Can I make this recipe dairy free? Suggestions of what to substitute the butter with?
I always use coconut oil in place of the butter. Turns out great.
Pretty darn foolproof, thank you!
I used part butter part coconut oil and it’s baking beautifully. Coconut oil sub is worth a shot
This worked out even better than I imagined! Thanks so much
I have made this twice and it turned out perfect both times. Perfect way to use sourdough discard for a quick loaf. I had unexpected overnight guest and was able to make this bread quickly and it was delicious, I had rave reviews. Thanks for the recipe and I followed exactly as written.
You have nutrition information here, but you don’t have a serving size. How many grams is a serving or how many ounces is a serving?
It turned out beautifully. I doubled the recipe, omitted the egg wash step, and buttered the tops right out of the oven for softness. It came out lovely and I will definitely make it again!
Genuinely don’t understand all the high ratings on this recipe. It’s one of the most infuriating sourdough/bread recipes I’ve ever encountered. I make a lot of bread – so this unfortunately isn’t newbie user error. I’ve attempted this recipe on three separate occasions and it has never not been unbearably sticky and unmanageable. Following all measurements and ingredients to a T and STILL it sticks to the bowl unceasingly.
I am sorry you did not have luck with this recipe!
It’s probably because of your discard hydration. If your starter is super liquidy the dough is obviously going to have excess liquid and will result in a stickier dough… I don’t see why adding more flour didn’t fix such a minor issue. I’m no sourdough expert, but I built my 4 month old starter from scratch and it’s strong, thriving and established. After 4 failed loaves I finally made my 1st successful loaf and another after that.
I say all that to explain that I’m currently making this recipe and the dough came together BEAUTIFULLY…. It’s currently on its 1st rise and it’s looking great! So clearly this is a you problem and a recipe that many other people have had great success with problem 🤔🤔…
🤷🏾♀️
I kneaded the bread for about 15 minutes (no stand mixer). It rose perfectly, passed the windowpane test, but was super dense and not at all fluffy.
Advice for next time? Thank you!
Sooo I tried this recipe and for some reason the crust became super hard. I buttered the pan, cooked on 375 for 40 min. Inside was done without any issues. I’m not sure what to do to not have the hard crust. Would love some feedback:)
I’ve made the dough but it feels more like play dough than bread dough. I followed your directions and mixed it in the blender with dough hook. Right now i have it resting in a sunny location to see if warmth will help it asbit sits.
What did I do wrong?
I’ve made the dough but it feels more like play dough than bread dough. I followed your directions and mixed it in the blender with dough hook. Right now i have it resting in a sunny location to see if warmth will help it as it sits.
What did I do wrong?
Why on earth would you mix dough in a blender??? Of course it was dense like play dough… You over mixed it 😂😂
Next time either use a stand mixer or use your hands….
I’ve made this recipe multiple times now and it turns out perfect every time!!! The softest and tastiest sandwich bread I’ve ever had!!!! I’ve been gifting loaves to friends and family too and they cannot get enough! Definitely a fool-proof and successful recipe if you follow the directions 😉
Some blenders have a dough hook and setting. It is a little faster than a stand mixer but I used it today and it worked perfectly….. you cannot use it for 10-15 minutes though. Over ten minutes I ran the dough setting 3-4 times. This loaf is rising beautifully in the oven
She meant mixer, not blender
I butter my crust when still hot and wrap it in a tea towel until it’s cooled and it always turns out perfect
I made this and my bread feels a little stiffer
Bad yeast? It rose?
Or too thickly sliced?
Or just need more practice?
Probably more practice!