


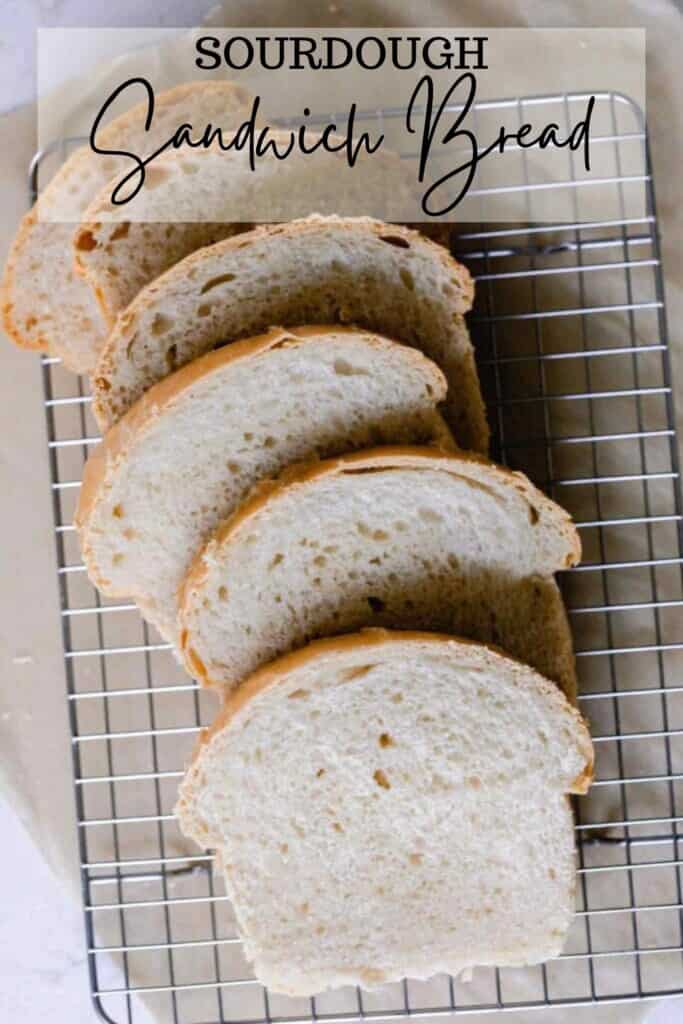
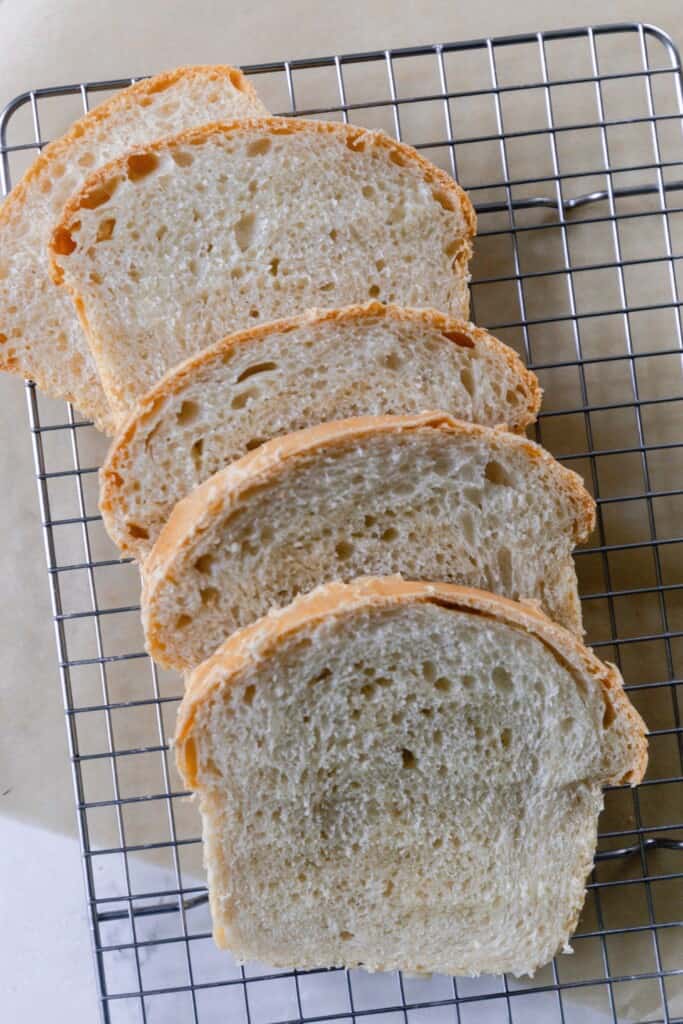
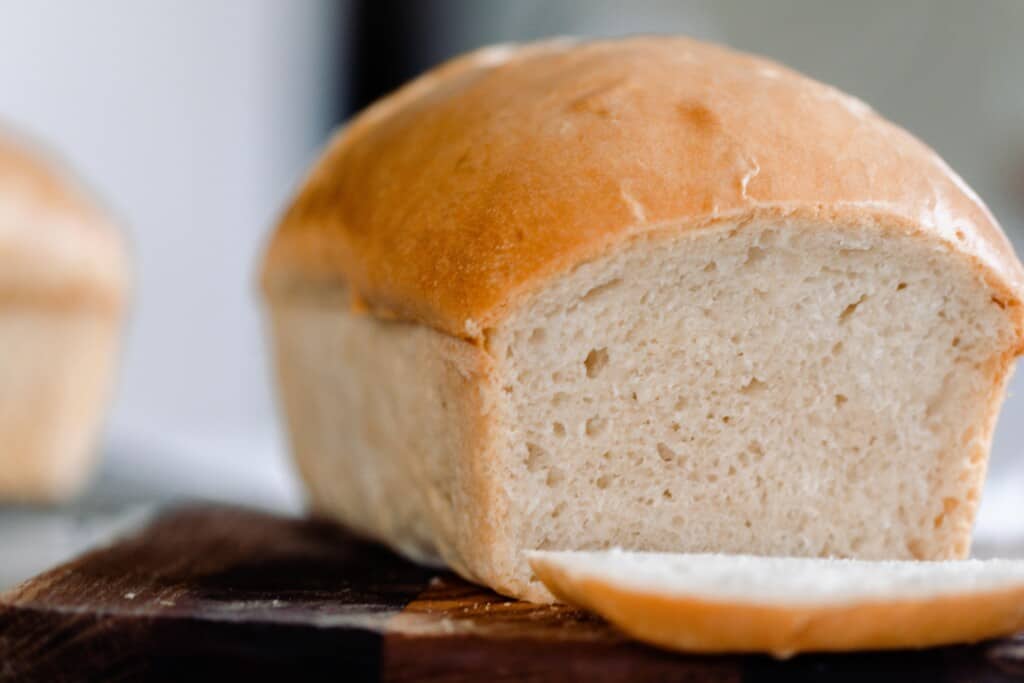
Soft and fluffy sourdough sandwich bread is the perfect bread to have on hand. Made with all purpose flour, sourdough starter, butter and a little honey, this fermented bread has a lighter texture and tangy flavor.
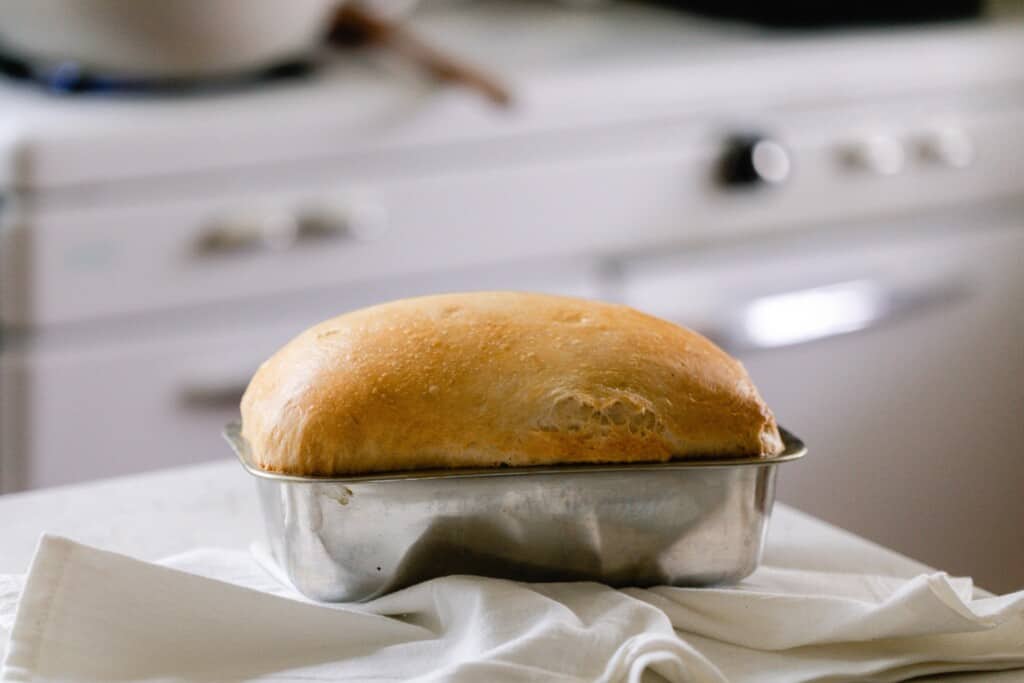
One of the main complaints I hear about making crusty sourdough from readers is that they miss the soft sandwich loaf style of bread.
Not only is this recipe absolutely delicious (making it really hard to ever go back to store-bought bread), but it is also super simple. No strange ingredients, no stretching and folding every 30 minutes… Just mix, rise, shape, rise again, and bake.
Let it cool, slice and slather it with butter. It’s so yummy and it reminds me of a bread you would get on a breadboard from a restaurant.
Let’s be honest, though, it’s way better since it’s made from scratch and has that wonderful sourdough tang.
Make sure to save this sourdough loaf bread recipe for the future. It will be a go to for sure.
Tips:
- Use really soft butter and cube it up so it blends easier.
- Don’t over ferment the dough. It will turn into a wet sloppy disaster that won’t rise well. Still edible. Maybe. It could also be turned into sourdough croutons.
- When making the dough, using a stand mixer makes the process much easier and hands off. You can also do this with your hands.
- If you are new to sourdough, you can check out how to make a sourdough starter here, find my sourdough conversion chart, and baking glossary of terms.
This post contains affiliate links, which means I make a small commission at no extra cost to you. See my full disclosure here.
Tools you may need:
Measuring cups and spoons. You could also use a kitchen scale
FAQ:
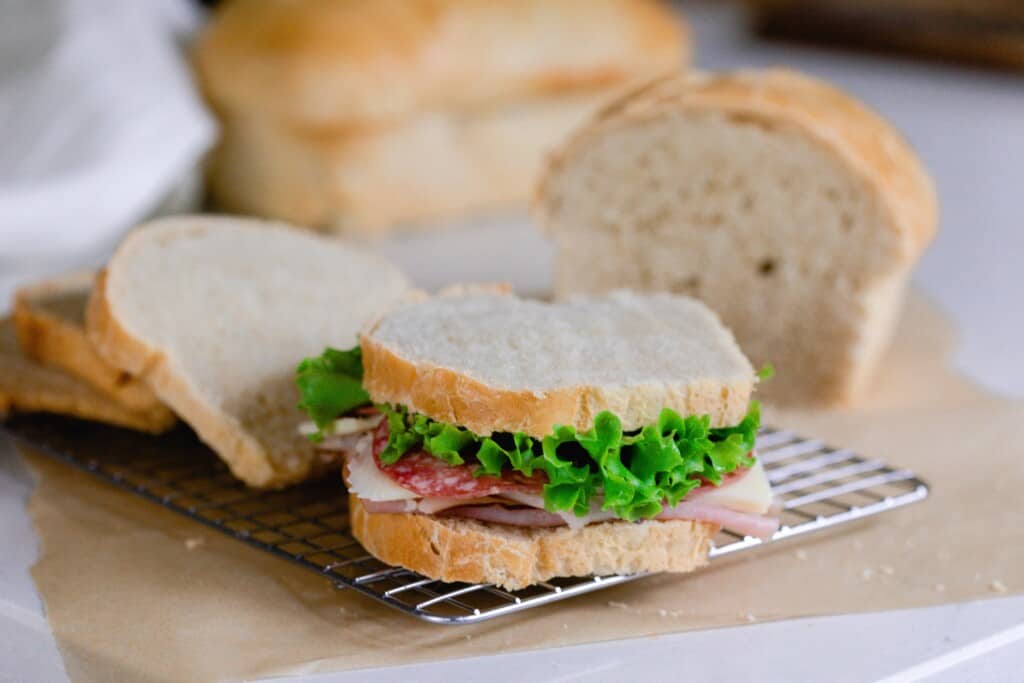
Does sourdough bread make good sandwiches?
Yes. The delightful tanginess adds to the flavor profile of the sandwich, making it a wonderful addition. You can use crusty sourdough bread or this soft sourdough sandwich loaf.
Why is my sourdough sandwich bread not rising?
There could be a few reasons for this. The most likely one is that your sourdough starter may not be active enough or is weak.
Another contributor could be the temperature of the room where you are placing your dough to rise. The cooler the temperature the longer it will take for bread to rise.
Lastly, the water you use in your dough mixture could be a factor. If the water used was too hot, it may have killed the starter. Additionally, if you are using city water the chlorine could potentially kill the yeasts in the starter.
Are sourdough sandwiches healthy?
Sourdough is one of the healthiest breads since the grains are fermented, which makes it more digestible and the nutrients more available for your body to absorb.
Top with your favorite healthy toppings and you can have a wholesome and filling meal in one sandwich.
Ingredients:
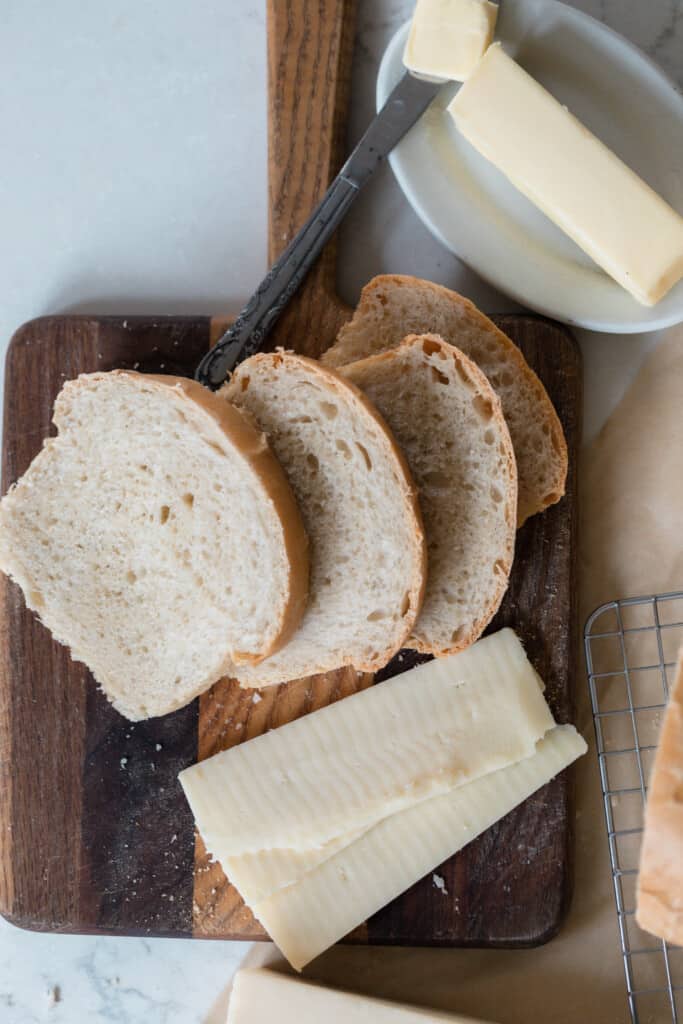
Butter (softened) or coconut oil – I prefer using butter for that savory buttery flavor. If you are wanting to make a vegan version, you can use softened (not melted) coconut oil.
Honey or sugar – I like to use honey since it is a natural sweetener.
Salt – This gives the bread so much flavor and skipping it will leave you with a tasteless loaf.
Sourdough starter – You want a nice active and bubbly starter to make bread. Starter that isn’t ripe won’t produce nice fluffy bread.
Water – Room temperature.
All-purpose flour – The best part of this recipe is that it uses good ol’ plain all-purpose flour. Nothing fancy.
How To Make Sourdough Sandwich Bread
To a stand mixer, add all of the ingredients. I like to add the flour last, so I can add a bit less or more depending on my starter’s hydration.
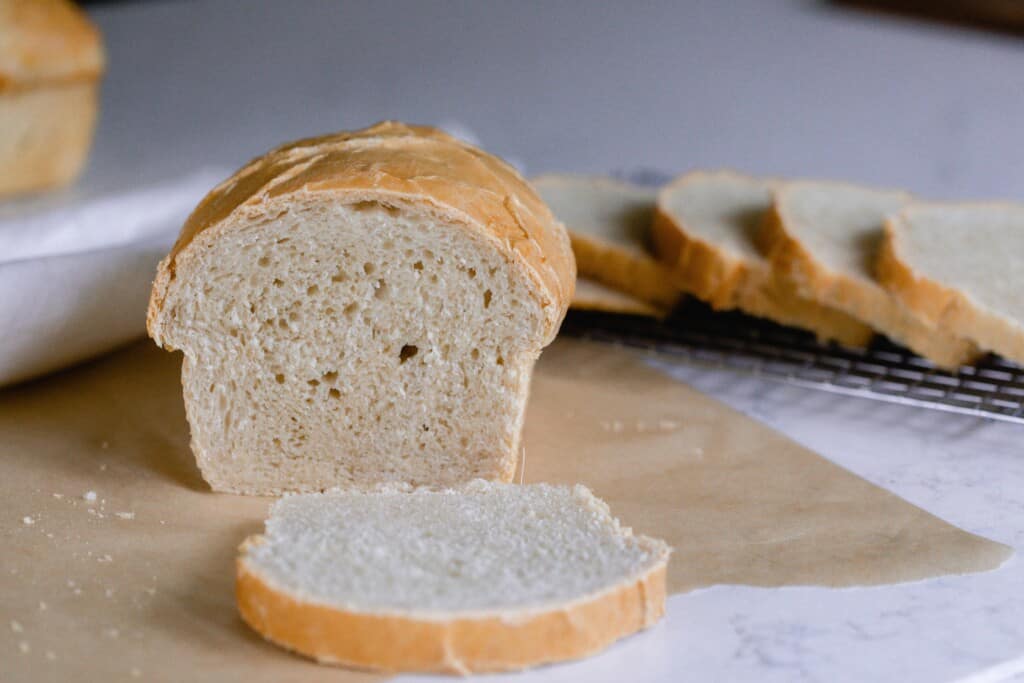
Knead until dough is stretchy and smooth. You want it to pull away from the sides of the mixing bowl and be smooth and elastic – about 10 minutes. It should pass the windowpane test. Grab a small ball of the dough and stretch it into a square. It should stretch thin enough to see through without breaking.
Tip: This isn’t a super hydrated dough and won’t be very wet like other doughs.
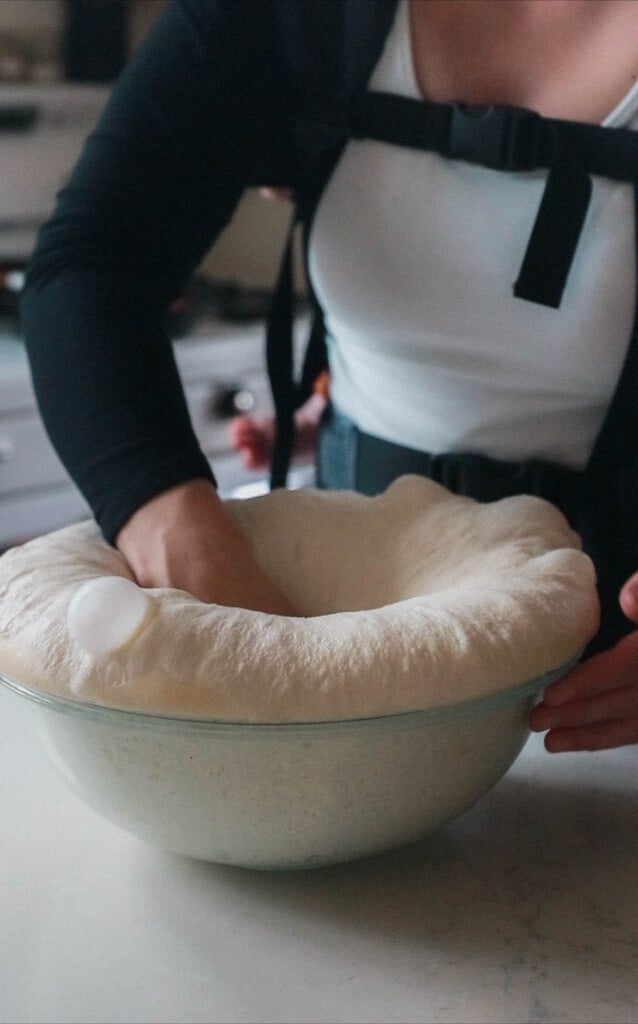
Allow to bulk rise for 10-12 hours in a warm place like on top of a stove or refrigerator. You can go longer if you want the benefit of the fermentation, but if it gets over-proofed the dough will turn into a sloppy mess!
In the summer, I ferment mine more like 8 hours but can get away with longer in the colder months.
Shape The Loaves And Rise
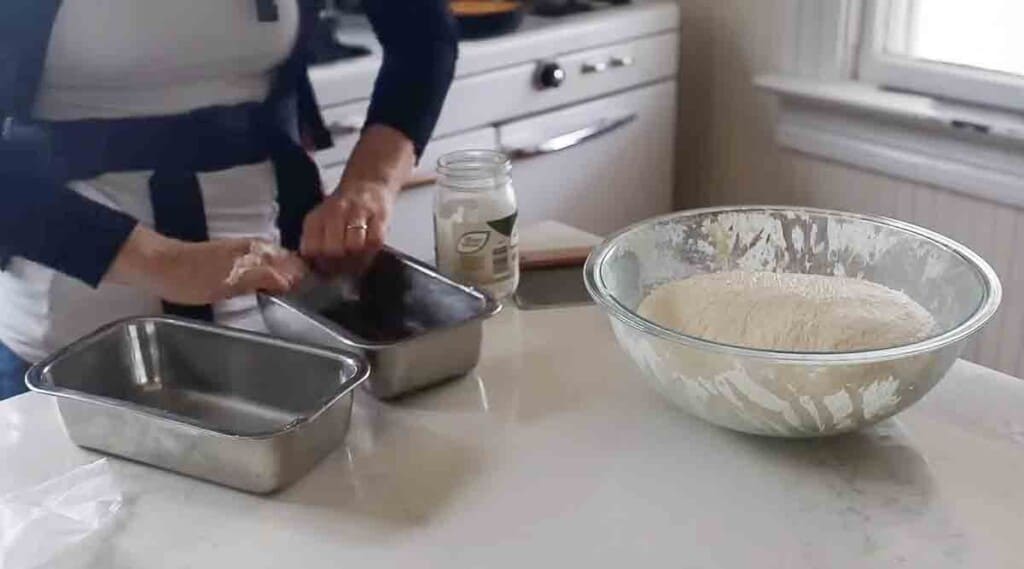
Grease two loaf pans or add parchment paper.
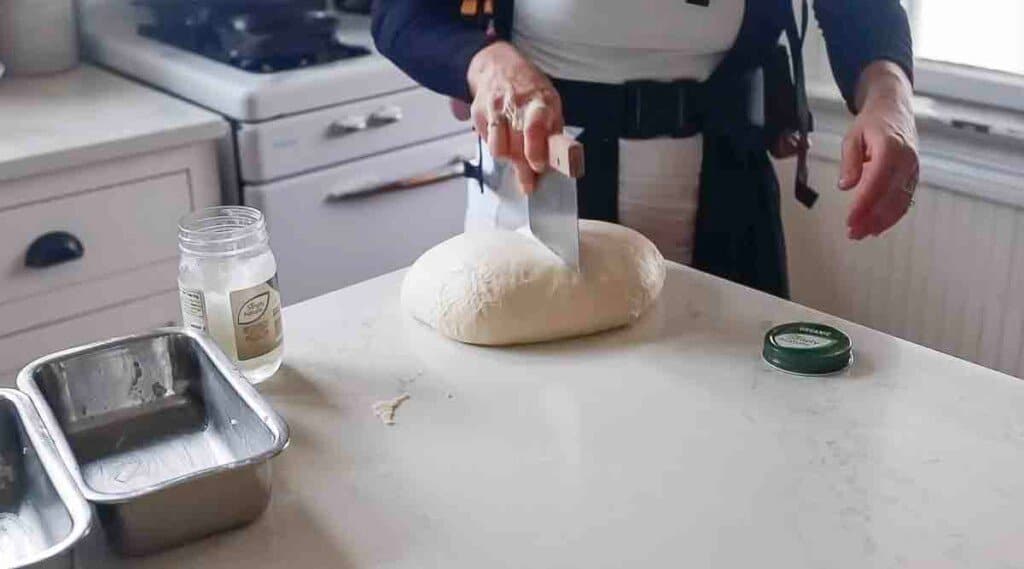
Divide in two equal parts.
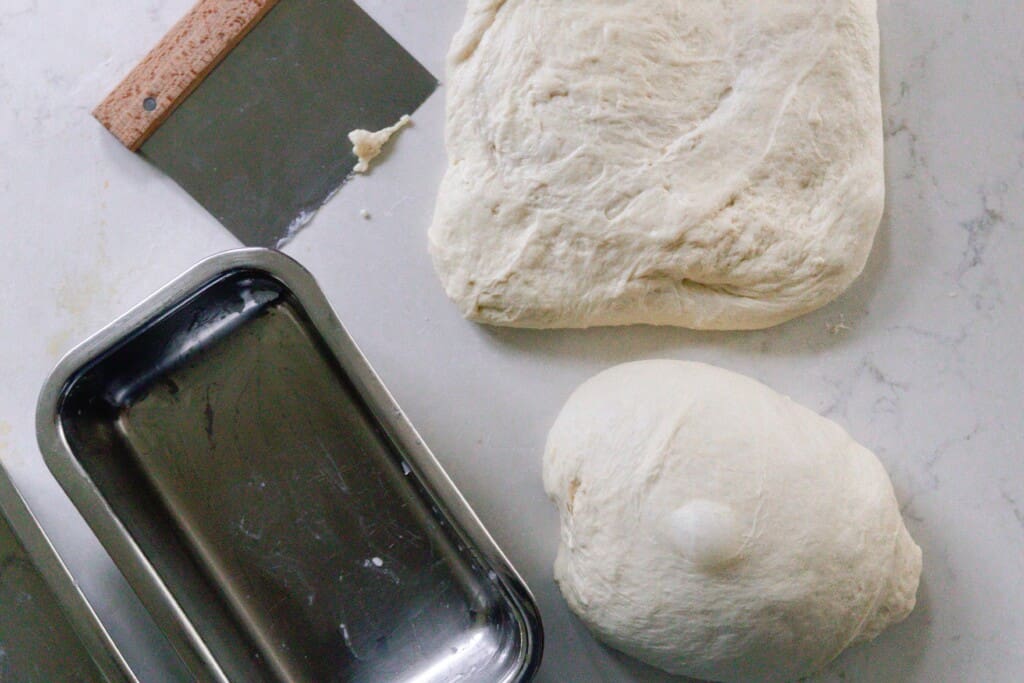
Shape by rolling the dough flat into a rectangle and rolling it up.
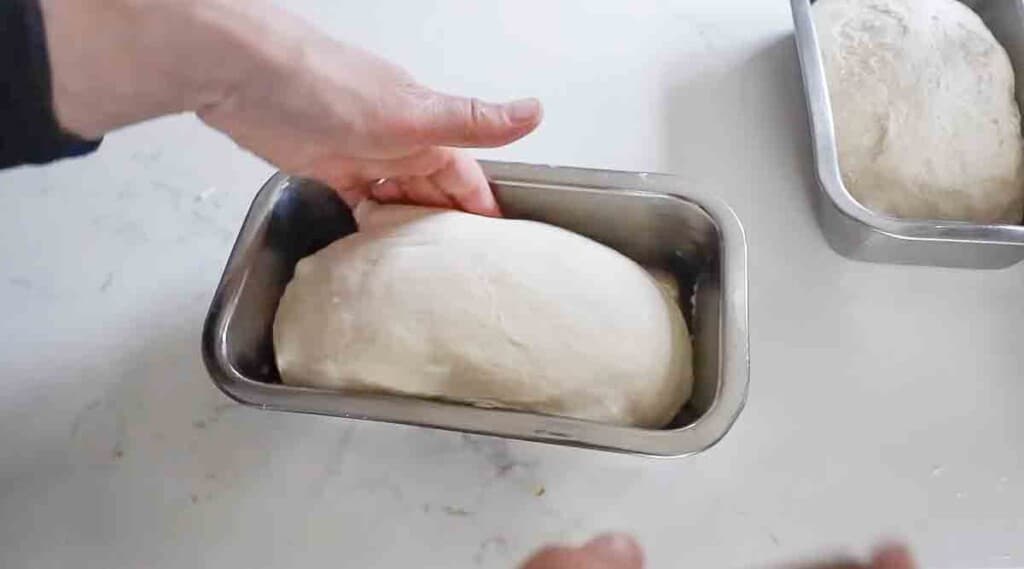
Add to parchment lined or buttered loaf pans.

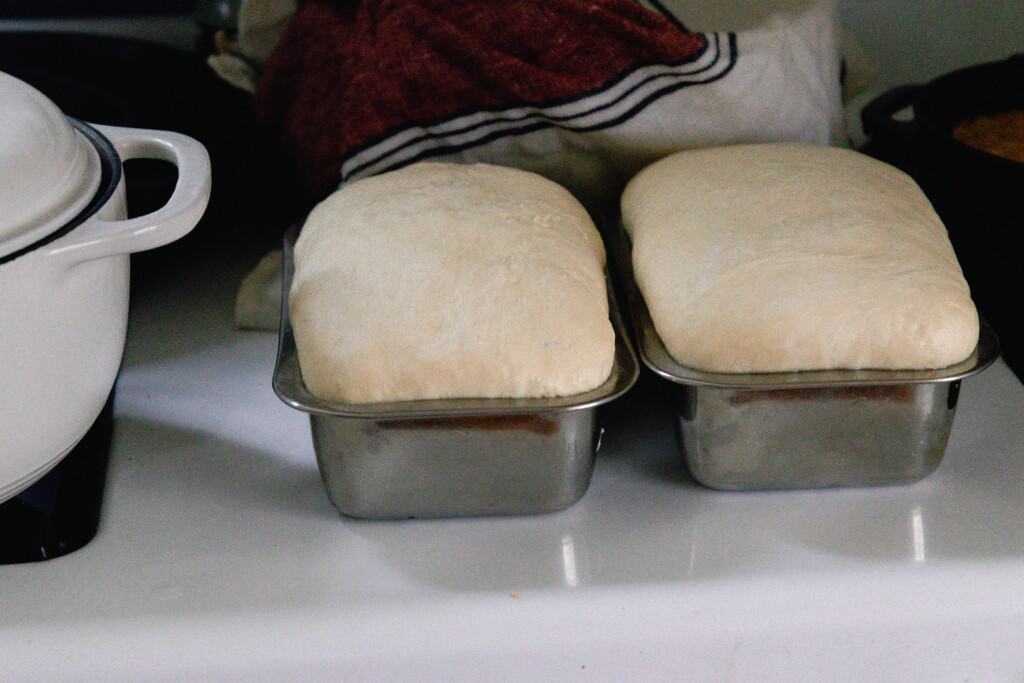
Second rise for 2-4 hours at room temperature, or until doubled. Again this depends on the temp! It could be as little as 1 hour if the house is warm and the starter active. Do not skip this step.It adds volume and strength to the dough.
Bake
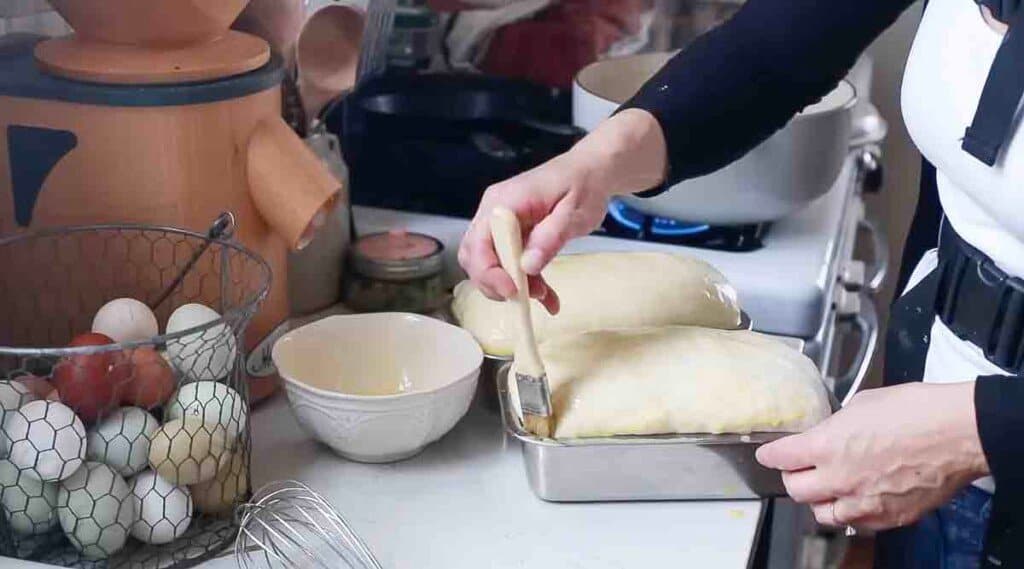
You can add an optional egg wash for more browning.
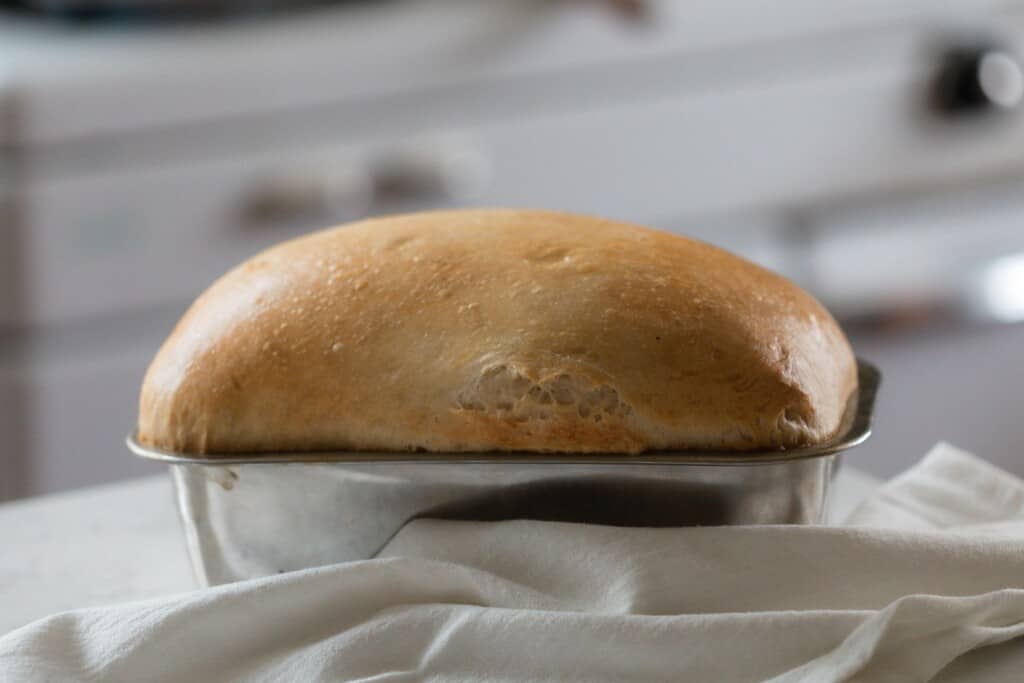
Bake at 375 for 45 minutes, or until golden on top.
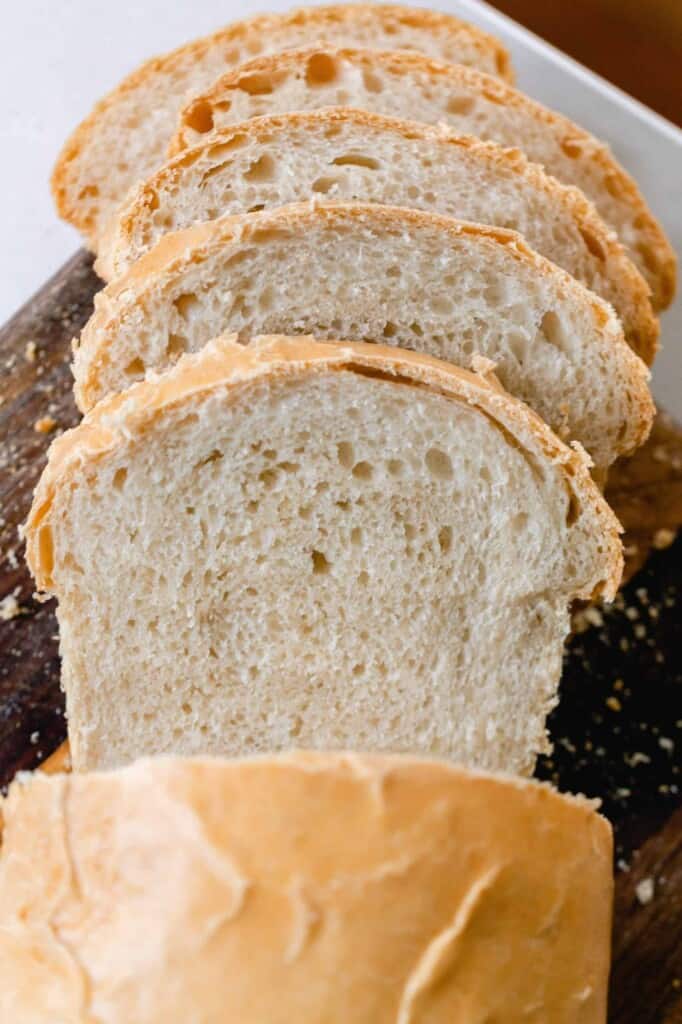
Allow to cool completely before slicing.
Storage:
Store in an air-tight container for up to five days for best results.
You can also freeze loaves in freezer safe plastic bags for 3-6 months.
Find More Of My Sourdough Recipes:
- Sourdough Zucchini Bread
- Easy Homemade Sourdough Pasta Recipe
- Sourdough Coffee Cake
- The Best Soft Sourdough Pretzels
- Sourdough Brioche
If you try this recipe and love it, I would love if you could come back and give it 5 stars! Tag me on Instagram @farmhouseonboone .
Sourdough Sandwich Bread

Ingredients
- 1/2 cup butter, 113 grams, softened or coconut oil
- 2 tablespoons honey or sugar, 42 grams for honey, If using sugar, 24 g
- 1 tablespoon salt, 15 grams
- 1 cup starter, 200 grams, active and bubbly
- 2 1/2 cups water, 590 grams
- 8 cups all purpose flour*, 1120 grams
Instructions
- To a stand mixer, add all of the ingredients. I like to add the flour last, so I can add a bit less or more depending on my starter's hydration.
- Knead until dough is stretchy and smooth. You want it to pull away from the sides of the mixing bowl and be smooth and elastic – about 10 minutes. It should pass the windowpane test.
- Allow to bulk rise for 10-12 hours in a warm place like on top of a stove or refrigerator.
- Divide in two equal parts.
- Shape by rolling the dough flat into a rectangle and rolling it up.
- Add to parchment lined or buttered loaf pans.
- Second rise for 2-4 hours at room temperature, or until doubled.
- Bake at 375 for 45 minutes, or until golden on top. You can add an optional egg wash for more browning.
- Allow to cool completely before slicing.
Notes
- *Some people have said making two loaves is too much for their stand mixer to handle. This depends on the type of stand mixer you have. If you have a standard KitchenAid mixer, you may want to halve the recipe and make one loaf.
- Use really soft butter and cube it up so it blends easier.
- Don’t over ferment the dough. It will turn into a wet sloppy disaster that won’t rise well. Still edible. Maybe. It could also be turned into sourdough croutons.
- When making the dough, using a stand mixer makes the process much easier and hands off. You can also do this with your hands.
Nutrition
Nutrition information is automatically calculated, so should only be used as an approximation.


Keep coming back to this one!
Can I have some suggestions? This dough is very tough and I can’t even mix it in my mixer without it sounding like the motor’s going to burn out. When I checked the grams per cup on flour, it’s supposed to be 120 which for 8 cups in your recipe would be 960 g. You have listed 1,120 g for 8 cups. Is that a mistake or am I missing something?
I have tried several sourdough sandwich bread recipes, but this one is the first that turned out well for me. The loaf was soft and delicious!
when the recipes calls to use a dough hook does this mean you don’t use the paddle at all
My family loves this bread. I have been making it now for several years.
I haven’t even baked them yet, but my loaves are perfect! I have a Kitchenaid mixer and the double loaf amount worked just fine. The dough rose perfectly overnight in a proofing box set at 82°. Can’t wait to try the finished bread!
So far have made 6 of these loafs, all have turned out great. Given some away, eaten a couple. It’s a very forgiving recipe great for beginners and even people who have made many times. Very versatile bread from morning toast to evening grilled cheeses.
Despite forgetting the dough in my oven for over 24 hours for the initial proofing only to remember it when I turned the oven on to 350 to preheat the next day, forming the loaves and letting them rise for 5 and 1/2 hours because my errands took too long and using 3 stretch and folds after a few minutes of hand kneading the bread still turned out amazing 🤣
Easy and delicious. Love ❤️ it . Thank you for sharing your recipes!
I am new to making sourdough in fact I used this recipe for the very first loaf of bread and it turned out amazing. I will be using this recipe again. It has a a nice crust and a good spongy interior.