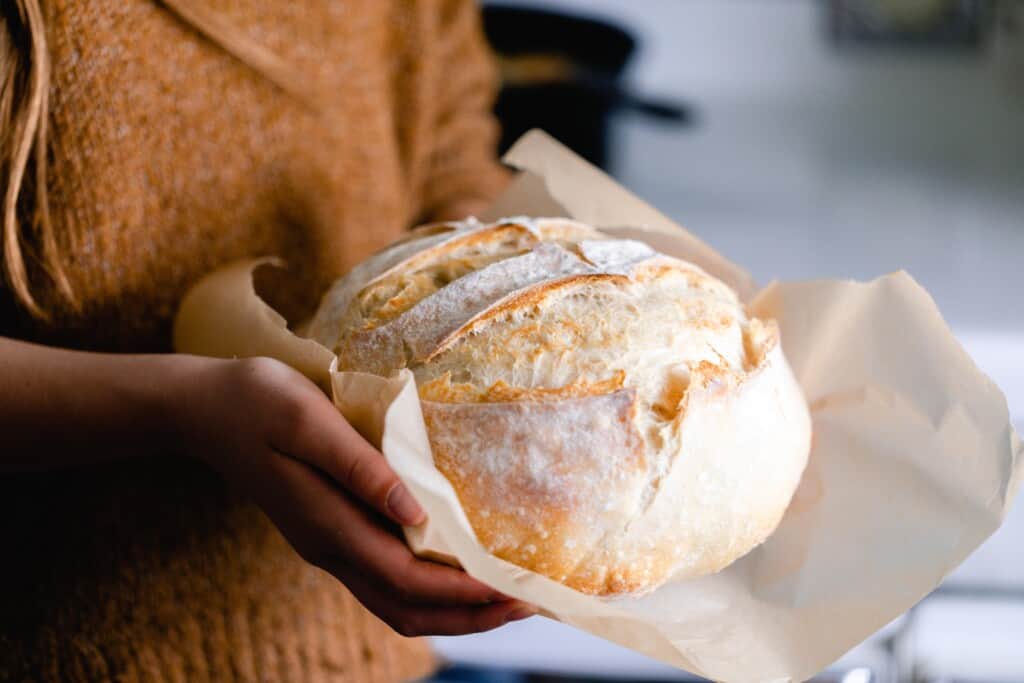
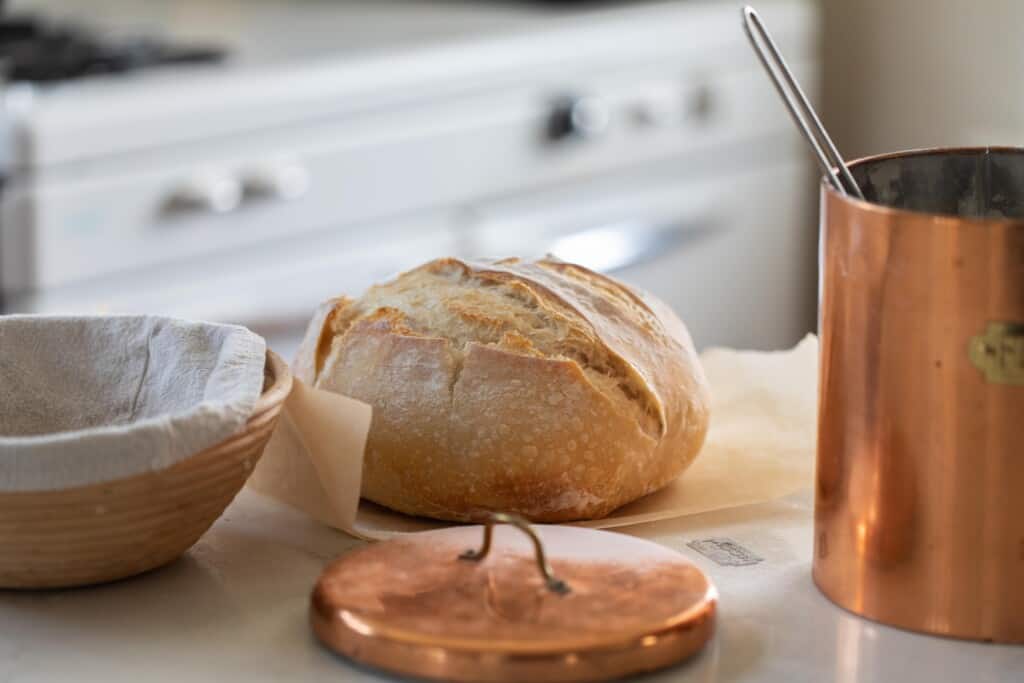
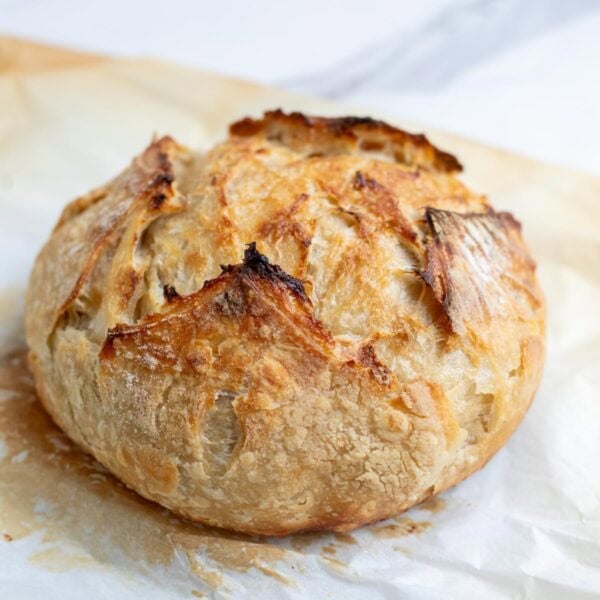
Learn how to make the easiest homemade sourdough bread recipe perfect for beginners. All you need is a few ingredients, some time, and patience. You’ll never want to go back to store-bought bread again.
I remember when I first started out on my sourdough journey. It was about 12 years ago, around the time of when my second daughter was born.
That first loaf of sourdough bread was not pretty, or really that edible to be honest. But I was proud I created something out of my own two hands from just a few ingredients.
Over the years I’ve really honed in on my sourdough baking skills and now have hundreds of recipes on this blog to show you just how simple it can be.
So today I’m going to show you step-by-step how to make an easy sourdough bread perfect for a beginner. Walking you through how you will know when your starter is ready to use, common terms (so you don’t feel lost in the gibberish), shaping, and everything else in between.
I promise it is not that hard. Once you get it down, it will become second nature and you will be whipping up everything from sandwich bread to Hawaiian rolls. Everyone will be amazed at the things you can create.
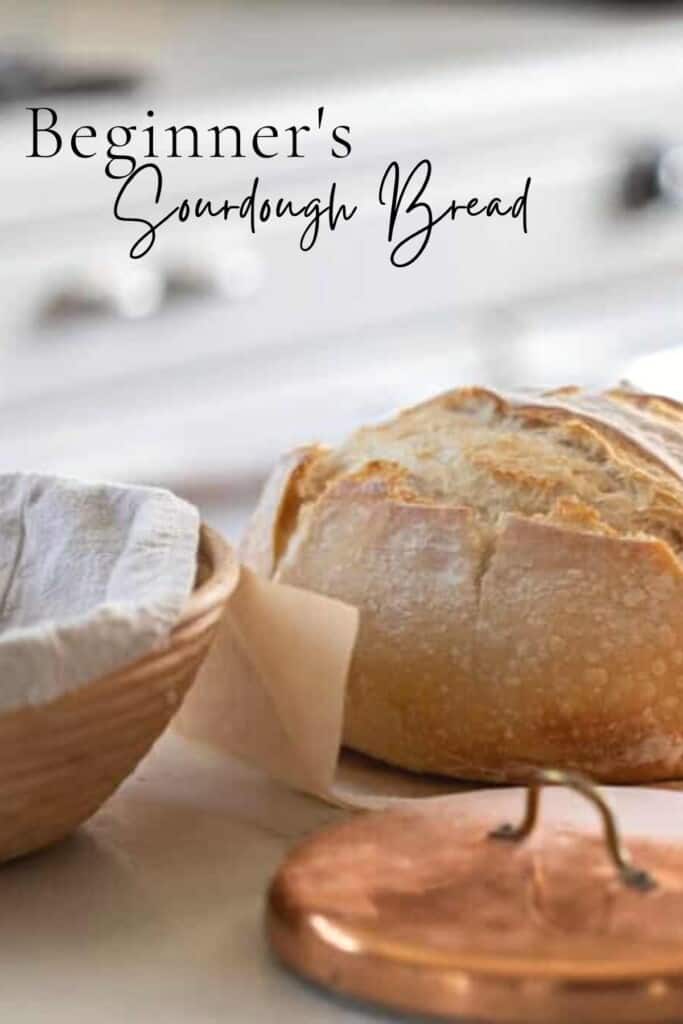
What is sourdough bread?
Sourdough bread is a fermented bread that uses natural wild yeast from the environment that has been captured to rise and ferment, rather than relying on commercial yeast.
Sourdough Health Benefits
As the grain is fermented, the gluten and phytic acid are broken down, making it easier to digest and more nutritious. Those who are sensitive to gluten (not celiac) may be able to tolerate sourdough products (especially long fermented), due to the fermentation of the grains.
Phytic acid (that is naturally present in wheat), is an anti-nutrient that blocks absorption of the nutrients found in wheat. During the fermentation, this gets broken down and the nutrients are more bio-available to the body.
Common Sourdough Terms:
Sourdough Starter
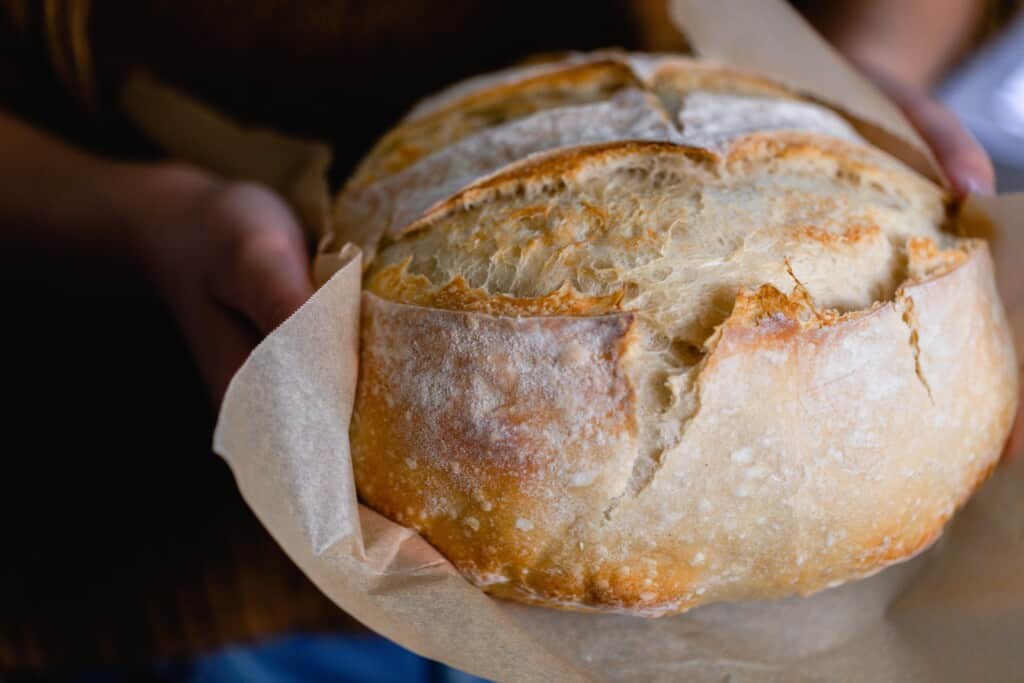
A mixture of flour, water, wild yeasts, bacteria, and organic acids that is used to ferment and leaven breads and grains. You can easily create one from scratch, purchase one or get one from a friend to start your sourdough adventure.
Sourdough Discard
The amount of starter that is removed from the sourdough starter before feeding. You can toss it or use it for many wonderful sourdough discard recipes.
Technically, you never have to actually throw it away. You can use it in discard recipes, or, once your starter is mature enough, you can just keep feeding it and using it. Make sure you don’t get too much starter or else it will be hard to maintain and keep healthy (which is the reason most discard).
Fed Sourdough Starter Or Active Starter
This is a sourdough starter that has been fed 4-12 hours before starting the dough. It is active and bubbly. It should pass the float test when a small amount of starter is placed in a cup of water. If it floats, it is ready to use for bread.
Autolyse
The process of hydrating the flour with water and allowing it to rest for 15-60 minutes during the bread making process.
Bulk Fermentation Or Bulk Rise
The first period of time a recipe rises. It is a very important step in sourdough baking. Not allowing the dough to rise enough will leave you bread that doesn’t get a good rise in the oven. Bulk ferment too long and the dough will over ferment and become a wet soupy mess. Usually, the dough should be about double in size.
Score
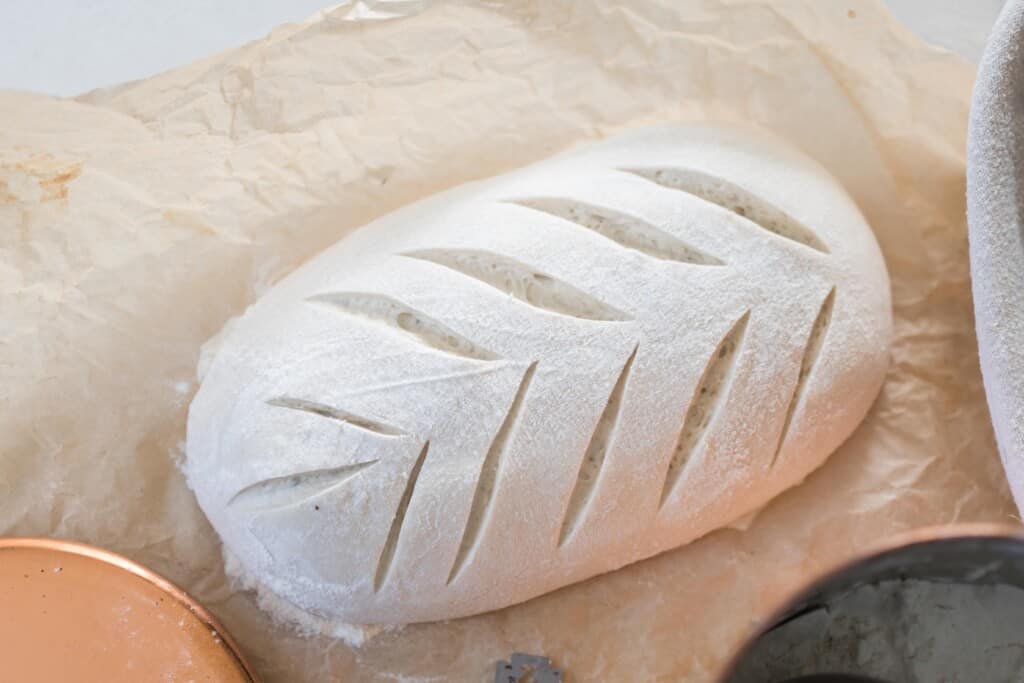
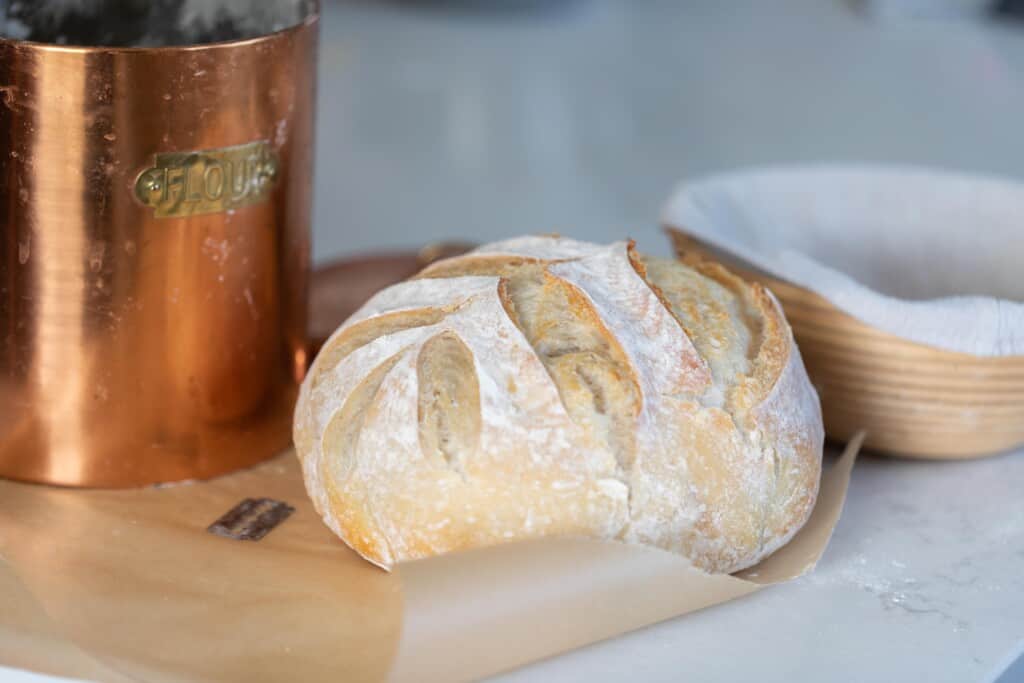
Cutting a line or design on the top of the dough with a sharp utensil like a razor, lame, or knife to give bread a beautiful design. There are two kinds of scores: expansion score (a deep score that allows the bread to expand). Artistic scores: the pretty design that doesn’t have much function except to make beautiful bread.
Windowpane Test
Taking a small amount of dough, stretch it between your fingers into a square to see if it can stretch thin enough to be able to “see” through it without breaking. This is a good indicator that enough gluten formation has been created to capture a good rise and large holes in the crumb.
Proofing
The final rise for the dough before baking to leaven the dough.
This post contains affiliate links, which means I make a small commission at no extra cost to you. See my full disclosure here.
Tips:
- You will need a very active sourdough starter that passes the float test. Check out how to make your own sourdough starter and how to care for one here.
- The dough may seem dry when it is first coming together. Resist adding more water. Use wet hands during the stretching and folding if the dough is too sticky.
- The amount of time it takes for your dough to double can be determined by many environmental factors, such as the temperature in your home, the maturity of your starter, and the hydration status of the loaf.
- The most accurate way to create consistent results is by using a kitchen scale. I’ve included both gram measurements and cup measurements in the recipe.
Ingredients
All purpose flour – Since this is a beginners loaf I’m using something most people already have in their pantry, all-purpose flour. You could also substitute with bread flour.
Water
Active sourdough starter – This is a starter that has been fed 4-12 hours before starting the recipe, is active and bubbly, and has about doubled in size. Learn how to make your own starter here.
Salt
Tools you may need to make this recipe:
Kitchen scale or measuring cups and spoons: I prefer to weigh my bread to get the most accurate and consistent results.
Banneton (optional): You could also use a towel lined basket or bowl.
Dutch Oven: This gives the bread a really nice crispy crust. If you do not have a dutch oven you could bake it on a baking sheet. To get the crust you will need to create steam in the oven. You can spray the loaf with water, and add a baking dish of water to the bottom rack of your oven.
Parchment paper: You could also add cornmeal to the bottom of the dutch oven to help prevent sticking, but I’ve never had great luck with this and prefer the parchment paper method.
Lid or plastic wrap: A lid, plastic wrap, a large plate, or beeswax wraps can all work.
How To Make Beginner’s Sourdough Bread: Easy Step-By-Step Instructions
Feed a sourdough starter 4-12 hours before starting the dough, ensuring it is active and bubbly.
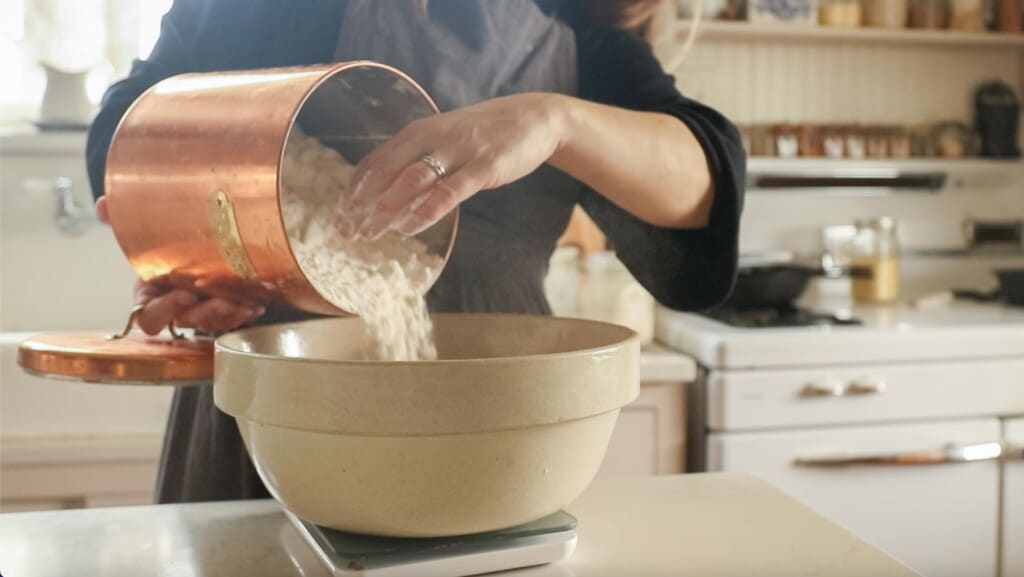
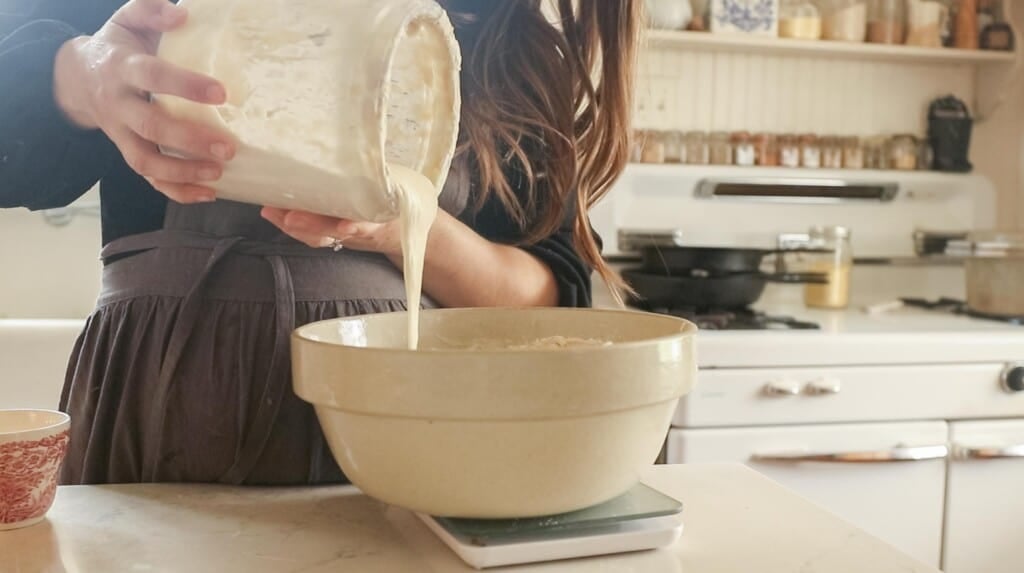
Add warm water, active starter, salt, and flour to a large mixing bowl. A kitchen scale will give the most accurate results.
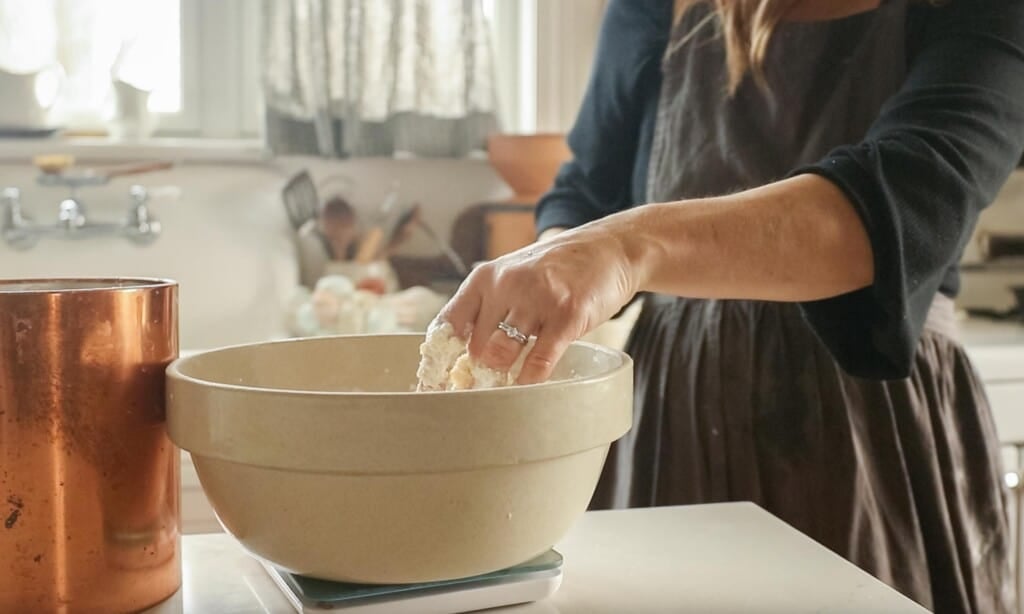
Mix together with wooden spoon or even just your hands.
Cover with plastic wrap or a lid and allow to rest for 30 minutes for the water to hydrate the flour. This is the autolyse process.
Stretch And Fold
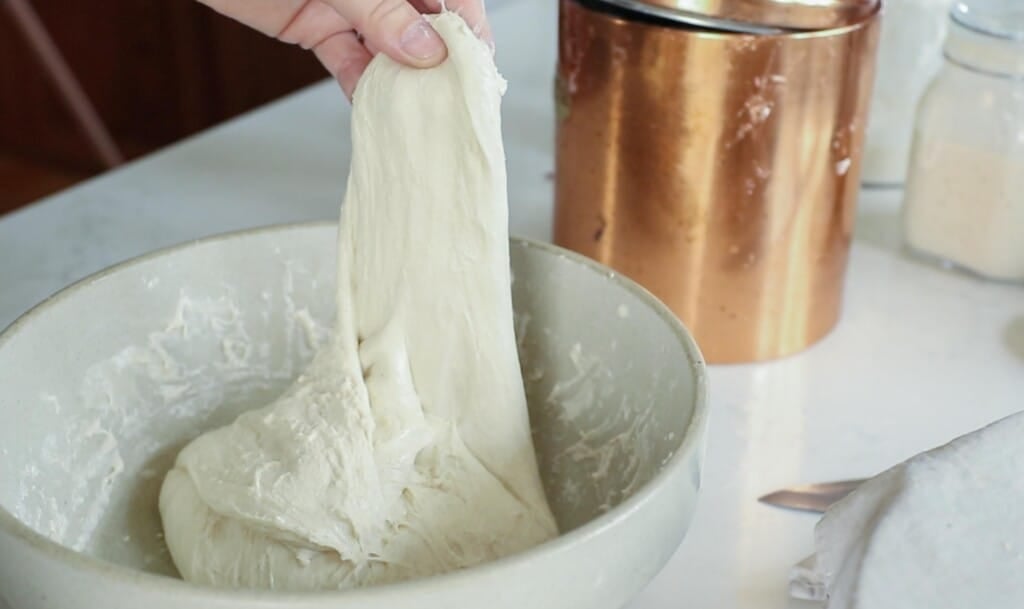
Rather than kneading the dough we are going to do a different method called the stretch and fold method. This is a way to get those desirable large holes in the crumb.
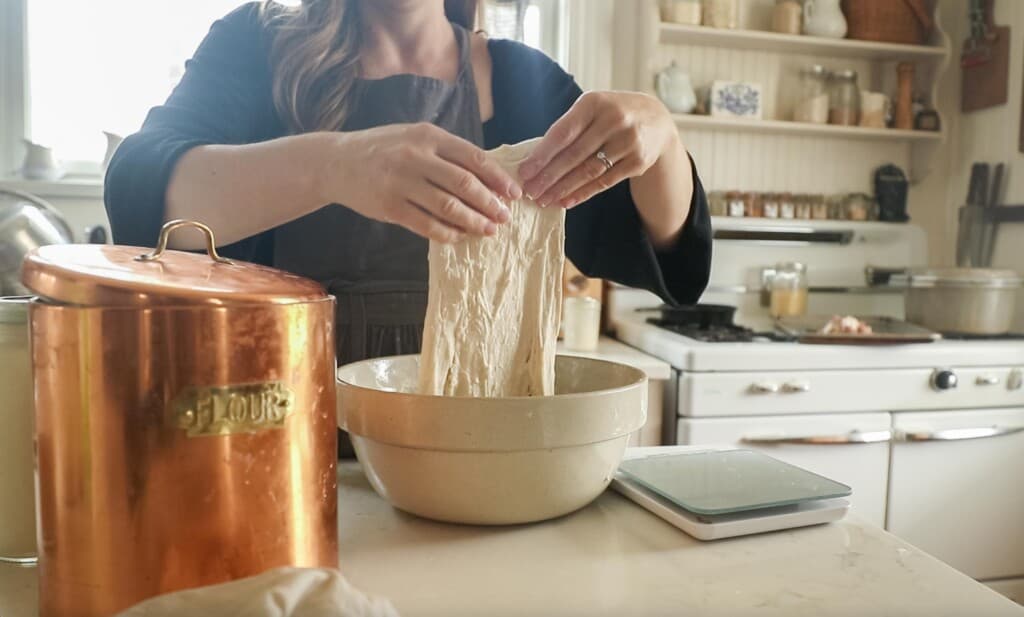
Grab the edge of the dough and pull up stretching it out as you pull upwards. This may be difficult and you may need to kind of bounce the dough to get it to stretch.
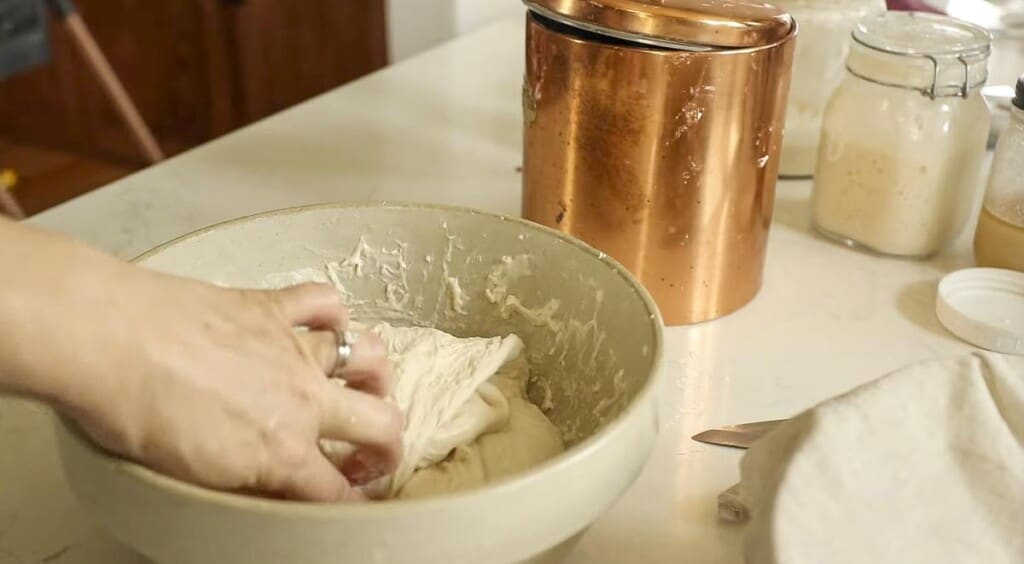
Place dough that is in your hands back into the center. Turn the bowl about a quarter turn and complete another stretch and fold. Repeat two more times. This is considered one round. If the dough is too sticky, dip your hand in warm water.
Cover and complete two more rounds 30 minutes apart.
Cover with a lid, damp towel, or plastic wrap. Let the dough bulk ferment in a warm place until it has doubled in size. This could be anywhere from 6-12 hours (or longer) depending on the temperature of your kitchen, maturity of your starter, etc.
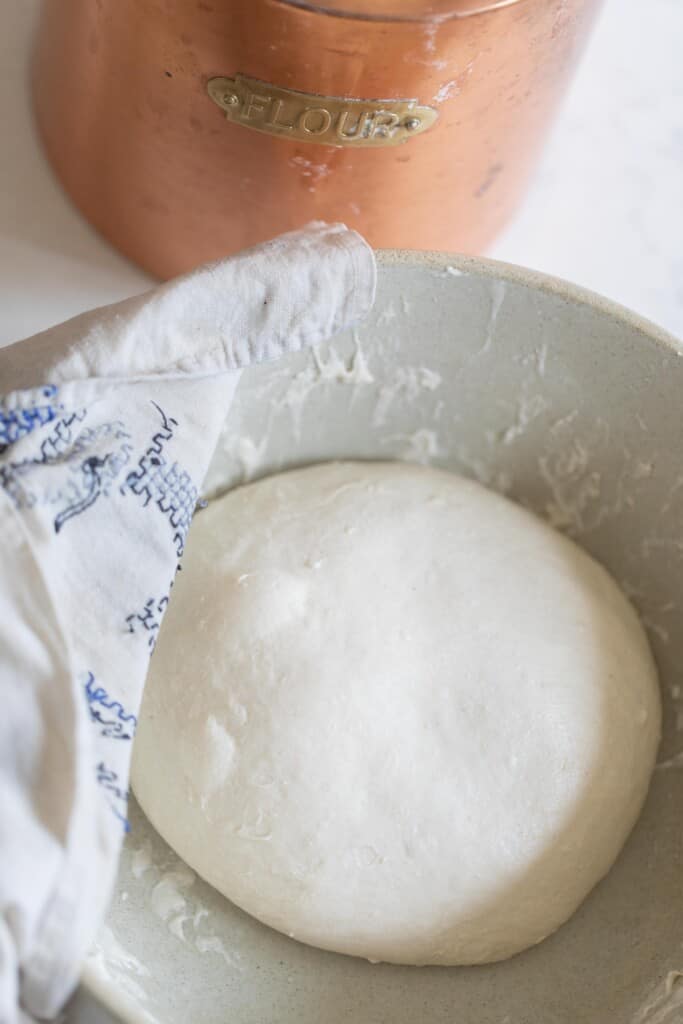
Be careful not to let it over ferment. If it is allowed to go too long, it will rise too much and become a soupy mess. It will not get a good rise when it bakes and resembles more of a pancake than a fluffy loaf. If this happens you can make stuffing, croutons, or bread pudding. It is not a total loss.
Shape
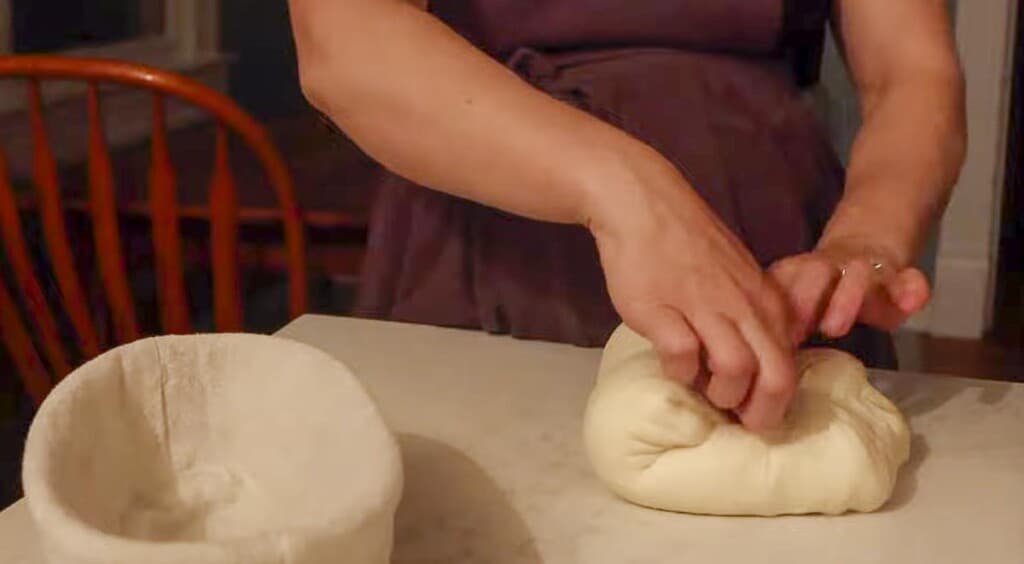
Place the dough on a clean work surface that has been lightly dusted with flour.
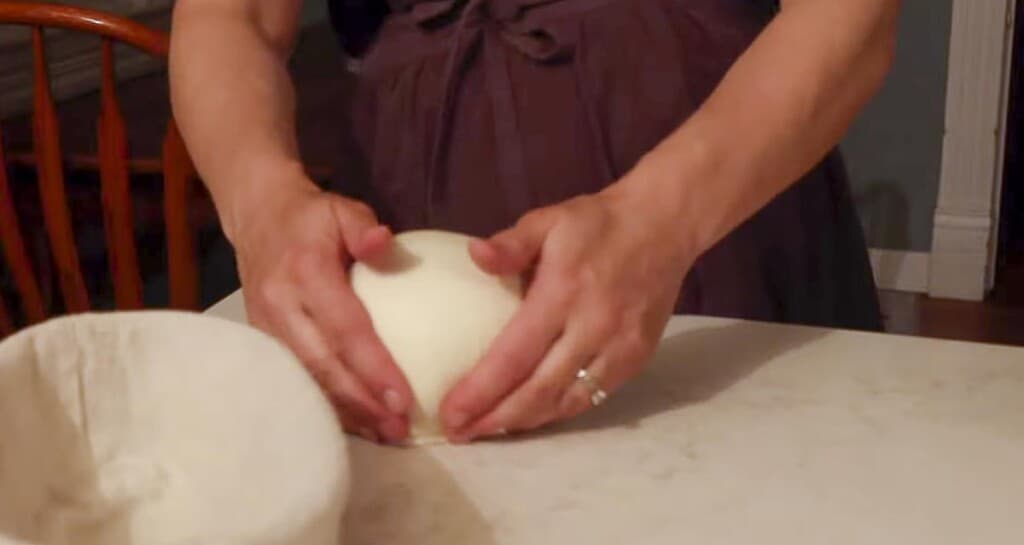
Fold the dough onto itself and roll up. Then shape into a ball by gently spinning it toward you.
(Optional)Set out 15-20 minutes uncovered. This allows the surface to develop a skin, so that it doesn’t stick to the tea towel during the overnight rise.
Then, place your dough upside down (smooth side down) on the counter and shape. I do this by folding the two sides over to meet in the middle, pinch together and then repeat on the other two sides. This creates surface tension which helps give it more oven spring (a good rise).
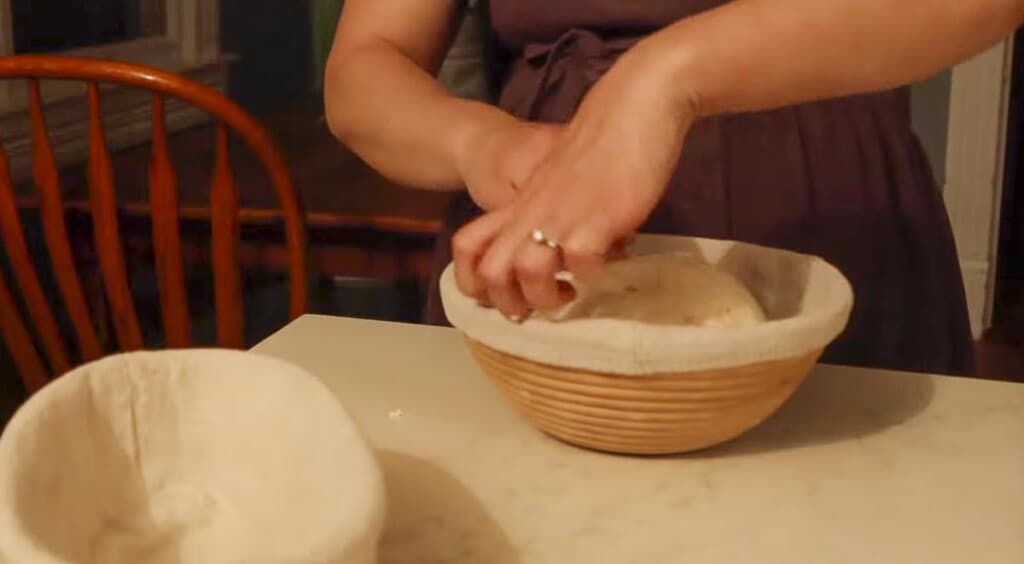
Transfer to a floured banneton or bowl with a floured tea towel (typically floured with rice flour, this is not necessary and all-purpose will work just fine) seam side up. You want the smooth side or pretty side facing down in the banneton. (Remember, the crust was so it wouldn’t stick to the tea towel!)
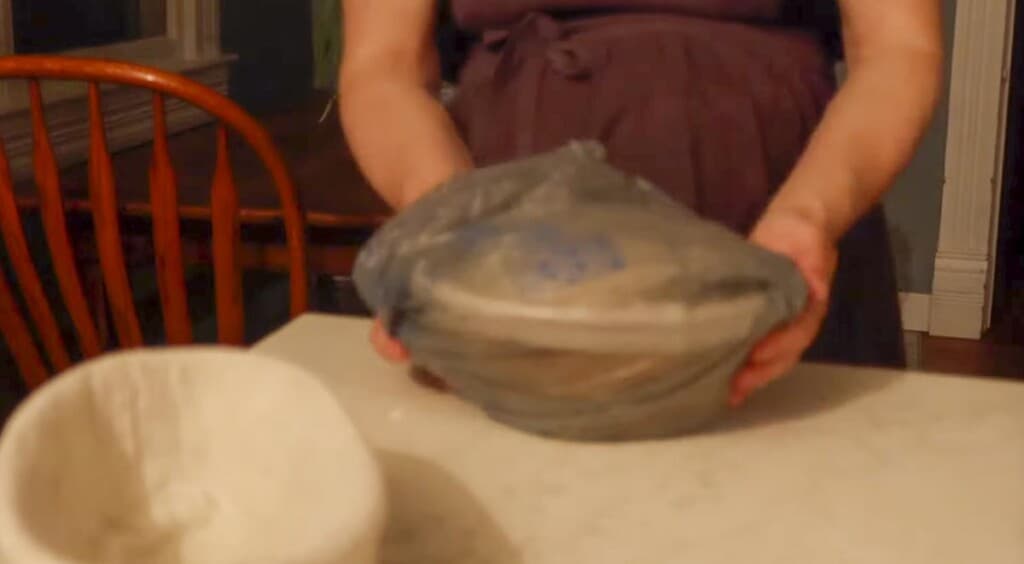
Cover with plastic or place in a plastic bag and tie the ends. Let the dough rest for 12-15 hours in the refrigerator. You can also let the bread rise at room temperature for 3-4 hours. I like using the longer rise time in the refrigerator because it is easier to score and I feel like the oven spring is better.
Bake
Preheat a dutch oven to 500 degrees for 1 hour.
Remove dough from the fridge right before baking.
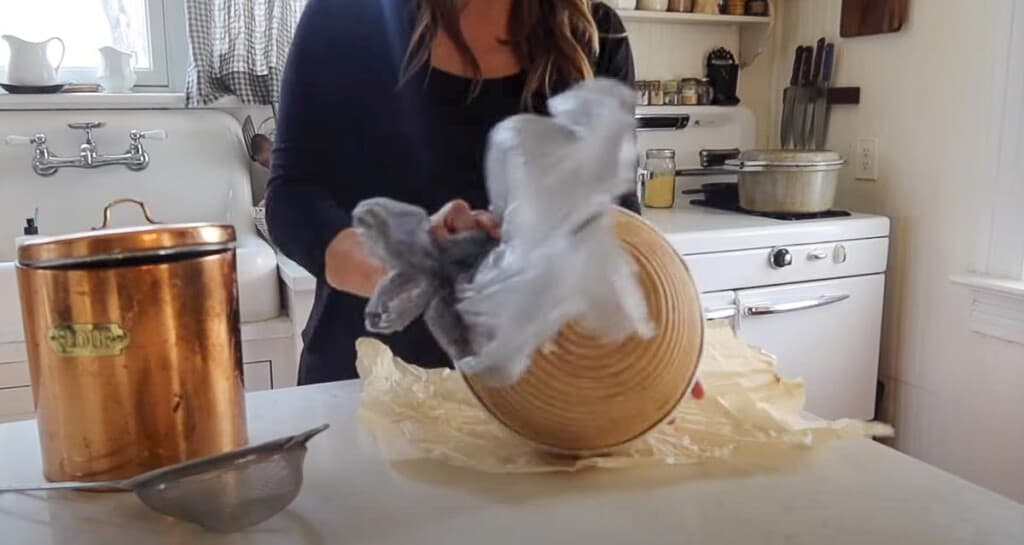
Place dough on a piece of parchment paper.
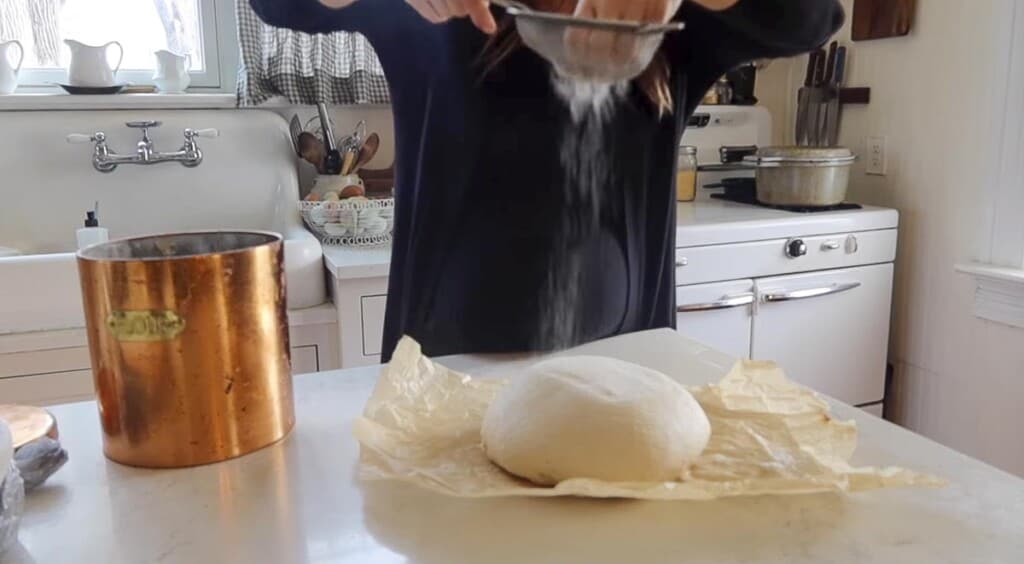
Dust with flour, if desired, and score with lame or razor blade. I like to do one large score (called an expansion score) and then a cute design for the other score.
Carefully, transfer the piece of parchment paper with the dough into the hot dutch oven. Careful not to burn your fingers.
Place the lid back on and place the dutch oven into the hot oven. Bake for 20 minutes.
Carefully remove the lid with oven mitts, turn the oven temperature down to 475, and bake an additional 15-25 minutes or until golden brown.
Best Tips For Scoring
- I highly recommend the long fermentation in the fridge. Yes it takes a long time, but this is the best way to make the dough more firm making the scoring easier and prettier.
- To make the pattern stand out more, dust the top of the dough with a bit of flour.
- Use a razor. A knife will just not have the same results.
- Find pretty patterns online to try to replicate. I have a post on my go-to patterns here.
- Practice. It takes a lot of trial and error to figure out bread baking in general and how to create pretty designs, the right depth to cut, etc.
Bakers Timeline For No-Knead Sourdough Bread
9 pm: Feed sourdough starter with flour and water.
8 am the next day: If the sourdough starter is mature, then proceed to creating the dough.
Combine ingredients together. Rest for 30 minutes.
Cover with a damp towel or plastic wrap. Rest for 30 minutes.
8:30 am: Stretch and fold.
3 stretch and folds – every 30 minutes
Cover with a wet towel or plastic wrap and allow the dough to bulk ferment until doubled.
Anywhere from 4:00 pm to 10 pm: Shape dough.
Sit out 15-20 minutes, uncovered.
Turn over and shape.
Transfer to a floured banneton basket or bowl with tea towel and cover with plastic. Place in the refrigerator for 12-15 hours.
The Next Day
9:00 am: Preheat the dutch oven on 500 for 1 hour.
10:00 am: Take dough out of the fridge, dust with flour, and score. Bake the sourdough bread and let it cool.
FAQ:
How do you make a sourdough starter?
Creating a sourdough starter is actually pretty simple. It is the process of mixing water and flour together and discarding for multiple days until yeasts in the environment are captured and the flour bubbles. You can find the tutorial on how to make a sourdough starter here.
Is it necessary to knead sourdough?
Not necessarily. The act of kneading is supposed to help create gluten formation in the bread, which can then help create a good texture and air pockets in the bread. But no-knead sourdough bread uses a stretch and fold method to develop the gluten.
What flour is best for beginner sourdough?
All-purpose flour or bread flour are perfect for the beginner baking just getting into sourdough. These flours can be used to feed the starter and bake with.
What are three top tips when making sourdough starter?
- Give it time. It takes a while for a sourdough starter to mature enough to make bread. Eventually it will happen and it is totally worth it.
- Don’t give up. Even if it doesn’t look like there is a lot of activity going on, there is.
- It probably isn’t dead. Many times people come to me asking if their sourdough starter is dead because it has a black liquid on top, a hard crust, etc. But unless there is mold, it can probably be revived.
What do I need to start making sourdough?
There are a few baking essential that you will need to start:
Large bowl- one with a lid is even better
Measuring cups and spoons or a digital scale. Scales are more reliable and will give you more consistent results.
Dutch oven and/or loaf pans
Other tools that are optional, but helpful:
Banneton baskets or a proofing basket (can also use baskets or bowls lined with a tea towel)
Lame
Dough whisk
What is the secret to a good sourdough starter?
The secret to a good starter is to use it when it is active and bubbly, and at its peak. You can tell this by how it looks: has it about doubled in size, have nice bubbles, and does it float when a small amount is placed in a glass of water?
Why is sourdough difficult to make?
Sourdough is not really that difficult to make, it just takes longer and has more variability compared to bread made with commercial yeast. While a dough made with active dry yeasts typically rise 1 1/2 to two hours during the bulk rise. A simple sourdough bread may take 8-12 hours.
Find More Sourdough Bread Recipes:
- Bread Machine Sourdough Bread
- Cheese Jalapeño Sourdough Bread
- Sourdough Potato Bread
- Rosemary Sourdough Bread
- Sourdough Sandwich Bread
If you try this recipe and love it, I would love it if you gave it 5 stars! Thank you! Tag me on Instagram @farmhouseonboone.
Beginners Sourdough Bread
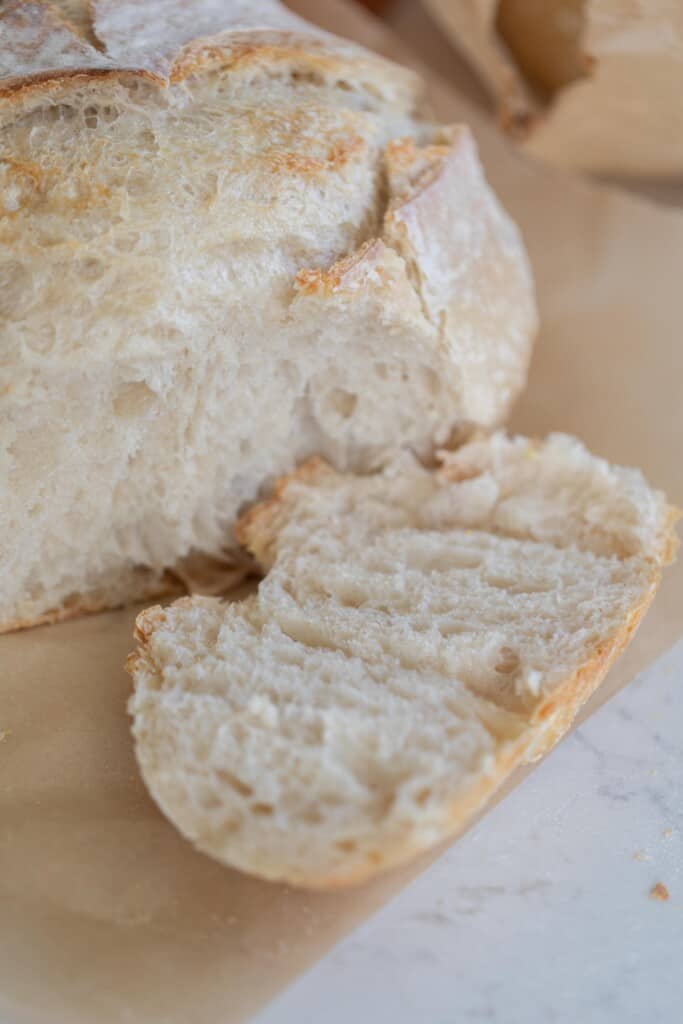
A sourdough bread perfect for beginners. This delicious recipe has a soft chewy crumb and crusty exterior. All you need is a few ingredients, some time, and patience.
Ingredients
- 475 g All-purpose flour (3 1/2 cups)
- 100 g starter, active and bubbly (1/2 cup)
- 325 g water (1 1/3 cups)
- 10 g salt (2 teaspoons)
Instructions
- Feed a sourdough starter 4-12 hours before starting the dough, ensuring it is active and bubbly.
- Combine warm water, active starter, salt, and flour with a wooden spoon or even just your hands in a large mixing bowl.
- Cover with plastic wrap or a lid and allow to rest for 30 minutes for the water to hydrate the flour.
Stretch And Fold
- Grab the edge of the dough and pull up stretching it out as you pull upwards. This may be difficult and you may need to kind of bounce the dough to get it to stretch. Place dough that is in your hands back into the center. Turn the bowl about a quarter turn and complete another stretch and fold. Repeat two more times. This is considered one round.
- Thirty minutes later, complete another round of stretch and folds. Cover and allow the dough to rest another 30 minutes.
- Complete one last stretch and fold round.
- Cover with a lid, damp towel, or plastic wrap. Let the dough bulk ferment in a warm place until it has doubled in size. This could be anywhere from 6-12 hours (or longer) depending on the temperature of your kitchen, maturity of your starter, etc. Be careful not to let it over ferment.
Shape
- Place the dough on a clean work surface that has been lightly dusted with flour. Fold the dough onto itself and roll up. Then shape into a ball by gently spinning it toward you.
- Optional - Let the dough sit out for 15-20 minutes uncovered. This prevents the dough from sticking to the tea towel during the overnight rise.
- Turn over and shape. I do this by folding the two sides over to meet in the middle, pinch together and then repeat on the other two sides. This creates surface tension which helps give it more oven spring (a good rise).
- Transfer to a floured banneton or bowl with a floured tea towel (typically floured with rice flour, this is not necessary and all-purpose will work just fine) seam side up.
- Cover with plastic or place in a plastic bag and tie the ends. Let the dough rest for 12-15 hours in the refrigerator. You can also let the bread rise at room temperature for 3-4 hours. I like using the longer rise time in the refrigerator because it is easier to score and feel like the oven spring is better.
Bake
- Preheat a dutch oven to 500 degrees for 1 hour.
- Remove dough from the fridge right before baking. Place dough on a piece of parchment paper.
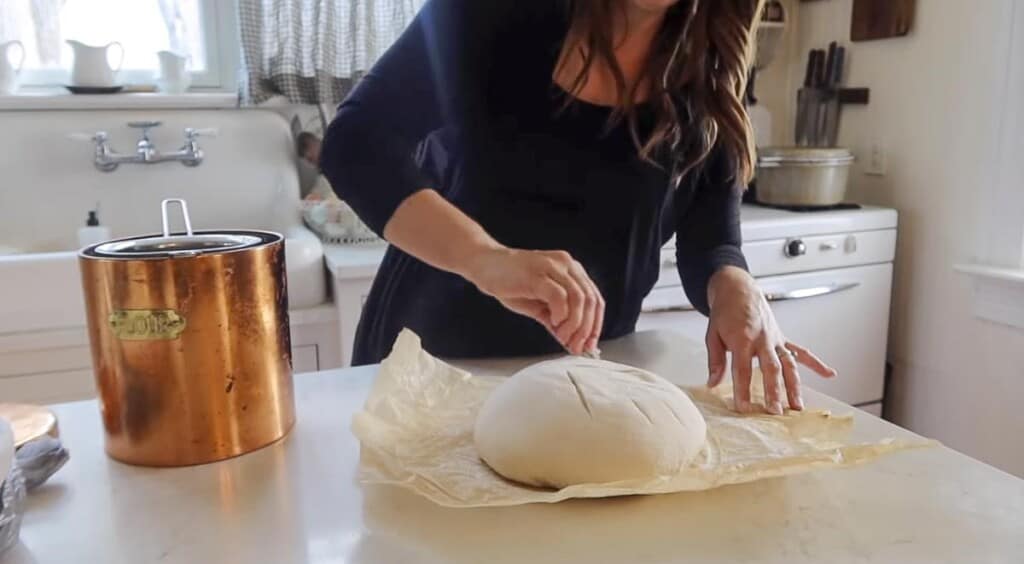
- Dust with flour, if desired, and score with lame or razor blade. I like to do one large score (called an expansion score) and then a cute design for the other score.
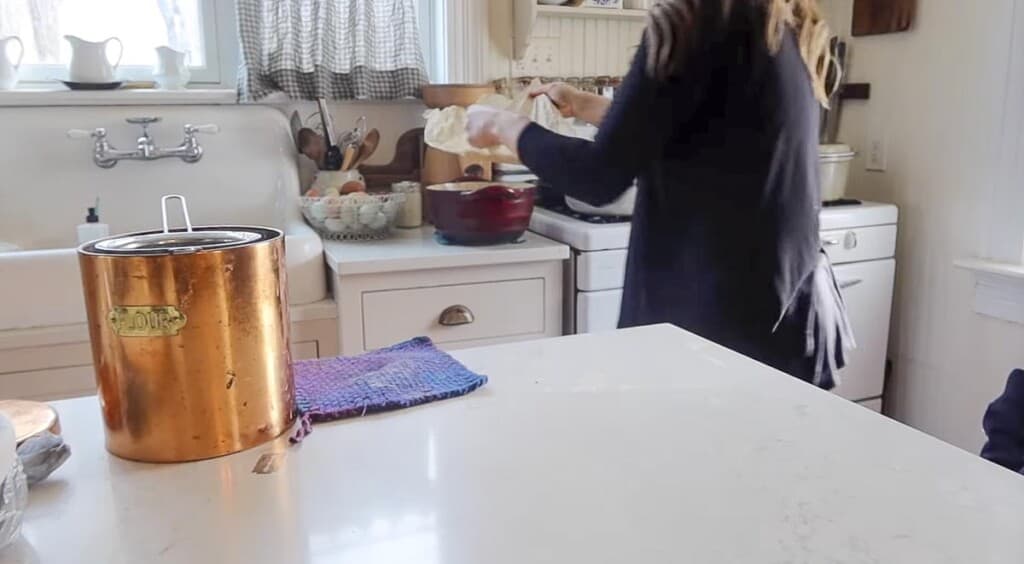
- Carefully, transfer the piece of parchment paper with the dough into the hot dutch oven. Careful not to burn your fingers.
- Place the lid back on and place the dutch oven into the hot oven. Bake for 20 minutes.
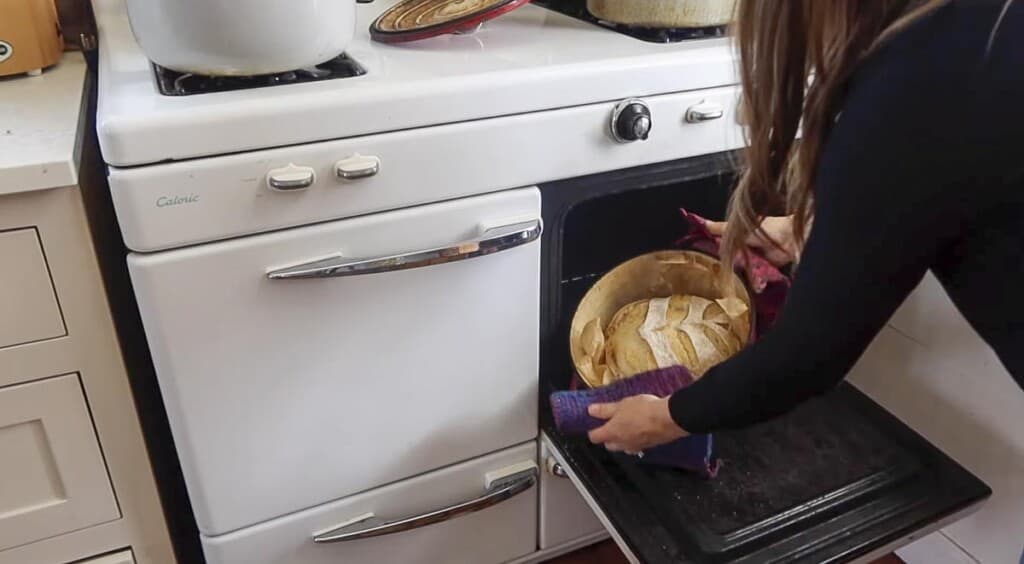
- Remove the lid with oven mitts, turn the oven temperature down to 475, and bake an additional 15-25 minutes or until golden brown.
Notes
- You will need a very active sourdough starter that passes the float test. Check out how to make your own sourdough starter and how to care for one here.
- The dough may seem dry when it is first coming together. Resist adding more water. Use wet hands during the stretching and folding if the dough is too sticky.
- The amount of time it takes for your dough to double can be determined by many environmental factors, such as the temperature in your home, the maturity of your starter, and the hydration status of the loaf.
- The most accurate way to create consistent results is by using a kitchen scale. I've included both gram measurements and cup measurements in the recipe.
Katie says
Thank you! I really need this! I have had my sourdough starter since last summer and can make all things except a basic loaf of sourdough bread. I’ve been making freshly ground bread for years yet this is so different. I’ll be doing this tomorrow!
Lisa says
I hope it turns out great!
Andrea says
Can I mix another kind of flour with all-purpose?
Amy says
great overview, Lisa!
Raymond Otero (Chef( baker from AZ.) says
From the description of just reading the recipe this is a two day Process?. Will try,but a good overnight rise in the fridge and a 2 to 4 rise on the counter should be Sufficient( depending on temp.) Will let you know. Just keep dough moist, must have a strong starter.
Lucy says
She does actually say, “or leave it for 4 hours on the counter” as an alternative for the long ferment in the fridge. Remember she’s making sourdough bread along with raising babies… something us mums know can be difficult to time right. I love that Lisa gives 2 options for the second rise it helps me fit baking around being a busy mummy. If you review other recipies you’ll see she often does this… I love her for it. Cheers lisa- another cracking sourdough loaf for me!
Tara says
The reason for overnight is to do the fermenting. If you don’t want sourdough then don’t do it that way and just do regular bread. There is a reason for it all. The more it rest, the more it ferments and the better it’ll taste. Not to mention getting rid of gluten.
Lisa has done tons of research and tons of real life application to find the best food possible.
If sourdough isn’t for you, that’s fine. But please, the prices is for a reason. If you go watch her YouTube video on this you would learn exactly why.
Jackie Adams says
I ended up putting too much water in the recipe. Is there anything I can do to save the dough? I don’t want to throw it away. I put in 375gm of water instead of 325. Sigh!
Lisa says
You could try to add more flour! Sorry. That is such a bummer.
Mila says
For the future, that’s not a problem at all, just do stretch and folds every 15 minutes. The dough will hold its shape better and better with each s&f, do those till the dough is strong
Izzy says
I just had the same issue, I accidentally put too much water and also used bread flour instead of all purpose. It was soupy and sticky the entire process. I ended up adding a ton of extra flour to counter it, did lots of kneading and stretching. I thought for sure I should throw it away when I took it out of the fridge this morning, as it was a flat floppy mess. But I had already preheated the oven so figured might as well finish. I’m so glad I did! It baked beautifully! Definitely a trust the process moment. I will definitely try this recipe again, but hopefully following directions a little better. 🙂
Em says
Wow what a turn around . I love when things go right just by chance, that’s my kitchen on a daily basis 😆 congrats
Katie says
Sadly I never got a rise out of my bread. Left on the counter for 15 hrs (~73 degrees) it was bubbly and very wet. I’m the morning I could hardly handle it, but went ahead and shaped and put into basket and left on the counter for 4 hrs. Size still didn’t change. I was hoping it would get a rise when baking but it didn’t. It’s just very flat. Could it be my starter? It passed the float test but it is a young starter.
This is my 4th attempt with the same results (first time using your recipe) Any advice would be really appreciated!
Lisa says
It was bubbly and very wet when you started the bulk ferment or after? If it was after, it is possible it was over fermented. It will turn into a wet sloppy mess if left to ferment too long. Rising issues could be from an immature starter as well.
Lydia Collins says
Wow. WOW. I am in LOVE with my sourdough!! I’ve spent the last month making crazy tough and flat and tasteless little loaves based on another recipe I was given. Finally I decided I HAD to figure out what was going wrong, so I found your recipe and decided to give it a go. Your recipe calls for a little less water and flour, and double the amount of the starter than my old recipe used, and called for a much longer countertop prove time, and a hotter oven for a shorter overall bake time. These changes resulted in a beautifully aerated and risen loaf, deliciously chewy on the inside and crunchy (but not overly so) on the outside. The flavor was so much more sour too, which was wonderful. At last,I have a loaf that I’m proud to serve to my family, AND to share with my friends! Thank you so much for sharing your wonderful recipe and tips. You’re a loaf-saver!
Lisa says
That is amazing!!! Wow. Thank you for sharing, and I’m so glad you enjoyed the recipe.
Darren Engleman says
My first ever sourdough bread, after 2 weeks of getting my starter ready. What an experience. I was nervous because of reading so many complicated sounding recipes, even though I’ve had a lot of success baking. I found your recipe, and this loaf turned out amazing. Thanks! I will be making it again.
Lisa says
So glad to hear this!! Thanks for sharing!
Bob Bush says
The best article on sourdough.
Lisa says
Thank you so much!
Heather says
I kept at it, finally got a perfect loaf! My starter just needed some age on it. Thank you for your clear step by step instructions! We have been enjoying the discard crackers wow so delish. Will be making this bread several times a week. Thank you for all your recipes and ideas!
Lisa says
Yay! That is so great to hear!
Dawn says
This recipe is pure perfection! It was the best one that I’ve tried so far, and my loaf came out stunningly beautiful, crunchy, and filled with holes
Lisa says
So glad you enjoyed it! thanks for sharing!
Erika says
Do any adjustments need to be made to this recipe when using freshly milled flour? Thanks!
Lisa says
Freshly milled can make things more dense on no knead bread. To make it fluffy, I recommend adding a bit of honey and oil like in my 100% whole wheat loaf.
Hannah-Grace says
Hello! I love all of your recipes and make them quite often!
A few questions for this sourdough loaf:
1. What kind of flour are you mulling for this?
2. Can I split the dough to make 2 smaller loaves? If so, when would I do that?
Lisa says
Thank you! I used just regular all-purpose flour from the store. You could, the baking time would need to be adjusted. Let it bulk rise, then split them during shaping.
Gabby says
I tried leaving the dough out for 20 minutes uncovered but it still sticks to the towel and I have to rip it off of the towel after the second fermentation. Is there anything else I could try to prevent this?
Laura says
Are you putting flour on your tea towel?
Tammy Bradford says
I am having the same problem. I put flour on the tea towel. I have somehow misplaced several flour sack towels, which I love. I was wonder if parchment paper wouldn’t work for the last rise before baking.
Salina says
I am also having this issue! I was even concerned about putting too much flour on the towel but it destroyed my load having to rip it off it was stuck so badly.
Lisa says
Was your dough really sticky when you added it to your banneton/bowl for the last rise? If so, it’s possible your dough over fermented. you could also try using rice flour next time, and don’t be afraid of adding too much flour. you can always dust it off later.
Amy says
I do not like doing the counter bulking, I find the bread too sour, so can I fridge ferment, w your recipe, at this point?
Ron says
Can i use this recipe with regular yeast instead of sour dough starter
Lisa says
I have not tried that. I have a post about converting yeast recipes to sourdough, though, and you could use it as a reference for the other way around. If you try this, let us know! https://www.farmhouseonboone.com/how-to-covert-any-recipe-to-sourdough
Lisa says
I was doing fantastic up until the fridge part. My dough did nothing overnight – was it supposed to rise a bit? It’s the same size as when I put it in, about the size of a slightly flattened large softball.It was ris8ng nicely before that.
Lisa says
It will actually look like it doesn’t rise much at all in the fridge. But when it bakes it should puff up nicely. Did you try baking it?
Allison says
What size Dutch oven is reccomended?
Lisa says
I use a 6 quart dutch oven, like this one (affiliate link): https://www.amazon.com/gp/product/B000N501BK/ref=as_li_tl?ie=UTF8&camp=1789&creative=9325&creativeASIN=B000N501BK&linkCode=as2&tag=farmhouseonbo-20&linkId=a1142bc41c1c5108c1887e7a175ac1c3
Leslie says
So it doesn’t hurt the dutch oven to bake it empty for an hour?
Lisa says
Nope not at all
Alisa says
Thank you so much! I haven’t tasted it yet but I just took my first one out of the oven and it looks beautiful
Lisa says
Hope it tastes as good as it looks! Enjoy!
Deb says
How can I bake this without a dutch oven?
Lisa says
You can bake it on a baking sheet, same time and temp. If you want it to have that really nice crusty exterior you will want to create a lot of steam. This can be done by placing a cast iron skillet with ice cubes to the bottom rack of the oven, or sprinting the dough with water a few times during baking.
Ali Harrington says
Hi!
If we do the second ferment in the fridge (instead of the counter for 3-4 hours) is it definitely a max of 12-15 in the fridge? Or can I do up to 24 hours in the fridge? Assuming No lol but thought I’d check. Thanks!!
Anna says
This is the same question I would also like answered.
Kori says
I just watched one of her YouTube videos where she made a bunch and had them in the fridge for up to six days. All turned out good.
Valerie says
Do you have a baker’s timeline (or what is your typical timeline) for this recipe? All the fermenting and resting is overwhelming and I am so worried I will need to wake up at 1AM to bake the bread.
Lisa says
Yes! It is included in the post.
Valerie says
How did I miss that?!? Sorry 🙂
Heather Cooper says
Hi Lisa,
Another recipe that I tried said to let bread cool on a wire rack for 1 hour before slicing. Is there a good reason for this? Who has that kind of self-control?????
Lisa says
Hahaha. It is hard! I find it easier to cut (not burning your hands ha), and it gives it a chance to cook all the way through. I’d say wait at least 20 minutes. When it is easier to handle.
Kayla says
Can you use a stand mixer in this recipe?
Lisa says
You could. For crusty breads like this, I like to use the stretch and folds. It gives it that amazing texture with lots of holes.
Rose says
Thank you for sharing this with us. Mine turned out great!
I did have a question in regards to the sourdough starter; do you need to feed the starter again after you take 100 g of it for the bread? Or do you wait until the next time you’re supposed to feed your starter?
Lisa says
If it is sitting on the counter you are supposed to feed it every 12 hours. So if will probably line up that you can just feed the starter when you remove some.
Sara says
This was my first time using sourdough starter and making bread- it turned out perfect! Thank you so much! My only problem is that I don’t think store bought bread will ever taste good to me again.
Lisa says
Homemade bread will do that! So glad you enjoyed it!
Marley says
Hello! I started this in the evening, and I won’t be home in the morning. What can I do so that it doesn’t over ferment? Can I stick it in the fridge? Thank you!
Lisa says
Yes you can. You can technically place it in the fridge at any point if you need to. I usually (especially in the winter and spring when the house is a little cooler) start bread the night before and let it rise over night at room temperature, then in the morning shape it and stick it in the fridge or let it rise on the counter until dinner.
Olivia says
My bread keeps getting burnt on the bottom, any clue as to what could be causing this?
Lisa says
You can try adding a sheet pan underneath your dutch oven or loaf pans.
Lucy says
She does actually say, “or leave it for 4 hours on the counter” as an alternative for the long ferment in the fridge. Remember she’s making sourdough bread along with raising babies… something us mums know can be difficult to time right. I love that Lisa gives 2 options for the second rise it helps me fit baking around being a busy mummy. If you review other recipies you’ll see she often does this… I love her for it. Cheers lisa- another cracking sourdough loaf for me!
Jennifer says
Do you have a time line that doesn’t include the fridge fermentation time? From what I’m reading it’s fold every 30 min 3x (so a total of an hr and half) then make into a ball…let it set covered for at least 6 hrs on the counter…then bake.
Making this for the 1st time after making starter foenthr 1st time too.
Lisa says
After the stretch and folds, Cover with a lid, damp towel, or plastic wrap. Let the dough bulk ferment in a warm place until it has doubled in size. This could be anywhere from 6-12 hours (or longer) depending on the temperature of your kitchen, maturity of your starter, etc. Then, you follow the shaping instructions and Transfer to a floured banneton or bowl with a floured tea towel. If you are not doing the fridge fermentation time, you can also let the bread rise at room temperature for 3-4 hours. Then, follow the instructions under “Bake”. I highly recommend the long fermentation in the fridge. Yes it takes a long time, but this is the best way to make the dough more firm making the scoring easier and prettier.
Cara says
I made the beginners sour dough and it was amazing! Can I substitute wheat flour instead of bread flour?
Lisa says
So glad! I haven’t tried that with this specific loaf, but it should be okay. Let us know if it turns out!
Kristen says
My dough and starter keeps looking wet at all stages. Not sure if it is due to living at high altitude but any suggestions on how to make the consistency slightly more dry? Thank you!
Lisa says
You may need to add a bit more flour to both.
Lauren says
If you need a longer fermentation for gluten intolerance, do you ferment longer during the bulk ferment or in the fridge? How do you do it without over fermenting?
Lisa says
I would ferment long in the fridge so that way there is much less risk of over fermenting.
Sophie Loughlin says
Made my 3rd sourdough today and decided to use your recipe and was amazing!!! Thanks so much for your help. It made a huge difference and also watching your starter video on YouTube.
Lisa says
That’s awesome! So glad it turned out well! Good luck with all your future sourdough endeavors!
Alex says
Hi Lisa! Is there a breadbox you recommend for the bread you bake?
Lisa says
I don’t personally have a bread box.
Andrea says
After many failed attempts at sourdough loaves, I came across your recipe and finally had my first successful loaf and many after. Thank you!!
Lisa says
Yay! That is wonderful to hear!
Jennifer says
This recipe is great and produced a delicious loaf! Mine did turn out way darker than yours and I was wondering if I should adjust the cooking temperature. I ended up pulling it out 10 minutes early and it was still darker than I prefer. My oven is electric and the dutch oven is coated.
Thanks so much!
Lisa says
Hmmm … you may want to adjust it slightly or pull it out sooner. If it is the bottom getting too dark, you can add a sheet pan underneath to help with that.
Jennifer says
What if my sour dough starter doesn’t float, what does that mean??
Lisa says
It means it hasn’t become active enough to use or it has gone beyond being active and has fallen flat.
April says
I am really enjoying your website with all its tips and tricks! Thank you so much. I am new to using sourdough starter but a friend gave me some so I had to do something with it! So far I have made English muffins, pancakes, and beginner sourdough bread. (3 times!) my husband said it’s the best bread ever. I am pinching myself because they all turned out great! I’ve only had the starter for a month or so.
I do still get a bit confused about discarding and maintaining but I think it’s working. I do keep the starter in the refrigerator most of the time. It’s when I switch back and forth that I get hazy! But, so far, so good.
Thanks again!
Lisa says
That is so wonderful to hear! Once you get the hang of it, sourdough is really pretty simple. Good luck on all your baking!
Sara says
My bread proofs wonderfully, but then when I take it from the bowl to the hot Dutch oven, it loses its size. I expected it to grow in the oven, but it didn’t really. I don’t use baskets as I don’t have any yet. Could that be the difference? Too much manipulation from bowl to Dutch oven? This last batch seemed really airy after proofing, and I was hopeful it would be my best yet, but it didn’t increase in size in the oven. Thoughts?
Lisa says
Are you still putting it on a floured tea towel? A bowl works great, as long as you are still dumping it out with a tea towel. You definitely don’t want to manipulate it too much after that final rise.
Traci says
Ty for such clear instructions. I let my intimidating feelings go and finally tried and beyond happy! Delicious
Natilie Kelly says
Hi! New to sourdough. Tried this recipe twice with my starter but the inside is still a bit doughy and not many holes. Is it likely my starter is not mature enough? How do I improve my starter? Thanks so much!
Another ?.. do I have to discard every time I feed my starter? Thanks!
Lisa says
It definitely could be. It can take a month or so before a starter is ready for baking bread. It will mature over time as you keep feeding and discarding. In the beginning, I recommend discarding every time you feed to get it establish (rather than throwing it away, you could use the discard in a recipe calling for discard). A good test to see if your starter is ready for baking bread, is the float test. Add a small amount of starter to a glass with some water. If it floats, it is ready for bread baking. Once your starter is mature enough, you don’t have to discard every time you feed it.
Katie Gitchel says
Hi Lisa,
This is my first time making a starter and attempting to bake sourdough.
I made my starter from rice flour and just baking my loaf now, also made with rice flour. My dough was not stretchy at all and somewhat crumbly right after refrigerator step & before putting in the oven to bake. Do you happen to know what I might have done wrong? It looks good but we haven’t tasted it yet as it is still cooling 🙂 Thank you! Love your videos ❤️
Lisa says
Unfortunately, this recipe will probably not work with rice flour since it doesn’t have any gluten. So it will probably not work.
Morgan says
This is my first time and I made a rookie mistake by the timeline of the dough in the fridge, is it okay if it’s in the fridge longer than 12-15 hours before cooking or do I need the cook it in that timeline?
Lisa says
Leaving the dough in the fridge longer than 12-15 hours is totally fine. I will make a few loaves of bread and keep them in the fridge for up to a week.
Ashley says
Hi! I’m in the process of making this recipe and I realized that I don’t have time to preheat the dutch oven, will the bread still turn out okay if I skip that step and go straight to baking? Thank you!
Lisa says
Honestly, I’ve never tried it. I have heard of other people having success with it.
Morgan says
Made my first ever sourdough loaf using your recipe and could not be happier with the results! It was delicious.
Quick question, what do you recommend for storing baked sourdough? How long will it last? Any recommendations if storing slices of bread instead of whole loaf?
Lisa says
Store uncut bread in a paper or linen bag. Once cut, store cut side down on a cutting board lightly covered or in a storage bag. A zip-lock bag will also work. I do not usually store in slices. My guess is it wouldn’t last as long if cut in slices already, and it may dry out a bit.
Judy Gillanders says
Hey! How can I bake this without a Dutch oven?
Also, I’m not huge on the crunch shell of a bread, can I remove the steam source and just bake as a regular loaf of bread? Or will it turn out different since it’s sourdough and not a traditional yeast bread?
Complete newbie here, my starter is on day 5 and I’m waiting to give it a try! Thanks
Lisa says
A dutch oven always gives me the best result, but you can use a cookie sheet or pizza stone. You can also use loaf pans, but if you do, I’d follow the baking instructions for sandwich bread, as opposed to dutch oven baking instructions. https://www.farmhouseonboone.com/sourdough-sandwich-bread
This blog post by Pantry Mamma also explains more on baking sourdough without a dutch oven: https://www.pantrymama.com/how-to-bake-sourdough-without-dutch-oven/ Hope that helps!
To get a good crust, a steamy environment is important. However, if you do not like the typical sourdough crust, you could experiment without. Let us know how it goes!
Anonymous says
How can I bake this without a Dutch oven? Also, I’m
Lisa says
A dutch oven always gives me the best result, but you can use a cookie sheet or pizza stone. You can also use loaf pans, but if you do, I’d follow the baking instructions for sandwich bread, as opposed to dutch oven baking instructions. https://www.farmhouseonboone.com/sourdough-sandwich-bread
This blog post by Pantry Mamma also explains more on baking sourdough without a dutch oven: https://www.pantrymama.com/how-to-bake-sourdough-without-dutch-oven/ Hope that helps!
April says
Thanks for all your tips! I recently received a jar of sourdough starter from a friend and I was clueless! But I have followed your recipes and have made English muffins, pancakes and beginner’s bread, all with great success. I owe it to you. Now I am baking bread every 4 days or so. Love it!
Thanks!
Anonymous says
I was so excited to try this and I totally missed a step but I’m not giving up and I’ll try it again All of your recipes are wonderful thank you for sharing
Lisa says
That happens to the best of us! Hope the next try goes better!
Rosa says
Hi!
I love your recipes and videos!
I followed your recipe and I have a sourdough starter that is 2 months old. When I take it out of the fridge and feed it, it is very big and bubbly the next morning. I have a scale and I weigh the ingredients. Why does my dough come out so loose? It is so sticky the fold overs are tough even with wet hands. And then when I go to shape it, it doesn’t hold a shape well. I feel like I have to add extra flour to make it resemble yours, but it’s still not coming out the same. Any thoughts? Is my starter not mature enough? Thanks!
Gabi says
Loving all this info, looking to start my sourdough journey! How long is the loaf good for after it is baked? As in how should it be stored and for how many days (if it is days ) is it edible? Can the dough be frozen?
thank you!! looking forward to your guidance!
Lisa says
Usually it will last about 3-4 days. You can always freeze the baked loaf for later. I have never tried freezing the dough.
Shelby says
This is literally the best sourdough recipe I have found! I tried so many other recipes and I couldn’t get any of them to turn out. I made this once twice so far and each time it’s been perfect!
Lisa says
Thank you for your kind words! So glad this worked well for you.
Jennifer Q says
This was my first bread I’ve ever successfully made from scratch! The only issue I had was the crust was really hard. Otherwise, perfection! It looked like a professional baker had made it. I was very proud. Thank you for putting all these great instructions together!!
Lisa says
That is amazing to hear. If the crust was really hard, it may need to be baked a little less time.
Ella says
Great information. I am just learning how to do this.
Wendy says
Hi Lisa, I have been teaching myself to make sourdough bread for over 2 years. I am a pretty experienced cook and ok baker. Pies are my specialty.
I came across your website and scrapped my starter to begin again using your recipe and method. After creating the starter for 1 week, last night I made this recipe of bread. This morning, my dough was more than double the size!! A first with my sourdough journey. I will be baking it later today. It looks like it will be the best loaf ever! The dough did everything you said it should do. Exactly. Thank you for the best starter and baking instructions.
Lisa says
Wow that is super impressive, especially with a starter that is only one week old!
Wendy says
I baked the bread last night in our Big Green Egg and it is specular. I will take photos today and post them for you, along with the Monte Cristo sandwiches I’m making for lunch today.
Wendy says
Hi again, I tried to upload some photos, but this form will not accept them. Let me know if you’d like them, and I can e mail them directly.
Jessica Weldy says
The bottom of my bread is always burned. Any suggestions?
Thanks!
Lisa says
Try adding a sheet pan underneath your dutch oven.
Kendall Rodesiler says
My very first sourdough bread try from my very first starter and it turned out perfectly! Thank you!
Lisa says
Awesome! That is a huge accomplishment! So glad it worked well for you.
Emily says
I do not have a Dutch Oven, would I be able to use my stone deep covered baker from Pampered Chef instead? Or would the stone dry it out?
Lisa says
That should work!
Melissa says
Just baked my first sourdough! It was delicious-however, it didn’t rise and came out a bit flat. I let it sit out for about 6-8 hours and it doubled in size just fine. What could have caused this?
Lisa says
There could be a lot of factors. It could be your starter wasn’t quite mature enough, it was over proofed, or maybe not enough tension was created during the shaping process.
Maria says
I am so excited to start this in the morning! I hope this isn’t a stupid question but if I want to make two loaves, can I just double this recipe? And if so, when do you think would be the best time to separate the loaves?
Lisa says
Yes you could. I would separate during the shaping stage.
Cindy says
I saw Jamerrill making sour dough following your recipe. I figured what the heck, I will give it a try because I was having issues with my step daughter’s recipe and directions. Well, it turned out beautiful! Thank you so much for your thorough instructions.
Lisa says
Awesome! So glad it turned out well for you. Thanks for sharing!
Carolyn McCarry says
I baked this bread last night, flavor good, but crust very hard. What did I do wrong. And how do you suggest storing bread. I live alone and takes a while to eat a loaf. Thanks
Lisa says
Sourdough is known for a hard crust. If you are noticing a burnt bottom on your loaf, you can try putting a sheet pan under your dutch oven. Store uncut bread in a paper or linen bag. Once cut, store cut side down on a cutting board lightly covered or in a storage bag.
Puckles says
Hello. Do you think 100% fresh milled whole wheat flour would work in this recipe?
Lisa says
For 100% whole wheat, i’d suggest following this recipe instead: https://www.farmhouseonboone.com/how-to-make-whole-wheat-sourdough-bread
Erin says
Hey! Not trying to be annoying, but thought you might like to know that in your description (the heading right before the ingredient list) you have a typo
You say it has a nice “crump” rather than “crumb”
Your sourdough is a different hydration % than my go to…I’m eager to try it!
Lisa says
Oops! thanks for catching that!
Mindy says
Question about the amount of salt. On my scale 10 g is way more than 2 tea spoons. Please help.
Lisa says
It could be because of the type of salt you are using. This blog explains how big of a difference salt can be volume wise: https://www.dadcooksdinner.com/salt-by-weight/#:~:text=With%20salt%2C%20density%20matters*.,whole%20cup%20of%20Diamond%20Crystal. Hope that helps!
KC says
My dough is absolutely always way too sticky to roll into a ball/shape. Always. I tried a bit less water, colder water, a bit more salt. I’m in a humid area, southeast North Carolina. The bread cones out very good. I just can’t shape or score it. Ever. I have tried multiple recipes. I’m not sure what else to do.
Lisa says
So sorry you are having trouble with that! It can be tricky to get right. If your dough is really sticky and wet after the bulk fermentation, it is possible it fermented too long. It also may need a bit more kneading in the beginning to come together.
Anonymous says
Thank you for this recipe!! It was super easy to follow and my bread is amazing! This is the first loaf of bread I’m making with my new sourdough starter and it turned out perfectly 🙂
Lisa says
That’s awesome! So glad you enjoyed the recipe.
Briana says
I love your recipes and blog! Any tips on telling when the dough is too wet and sticky vs too dry? I have a hard time with my dough being sticky and wet, I live in Georgia, a humid climate! Thank you so much!
Lisa says
I’d suggest checking out some of my baking videos on YouTube. This one may help as a visual: https://youtu.be/kp3ZYkzbg9Q?si=bNx4oyO1Yjlzh-UP
Sydney says
Hi Lisa,
I followed the instructions but after taking out of the fridge my dough looks much more flat than yours, with almost no rise, definitely not round or shaped like it was. Do you think this is an issue with my starter? It did pass the float test but is only about 3 weeks old.
Lisa says
That could be. Sometimes it takes awhile before a starter is mature enough to make bread. Did it puff up during baking? Sometimes I find my bread looks flat coming out of the fridge, but then it puffs up just fine during baking .
Sydney says
Hi Lisa,
I followed all instructions expect used a bowl instead of basket in fridge (still covered with bag). After taking out of the fridge, my dough is much more flat than yours with almost no rise, kind of like a raised disk shape. Do you think this is an issue with my starter? It did pass the float test but is only 3 weeks old.
Lisa says
Did it rise during the bulk ferment? It may be because of the shape of your bowl or an immature starter. You may also be surprised how much it rises in the oven!
Lydia says
I’ve used the recipe twice now to make sourdough and it’s turned out great! My question is when I get to the Shape section after the bulk ferment my dough has been really sticky both times so that it’s very hard to shape the dough even with a pretty floured surface and hands… do you have any suggestions?
Lisa says
It’s possible your dough is a bit over fermented.
Anjyla says
I really appreciate the in-depth explanation throughout this recipe! My sourdough starter is brand new (I’m on day 3 now) and I was looking for my first recipe using it once it’s ready and I think this is it! Your entire post gave me so much more information on the whole process, thank you!
Lisa says
This is a great one to start with! Can’t wait to hear how it turns out!
Lacy says
Hi! Can you leave the dough in the fridge for longer than the 12-15hour recommendation?
Lisa says
Definitely. I like to make a bunch of loaves and once and then keep them in the fridge, just taking one out a night.
Kayleigh Young says
Hi there! Newbie here. I purchased a 3 quart Dutch oven. Is that big enough for this recipe? Thanks!
Lisa says
Hmm I think that may be too small. You’ll have to try it out and let me know
Kerry says
Used whole wheat flour without thinking..is this going to be problematic? Anything I can do to correct it and at what stage?
Lisa says
It will probably be ok. May just be denser than bread made with all-purpose
Robin says
My bread is really good but it burns every time! I tried reducing the 475 to 10 minutes but it still burns. What am i doing wrong?
Lisa says
Everyone’s oven is at slightly different temperatures. If it is burning I would try to bake it at 450-475.
Melissa says
Thank you so much for this recipe. This is the first actual loaf I have made with the my starter that’s only a few months old. I was a bit worried I would end up with croutons, bit the loaf turned out great!
Lisa says
Yay! So glad it turned out well. Have a wonderful day!
Lisa says
Yay! That is wonderful to hear.
Emily says
Hi Lisa. I’ve done sourdough of and on for 2 years but now getting into it again because I have time. I just made this recipe and it looked great up until the part where I was supposed to shape it and get it ready to be in the fridge overnight. I dumped it out from rising and it was very wet. I did the best I could but it is still wet and lost all its rise. I am putting it in the fridge anyway and hoping for the best in the morning. Will this affect its rise in the oven and what could have happened? It was a wonderful texture during the stretch and folds. I am worried it won’t rise in the oven now and it’ll be a little dense loaf. Will followup once it’s baked off.
Lisa says
It is normal for it to look like it didn’t rise much in the fridge overnight, so if it looks questionable in the morning it may still bake up ok. When you shape it, it will seem to lose its rise and that is ok. If it was super wet and sticky it’s possible it over fermented. How long did it rise for? Was it in a warm spot?
Emily says
Thanks for responding! It rose in a warm spot for about 7 hours. That was when it was double it’s size. I then prepared it to go in the fridge overnight and realized it was very wet. How can you tell if it was overfermented? The bread actually baked off amazingly. It didnt rise nearly as much as I expected it to, but it still rose decently. It tasted amazing but didn’t have those fluffy holes. I definitely need to work on tweaking something. I am making my second loaf today (currently in the stretch and fold stage) we will see how this one turns out!
Lisa says
Glad it turned out okay! You can always make bread crumbs or croutons with bread that doesn’t turn out the best, too. Dough that is over fermented will start to lose its structure and become wet and soupy.
LORI. says
This was great. My friend gave me the starter and I have no idea how to make sourdough this help me a lot what should you bake it in if you do not have a Dutch oven?
Lisa says
You could bake in a loaf pan, but I would recommend following the baking instructions for sandwich bread, as opposed to dutch oven baking instructions. https://www.farmhouseonboone.com/sourdough-sandwich-bread
Tellie says
Hi Lisa, I’ve been using this recipe for a few months and the last two loaves I’ve made have been very dry during the stretch and folds process and it have been taking almost two hours to have my dough fully autolyzed. I am thinking this could be due to less humidity in the air? Do you have any suggestions? Thank you!!
Lisa says
It definitely could be that. Or if your starter is being fed less water than usual. I would wet your hands when you are doing the stretch and folds, and that should give it a little more moisture without it being too wet. That should help.
Tellie says
Hi Lisa, I just wanted to follow up to my precious comment and say that you were right about the issue being the starter. I used some of my moms more hydrated starter and it autolyzed and baked up beautifully!! Thank you for your suggestion!!
Anna Ogletree says
I just successfully made this recipe, and doubled it for my large family. Thank you so much, Lisa! The instructions are easy to follow and explicit! Blessings to ya’ll!!
Lisa says
Awesome! Thanks for sharing, Anna! Have a great day!
Valerie says
Can you bulk ferment in the fridge? Let’s say you started too late in the day…and want to continue the process the following morning after stretches and folds. Is that an option? TIA.
Lisa says
It is not normally recommend to do the bulk ferment in the fridge. I have let bread sit out for a few hours, popped it in the fridge overnight, and then took it out to ferment again for a few hours the next day before shaping, and rising again with pretty good results.
Mel says
I followed the measurement of the ingredients, after the 3rd S&F and 4 hours of counter resting this is so very shaggy and hard to manipulate. So I added some more flour and kneaded it in the stand mixer. Still, it is very shaggy, what can I do to continue the process and not let it die?
Lisa says
Was it shaggy during the 3rd stretch and fold? or after sitting for four hours. Shaggy sounds dry to me so not sure if adding more flour would help. I would still let it rise for the full time, shape, rise again and try to bake it. If all else fails you can make bread crumbs, strata, French toast casserole or croutons with a failed loaf.
Shelly Anderson says
This is the best recipe I’ve found by far! Delicious and easy. The dough was in the banneton in the fridge for about 36 hours and still was perfect!
Lisa says
That’s what I love about sourdough! It can fit into your schedule as needed with a little fridge time. Thanks so much for sharing and glad you loved the recipe!
Allie says
Thank you so much for this! After struggling through other recipes, this loaf came out amazing. My family devoured it in one day. When the four year old keeps going, “Can I have more bread please?” then you know it is a winner.
Lisa says
Love to hear that! Thanks so much for sharing!
Jessica says
I love this recipe, but the bottom of my bread always burns. Do you have any suggestions?
Lisa says
Try adding a sheet pan underneath your dutch oven.
Christina says
Hello, so glad I found because Banking bread really helps me to live healthy. I tried this recipe now for a while. The problem is my dough never Looks Like a ball at the end. It IS Always very sticky and I am Not able to shape it and hardly transfer it from my Bowl to the baking sheet. Do you have any Idea? To much water? Wrong flour?
I really appreciate your Help.
Sending greetings from Germany.
Warmly, Christina
Lisa says
There could be multiple factors. Where you live (higher humidity places may may dough more sticky), how you feed your starter, how warm your house is, the ratio you feed your sourdough starter all can have an effect on your dough. If this is a constant problem, you may want to add a little more flour.
Anonymous says
never made bread before but have made lots of beer. Thought to try my hand at making sourdough. Spot on process and detailed explanation. Thanks
Lisa says
That is wonderful to hear.
Kamela says
Excellent recipe that’s NEVER failed me. Thanks!
Lisa says
Wonderful! So glad you enjoy it