


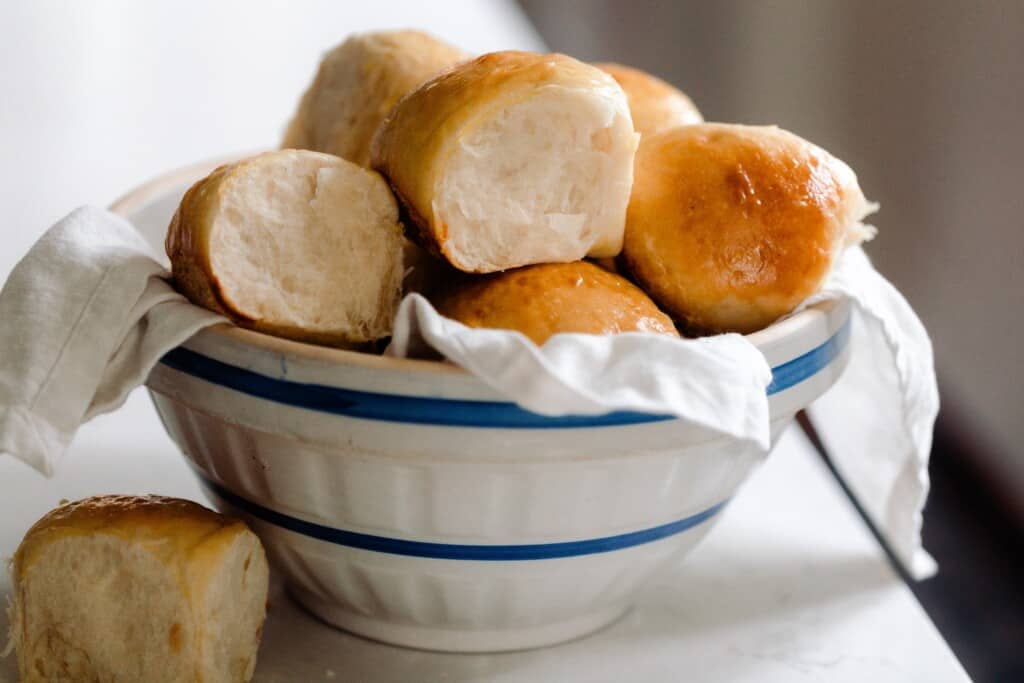
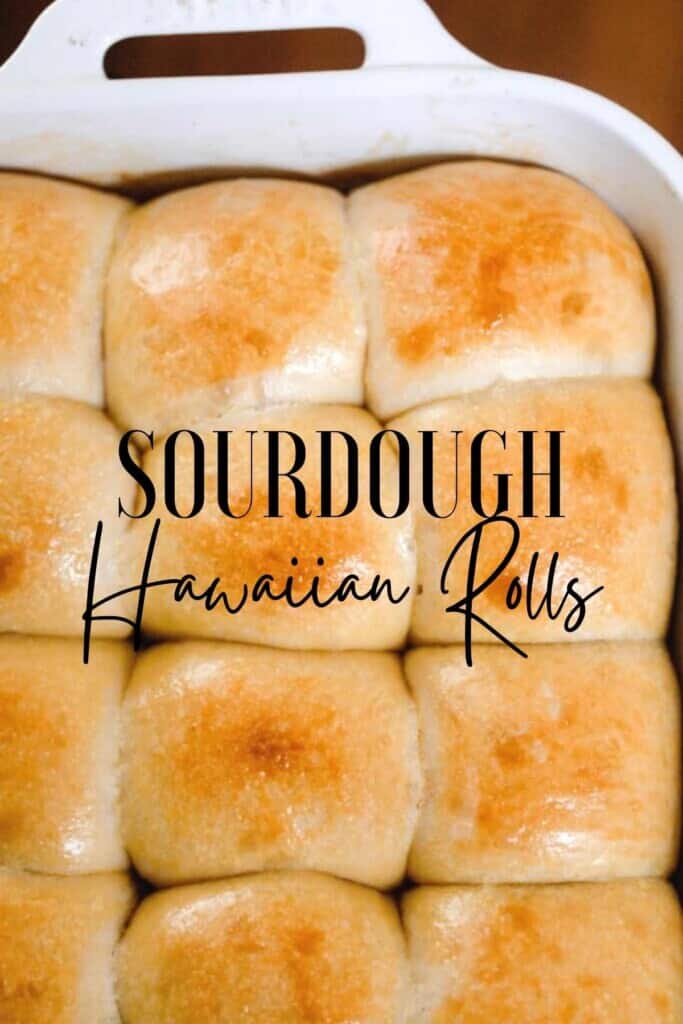
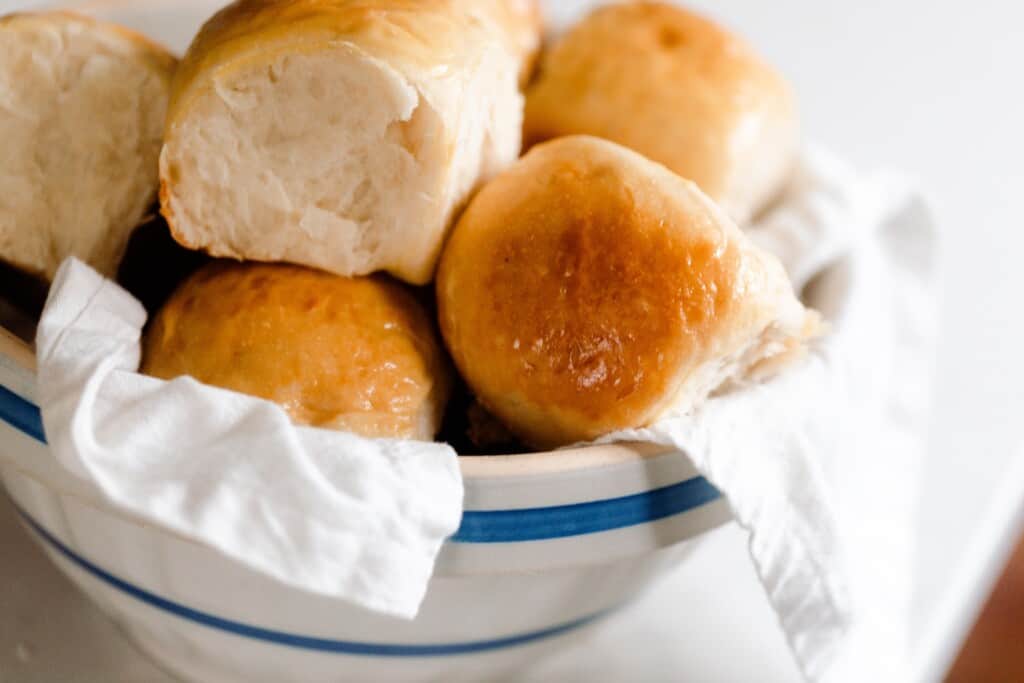
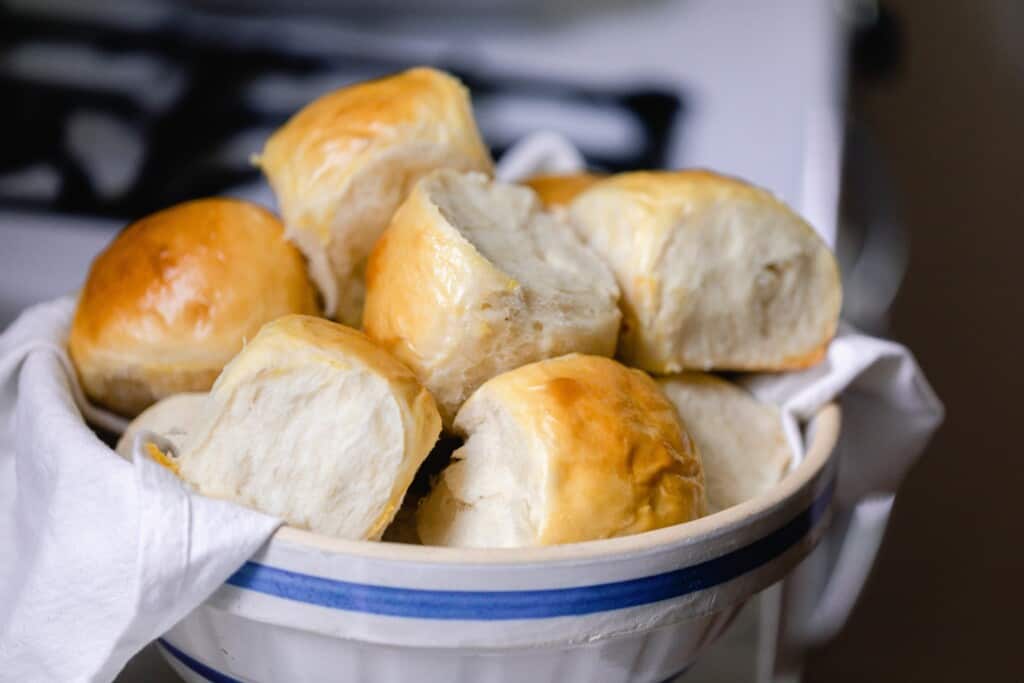
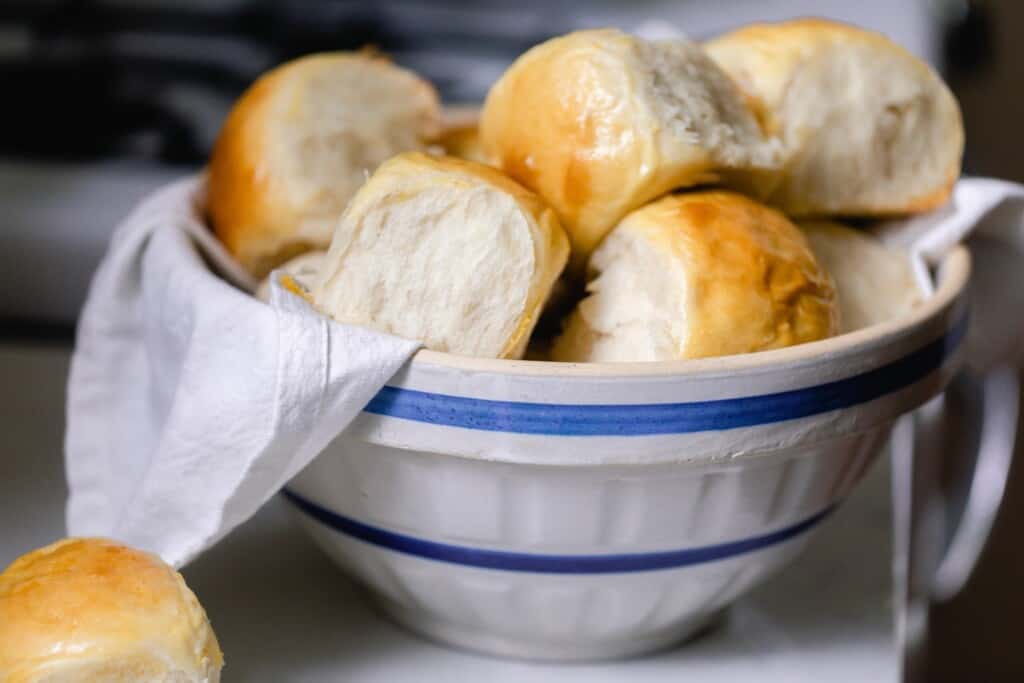
Sourdough Hawaiian rolls are a soft, fluffy, sweet roll with a delicious pineapple flavor and classic sourdough tang. These make the best dinner rolls, or you can use them to make mini sandwiches.
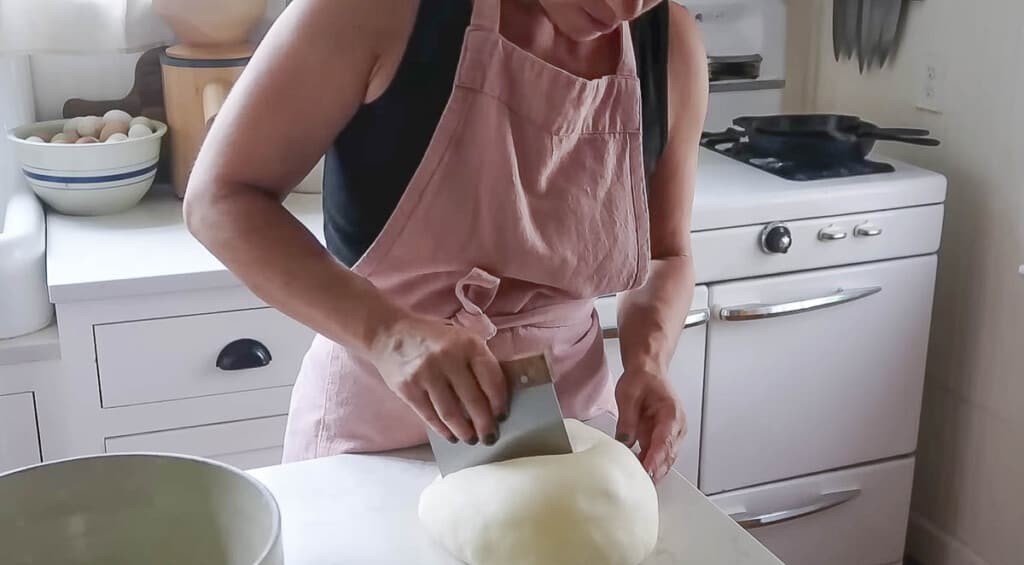
Probably one of the easiest bread recipes ever and also one of the tastiest. You simply dump all the ingredients into a stand mixer, allow the mixer to knead, let the dough rise, shape, rise again and bake.
No folding and stretching. Just mix until stretchy right in the stand mixer.
Hawaiian rolls are one of our family’s favorite sweet sourdough rolls (it’s a tie between these and sourdough brioche, which is quite similar).
If we are out of town or traveling and we need to stop by the grocery store to get some bread, we will grab Hawaiian rolls rather than white bread. It is just so much more delicious.
Hawaiian rolls are a great way to feed a crowd. For an easy dinner, I love having this sourdough Hawaiian bread on hand to make ham and Swiss rolls. Slice the rolls in half, add your ham and cheese, top with the other half, then bake until gooey.
The perfect combination of sweet and savory.
Tips:
- Make sourdough Hawaiian bread – Usually, we make these into rolls, but you can also make this recipe into a loaf. Just make 6 larger dough balls and bake in a bread pan, rather than in a 9×13. Bake for about 25 minutes.
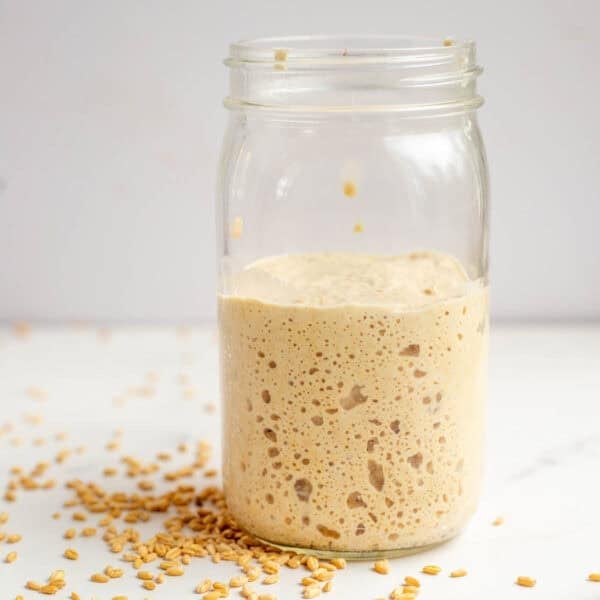
- Make sure your sourdough starter is super active and bubbly for best results.
- If you find yourself with risen dough, but don’t have time to shape and rise again before baking, you can stick it in the fridge until you have time. This slows down the fermentation process, allowing you a little extra time.
- New to sourdough? Check out how to make a sourdough starter here, and see the list of terms you may need to know.
This post contains affiliate links, which means I make a small commission at no extra cost to you. See my full disclosure here.
Why you will love this recipe:
Simple: This recipe couldn’t be easier. Add all the ingredients straight to the stand mixer and let it do all the work. Allow it to rise, then shape the dough, rise again and bake.
Super delicious: Is there anything better than super soft, fluffy, buttery sweet rolls?
Perfect for mini sandwiches or appetizers: These rolls make the best vessel for ham and Swiss sandwiches or sliders. Yum!
FAQ:
Are Hawaiian rolls the same as brioche?
They are similar since Hawaiian rolls and brioche are both enriched doughs, meaning they include eggs and/or butter. The main difference is that Hawaiian rolls are sweeter and include pineapple juice to give them a super yummy flavor.
How is Hawaiian bread different from regular bread?
It includes pineapple juice and more sugar compared to regular bread.
What is special about Hawaiian bread?
It is sweet and fluffy with a slight pineapple flavor.
What’s the difference between Hawaiian rolls and regular rolls?
They are an enriched roll, meaning that they include butter and eggs. Regular rolls usually do not. Hawaiian rolls also include pineapple juice to give them that tasty, sweet, pineapple flavor.
Why is it called a Hawaiian roll?
Because they originated in Hawaii in the 1950’s. It is actually a twist on the Portuguese sweet bread, which also has a slight pineapple flavor even though pineapple isn’t listed on the ingredient list.
Ingredients
- Pineapple Juice – Canned or bottled will work the best.
- Milk
- Sugar
- Sourdough starter – Make sure it is nice and bubbly. Discard or immature starter will not work for this recipe.
- Butter – This needs to be softened so it can easily be incorporated. Butter that is too hard will just leave you with chunks.
- Vanilla extract – Store-bought or homemade.
- Egg
- Salt
- All-purpose flour – Nothing fancy here. Plain ol’ all-purpose flour will work. Fresh milled or store bought.
Egg wash
- Egg yolk
- Water
Tools you may need:
Measuring cups and spoons
9×13 baking dish
Bench scraper (optional but useful)
How To Make Sourdough Hawaiian Rolls
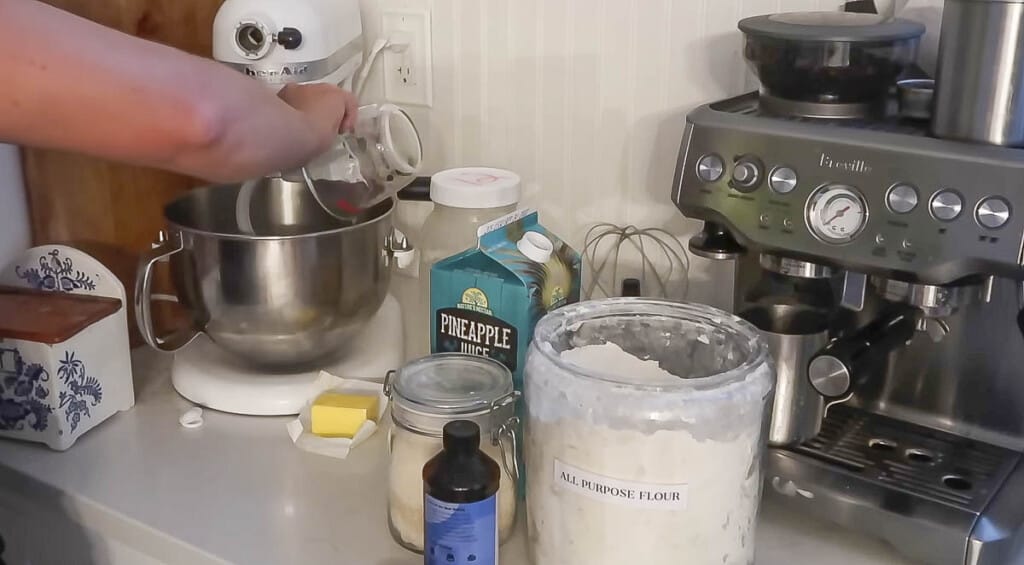
Add all of the ingredients (except the egg wash) to the stand mixer with a dough hook.
Knead until smooth and elastic, about 10-15 minutes.
Place dough in a greased bowl and cover with plastic wrap or a tight lid.
Allow to rise overnight. About 8-12 hours.
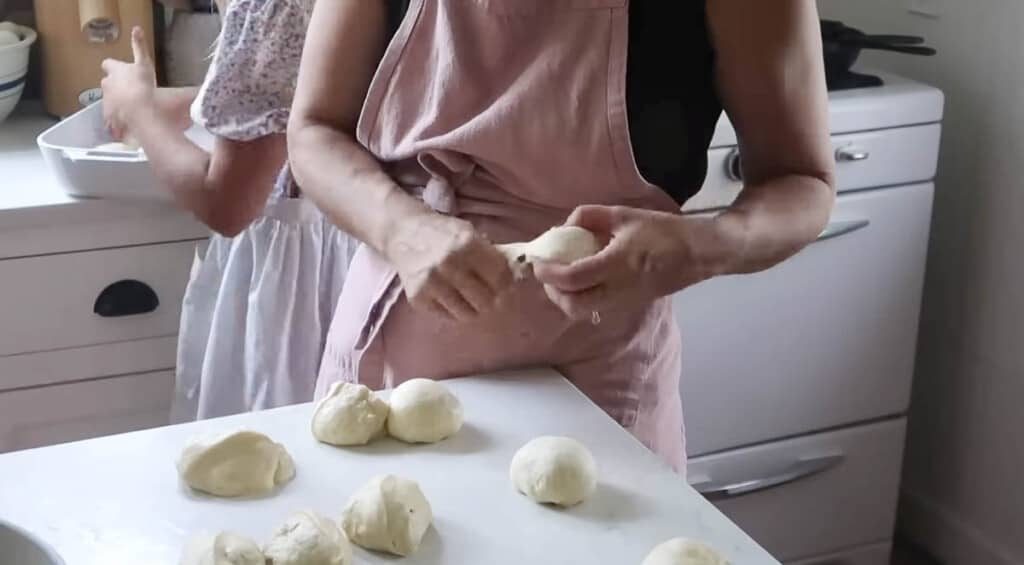
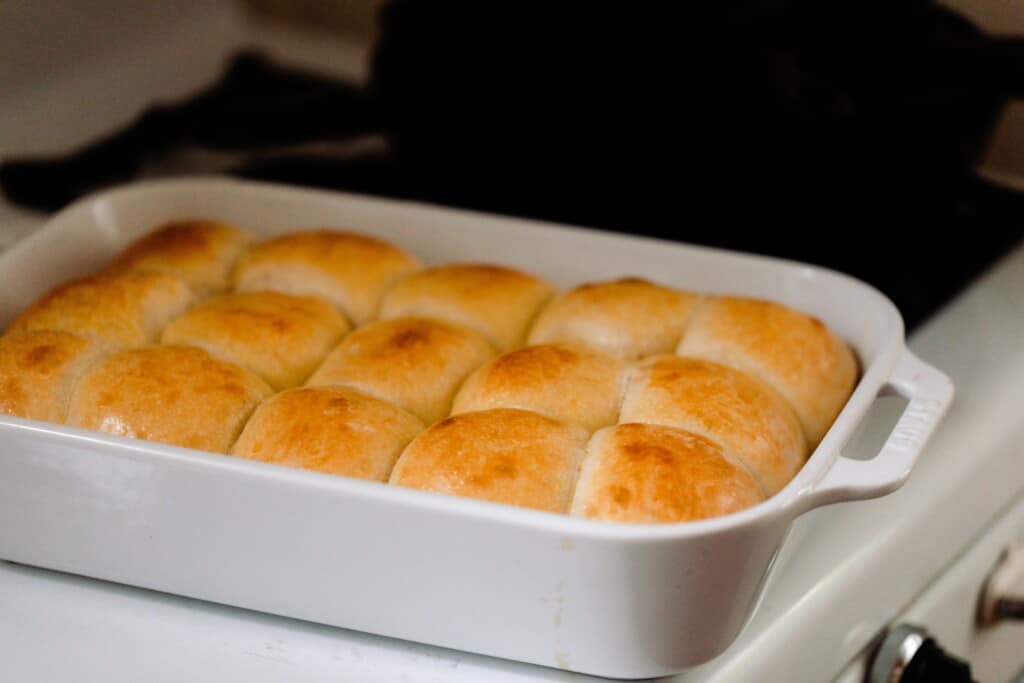
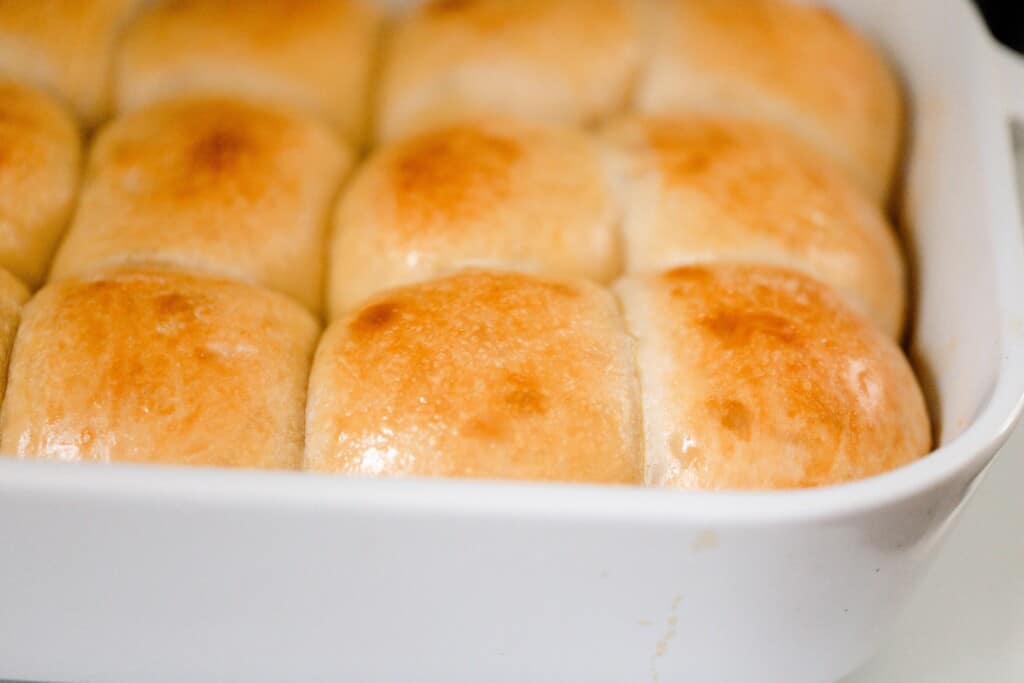
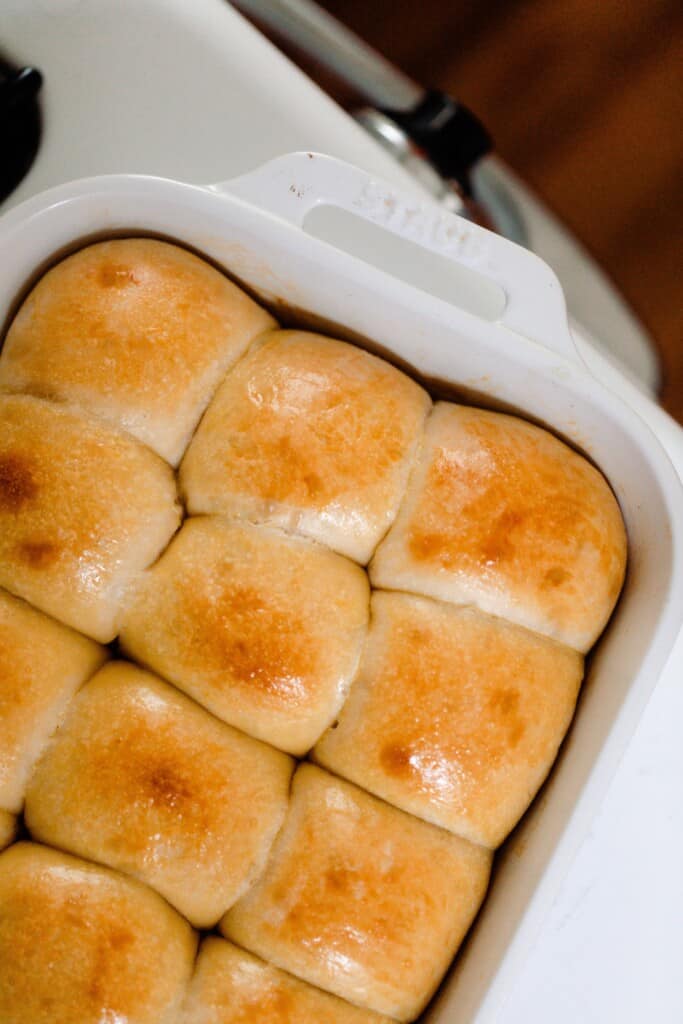
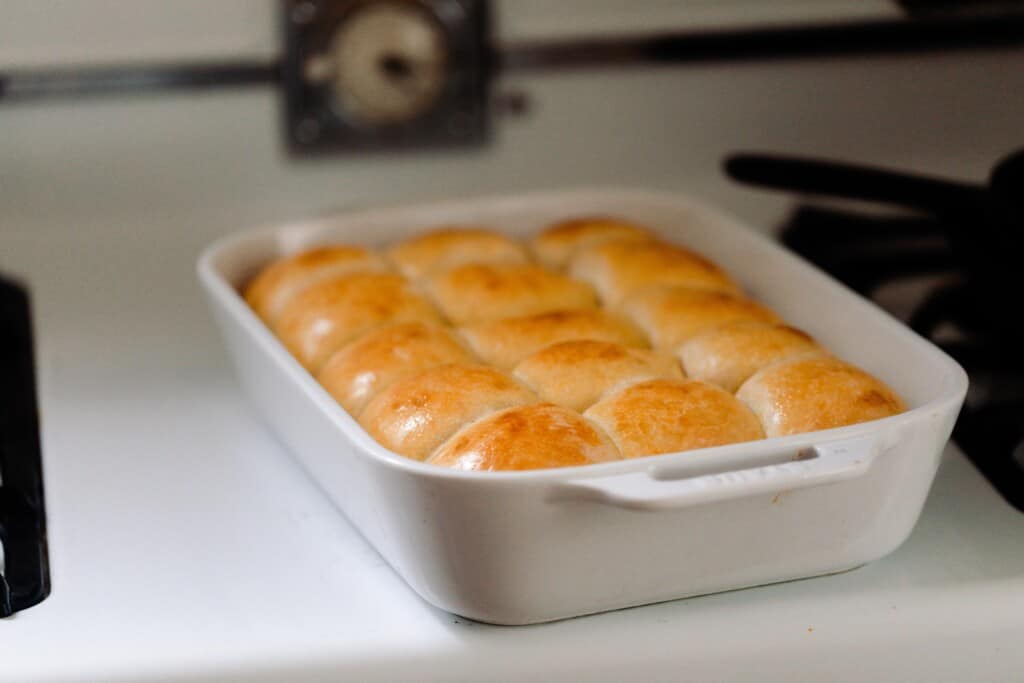
Divide dough into 18 even rolls and place in a greased 9×13 baking dish.
Cover with a towel and allow to rise until doubled. This rise will take about 1-3 hours depending on the temperature of your home.
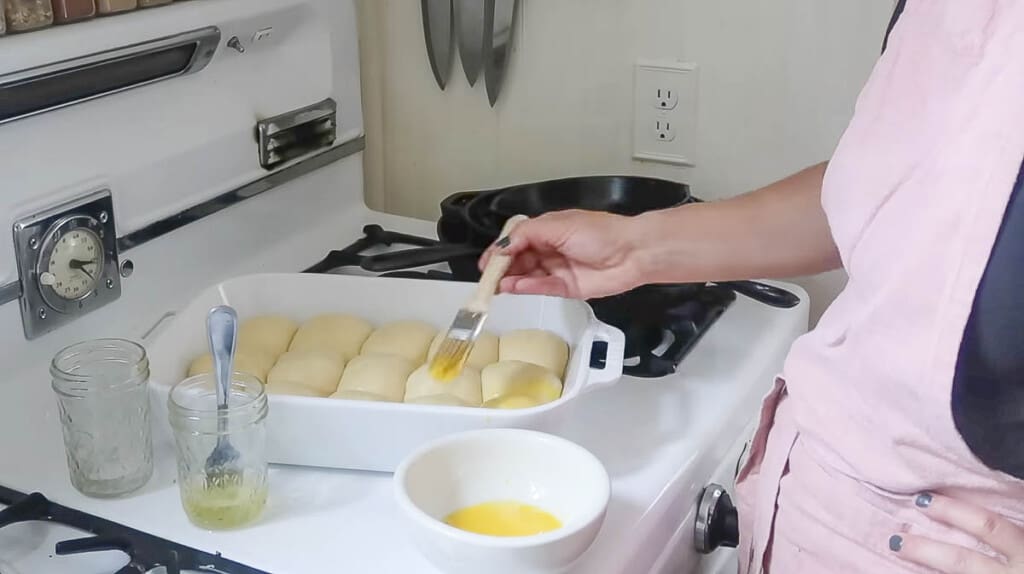
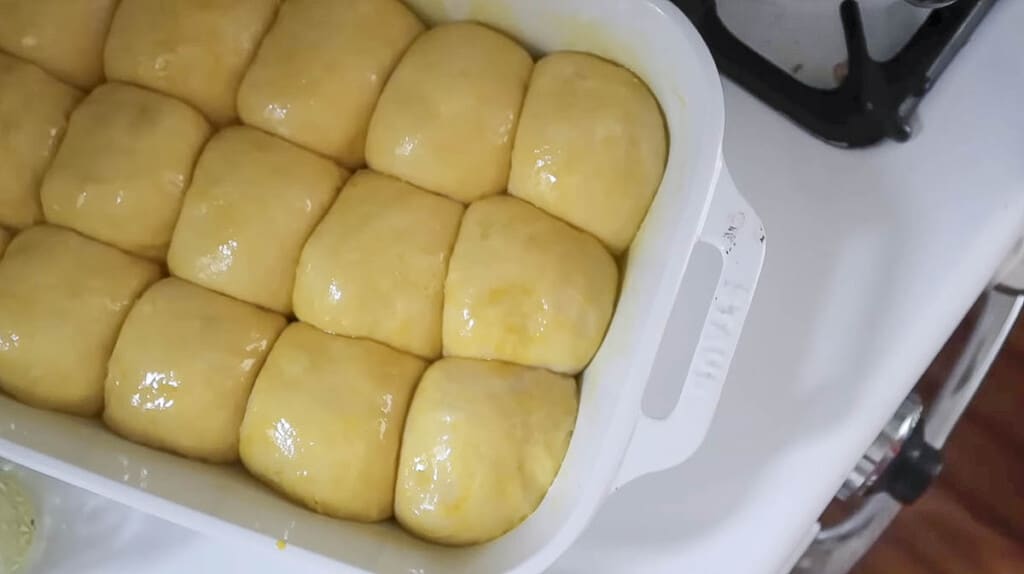
Once the dough has doubled, create the egg wash and brush over the dough.
Bake for 20-25 minutes at 375 until the rolls are golden in color.
Cool.
Storage:
Store in an air-tight container. Use within 3-4 days for best results. Or freeze for up to 6 months.
Baker’s Schedule:
12 PM: Feed sourdough starter.
8 PM: Create dough and allow it to ferment overnight, covered.
8 AM the next day: Take dough and roll into 16 rolls. Place in a baking dish covered and allow to double in size.
10 AM: Bake and allow to cool before serving.

How To Use Sourdough Hawaiian Rolls:
- Ham and Swiss
- Pulled pork
- Mini hamburgers. Growing up my aunt made the best sliders with these rolls. She would brown ground beef with seasonings and onions. Slicing the rolls in half, she would add ground beef, top with pickles, and then replace the other half of the rolls and bake.
- Chicken parmesan sliders: Add cooked chicken and a little tomato sauce, top with parmesan and mozzarella cheese, then bake until gooey.
- Fried chicken sliders: Use my sourdough fried chicken recipe and create mini sandwiches.
- BLT
Find More Sourdough Roll Recipes:
If you try this recipe and love it, I would love if you gave it 5 stars! Thank you! Tag me on Instagram @farmhouseonboone.
Sourdough Hawaiian Rolls

Ingredients
- 1 cup pineapple juice
- ½ cup milk
- ½ cup sugar
- ½ cup starter
- ¼ cup unsalted butter softened
- 1 teaspoon vanilla
- 1 large egg
- 2 teaspoons salt
- 5 cups all Purpose Flour
Egg wash
- 1 large egg yolk
- 2 tablespoons water
Instructions
- Add all of the ingredients (except the egg wash) to the stand mixer with a dough hook.
- Knead until smooth and elastic. About 10-15 minutes.
- Place dough in a greased bowl and cover with plastic wrap or a tight lid.
- Allow to rise overnight. About 8-12 hours.
- Divide dough into 18 even rolls and place in a greased 9×13 baking dish.
- Cover with a towel and allow to rise until doubled. About 1-3 hours depending on the temperature of your home.
- Once the dough has doubled, create the egg wash and brush over the dough.
- Bake for 20-25 minutes at 375 until the rolls are golden in color.
- Cool.
Notes
- Make sourdough Hawaiian bread: Usually, we make these into rolls, but you can also make this recipe into bread. Just make 6 larger dough balls and bake in a bread pan rather than in a 9×13. Bake for about 25 minutes.
- Make sure your sourdough starter is super active and bubbly for best results.
- If you find yourself with risen dough, but don’t have time to shape and rise again before baking you can stick it in the fridge until you have time. This slows down the fermentation process allowing you a little extra time before needing to make.
Nutrition
Nutrition information is automatically calculated, so should only be used as an approximation.


Can I substitute honey for the sugar and if so, how much?
Yes, the same amount that is listed for the sugar.
These rolls remind me of my grans. She made delicious rolls for Sunday family dinners. This took me back to happy memories. I’ll be making these again and again.
Thank you!
My question is, do you weigh them out by grams? I doubled my recipe and believe I only got 24. So im just curious how you got 18 in the first batch? I just want to know for future baking.
I just eyeball them, but you could certainly divide them out by weight!
Not sure what I did wrong, they are crumbly and get a little “doughy” as I chew in my mouth.
Not sure what i’m doing wrong (tried twice)…i followed the recipe and the timing of everything and they are not doubling in size when proofing and are dense. help!
It could be a number of things! Is your starter mature and active when you’re using it? Are you keeping it in a warm place? Are you sure it’s not doubling and falling and you are missing the rise?
I’m giving these 5 stars because they were so delicious, but there is a little I have learned when making this recipe. I am making these again for the third time in 4 days. The first time I made these, I just scooped the flour out of the bin and leveled it off with my finger, and they were a bit dense, but everyone loved them. The second time, I spooned and leveled the flour with a butter knife, and the dough was a little stickier but the rolls were much lighter, and everyone loved them even more! This is the only issue I have when the recipe doesn’t have gram measurements because you can have variations in the end result especially with bread depending on how the flour is measured. My dough took almost 22 hours to rise fully, but it is a little cool in my kitchen. I had risen it all day and just ended up leaving it overnight to continue rising. It all depends on the temp in your house, so be patient! I was also confused because the recipe card states 18 rolls for one recipe, the blog post said to cut into 16 rolls, and the pictures show 15 rolls in the pan. I went ahead and made 15 rolls based on the picture in the blog post. They were the size of a traditional dinner roll. I’m sure the rolls would be more like the size of true Hawaiian rolls if you cut the dough into 18 balls. I think I may try that for this next batch. I hope that info helps – this recipe is sure to be made often in my house!
Will fresh milk led flour work in this recipe instead of all purpose flour? If so, what amounts and what grains would you recommend? Thanks for the recipe
Yes, it will work. I just recommend measuring by weight for FMF.
Love this recipe! It’s easy and always comes together smoothly. The taste is incredible! This has become a staple in our family.
So after sitting overnight for 12 hours the dough did not double. Actually it barely rose at all. I went ahead and shaped and let rise for 3 hours. Again, no rise. I have a super active starter that I use to bake with weekly so not sure what went wrong here. I was really looking forward to these 😞
Did you bake them? Sourdough can surprise you! The general rule is “Bake it anyway!”.
(I’m not sure my starter is strong & active; mine are portioned and rising. I was considering putting some yeast in there (which I probably should have done!) but I’m going to bake it anyway!…)
I’m wondering if I’m reading this correctly that I am only going to use 1/2 cup of starter. I made a fresh starter this morning and it’s beautiful but of course I have a full cup. That kind of confused me. So can you verify that I only use half of that starter?
Yes, just use half of it. You always want to keep some starter held back and never use it all. Here’s a post about maintaining a sourdough starter.