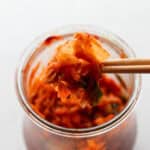

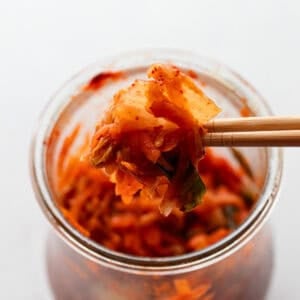
Learn how to make this homemade kimchi recipe that is not only super delicious, but also packed with gut healthy probiotics.
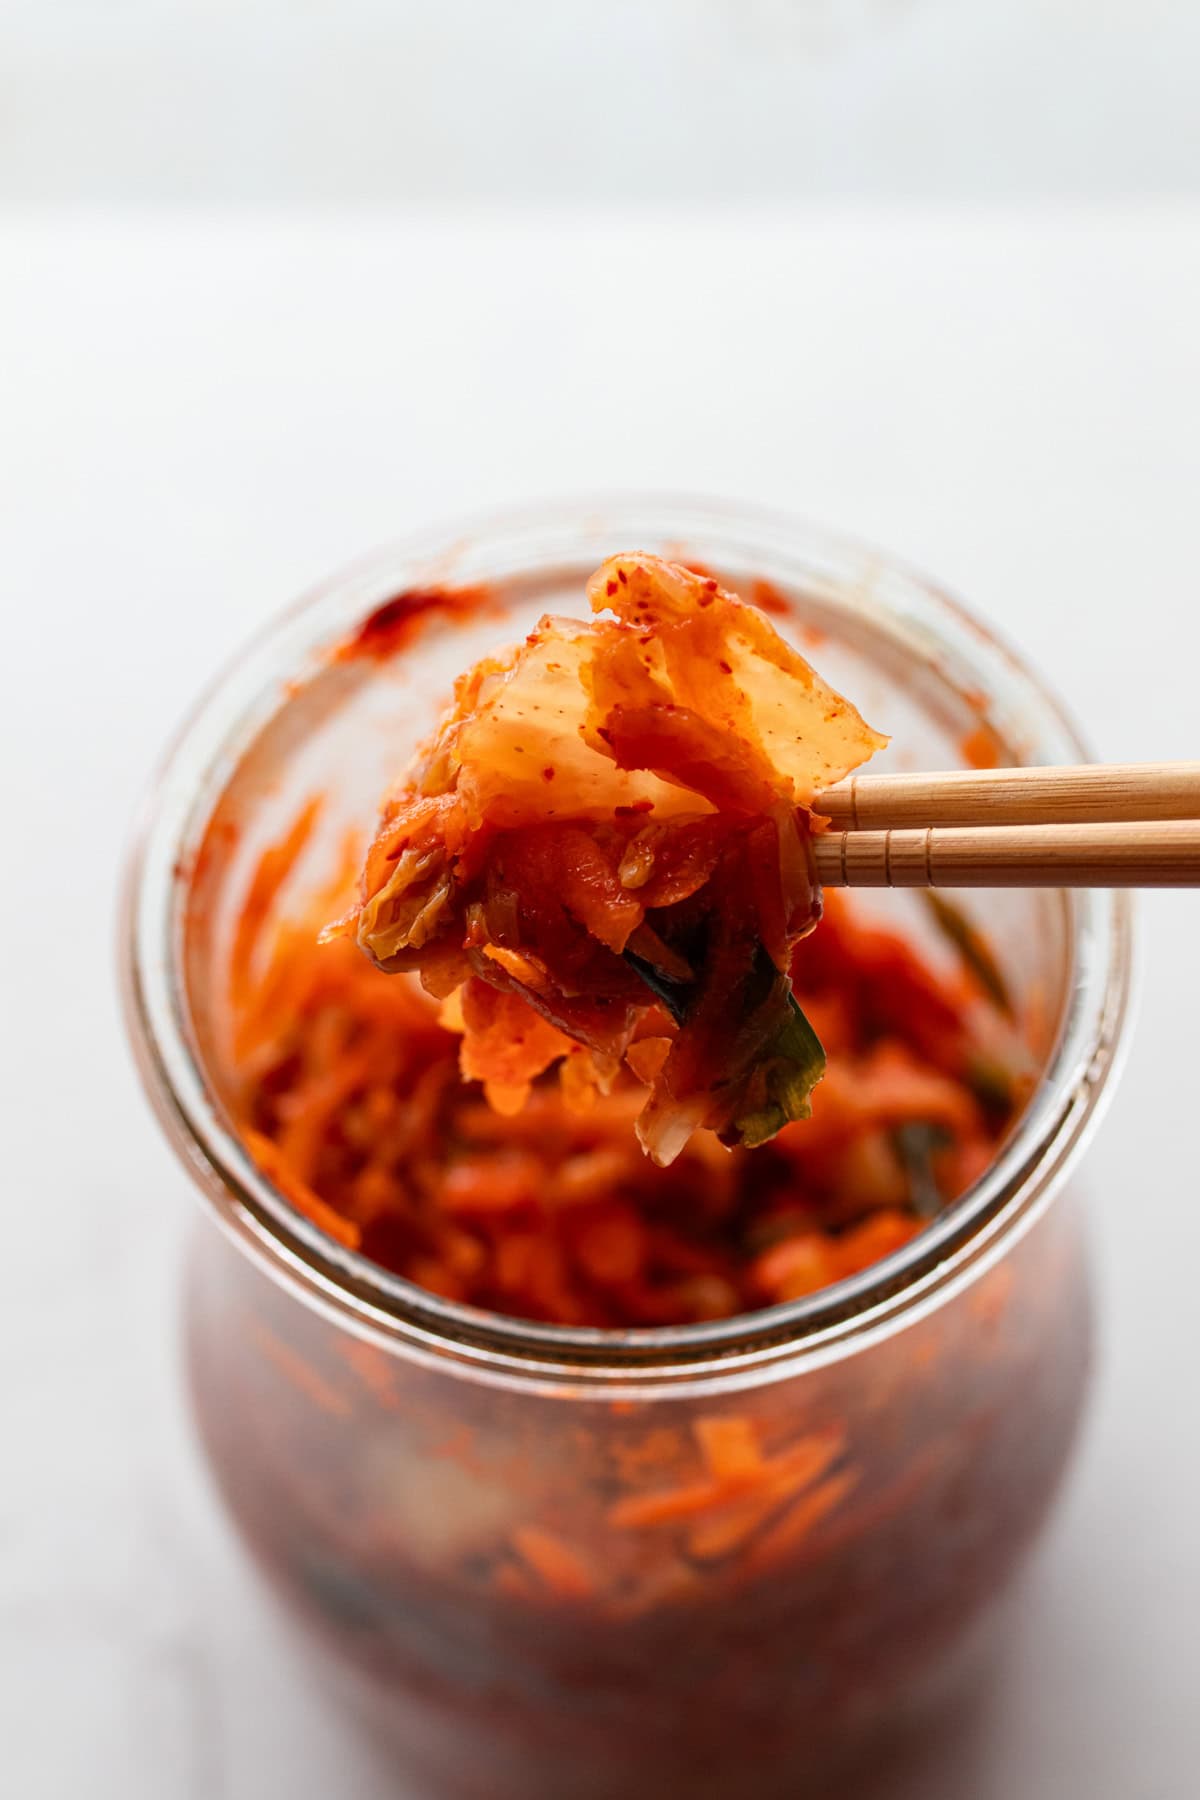
I am a huge fan of fermented foods and love to incorporate them into my cooking as often as possible. We are constantly making batches of homemade sauerkraut and enjoy eating fermented beets, fermented carrots, and even lacto fermented salsa. Another fermented food we have been enjoying immensely is this homemade kimchi! Kimchi is a traditional Korean side dish. It is a delicious blend of spicy, tangy, sour, and bold flavor.
Serve this perfect recipe with sautéed beef, grilled chicken, or even fried eggs, for an extra zip. Eating this is one of my favorite ways to enjoy the benefits of fermented food while enjoying the delicious taste of Korean cooking.
Making your own kimchi is such a simple and rewarding process, you are going to love it!
Why You’ll Love This Recipe
Gut healthy – Food that goes through the fermentation process takes on a ton of health benefits. It introduces beneficial bacteria for your body that helps with digestion and makes it easier to absorb nutrients into your body. It also can help reduce inflammation in your body and help your immune system. If you are new to fermented foods you can learn more about how to make fermented vegetables and their benefits in this post.
Unique flavors – This is the best kimchi. It has an amazing combination of unique and delicious flavors that adds a tasty punch when served alongside other dishes, or even eaten straight out of the jar!
Easy – This easy kimchi recipe truly is so simple to make. It is an easy process that consists of combining a handful of ingredients, placing them into a jar and waiting until it reaches your desired level of fermentation.
Ingredients
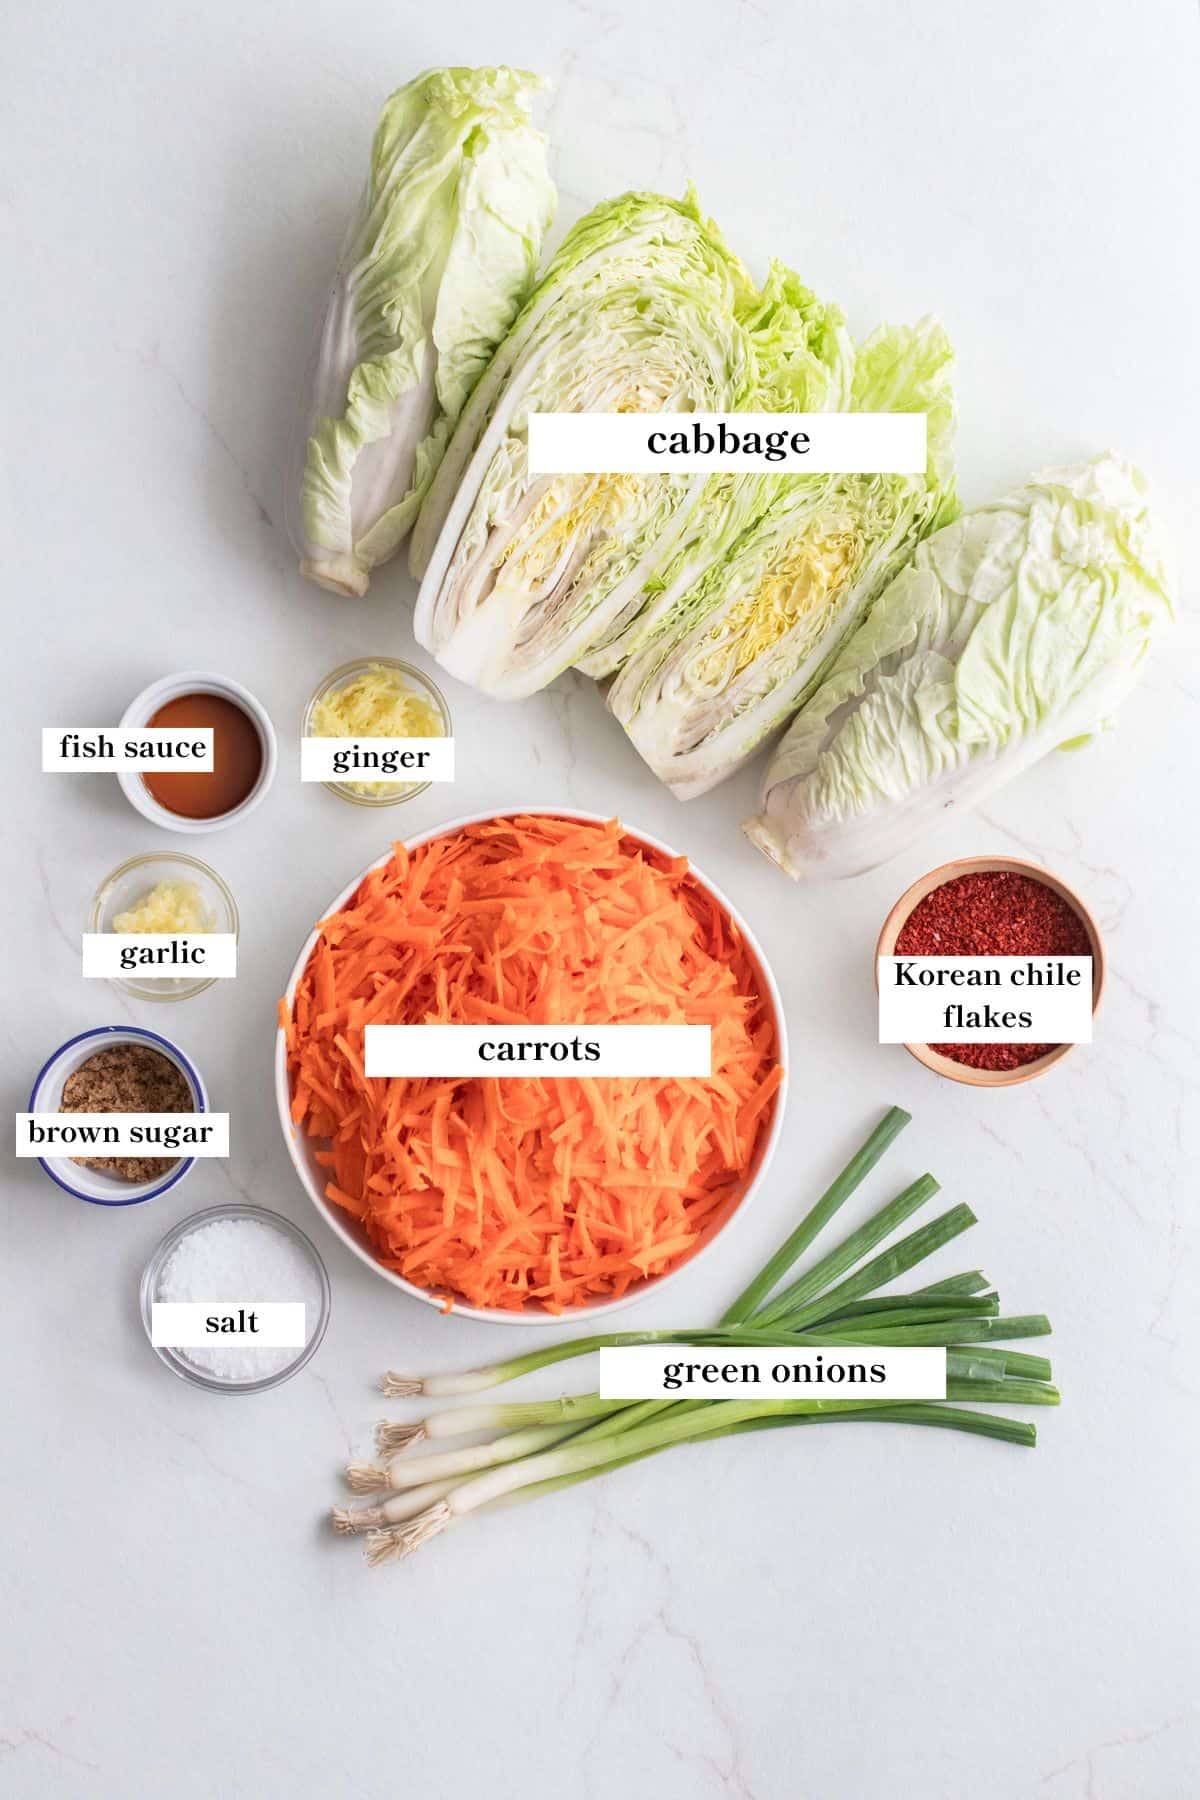
Napa Cabbage – These beautiful cabbages are specific to this Napa cabbage kimchi. It is important to the end result to use this variety opposed to another type of cabbage as it is the main ingredient.
Sea Salt – Choose unrefined sea salt, since other salts can cause the Napa cabbage to wilt too much.
Korean Chile flakes – This cannot be substituted with any other type of chili flake. It has to be Korean Chile flakes or the taste will be off. I like to use these Korean Chile flakes.
Fish Sauce – Fish sauce is a traditional Korean addition that adds a delicious Unami taste to the recipe. If you just cannot find this ingredient, you can skip. It won’t taste the same, but will continue to be a wonderful probiotic.
A full ingredient list with exact amounts can be found in the recipe card below.
Tools You May Need
- Fermentation lids (optional – see tips section for more information.)
- Fermentation weights – If you do not have fermentation weights, you can use almost anything that will keep the ferments submerged in the brine. One option is to use a clean rock wrapped in plastic wrap or in a sealed plastic bag.
- 1 WECK jar 738 (59 oz) You can also use mason jars or other jars you have on hand!
How to Make Homemade Kimchi
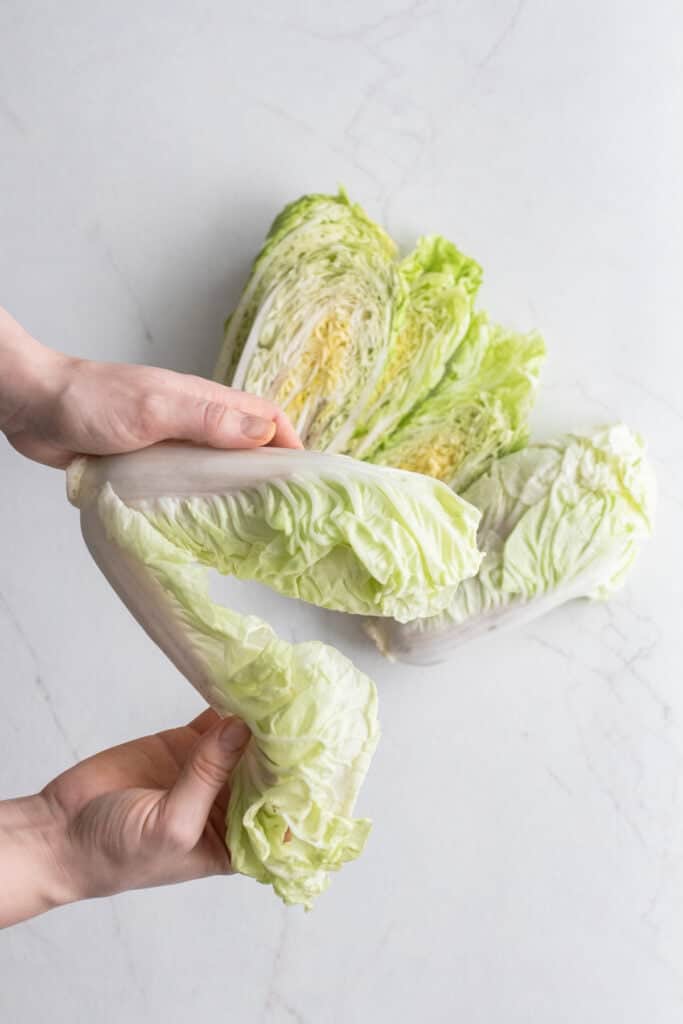
Step 1: Reserve a few outside cabbage leaves to use for pushing the kimchi below the brine.
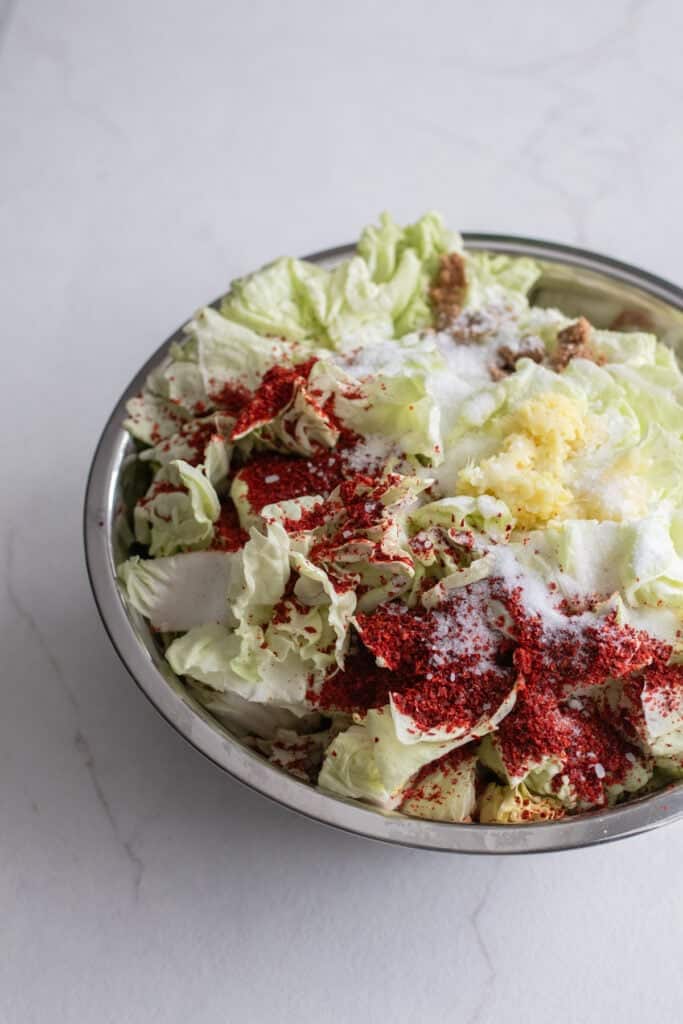
Step 2: Chop and grate all the vegetables on a cutting board and add them, with the rest of the ingredients, to a large bowl.
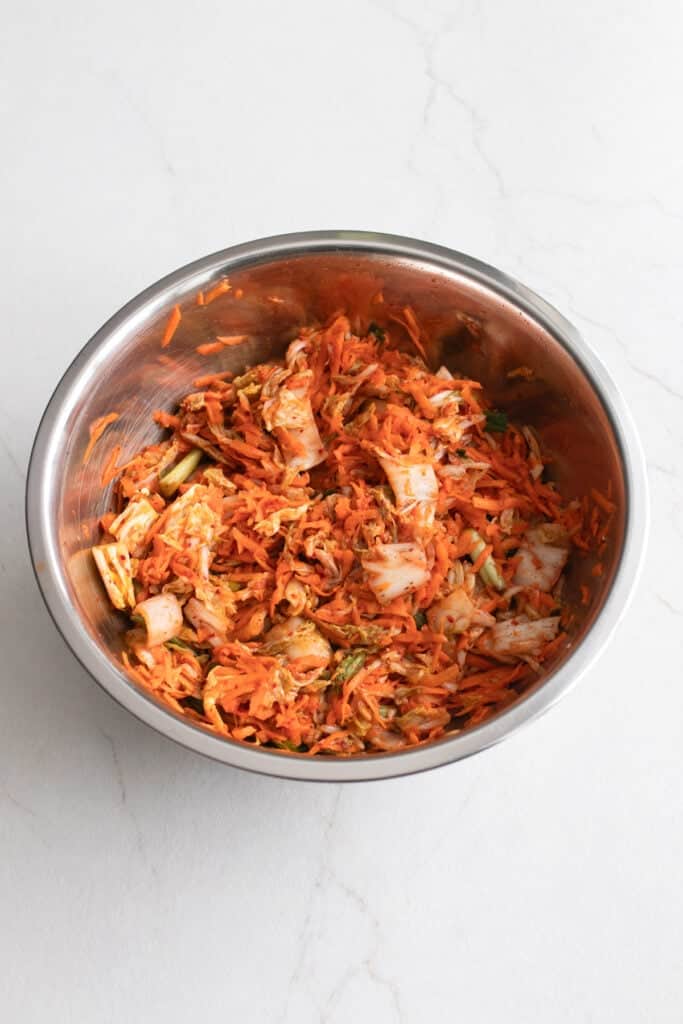
Step 3: Using clean hands, massage the ingredients together, so that the salt causes the cabbage to sweat and make a brine.
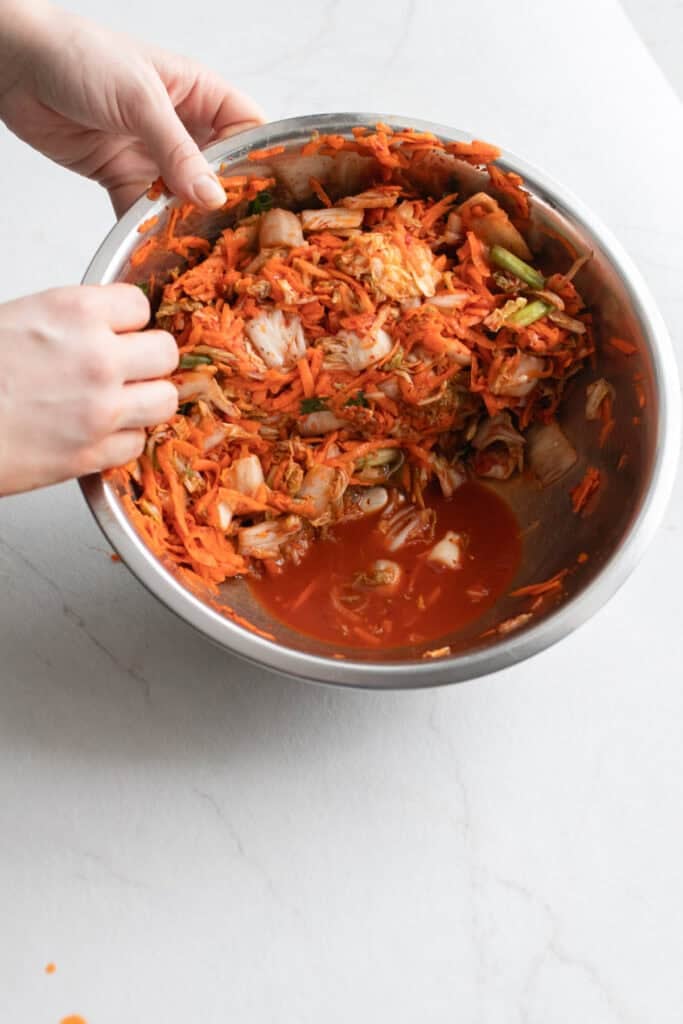
Step 4: Let it all sit for a few minutes. You want everything to get nice and juicy.
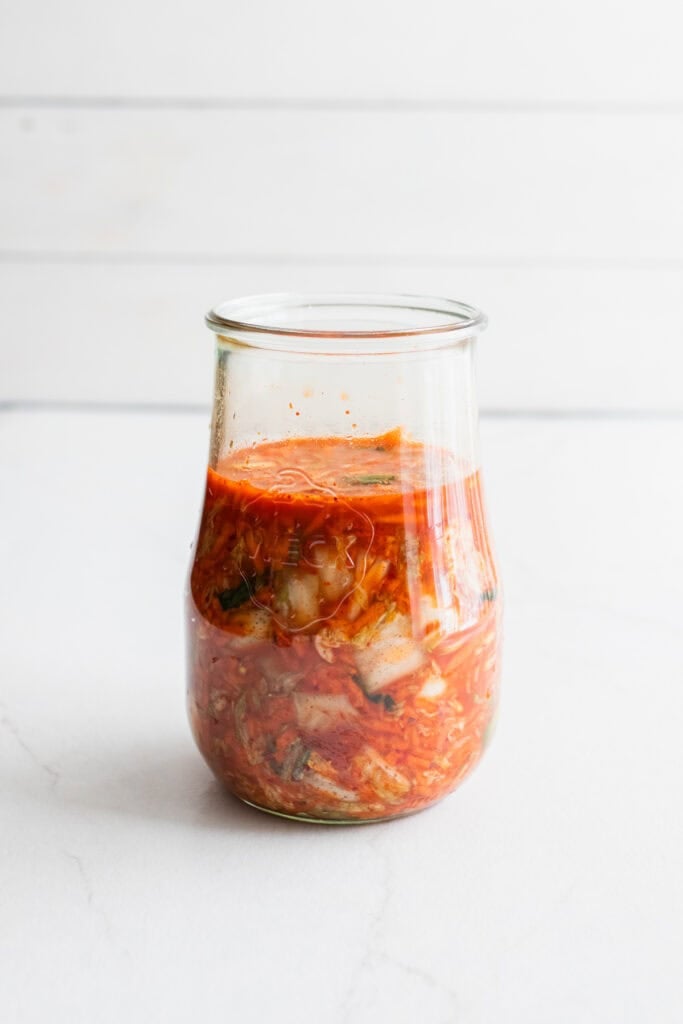
Step 5: Pack the mixture tightly into large mason jars. I used a WECK jar 738 (59 oz), but you could also use a mason jar.
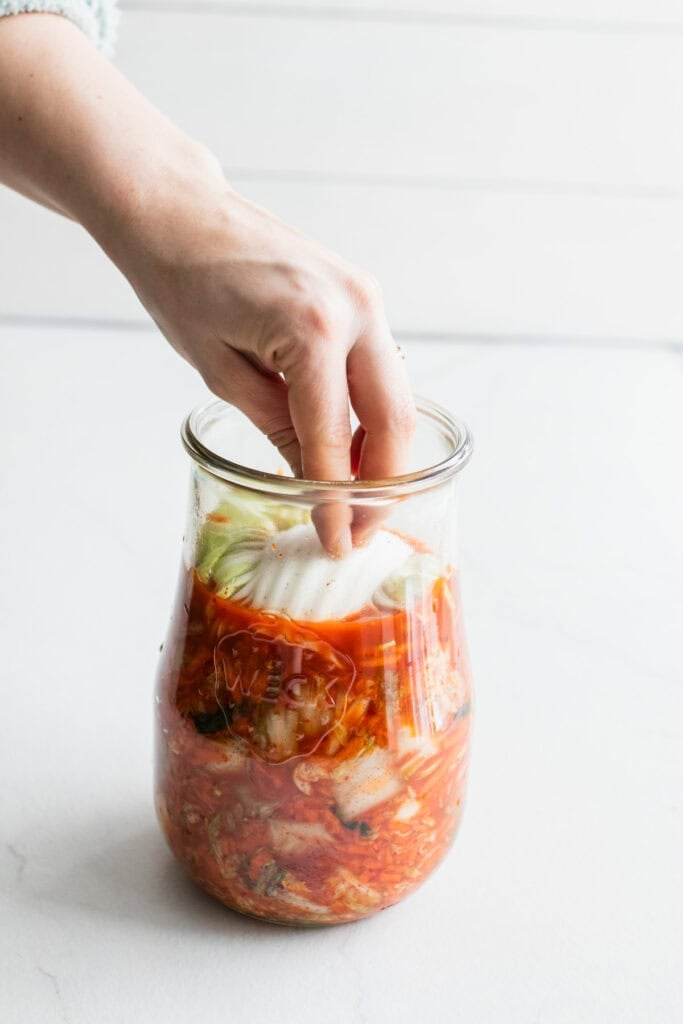
Step 6: Fold up a cabbage leaf, that you saved earlier, and use it to keep all the veggies down below the salty brine. The cabbage and other ingredients should create enough brine to be able to submerge everything.
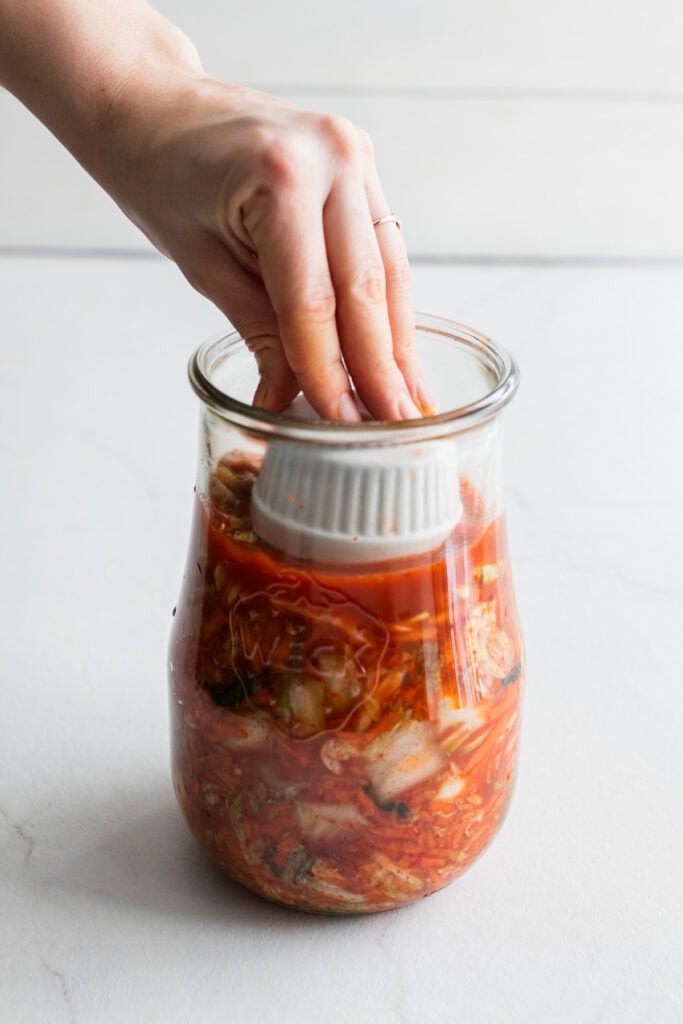
Step 7: Add weights to the top of the mixture and add a fermentation lid (See tips section for more information on the purpose of a fermentation lid and what to do if you don’t have one.)
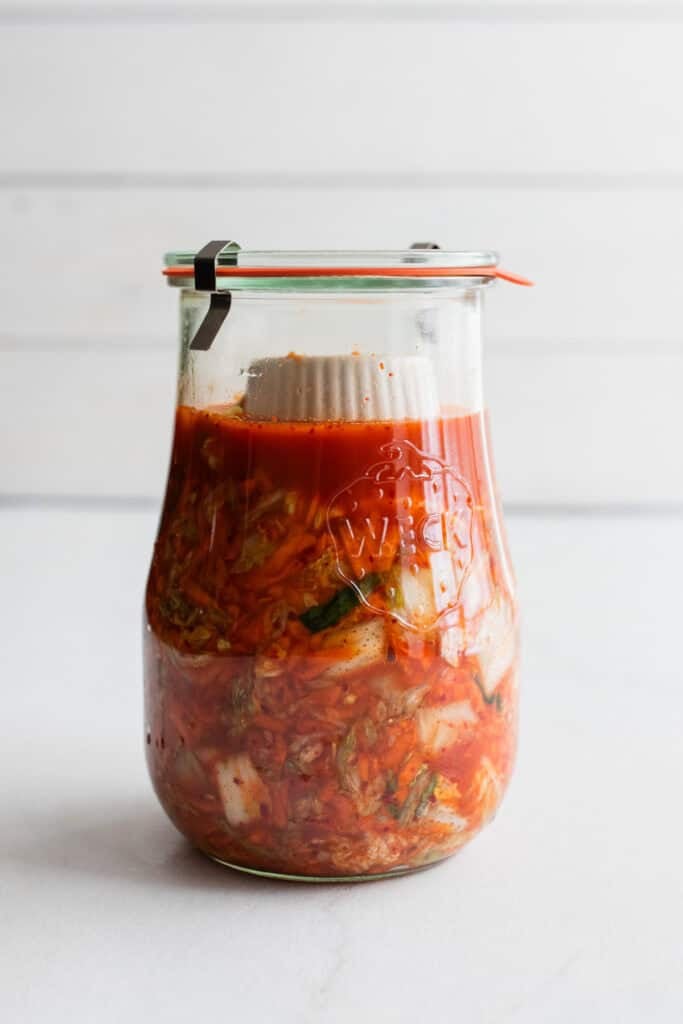
Step 8: Place the jar in a baking dish in case of any liquid that may overflow, and let it sit out for up to five days. Starting on day 2, check your ferments every day. The warmth of your home will determine how long it takes to ferment. It could take anywhere from 2 to 5 days. The best way to determine if it is ready is by taste!
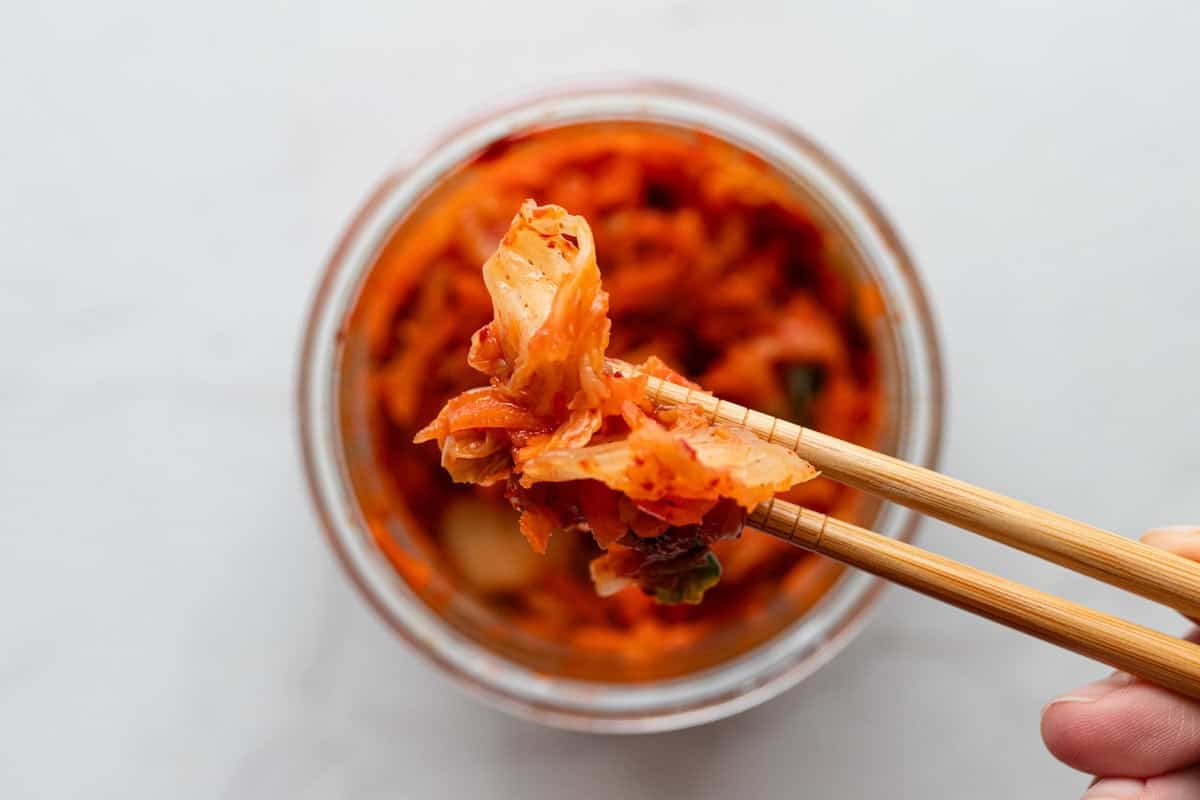
Step 9: Once ready, take the weight and folded up cabbage leaf out. Replace with the regular mason jar lids, if you were using a fermentation lid.
Store in the refrigerator for later use, and enjoy this homemade traditional Korean recipe!
Tips
- A fermentation lid is great to have if you plan to do a lot of fermenting. It allows carbon dioxide to escape, while, at the same time, keeps oxygen out of the jar. This helps prevent mold and contamination.
- If not using a fermentation lid, you can use a regular lid. Just be sure to burp the kimchi once or twice a day and check that all the vegetables are still below the brine. You can do this by opening the jar briefly and then resealing it in order to allow the buildup up of gases inside to release.
- Sometimes, I like to top off my ferments with a little bit of water to make sure everything is good and submerged. When fermenting any vegetable, you want to make sure you use non-chlorinated water, as chlorine can kill the good bacteria.
- Cooler climates usually slow down fermentation, while warmer climates make it ferment faster. Keep this in mind when making your new batch of kimchi.
- Do not let your kimchi ferment in direct sunlight. The best way to let it ferment is to place it in a cool dark place at room temperature away from any windows.
Recipe FAQs
This is dependent on the warmth of the fermentation area. If you are making it in summer, it may ferment enough in just 1-2 days, whereas if you make it in the winter, it may take 4-5 days. Tiny bubbles will start to form, and you can taste it to determine if it has fermented long enough.
If there is any mold, weird smell, or the appearance doesn’t look good, throw it out. Ferments usually last quite a long time. 3-6 months, sometimes even a year. But if you are questioning it, then it may be better to dispose of it.
No, Napa cabbage is specific to kimchi and has a different texture than other cabbages. Using other types just wouldn’t be the same.
Taste it. After about a day or two, you can start tasting the kimchi to see if it is done. Some like it more sour, so you may consider leaving it out longer before moving it to the fridge. If you don’t like it very sour, go ahead and refrigerate sooner.
Making your own homemade kimchi recipe from scratch is so rewarding. Plus this traditional Korean dish tastes much better and more fresh when made at home than anything you can get at the store.
More Fermented Recipes from the Farmhouse
- Homemade Fermented Ketchup
- Fermented Hot Sauce
- Fermented Balsamic Blueberry Vinaigrette
- How To Make Fermented Fruit
- How To Make Fermented Jalapeños
If you try this recipe and love it, I would love it if you could come back and give it 5 stars! Tag me on Instagram @farmhouseonboone.
Fermented Homemade Kimchi
Equipment
- 1 Fermentation Lid optional
- 1 WECK jar 738 (59 oz) You can also use mason jars or other jars you have on hand!
Ingredients
- 2 heads of Napa cabbage, or 4 heads of baby Napa cabbage, chopped
- 3 tablespoons sea salt
- 2 teaspoons brown sugar, organic
- 2 teaspoons ginger, grated
- 2 cloves garlic, minced
- 8 green onions, chopped
- 6 tablespoons Korean chile flakes
- 1 tablespoon fish sauce, optional
- 4 carrots, grated, optional
Instructions
- Reserve a few outside cabbage leaves to use for pushing the kimchi below the brine.
- Chop and grate all the vegetables on a cutting board and add them, with the rest of the ingredients, to a large bowl.
- Using clean hands, massage the ingredients together, so that the salt causes the cabbage to sweat and make a brine.
- Let it all sit for a few minutes. You want everything to get nice and juicy.
- Pack the mixture tightly into a large jar or or multiple smaller jars. I used a WECK jar 738 (59 oz).
- Fold up a cabbage leaf, that you saved earlier, and use it to keep all the veggies down below the salty brine. The cabbage and other ingredients should create enough brine to be able to submerge everything.
- Add weights to the top of the mixture and add a fermentation lid* (See notes for more information on a fermentation lid and what to do if you don't have one.)
- Place the jar in a baking dish in case of any liquid that may overflow, and let it sit out for up to five days. Starting on day 2, check your ferments every day. The warmth of your home will determine how long it takes to ferment. It could take anywhere from 2 to 5 days. The best way to determine if it is ready is by taste!
- Take the weight and folded up cabbage leaf out. Replace with the regular mason jar lids.
- Store in the refrigerator for later use, and enjoy this homemade traditional Korean recipe!
Notes
-
-
- *A fermentation lid is great to have if you plan to do a lot of fermenting. It allows carbon dioxide to escape, while, at the same time, keeps oxygen out of the jar. This helps prevent mold or other contamination.
-
- If not using a fermentation lid, you can use a regular lid. Just be sure to burp the kimchi once or twice a day and check that all the vegetables are still below the brine. You can do this by opening the jar briefly and then resealing it in order to allow the buildup up of gases inside to release.
-
- Sometimes, I like to top off my ferments with a little bit of water to make sure everything is good and submerged. When fermenting any vegetable, you want to make sure you use non-chlorinated water, as chlorine can kill the good bacteria.
-
- Cooler climates usually slow down fermentation, while warmer climates make it ferment faster. Keep this in mind when making your new batch of kimchi.
-
- Do not let your kimchi ferment in direct sunlight. The best way to let it ferment is to place it in a cool dark place at room temperature away from any windows.
- Seeing tiny bubbles form in your kimchi while it is fermenting is a positive indication that the fermentation process is going well.
- If using mason jars, it yields 3 pint jars, approximately 4 servings each.
-
Nutrition
Nutrition information is automatically calculated, so should only be used as an approximation.


This is amazing!! I almost didn’t use the Korean red pepper flakes. I was going to use regular red pepper flakes and that would have been a tragic mistake lol. There is a specific flavor profile in Korean red pepper flakes that is amazing. I used The Spice Way Gochugaru Korean Red Pepper Flakes. No MSG, organic, and non-GMO. I would consider this to be a medium heat and I used 3 tablespoons because this was my first time making kimchi and didn’t want it to be too hot. Thanks so much for posting this wonderful recipe. I could eat it every day!
This was SO good, but apparently I got some super spicy Korean chili because it’s WAY too hot for me, though my husband LOVES it! I’ll be making it again soon but with less chili.
TryThe Spice Way Gochugaru Korean red pepper flakes and use half the amount. Since everyone has a different idea of what is hot spicy, maybe add 1 TSB, taste it and adjust accordingly. The flavor profile of The Spice Way brand was incredible. I used 3 TBS and it was perfect for me.
Can you hot water bath can this recipe?
No.
It will kill the beneficial microbes in the kimchi and defeat the purpose of making it.
this wonderful really easy to make. I got to where I ferment what I can.
I wondering, with all of your fermented foods, do you follow the 6′ apart rule? Kefir 6′ away from sourdough, saur kraut 6′ away from kombucha, etc… What about putting them in the fridge? I already have sourdough and kombucha. I’ve been thinking about starting kefir, but am trying to think through storage. 😅 Thanks for any insight!
I made this and it looks amazing, but is extremely salty. Is there any way to fix that so I don’t have to throw out a whole gallon jar of kimchi
Try adding a few daikon radishes to the batch. They help draw out all salt!
You can always make another batch without salt, then mix it with the too salty batch.
So good! Added whey to jump start it. I was afraid to approach it until I saw this recipe. My cabbage was massive (much bigger than my head), so I doubled the recipe, but don’t double the salt.