


Learn how to sew a seam with simple, clear sewing instructions for a beginner. Seams not only attach the fabric together, but also give nice, finished edges.
This simple sewing series has been really fun so far. We’ve already gone through some basics, and today, we are going to continue that by showing you how to sew a seam.
I adore sewing and creating handmade projects and gifts for friends and family. It is one of those skills I think everyone should learn.
Sewing is a lost art, and teaching others to sew gives me so much joy. Talk about being useful. Do you need custom curtains for your really tall ceilings?
How about beautiful pillows to add the perfect touch to a room? Or maybe you would like a super practical apron to help keep your clothes clean while you work in the kitchen?
All of these projects can be done pretty easily with some simple sewing techniques.
No matter your age, or skill level, anyone can learn to sew.
Today, I’m going to show you how to sew a seam. A seam is just the technical term for attaching two pieces of fabric together. It also creates a nice, pretty edge for whatever project you are creating.
If you look down the side of your shirt, there will be a seam running down the side.
Common Questions
How Do I Sew a Straight Seam?
Practice! Once you have a few projects under your belt, sewing a straight seam will be really easy.
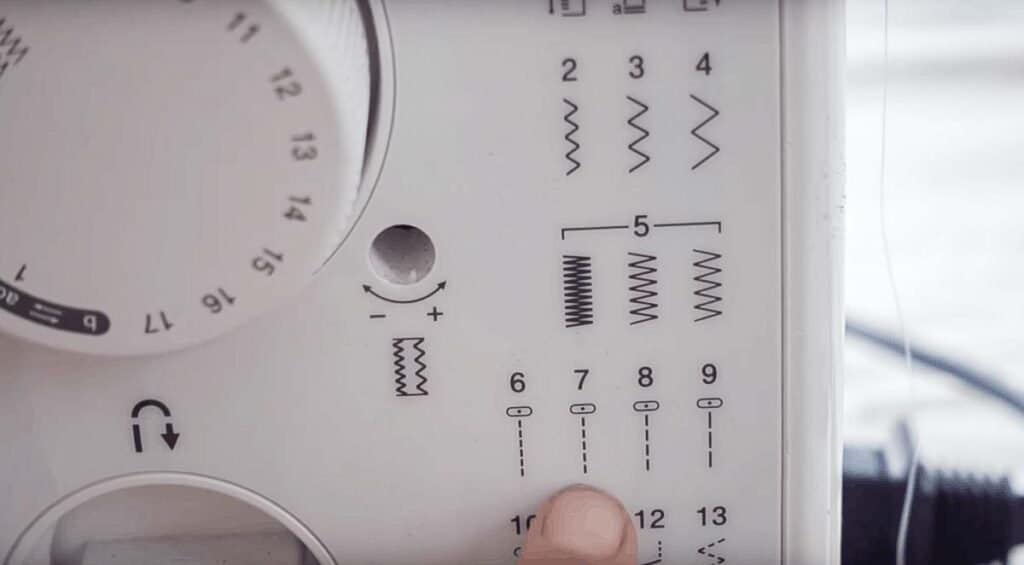
What Stitch Length Do I use for a Straight Seam?
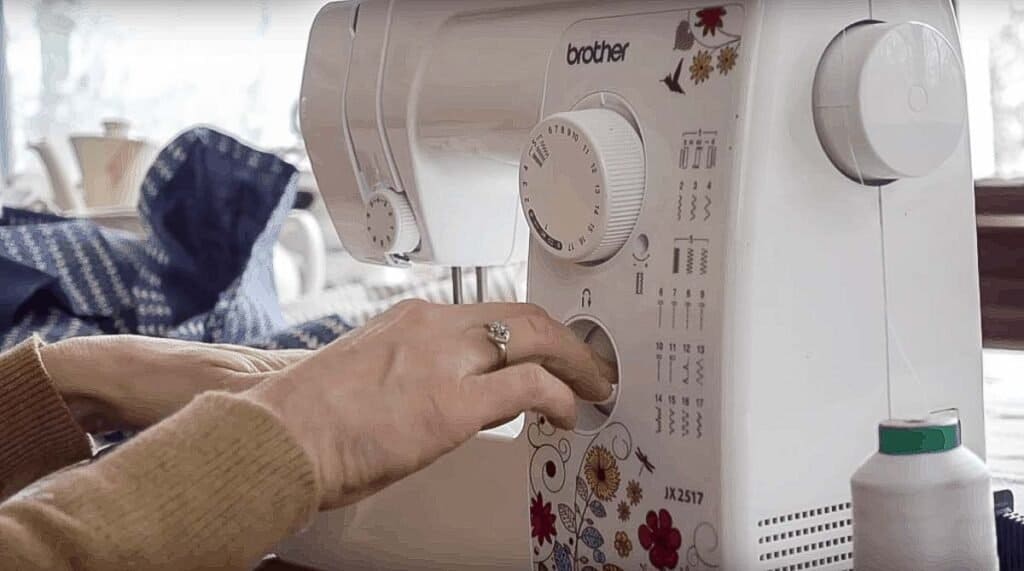
I use the #7 stitch on my machine, but it may be a different number on yours.
What are my Zig-Zag stitches?
On my machine, the zig-zag stitches are the #5 stitches. Most machines will have this labeled with a symbol that looks like a zig-zag.
What is the Finishing Stitch on my Sewing Machine?
On my sewing machine, the #5 stitches are the finishing stitches.
How do I Back Stitch on My Sewing Machine?
On my sewing machine, I have a handle I press down on while I simultaneously press gently down on the peddle to create a backstitch.
First, sew about 1 inch into your project by pressing down on the peddle very gently with your foot. Then press down on your handle, if your machine is similar to mine, while simultaneously pressing gently down with your foot on the peddle until you backstitch the the beginning of where you started.
Some people like to do this several times, but I do it twice. A backstitch just locks the thread into place and makes sure it does not un-thread.
How Fast Should I Sew?
If you are a beginner, I would recommend starting sewing slowly so that your seams are straighter.
Should I pin my Fabrics Together?
I say yes! Especially if you are a beginner, pinning helps hold your fabric in place.
How Should I insert the Pins in my Fabric?
I would recommend inserting the pins where the pointy side is facing your sewing machine. That way it is easier to pull the pins out while you are sewing.
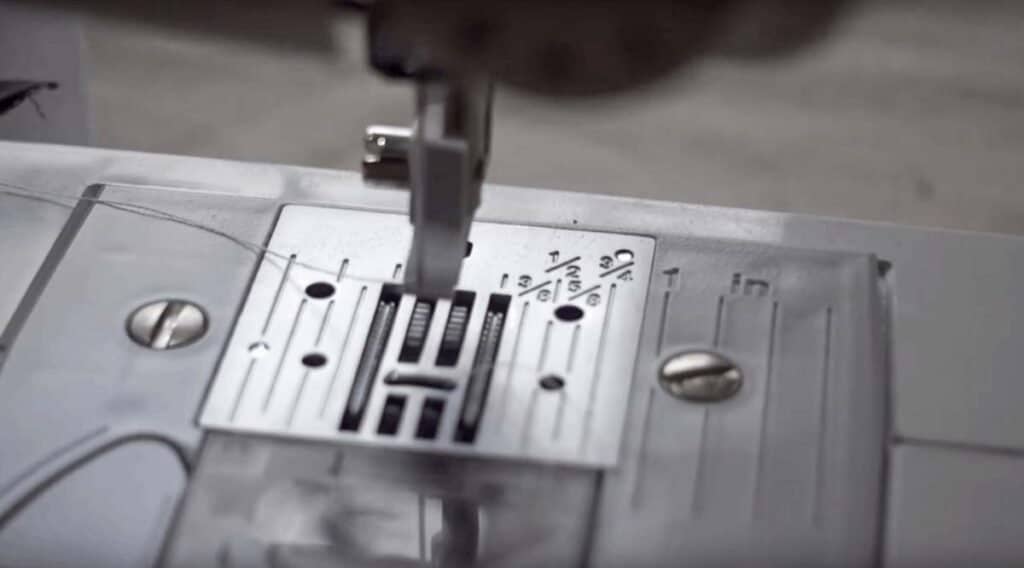
What do the Fractions Mean on the Side of the Sewing Plate?
Those “fractions” help you determine the seam length on your fabric. For example, say you want to sew a 1/2 inch seam, then you just line up your fabric with the 1/2 inch line on your sewing plate. It is really helpful to help you create a straight seam.
This post contains affiliate links, which means I make a small commission at no extra cost to you. See my full disclosure here.
Tools you may need:
- Sewing machine
- Fabric scissors
- Pins
- Coordinating thread
- Fabric
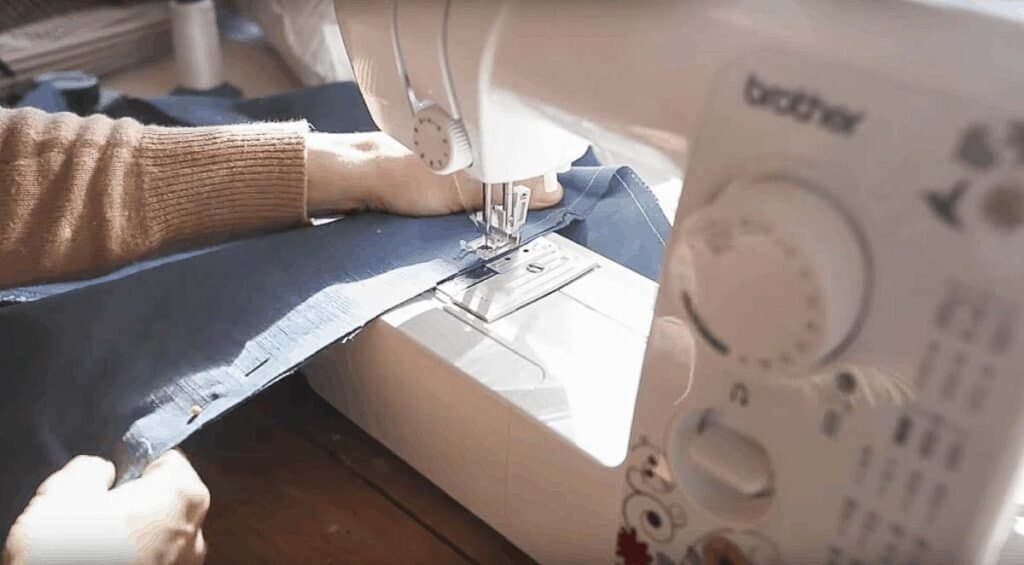
How To Sew A Seam
Prepare the machine and materials:
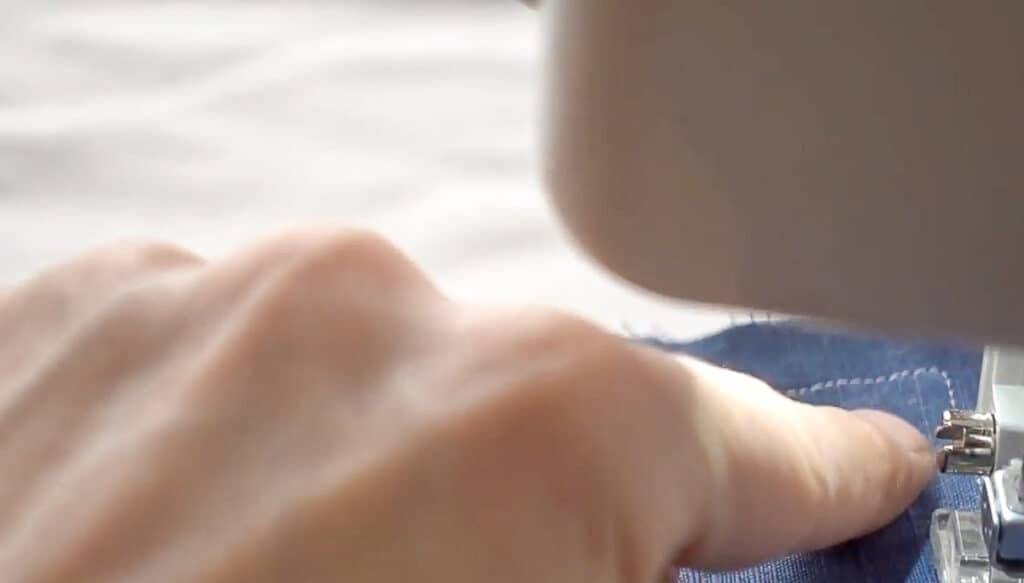
Make sure the settings are right and the machine threaded properly. You want to choose a setting that is a straight line and is not too loose or too tight. For my machine, the #7 setting is perfect.
Place the sewing foot up.
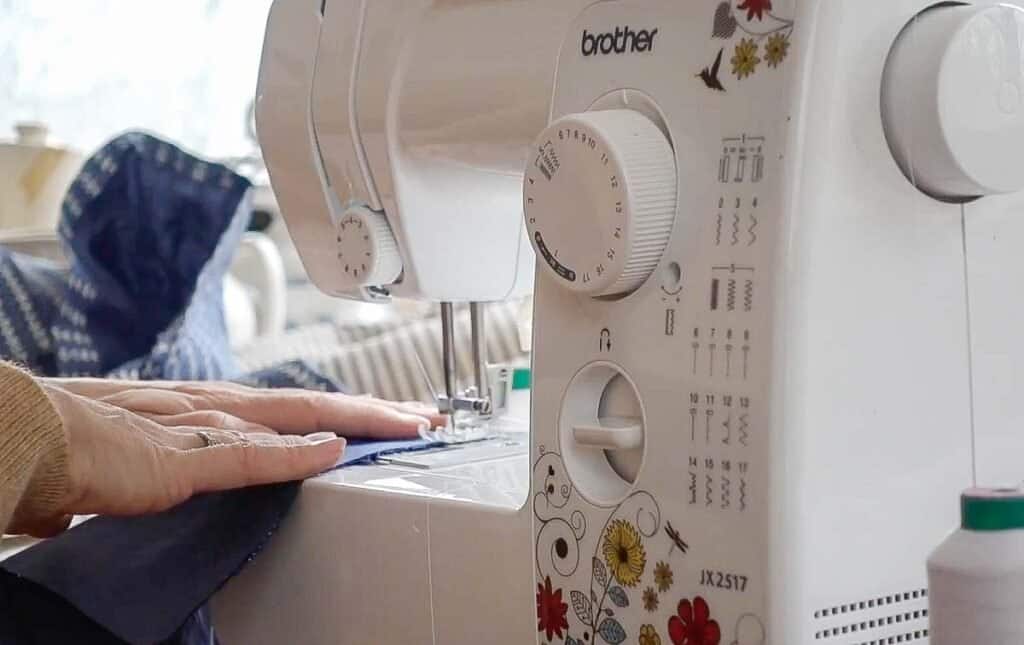
Line two pieces of fabric up with the right sides facing each other. The right side of the fabric is the side you want to show. Most fabrics have a right side and a wrong side.
Pin together and place onto your sewing machine. I usually sew a 1/4 inch or 1/2 inch seam, so I line it up with the edge of the fabric on the sewing plate. If you are using a pattern, follow the pattern seam requirement.
Put the sewing foot down using the lever in the back (or side). This will hold the fabric down.
Sewing the seam:
Gently press down on the pedal to start sewing. Sew a few stitches, stop, and do a few backward stitches, then go forward again. At the beginning and end of every seam, you will want to do this to secure the stitches in place and make sure the seam doesn’t come undone. It is like putting a knot in the thread. I usually only do this once, but some people like to go back and forth a few times.
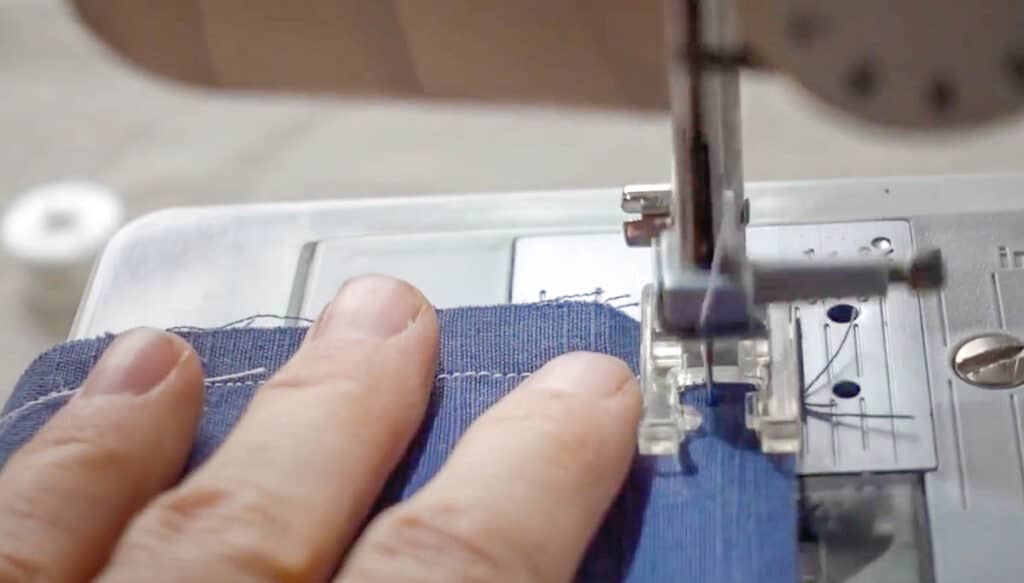
Press the pedal down to continue sewing. Be patient and go slow. Gently guide the fabric through the sewing machine, trying your best to keep the edge of the fabric following the line on the seam allowance plate. The machine will pull the fabric through, and your hands just need to guide it in the right direction.
Continue sewing all the way down until you get to the end. Press the backward stitch button or lever (machine specific) and go backwards a few stitches. Then, release and sew a few more stitches forward until you get to the end.
Lift up the foot, raise the needle until it is out of the fabric, and gently pull out your fabric. Trim the extra thread.
To sew a corner seam:
If you are creating a pillow or something that continues to sew around a corner rather than stopping, you’ll need to be familiar with a corner seam.
Instead of doing a back and forth stitch at the end of the fabric, stop the machine with about the length of your seam allowance you chose.
With the needle still inserted into the fabric, pick up the sewing foot, pivot your fabric to the new edge you will be sewing, and then put the foot back down.
Continue sewing along the seam marking to the end. Back and forth stitch to end, or repeat the previous steps to turn the corner and continue sewing.
If the edge of the fabric is not lining up correctly on the new side when you pivot, perhaps there is too much space, turn the fabric back to where you were just sewing, add a few more stitches, and try to pivot again. You want to create as straight of an edge as possible.

Tip: I like to snip off some of the corner fabric on a diagonal to reduce the amount of bulk when you turn it out.
Finishing The Seams:
Having raw edges is fine if they are hidden, but the proper way to sew is to finish off the raw edges on the seam.
You could use a serger to finish off your seams, but if you are completely new to sewing, I wouldn’t recommend investing in that just yet.
A basic zig-zag stitch will work just fine. Choose the tightest zig-zag setting your machine offers.
Place your newly sewn seam back onto the machine and place the foot down.
The key to this is catching the very edge of the fabric with the zig-zag, so you are containing the raw edge and any frays that may occur.
Make sure that the zig-zag stitch never goes beyond the seam.
Tip: With zig-zag stitches, there is no need to back and forth stitch like a regular seam.


Thank you for a wonderful sewing lesson. I’m new to sewing and you are the first person I can understand. I’m going to practice and then try your linen throw blanket.
Blessings🌸
Lori