


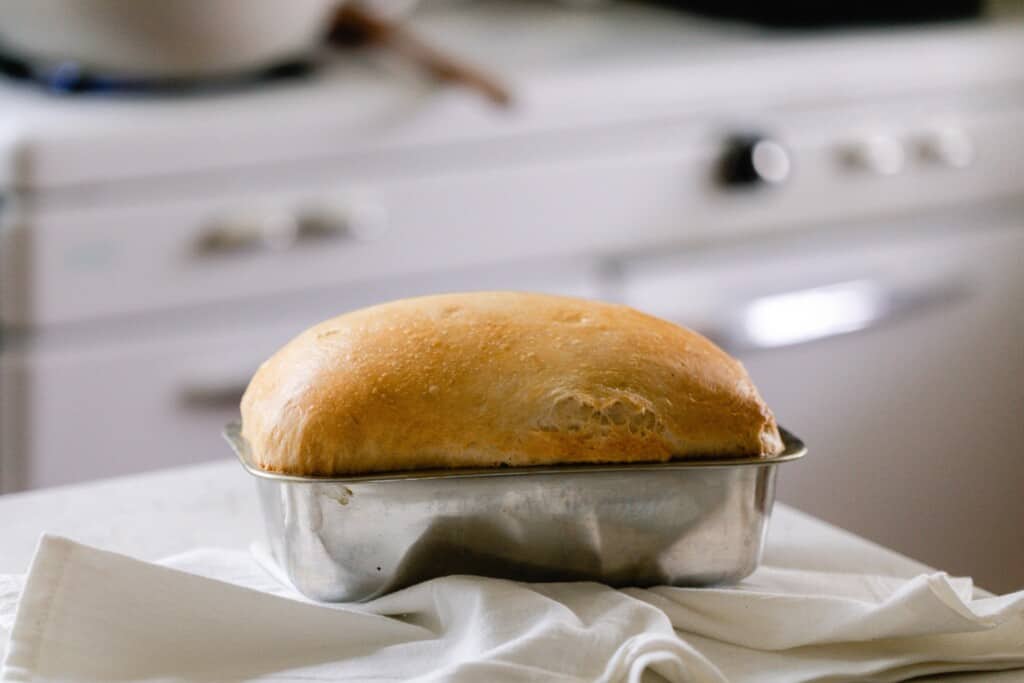
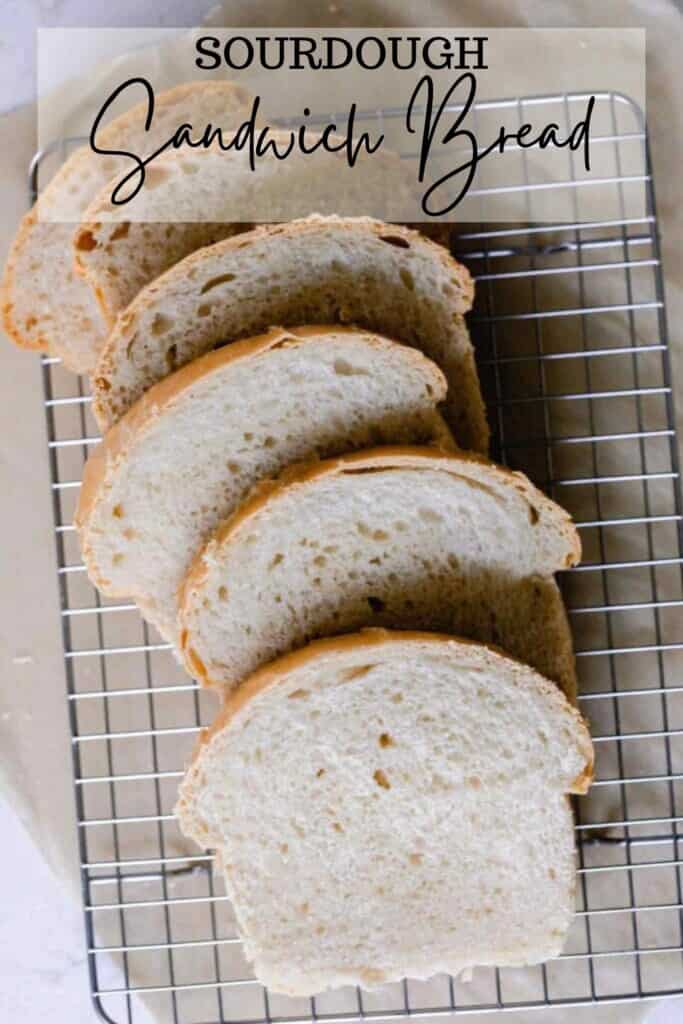
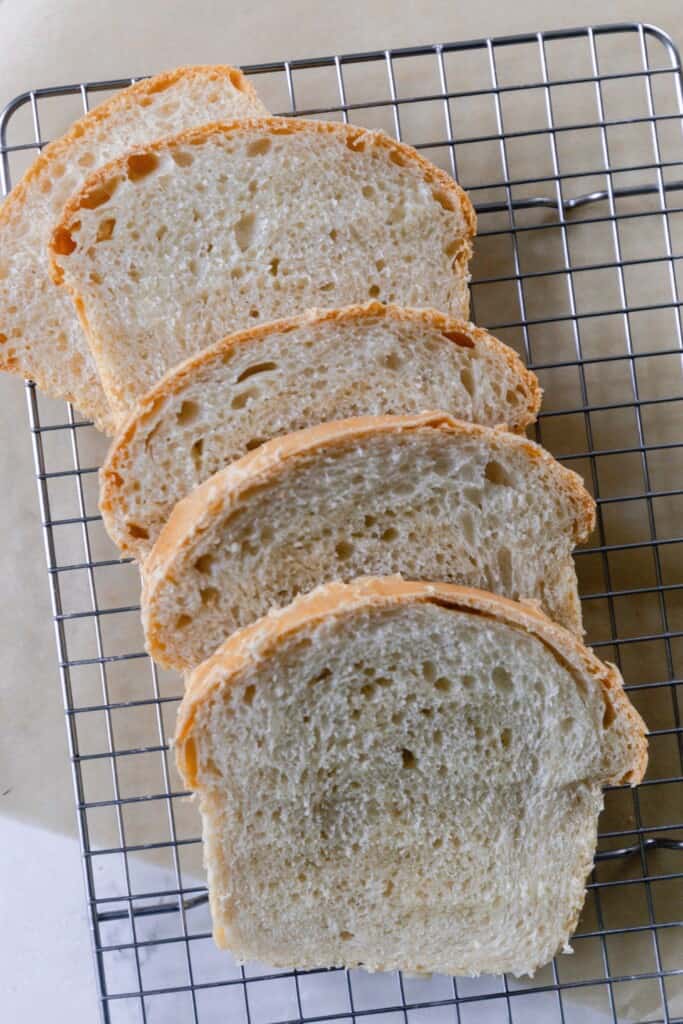
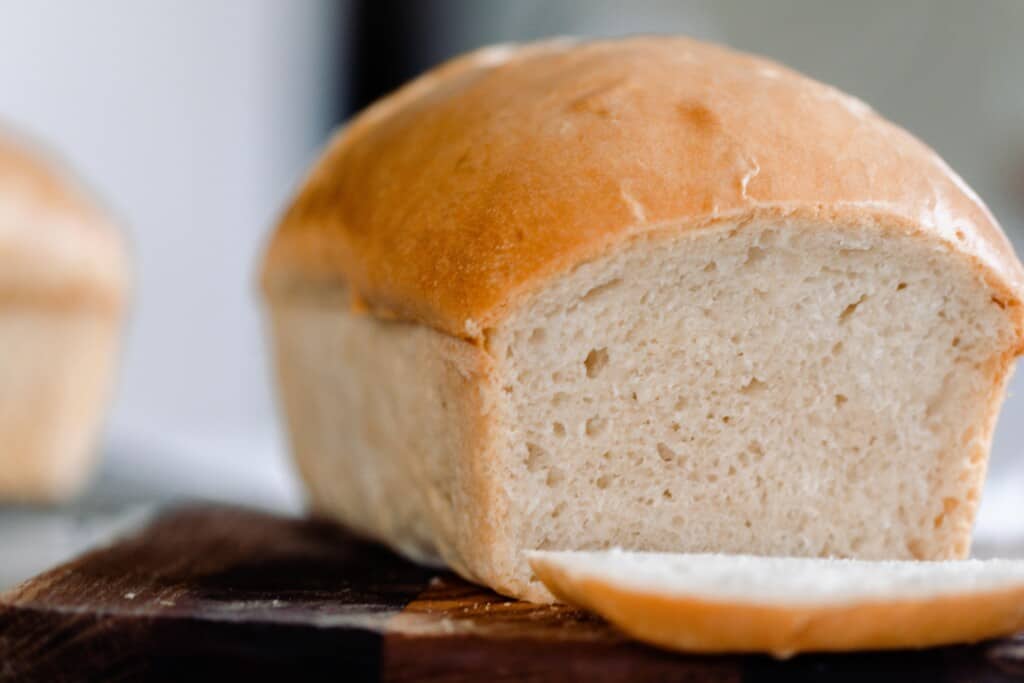
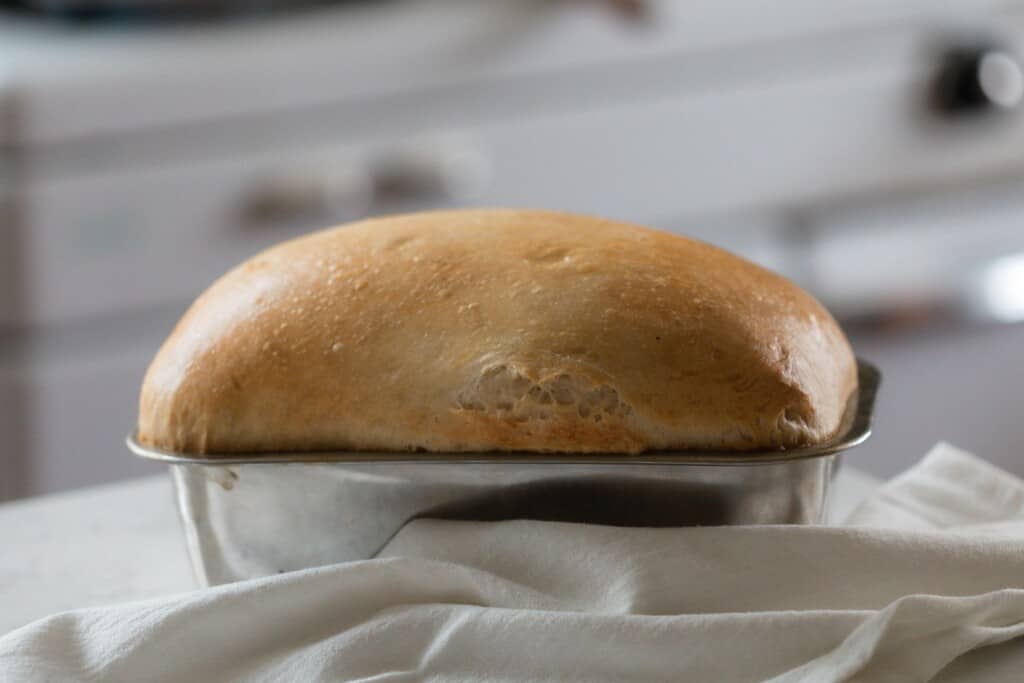
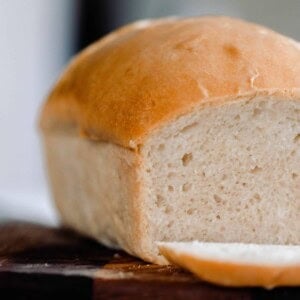
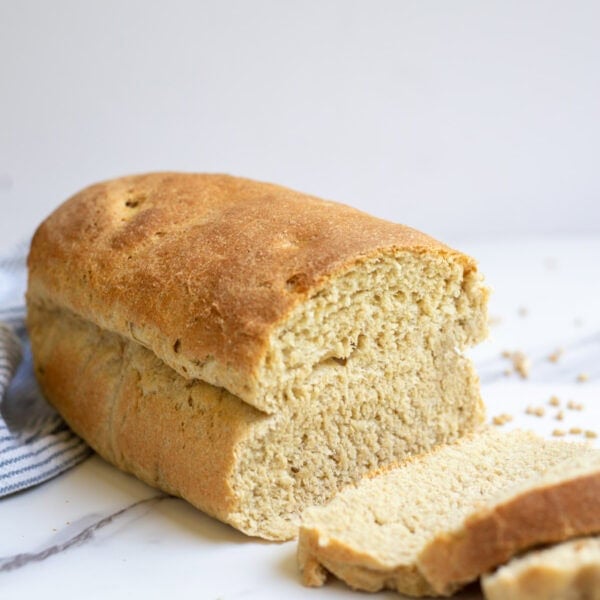
Soft and fluffy sourdough sandwich bread is the perfect bread to have on hand. Made with all purpose flour, sourdough starter, butter and a little honey, this fermented bread has a lighter texture and tangy flavor.
One of the main complaints I hear about making crusty sourdough from readers is that they miss the soft sandwich loaf style of bread.
Not only is this recipe absolutely delicious (making it really hard to ever go back to store-bought bread), but it is also super simple. No strange ingredients, no stretching and folding every 30 minutes… Just mix, rise, shape, rise again, and bake.
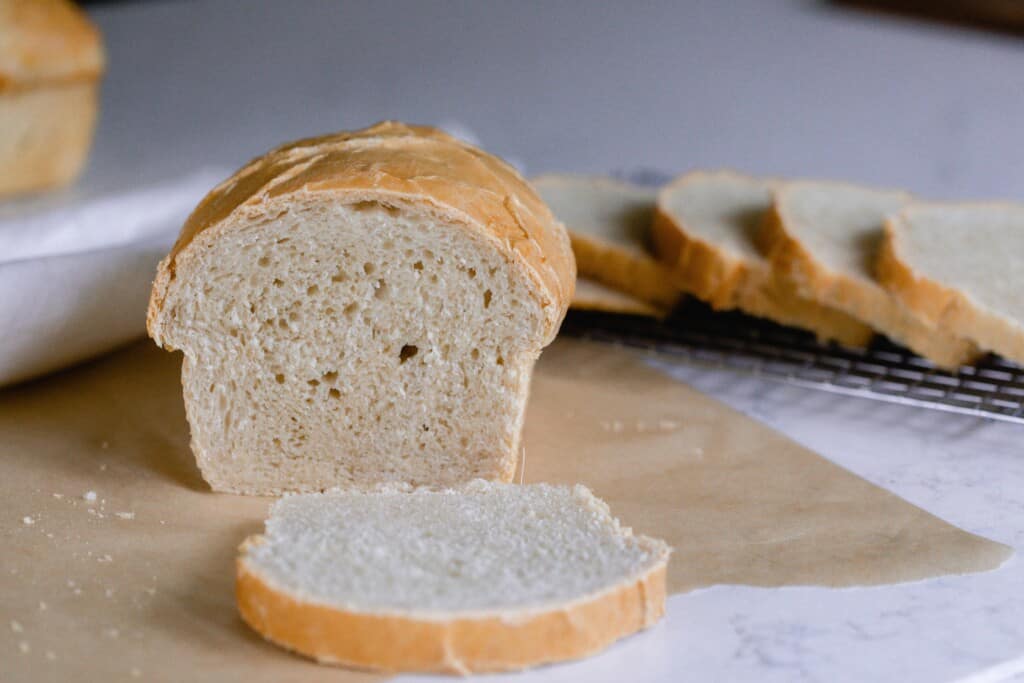
Let it cool, slice and slather it with butter. It’s so yummy and it reminds me of a bread you would get on a breadboard from a restaurant.
Let’s be honest, though, it’s way better since it’s made from scratch and has that wonderful sourdough tang.
Make sure to save this sourdough loaf bread recipe for the future. It will be a go to for sure.
Tips:
- Use really soft butter and cube it up so it blends easier.
- Don’t over ferment the dough. It will turn into a wet sloppy disaster that won’t rise well. Still edible. Maybe. It could also be turned into sourdough croutons.
- When making the dough, using a stand mixer makes the process much easier and hands off. You can also do this with your hands.
- If you are new to sourdough, you can check out how to make a sourdough starter here, find my sourdough conversion chart, and baking glossary of terms.
This post contains affiliate links, which means I make a small commission at no extra cost to you. See my full disclosure here.
Tools you may need:
Measuring cups and spoons. You could also use a kitchen scale
FAQ:
Does sourdough bread make good sandwiches?
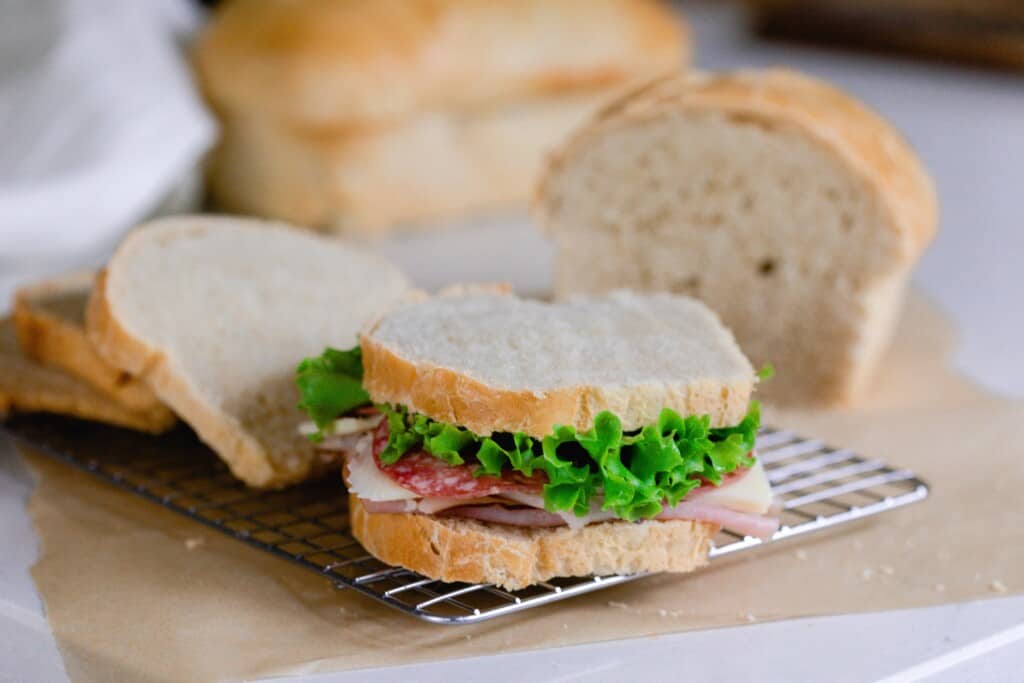
Yes. The delightful tanginess adds to the flavor profile of the sandwich, making it a wonderful addition. You can use crusty sourdough bread or this soft sourdough sandwich loaf.
Why is my sourdough sandwich bread not rising?
There could be a few reasons for this. The most likely one is that your sourdough starter may not be active enough or is weak.
Another contributor could be the temperature of the room where you are placing your dough to rise. The cooler the temperature the longer it will take for bread to rise.
Lastly, the water you use in your dough mixture could be a factor. If the water used was too hot, it may have killed the starter. Additionally, if you are using city water the chlorine could potentially kill the yeasts in the starter.
Are sourdough sandwiches healthy?
Sourdough is one of the healthiest breads since the grains are fermented, which makes it more digestible and the nutrients more available for your body to absorb.
Top with your favorite healthy toppings and you can have a wholesome and filling meal in one sandwich.
Ingredients:
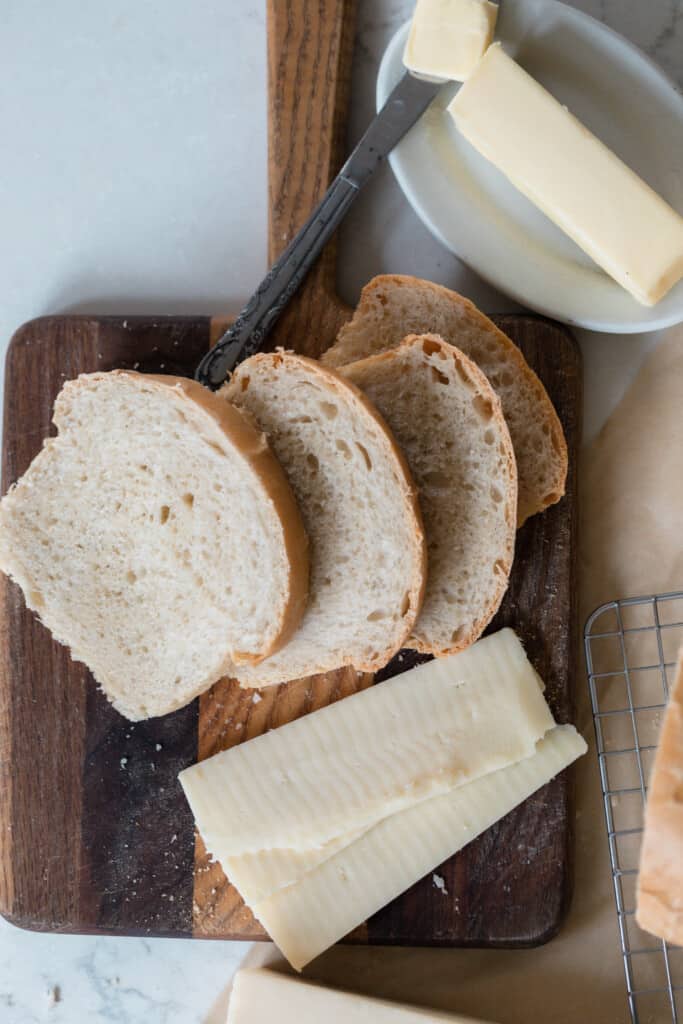
Butter (softened) or coconut oil – I prefer using butter for that savory buttery flavor. If you are wanting to make a vegan version, you can use softened (not melted) coconut oil.
Honey or sugar – I like to use honey since it is a natural sweetener.
Salt – This gives the bread so much flavor and skipping it will leave you with a tasteless loaf.
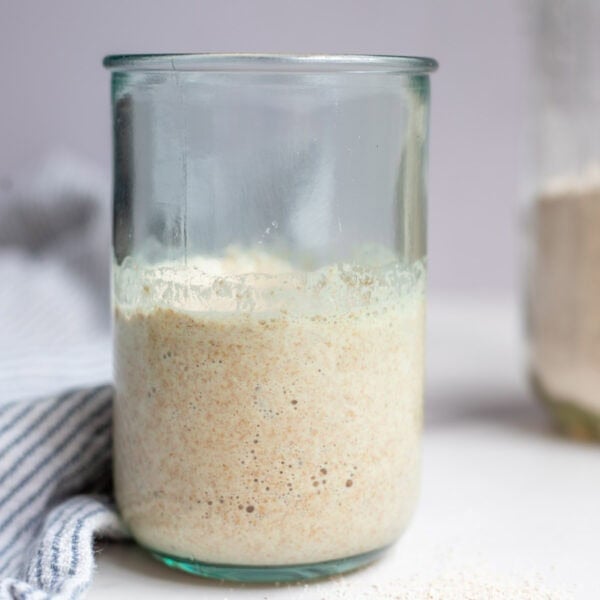
Sourdough starter – You want a nice active and bubbly starter to make bread. Starter that isn’t ripe won’t produce nice fluffy bread.
Water – Room temperature.
All-purpose flour – The best part of this recipe is that it uses good ol’ plain all-purpose flour. Nothing fancy.
How To Make Sourdough Sandwich Bread
To a stand mixer, add all of the ingredients. I like to add the flour last, so I can add a bit less or more depending on my starter’s hydration.
Knead until dough is stretchy and smooth. You want it to pull away from the sides of the mixing bowl and be smooth and elastic – about 10 minutes. It should pass the windowpane test. Grab a small ball of the dough and stretch it into a square. It should stretch thin enough to see through without breaking.
Tip: This isn’t a super hydrated dough and won’t be very wet like other doughs.
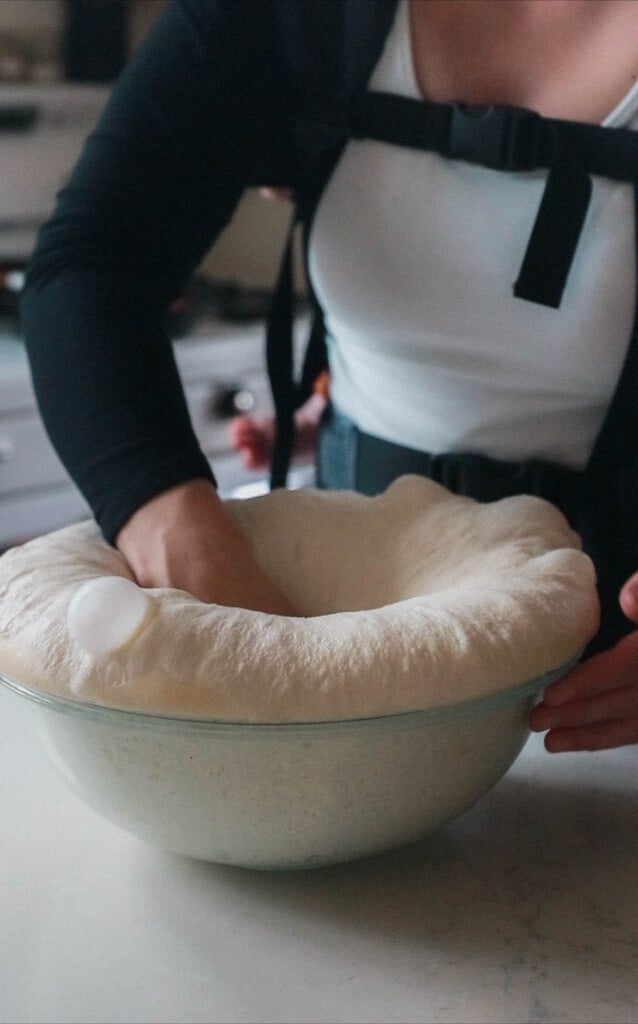
Allow to bulk rise for 10-12 hours in a warm place like on top of a stove or refrigerator. You can go longer if you want the benefit of the fermentation, but if it gets over-proofed the dough will turn into a sloppy mess!
In the summer, I ferment mine more like 8 hours but can get away with longer in the colder months.
Shape The Loaves And Rise
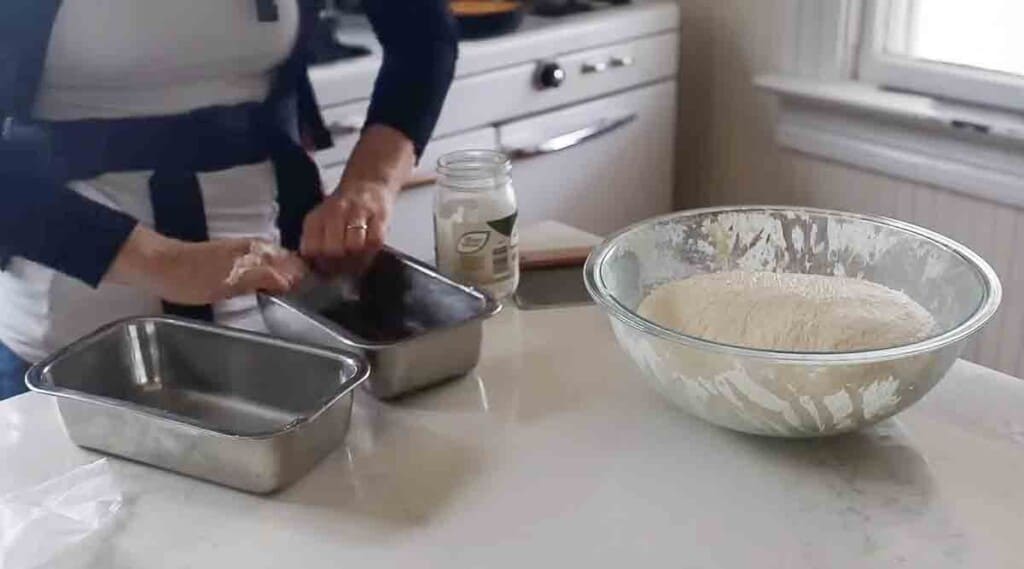
Grease two loaf pans or add parchment paper.
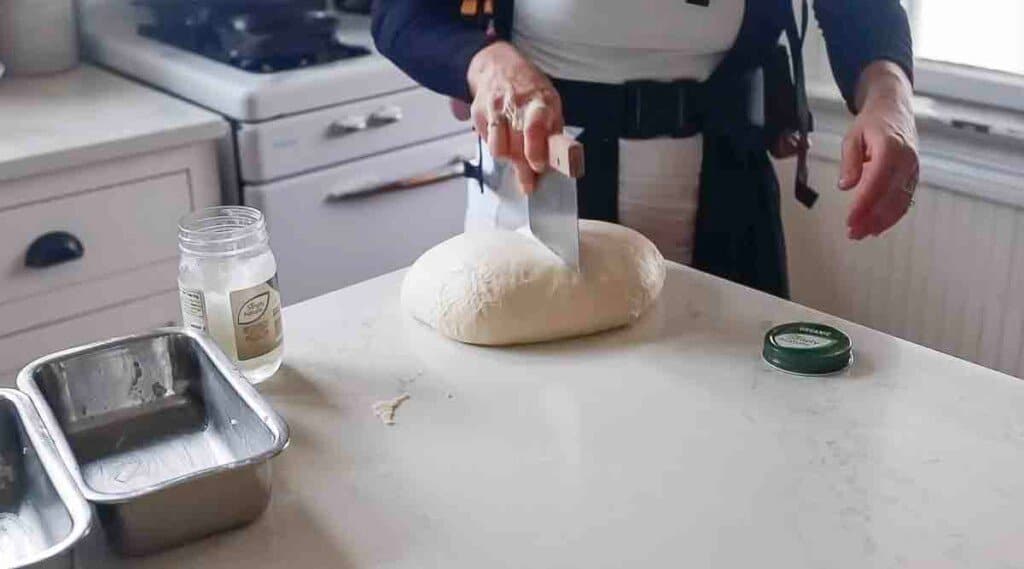
Divide in two equal parts.
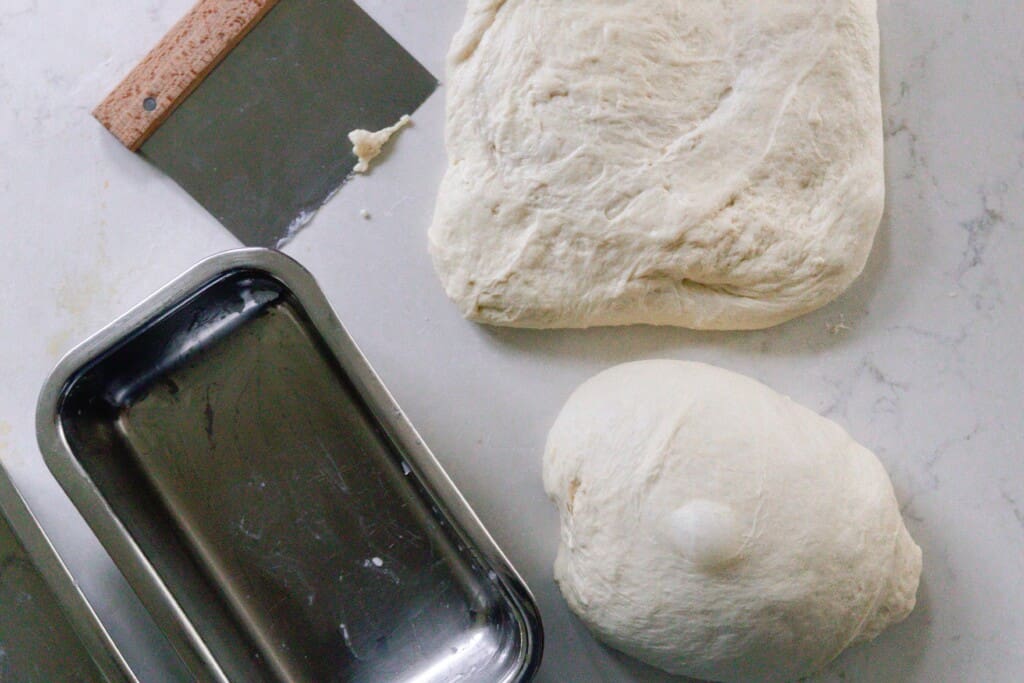
Shape by rolling the dough flat into a rectangle and rolling it up.
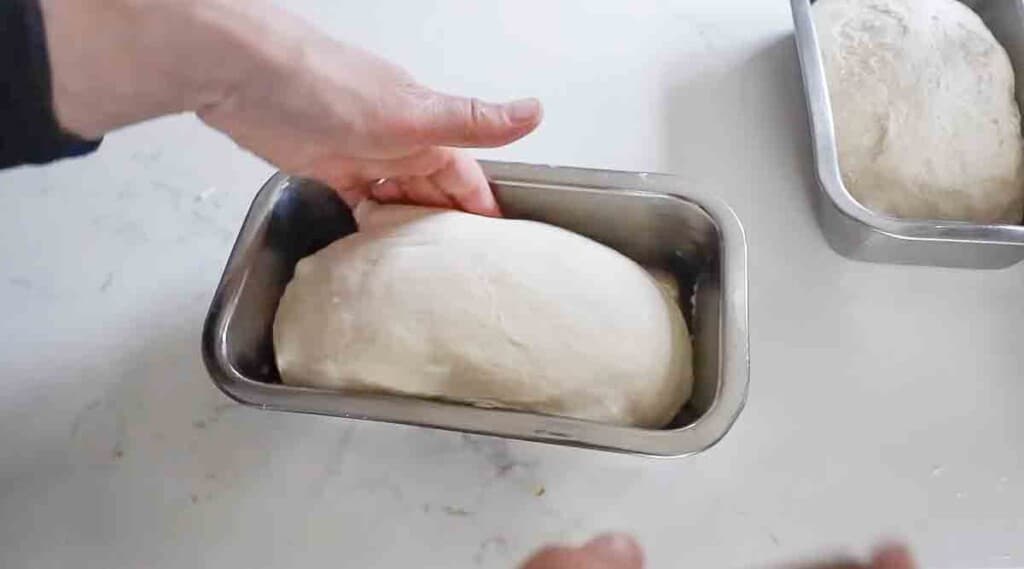
Add to parchment lined or buttered loaf pans.
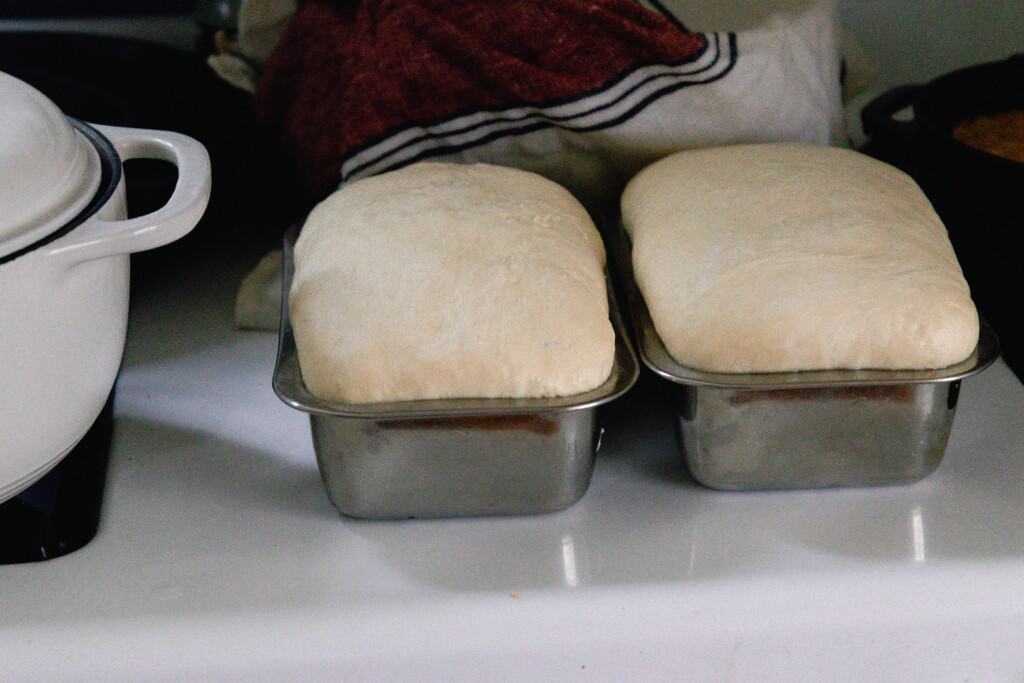
Second rise for 2-4 hours at room temperature, or until doubled. Again this depends on the temp! It could be as little as 1 hour if the house is warm and the starter active. Do not skip this step.It adds volume and strength to the dough.
Bake
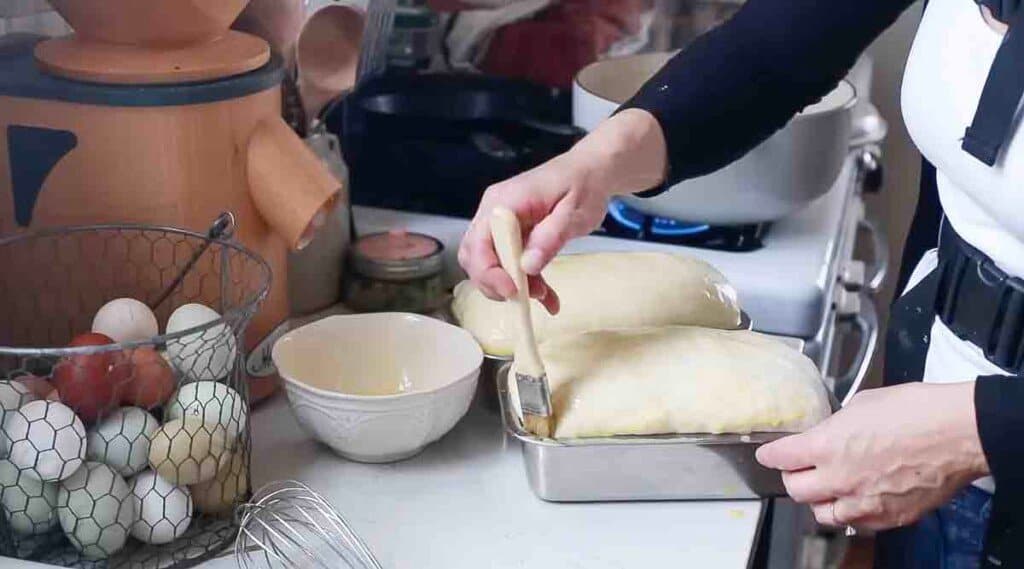
You can add an optional egg wash for more browning.
Bake at 375 for 45 minutes, or until golden on top.
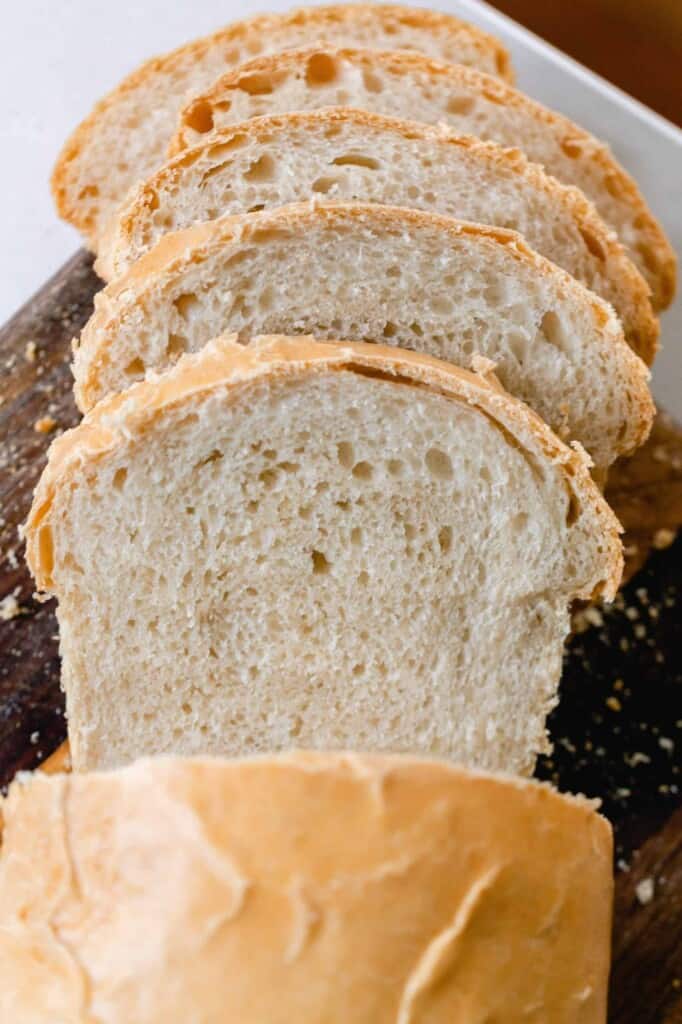
Allow to cool completely before slicing.
Storage:
Store in an air-tight container for up to five days for best results.
You can also freeze loaves in freezer safe plastic bags for 3-6 months.
Find More Of My Sourdough Recipes:
- Sourdough Zucchini Bread
- Easy Homemade Sourdough Pasta Recipe
- Sourdough Coffee Cake
- The Best Soft Sourdough Pretzels
- Sourdough Brioche
If you try this recipe and love it, I would love if you could come back and give it 5 stars! Tag me on Instagram @farmhouseonboone .
Sourdough Sandwich Bread
Ingredients
- 1/2 cup butter, softened or coconut oil
- 2 tablespoons honey or sugar, If using sugar, note that it will be 24 g
- 1 tablespoon salt
- 1 cup starter, active and bubbly
- 2 1/2 cups water
- 8 cups all purpose flour*
Instructions
- To a stand mixer, add all of the ingredients. I like to add the flour last, so I can add a bit less or more depending on my starter's hydration.
- Knead until dough is stretchy and smooth. You want it to pull away from the sides of the mixing bowl and be smooth and elastic – about 10 minutes. It should pass the windowpane test.
- Allow to bulk rise for 10-12 hours in a warm place like on top of a stove or refrigerator.
- Divide in two equal parts.
- Shape by rolling the dough flat into a rectangle and rolling it up.
- Add to parchment lined or buttered loaf pans.
- Second rise for 2-4 hours at room temperature, or until doubled.
- Bake at 375 for 45 minutes, or until golden on top. You can add an optional egg wash for more browning.
- Allow to cool completely before slicing.
Notes
- *Some people have said making two loaves is too much for their stand mixer to handle. This depends on the type of stand mixer you have. If you have a standard KitchenAid mixer, you may want to halve the recipe and make one loaf.
- Use really soft butter and cube it up so it blends easier.
- Don’t over ferment the dough. It will turn into a wet sloppy disaster that won’t rise well. Still edible. Maybe. It could also be turned into sourdough croutons.
- When making the dough, using a stand mixer makes the process much easier and hands off. You can also do this with your hands.
Nutrition
Nutrition information is automatically calculated, so should only be used as an approximation.


I’m fairly new to the sourdough game and have just been making boules in the Dutch oven… wanted to try loaves and these are perfect!! Was a little concerned coming out of the oven, as the top crust was very hard, but it softened as the loaves cooled. This recipe is a keeper for sure!! (Though I may now have to spring for a new Stand mixer… mine got quite warm during the kneading. I mixed and then kneaded 1/2 at a time and it was still hot to the touch… Easter present to myself?!)
My friend has made this recipe and it was soo good. I’ve tried it twice now and have let my dough bulk ferment for 10 hours and it was a big sloppy mess. I wasn’t able to shape it and it was very very sticky…any suggestions or thoughts on where I went wrong? Thank you!!
Hi Angela! It sounds like you could be over proofing your dough. It’s always better to read your dough than watching the clock because some houses run warmer than others. I always look for my dough to have at least doubled in size, has a gloss on the surface with some air bubbles and slowly springs back when poked. If poked and it springs back quickly, you can probably ferment for longer. If you poke it and the indent stays, the loaf could be over proofed and should be baked immediately. I hope this helps somewhat!
Hello and thank you for the recipe! I was wondering, once the dough is in the loaf pans if it should reach a certain point in the pan before baking? I.E. half inch to an inch above the lip of pan
Thanks again
My friend made this recipe and it was soo good. I’ve tried it twice now and after the 10-12 hour bulk ferment, my dough looks great in the bowl but when I take it out it is soo sticky and difficult to shape. It’s just a big blob. Any suggestions would be great! Thank you!!
Hi Lisa, how long do you think kneading by hand would take? I don’t own a stand mixer and nervous about biting iff more than I can chew! Also would it be quicker to knead if it’s only one loaf’s worth? Thanks in advance! Anna
I would try and do the stretch and fold method. I think it will be easier for you then kneading by hand!
Well, I totally destroyed my mixer, and the dough became so, so stiff. I don’t know how to fix this. The only thing I can think is that my altitude is affecting it. I’m 3438 above sea level. Does that affect things? I’m leaving it to bulk ferment now and hoping for the best. It’s tough to waste so many quality ingredients on a failure 🥴
You might be onto something Toby. I live only 90 feet above sea level and this is my go to recipe. It is the same process I used with regular yeast bread for years and it has never failed. I can’t pretend to know what the adjustment needs to be for elevation but don’t give up.
Made this once and it was my favorite bread! Making again and planning to make weekly. If I wanted to freeze one loaf would it be better to bake and then freeze or wrap and freeze it after the bulk rise then thaw, shape and rise when ready to bake it?
Either will work! I like to freeze it fully baked though.
Hi! Love this recipe! I froze a loaf life recommended, can you please share after defrosting how to reheat or rewarm? Thanks so much!
I just leave it on my counter to defrost!
I wish your recipes were in metrics so I can follow.
Here’s a conversion chart!
Can you substitute whole wheat flour?
There is an option at the bottom of the ingredient list to switch to metric if you prefer. (I do, so thank you Lisa)
My dough didn’t rise well in the loaf pan. It was sticky after the bulk rise when I shaped it into a rectangle and rolled – did I over ferment? This is my second try on this recipe and it’s happened twice now.
Yes, it sounds like the dough is over fermented.
Can you please give more details on the first rise? I left it for 10 hours so it wasn’t too long according to the recipe. So maybe the temperature was too warm? What temp do you recommend? I am currently trying this for a third time and 2 hours into the proofing in the loaf pan and I don’t see a rise.
Why did mine come out dense?? The bread tastes great but the outside is still a little crunchy and the inside in super dense. 😞
My bread was quite dense, should I just increase how much water I put in it? Or adjust other ingredients too? I proofed for long enough I’d think according to temperature and appearance.
Thanks,
Kat