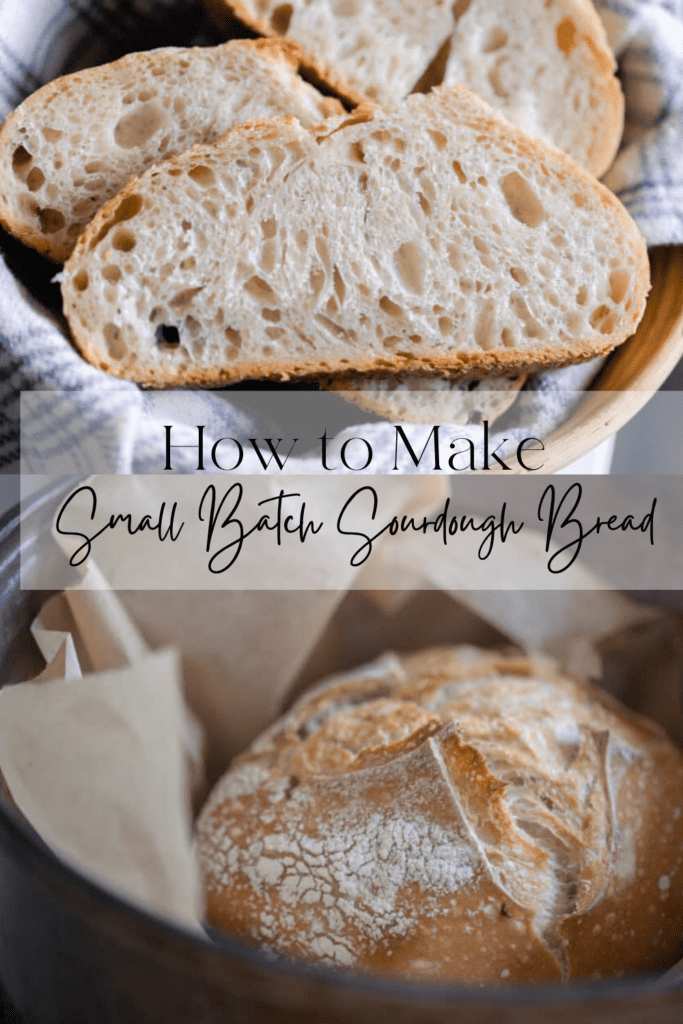
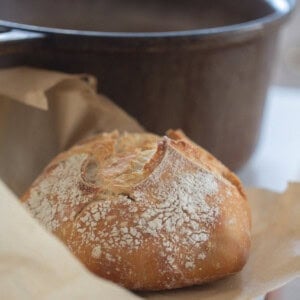
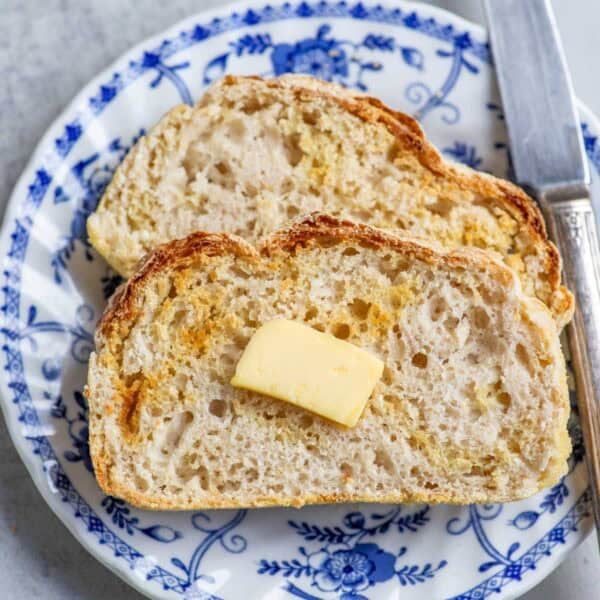
If you can’t ever seem to make it through an entire sourdough loaf before it goes bad, this small batch sourdough bread recipe is for you! Half the size of your typical boule, you’ll get all the same robust sourdough flavor without any going to waste. It’s a perfect loaf for smaller households or to give as a gift.
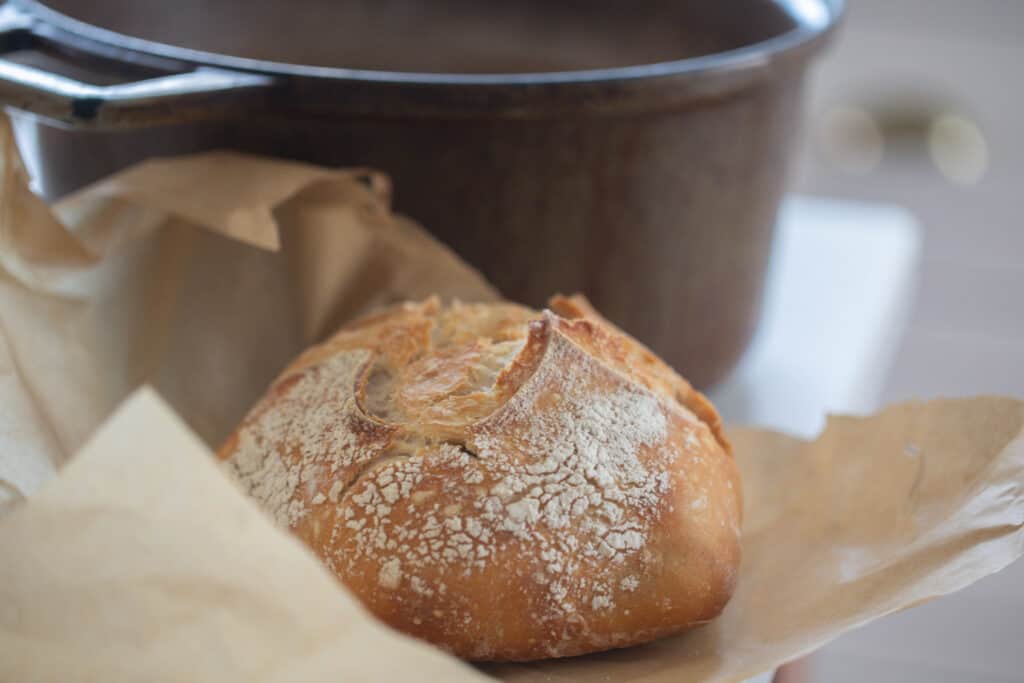
Table of Contents
- What is small batch sourdough?
- Why You’ll Love This Recipe
- Tips
- Ingredients
- Tools You May Need
- How to Make Small Batch Sourdough Bread
- Baker’s Timeline:
- FAQ
- Sourdough Baking Tips and Tricks
- Become a Sourdough Pro with Simple Sourdough
- More Sourdough Bread Recipes
- How to Make Small Batch Sourdough Bread Recipe
As a family of 10, it is rare that any bread ever goes to waste around here. In fact, I typically have to make multiple loaves a week just to keep up with all my little sourdough lovers.
I know that is not the case for everyone, though. If there are just a few people eating on a loaf or even just one, it can be difficult to eat an entire boule before it starts to go stale or bad.
No one ever wants to waste food, especially food you put so much effort and love into. So, if you seem to be throwing away bread each week, this small batch sourdough recipe should be perfect for you!
It’s basically my Beginner’s Sourdough Bread recipe, but cut in half.
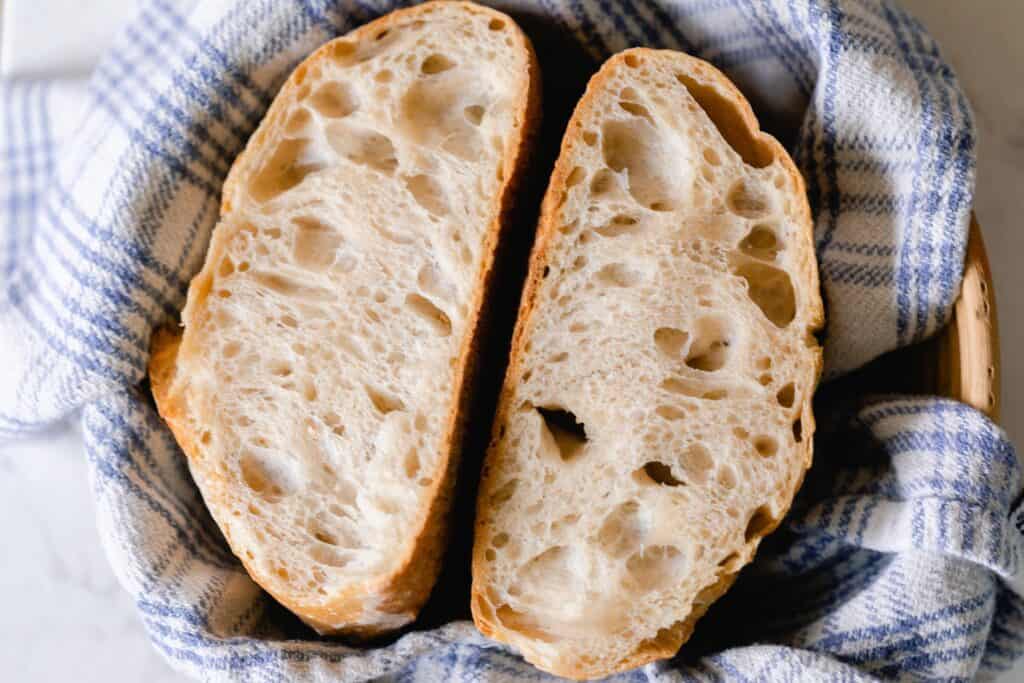
That means all the delicious flavor sourdough brings, plus a beautiful airy crumb and crips crust, just in a smaller package.
What is small batch sourdough?
Sourdough bread is a fermented bread that uses natural wild yeast from the environment that has been captured to rise and ferment, rather than relying on commercial yeast.
Thanks to the fermentation process that breaks down gluten and phytic acid, sourdough tends to be easier to digest than regular yeast bread. It is also packed full of nutrients that are more bio-available to the body.
Small batch sourdough refers to a small loaf of sourdough bread that is typically half the size of a typical boule shaped loaf.
Why You’ll Love This Recipe
Less waste – If you find it impossible to finish a loaf of sourdough bread before it goes bad, this size is perfect for you!
Simple ingredients – With just four ingredients, this bread is simple, yet delicious. Besides the starter, all you need are a few pantry staples to make delicious homemade bread for you and your family.
Great for practicing – This recipe is modeled after my Beginner’s Sourdough Bread recipe, so it is perfect for anyone at the beginning of their sourdough journey. Plus, this recipe is great for practicing.
Work on your stretch and fold technique, fermentation timing, and scoring skills without feeling like you’ve wasted a ton of flour if things don’t go as planned. Don’t forget though – even loaves that don’t turn out perfectly can be turned into croutons or bread crumbs!
Tips
- The dough ball will be too small for a regular size banneton. I recommend using a large soup bowl or a small stainless steel bowl. There are smaller bannetons you can purchase, but I personally like to just use what I already have.
- Bulk fermentation time can vary based on many factors, including the maturity of your starter and the temperature of your home. A smaller loaf will not proof faster just because of its size.
- Not sure how to tell when bulk fermentation is done? One trick is to let your dough rise in a glass container so you can easily see once it has doubled and can see if there are bubbles all over the dough. If you don’t have a glass bowl that is the right size for your dough, take a small chunk of dough and place it in a jar. Flatten it down slightly in the bottom and mark where it reaches on the jar. Once this dough has doubled, the rest of your dough should be ready, too!
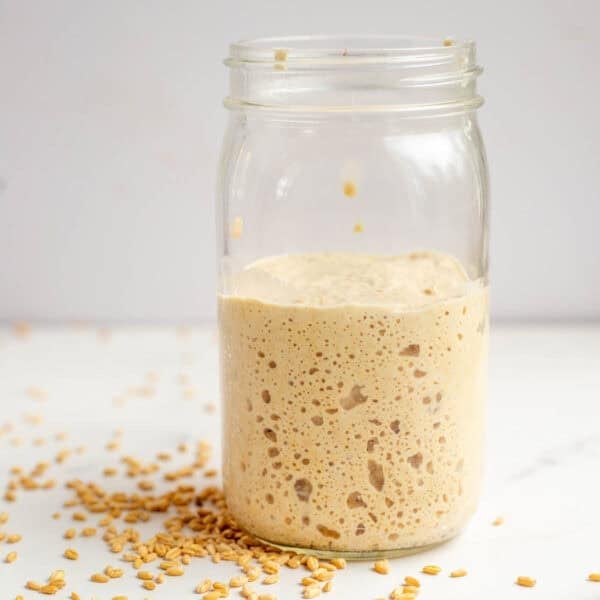
- You’ll need an active starter for this recipe that has been fed anywhere from 4-12 hours before you start. New to sourdough? Learn how to make your own sourdough starter from scratch here.
This post contains affiliate links, which means I make a small commission at no extra cost to you. See my full disclosure here.
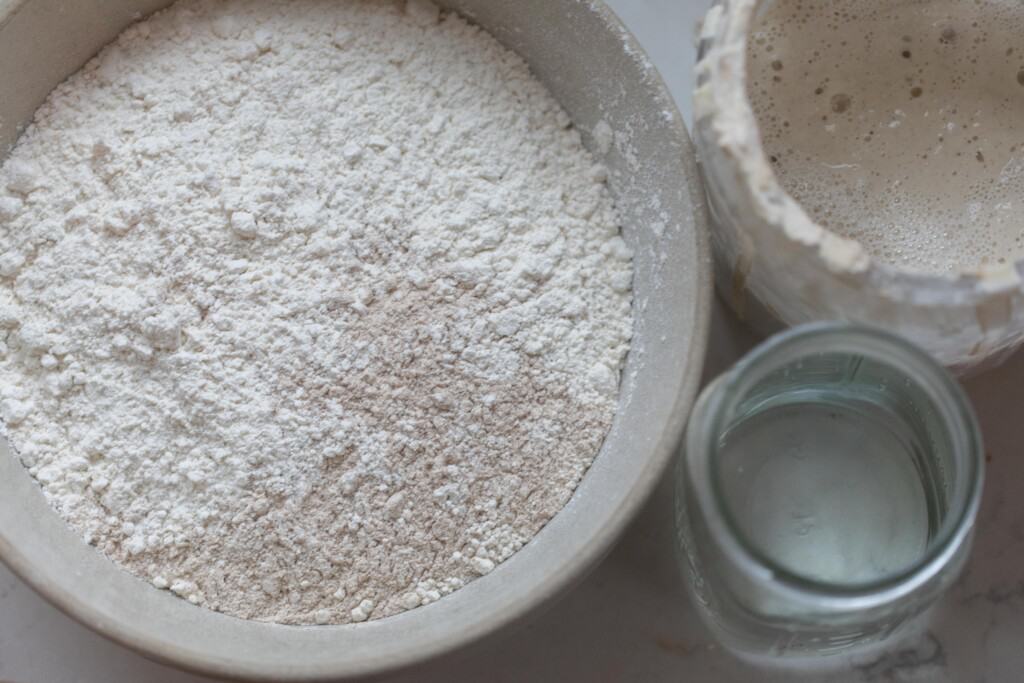
Ingredients
All purpose flour – I like to keep this loaf simple and use only all purpose. However, you can experiment with whole wheat flour and bread flour, similar to how I make my regular no-knead bread.
Active sourdough starter – I use an 100% hydration starter. This simply means I feed it equal parts flour and water.
Water – I prefer to use filtered water for best results.
Salt – Sea salt is best if you have it.
Tools You May Need
Dutch Oven – This is the best way to bake sourdough bread. You can do it without one, though! See how I make my sourdough mini loaves without one here.
Large Soup Bowl or Small Stainless Steel Mixing Bowl – This bread will be too small for a regular banneton. You can either purchase a small banneton or just use what you have!
Digital Kitchen Scale – Weighing your ingredients will give you the most accurate results. If you prefer volume measurements, you can use my conversion chart here.
Scoring Lame or Razor Blade
How to Make Small Batch Sourdough Bread
Before you plan to make sourdough bread, you’ll want to feed your starter, ensuring it is nice and bubbly and active. Typically, this will be 4-12 hours before you begin your bread.
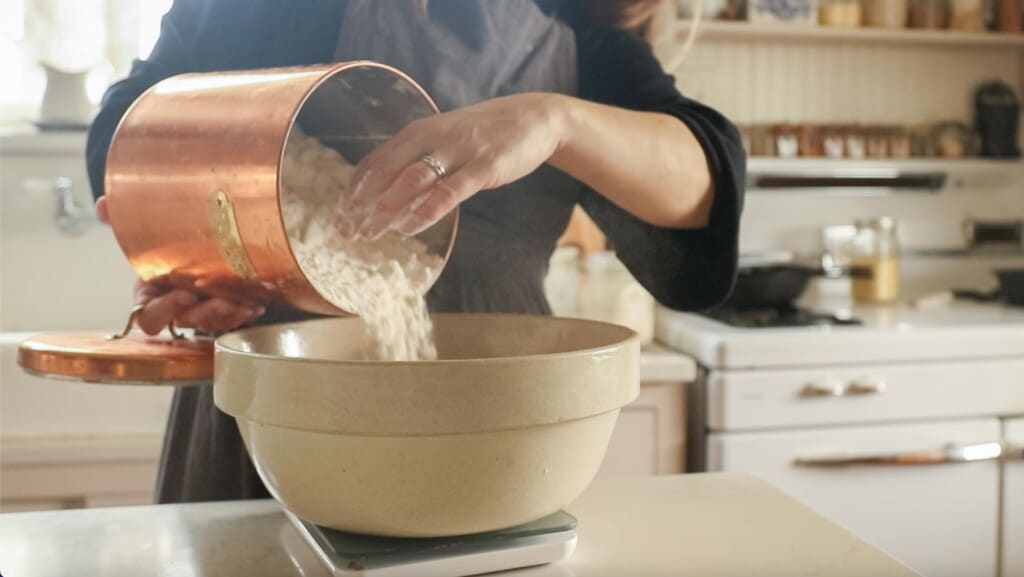
Set a medium sized mixing bowl on a digital kitchen scale and add your ingredients – warm water, active starter, salt, and flour.
Mix everything together using a dough whisk, wooden spoon, or your hands.
Cover the bowl with plastic wrap or a lid and allow the dough to rest for 30 minutes. This is a process called autolyse, meaning the water is hydrating the flour.
Stretch And Fold
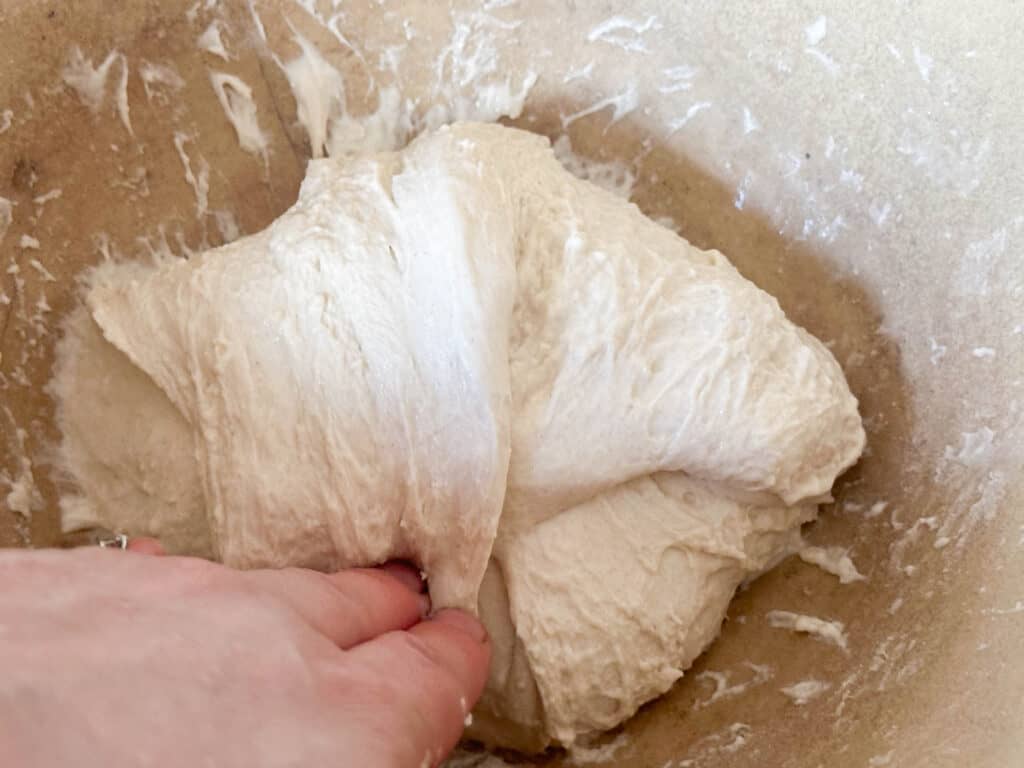
To strengthen the gluten in your dough, you will perform a series of stretch and folds. This is a critical step to ensure you get a beautiful open crumb.
To do a stretch and fold, grab the edge of the dough and pull up stretching it out as you pull upwards. This may be difficult and you may need to kind of bounce the dough to get it to stretch.
Place dough that is in your hands back into the center. Turn the bowl about a quarter turn and complete another stretch and fold. Repeat two more times. This is considered one round.
Cover your dough again. Set a timer for 30 minutes. Do a second round of stretch and folds. Wait another 30 minutes before doing the third and final stretch and fold round. That is a total of 3 sets of stretches and folds.
Bulk Fermentation
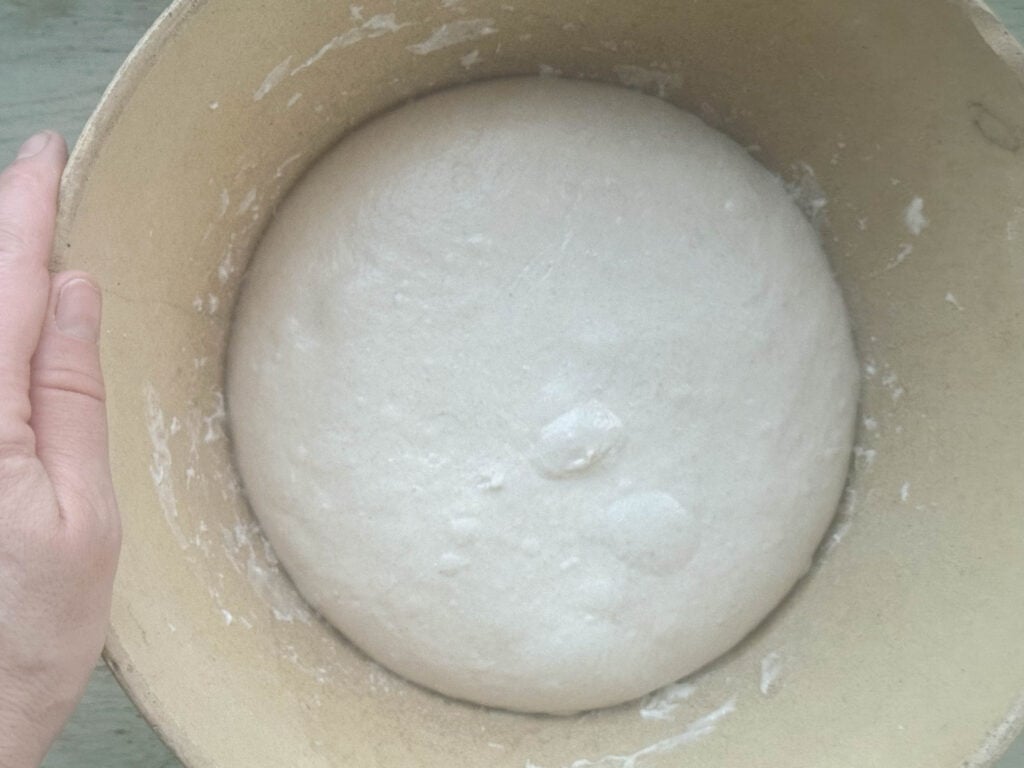
After the final stretch and fold, let the dough rest and continue to bulk ferment. To avoid the dough forming an unwanted crust, cover the bowl with a lid, damp kitchen towel, or plastic wrap.
Let it sit in a warm place until the dough has doubled in size. You’ll also notice bubbles on your dough. It should form a dome and pull away from the sides of the bowl.
The time the fermentation process takes can vary. It can take anywhere from 6 to 12 hours, sometimes longer.
Shape
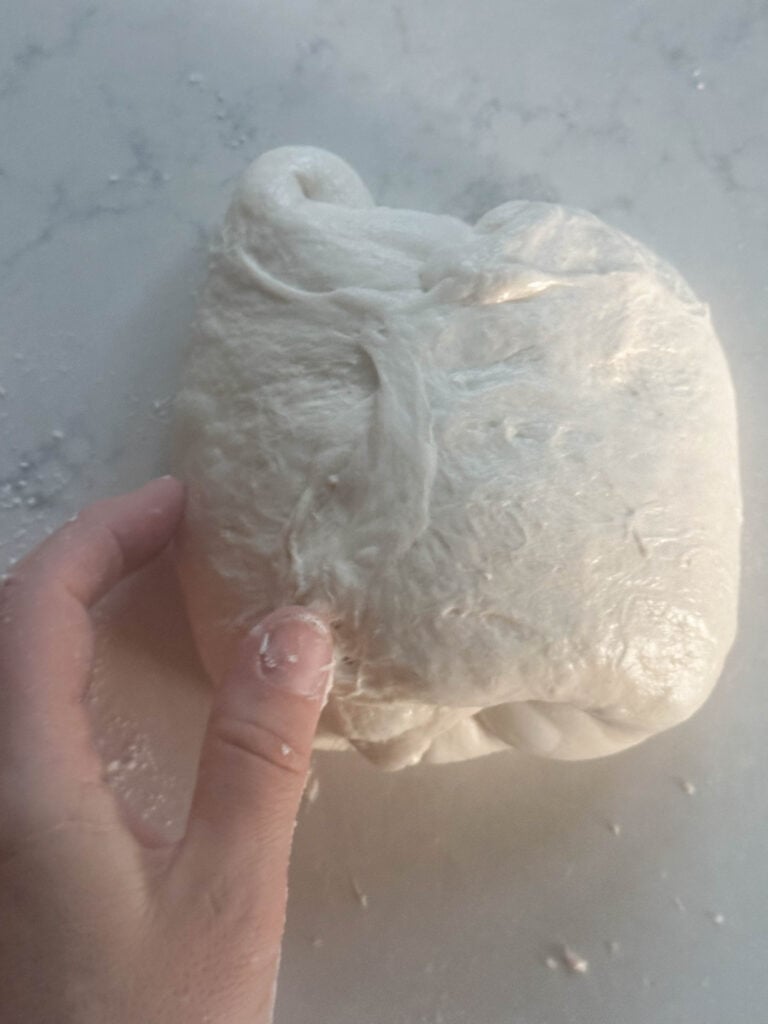
Transfer dough to a clean floured surface.
Fold the dough onto itself and roll up. Then shape into a ball by gently spinning it toward you.
Let the dough ball sit uncovered for about 15 to 20 minutes. In this case, you want the top of the dough to develop a skin. This helps prevent it from sticking to the bowl or basket during the overnight rise.
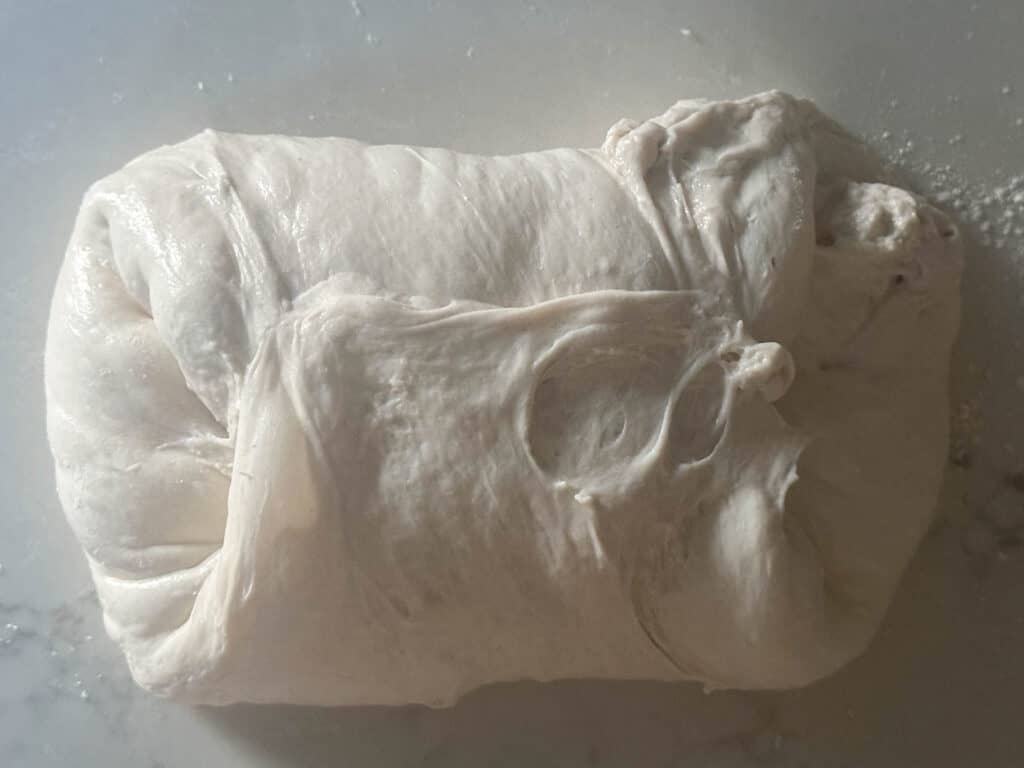
Place the smooth side down and shape again. I do this by folding the two sides over to meet in the middle, pinch together and then repeat on the other two sides. This creates surface tension which helps give it more oven spring (a good rise).

Place the dough in a small bowl with a floured tea towel. Make sure to place it seam side up, smooth side down.
Cover with plastic or place in a plastic bag and tie the ends. Let the dough rest for 12 to 15 hours in the refrigerator. You can also let the bread rise at room temperature for 3-4 hours. I personally prefer placing the dough in the fridge. It makes it much easier to score.
Bake

Preheat a dutch oven to 500 degrees for 1 hour.
Remove dough from the fridge right before baking.
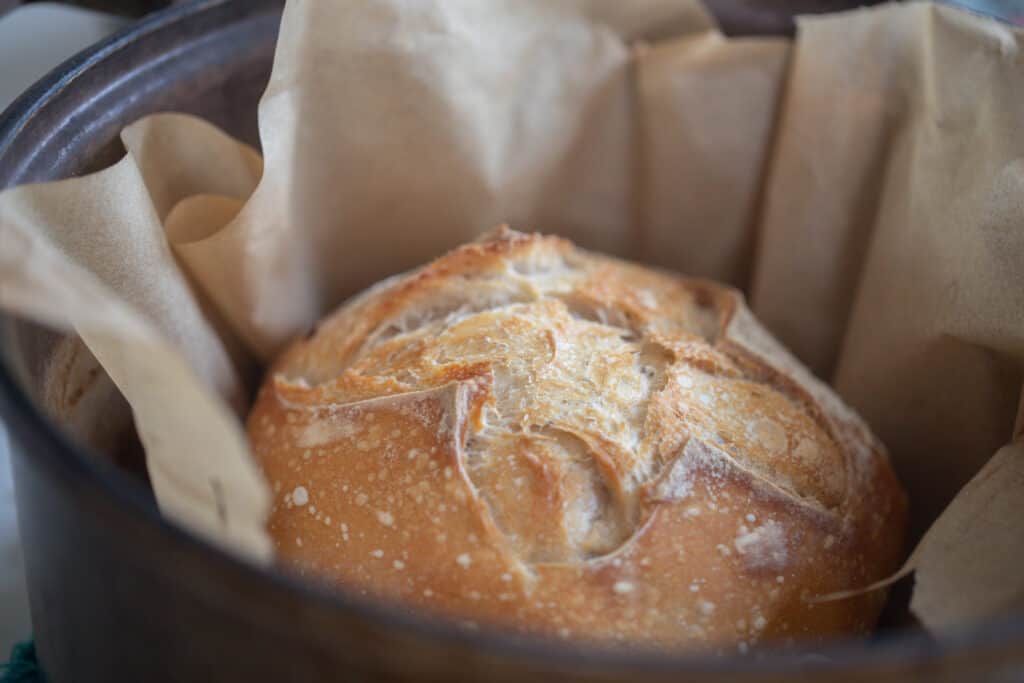
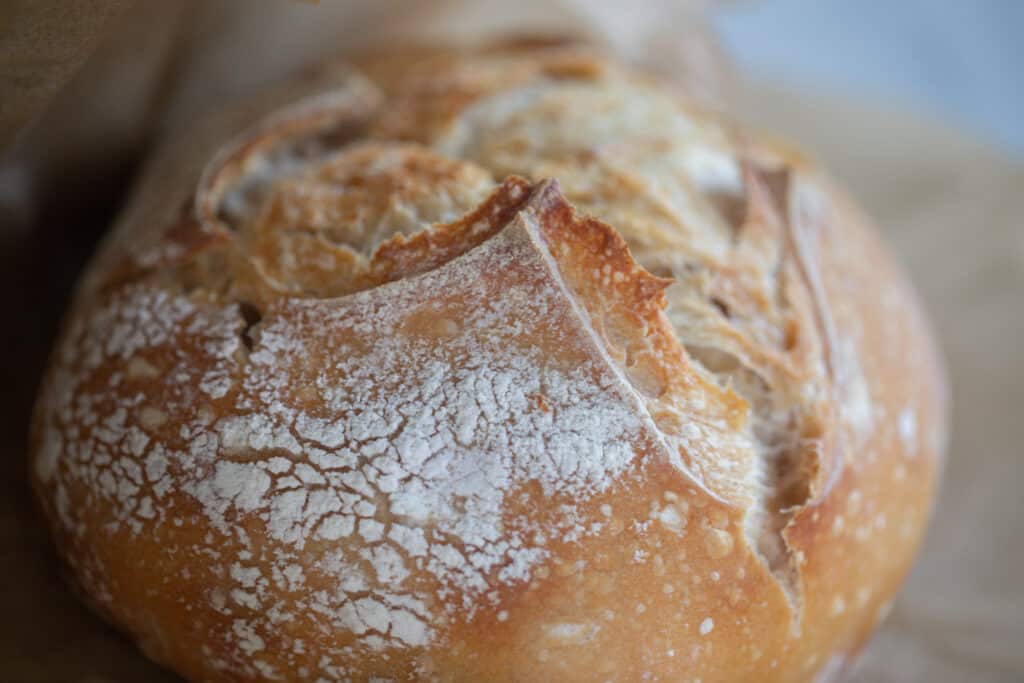
Place dough on a piece of parchment paper. Dust the dough with flour and score with a lame or razor blade. Make sure to do one large score (called an expansion score). You can also add a design if you feel so inclined! Learn more about scoring here.
Carefully, transfer the piece of parchment paper with the dough into the hot dutch oven. I recommend using oven mitts that can withstand the higher temperatures.
Place the lid back on and place the dutch oven into the hot oven. Bake for 20 minutes.
Carefully remove the lid with oven mitts, turn the oven temperature down to 475, and bake an additional 15 to 25 minutes or until golden brown.
Baker’s Timeline:
This can be started or made at any time. This is just a sample schedule to give you an idea of how you could fit this into your day.
Feed sourdough starter with flour and water.
If the sourdough starter is mature, then proceed to creating the dough. This will depend on how mature your starter is and how warm your house is.
Combine ingredients together. Rest for 30 minutes. Cover with a damp towel or plastic wrap.
Stretch and Fold
3 stretch and folds – every 30 minutes
Cover with a wet towel or plastic wrap and allow the dough to bulk ferment until doubled.
(may be much sooner or later)
Shape dough.
Sit out 15-20 minutes, uncovered.
Turn over and shape.
Transfer to a small bowl with a floured tea towel and cover with plastic. Place in the refrigerator for 12-15 hours.
Preheat the dutch oven on 500 for 1 hour.
Take dough out of the fridge, dust with flour, and score. Bake the sourdough bread and let it cool.
FAQ
Nope! The bake time is the same as my regular sized boules. Keep in mind, though, that every oven is going to bake a bit differently. So, you may have to adjust the timing for your specific oven. If you are unsure if your loaf is done, use a kitchen thermometer to test the internal temperature. It should be about 205 F.
Yes! Dutch ovens work the best, but there are alternative methods. The most important thing is to create steam in your oven. Learn how to make sourdough without a Dutch oven here.
Yes! To do this, I typically use the sheet pan method for baking bread. Check out my mini loaves recipe here for the details! You can also turn these mini loaves into bread bowls, filled with your favorite soup, it makes a delicious and cozy winter meal. Get my bread bowl recipe here.
Sourdough Baking Tips and Tricks
First time making sourdough? It can seem overwhelming at first, but with practice, you will get the hang of it!
Here are some of my posts on tips and tricks for making the most delicious sourdough loaves!
- Sourdough Float Test
- Sourdough Hydration: How To Make Delicious Bread
- How to Cut Sourdough Bread for the Perfect Slice
- How to Store Sourdough Bread to Keep it Fresh
- How to Freeze Sourdough Bread – The Best Way
Become a Sourdough Pro with Simple Sourdough
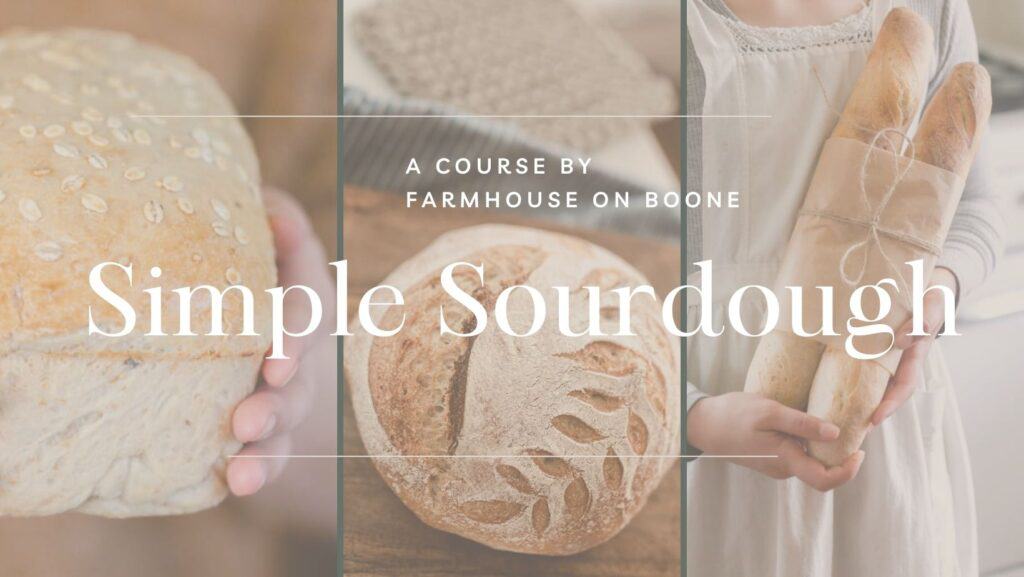
Want more sourdough guidance?
Check out my course Simple Sourdough! Inside, I’ll take you through every step of the process – from creating your starter to making beautiful scoring patterns.
In Simple Sourdough, you will:
- Make your own starter that is robust enough to bake your bread. – I’ve had my master starter for over 12 years and it is still going strong!
- Bake your very first loaves of sourdough bread. – My tried-and-tested recipes will turn out great results for you. Practice makes perfect, and I promise, you’ll want to eat your experiments!
- Improve your understanding of sourdough and bake better loaves. – Perfect your rising and proofing, make Instagram-worthy boules, and build your confidence as a sourdough baker.
- Expand your repertoire with specialty loaves and a variety of flours. – Once you’ve mastered the basics, you’ll be amazed how versatile sourdough can really be!
You’ll also be invited to join the private Facebook page for members only. It’s a great place to ask questions, learn from fellow bakers (including me!), and find encouragement and inspiration.
Learn more about what Simple Sourdough is all about here.
More Sourdough Bread Recipes
- Best Garlic Sourdough Bread with Rosemary
- Sourdough Pumpernickel Bread Recipe
- Honey Sourdough Bread Recipe
- Sourdough Cranberry Walnut Bread
- Sourdough Brown Bread Recipe
If you try this recipe and love it, I would love if you gave it 5 stars! Also, tag me on Instagram @farmhouseonboone.
How to Make Small Batch Sourdough Bread
Ingredients
- 240 grams all purpose flour
- 50 grams sourdough starter, bubbly and active
- 165 grams water
- 5 grams salt
Instructions
- Before you plan to make sourdough bread, you'll want to feed your starter, ensuring it is nice and bubbly and active. Typically, this will be 4-12 hours before you begin your bread.
- Set a medium sized mixing bowl on a digital kitchen scale and add your ingredients – warm water, active starter, salt, and flour.
- Mix everything together using a dough whisk, wooden spoon, or your hands.
- Cover the bowl with plastic wrap or a lid and allow the dough to rest for 30 minutes. This is a process called autolyse, meaning the water is hydrating the flour.
Stretch And Fold
- To strengthen the gluten in your dough, you will perform a series of stretch and folds. This is a critical step to ensure you get a beautiful open crumb.
- Complete 3 rounds of stretch and folds, 30 minutes apart.
- To do a stretch and fold, grab the edge of the dough and pull up stretching it out as you pull upwards. This may be difficult and you may need to kind of bounce the dough to get it to stretch.
- Place dough that is in your hands back into the center. Turn the bowl about a quarter turn and complete another stretch and fold. Repeat two more times. This is considered one round.
Bulk Fermentation
- After the final stretch and fold, let the dough rest and continue to bulk ferment. Cover the bowl with a lid, damp kitchen towel, or plastic wrap.
- Let it sit in a warm place until the dough has doubled in size. This can take anywhere from 6 to 12 hours.
Shape
- Transfer dough to a clean floured surface.
- Fold the dough onto itself and roll up. Then shape into a ball by gently spinning it toward you.
- Let the dough ball sit uncovered for about 15 to 20 minutes to develop a skin
- Place the smooth side down and shape again. I do this by folding the two sides over to meet in the middle, pinch together and then repeat on the other two sides. This creates surface tension which helps give it more oven spring (a good rise).
- Place the dough in a small bowl with a floured tea towel. Make sure to place it seam side up, smooth side down.
- Cover with plastic or place in a plastic bag and tie the ends. Let the dough rest for 12 to 15 hours in the refrigerator.
Bake
- Preheat a dutch oven to 500 degrees for 1 hour.
- Remove dough from the fridge right before baking.
- Place dough on a piece of parchment paper (optional). Dust the dough with flour and score with a lame or razor blade.
- Carefully, transfer the piece of parchment paper with the dough into the hot dutch oven.
- Place the lid back on and place the dutch oven into the hot oven. Bake for 20 minutes.
- Carefully remove the lid with oven mitts, turn the oven temperature down to 475, and bake an additional 15 to 25 minutes or until golden brown.
Notes
- The dough ball will be too small for a regular size banneton. I recommend using a large soup bowl or a small stainless steel bowl. There are smaller bannetons you can purchase, but I personally like to just use what I already have.
- Bulk fermentation time can vary based on many factors, including the maturity of your starter and the temperature of your home. A smaller loaf will not proof faster just because of its size.
- Not sure how to tell when bulk fermentation is done? One trick is to let your dough rise in a glass container so you can easily see once it has doubled and can see if there are bubbles all over the dough. If you don't have a glass bowl that is the right size for your dough, take a small chunk of dough and place it in a jar. Flatten it down slightly in the bottom and mark where it reaches on the jar. Once this dough has doubled, the rest of your dough should be ready, too!
Nutrition
Nutrition information is automatically calculated, so should only be used as an approximation.


I want to make 2 small batch loaves. Should I double the recipe, or make same day sourdough and divide the dough before cold fermentation?
You can do either!
Absolutely perfect size for the two of us and was just as yummy as your beginner’s sourdough. Thank you so much for sharing all your knowledge and amazing recipes. I just read your family has moved into your beautiful farmhouse. I am so thrilled for you and your lovely family. May God continue to bless you all. Congratulations!!
Can you clarify what the 12 servings means? Does this mean that this recipe will make 12 mini loaves of bread?
It makes 12 slices of bread.