


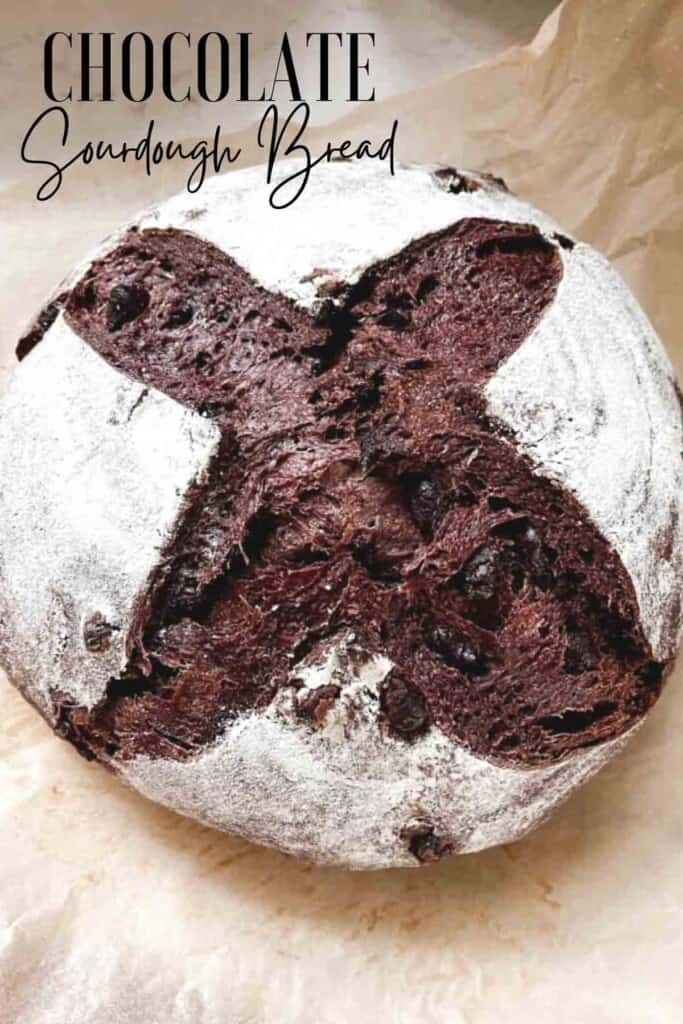
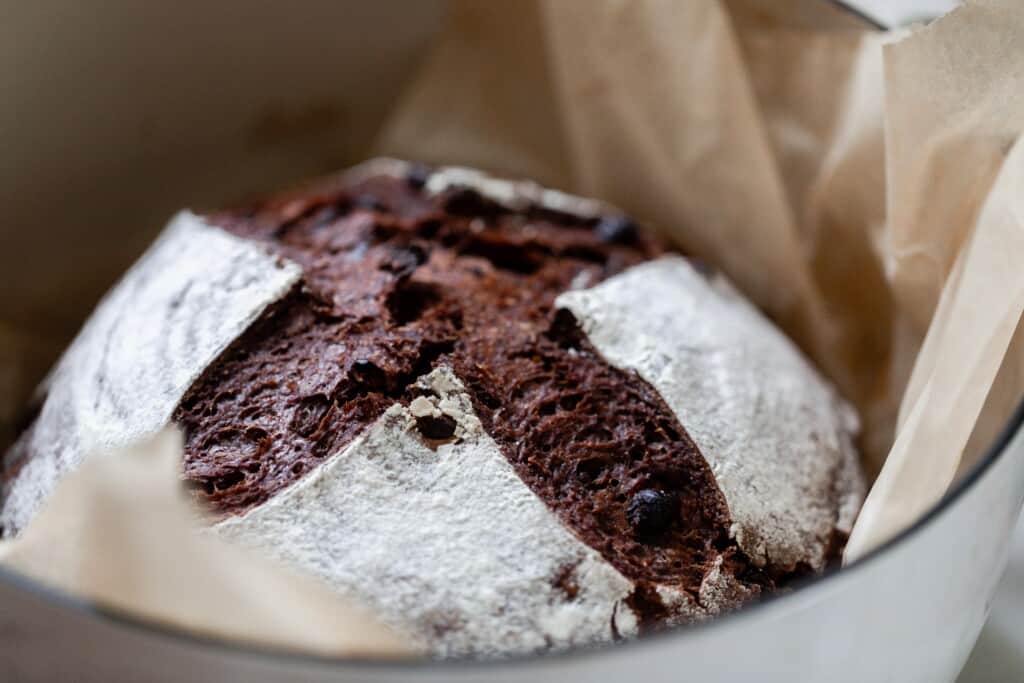
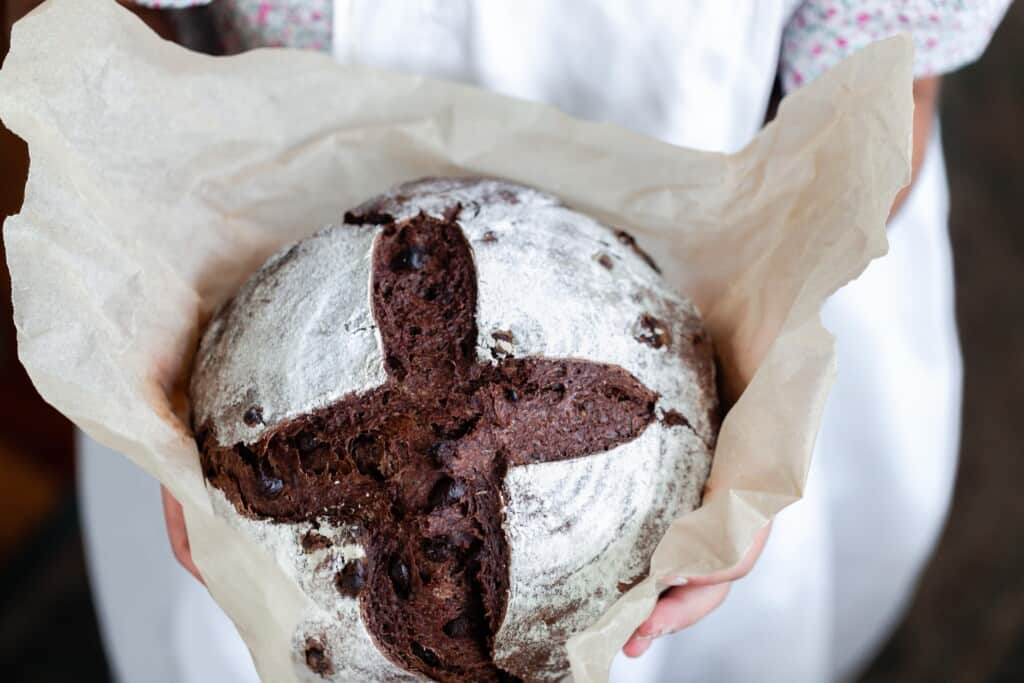
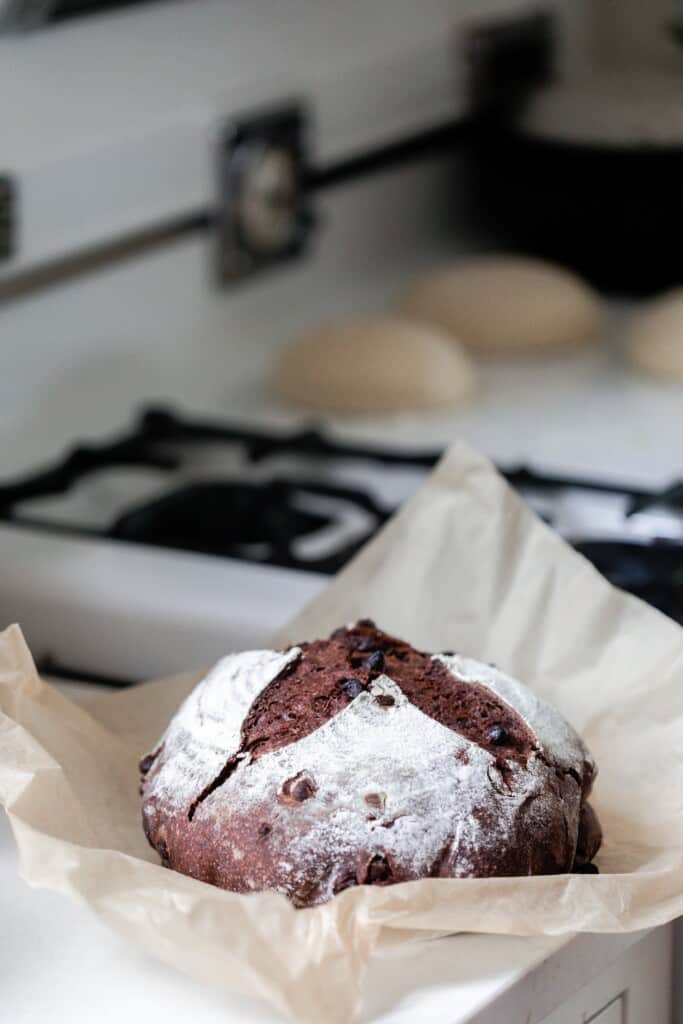
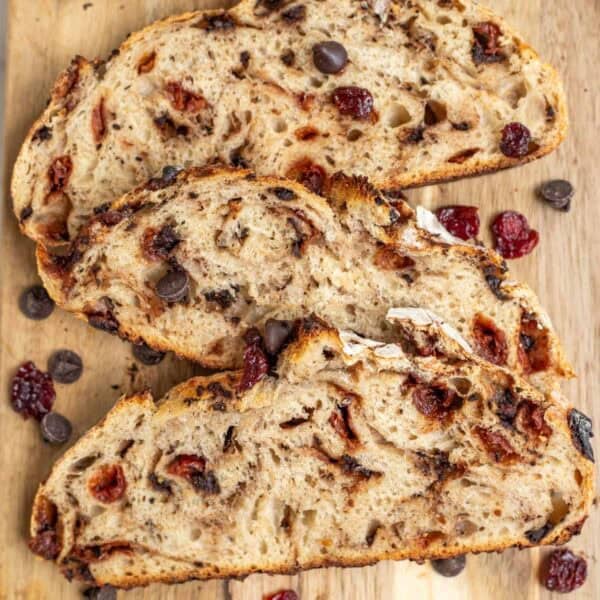
Double chocolate sourdough chocolate bread is a decadent recipe you will want to make over and over. Soft and chewy on the inside, crusty on the outside, and scattered with chocolate chips throughout.
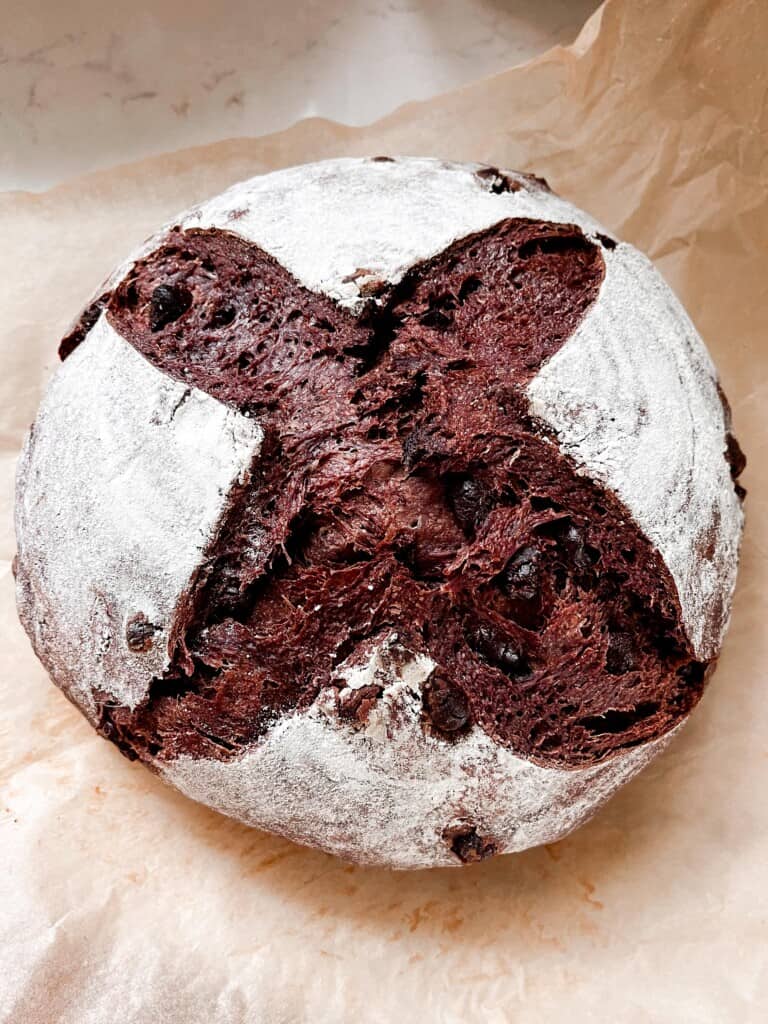
Table of Contents
Adapted from my no knead artisan loaf, this chocolate sourdough bread is such a fun twist on a classic recipe. Cocoa powder, chocolate chips, and brown sugar give this recipe a chocolatey richness.
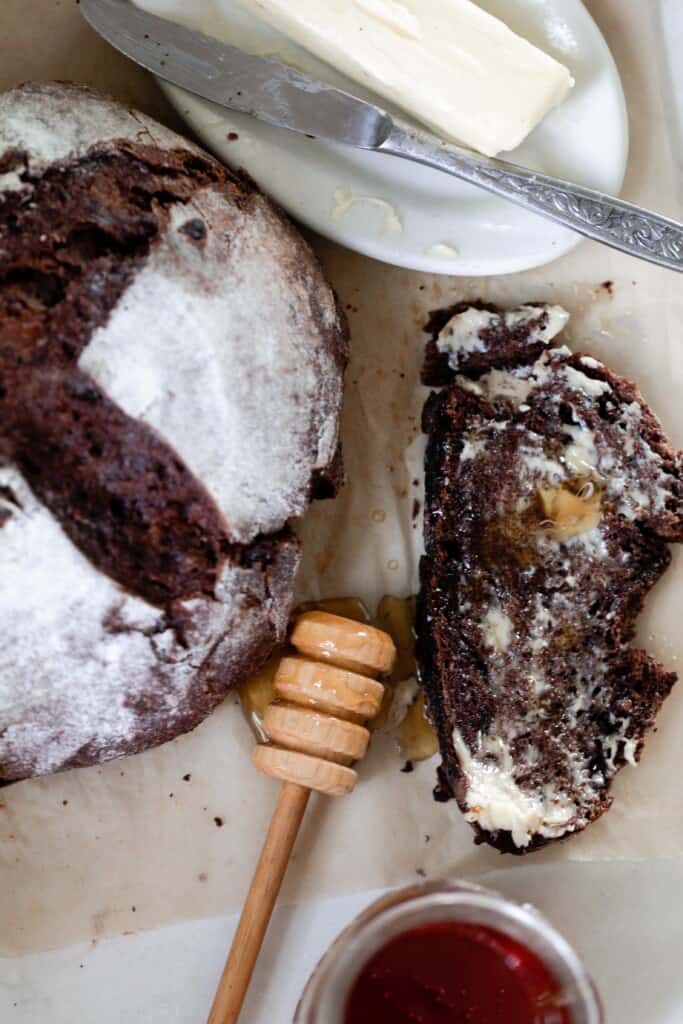
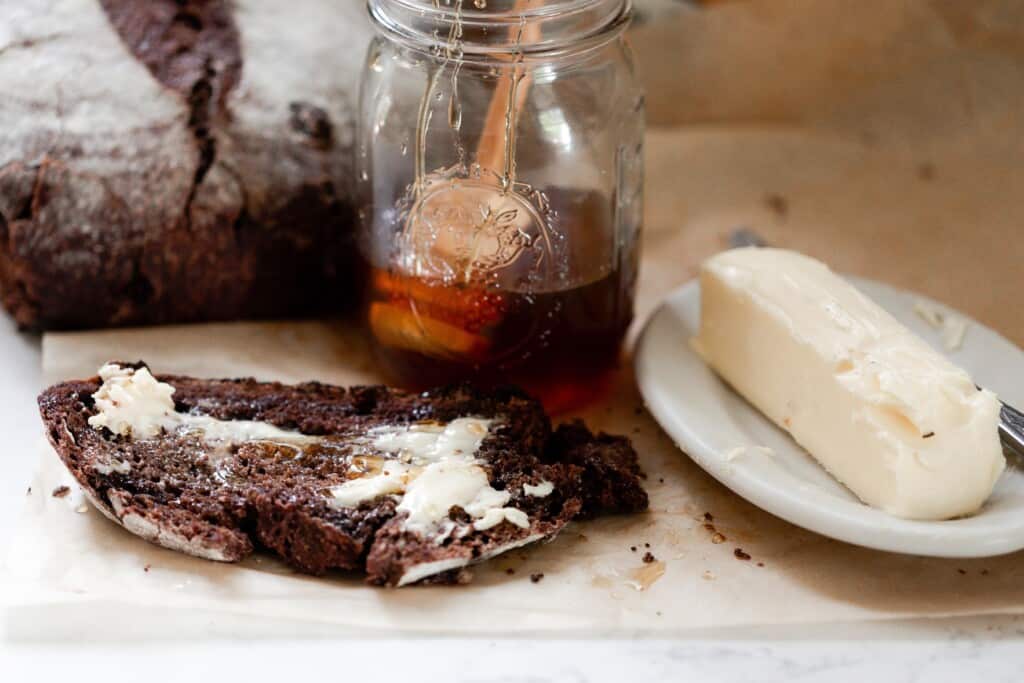
Serve it sliced with some butter, topped with honey and a side of raw milk ice cream. Yum.
Delicious for brunch, a fun breakfast, or really anytime. It has such a lovely crust, and it’s so pleasantly chewy inside. Check out my ideas on how to serve this down below.
Why you will love this recipe:
Double chocolate goodness: Not only is there cocoa powder in the dough giving it a deep rich flavor, but also chocolate chips throughout. Every bite is full of chocolatey goodness.
Easy no knead recipe: There is no kneading involved with this recipe. Rather, it uses the stretch and fold technique which is much easier on you and your forearms.
Sweet treat to add to your weekly bread routine: I recently shared my new weekly bread routine. Make 6 loaves or so of bread one day a week, then leave them to proof in the fridge all week. Just pop one out and bake each day you want a fresh loaf of bread. This recipe has now been aded to the repertoire.
Sourdough Chocolate Bread Baking Tips:
- For that nice hard and beautiful crust, use a dutch oven with a lid.
- I’m usually not one for being super precise, but I’ve come to find that weighing your ingredients makes this bread more consistent and easier to get together.
- You will need a nice active sourdough starter to make a loaf of bread. Check out how to make a sourdough starter and learn how to care for one here.
- Cover the dough with a damp towel, beeswax wrap, or plastic wrap to ensure that an unpleasant crust doesn’t develop.
This post contains affiliate links, which means I make a small commission at no extra cost to you. See my full disclosure here.
FAQ:
Does cocoa powder affect yeast?
The cocoa powder can change the pH of the dough, affecting the yeast. I, however, have not had any issues with the cocoa powder affecting this chocolate sourdough bread.
Is sourdough bread healthier for you?
The short answer is yes. Sourdough bread that has been fermented using a sourdough starter is a healthier way to eat grains.
The wild yeast that is captured in the starter helps break down the phytic acid present in grains. This breakdown helps make the nutrients naturally occurring in the wheat to be more bio-available (easier to absorb) for the body.
Gluten is also broken down during this process, allowing easier digestion, especially for those who have a difficult time digesting gluten.
Tools you may need:
Kitchen scale or measuring cups
Dough whisk (optional)
Banneton (optional)
Lame
Ingredients:
Unbleached all-purpose
Whole wheat: Preferably freshly milled. The Mockmill is my favorite mill.
Bread flour: Can omit and just add more to the unbleached all purpose. Bread flour helps give the bread a softer texture.
Salt: Ever had bread without salt? It’s bland and blah.
Brown sugar: Adds a delightful sweetness with a touch of caramel flavor.
Cocoa powder: What’s chocolate bread without cocoa powder?
Sourdough starter: Active and bubbly. To make bread, you need a mature starter.
Water: Preferably filtered. Tap water, especially one with a lot of chlorine, can inhibit the yeasts.
Chocolate chips: Semi-sweet. Milk chocolate also works. Chips or chunks.
Optional Add-Ins: You could also add in nuts, seeds, or dried cherries.
How To Make Chocolate Sourdough Bread
Feed a sourdough starter 4-12 hours before with sufficient flour and water. The starter should be super active and bubbly before starting the dough.
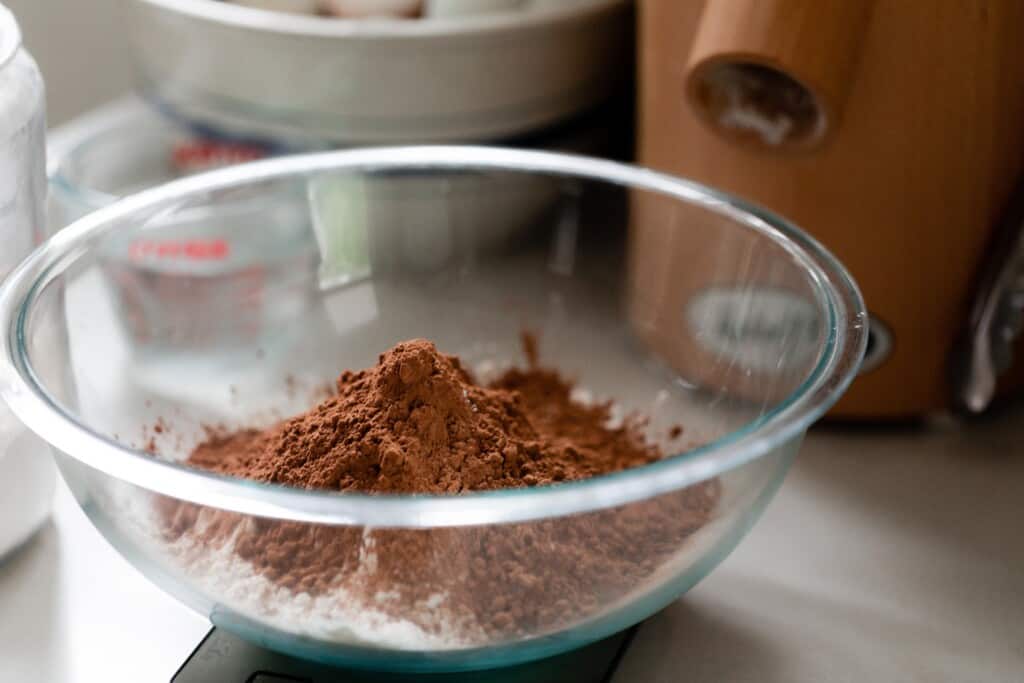
In a large bowl, weigh out dry ingredients (except salt). Stir together
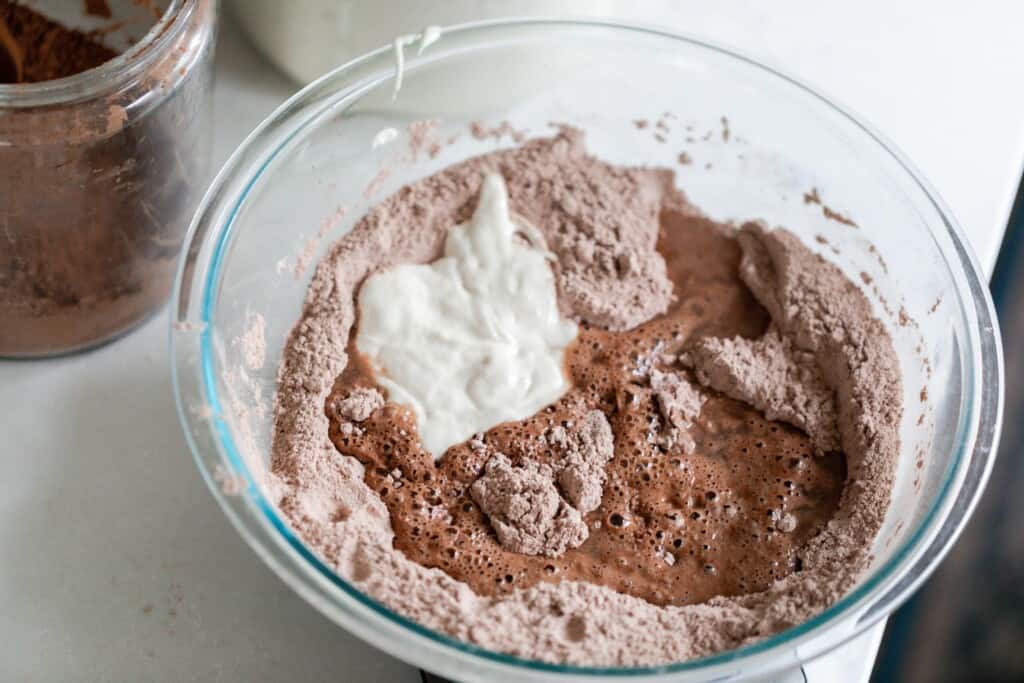
Add warm water and sourdough starter. Combine and allow to rest for 30 minutes. This is called autolyse and it allows the water to hydrate the flour.
Sprinkle salt over top.
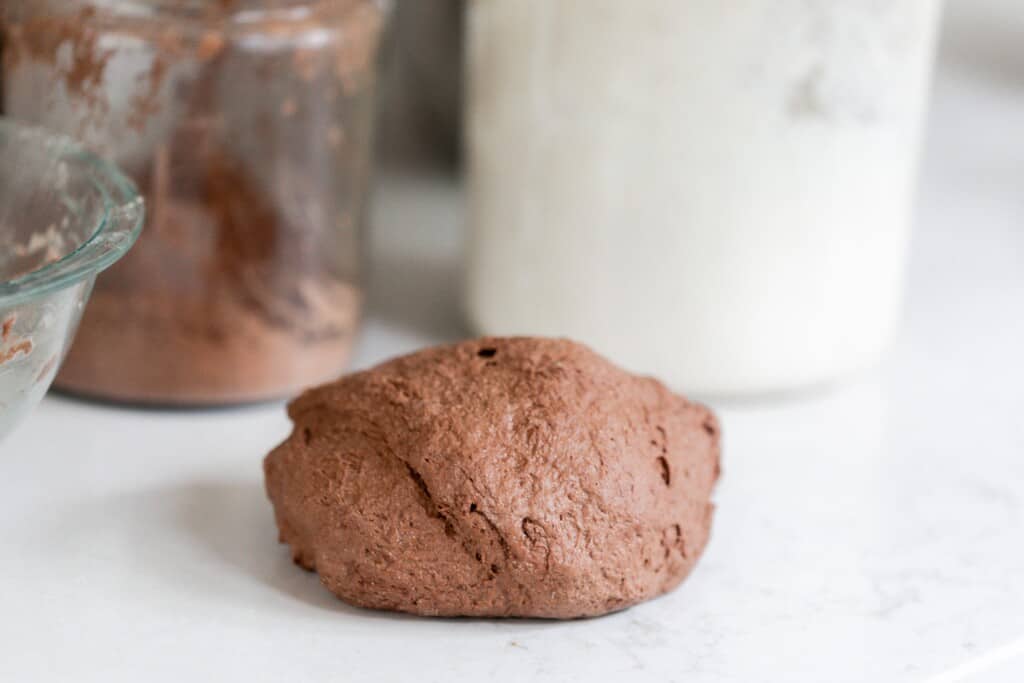
*With your hands, mix the dough for about 5 minutes until the dough comes together.

Cover with damp towel or plastic wrap. This prevents a less than pleasant crust from developing. If one does develop, you can break it up with your hands and try to incorporate it. Not the best, but it’s not all a lost cause.
Let rest for 30 minutes.
Stretch and folds
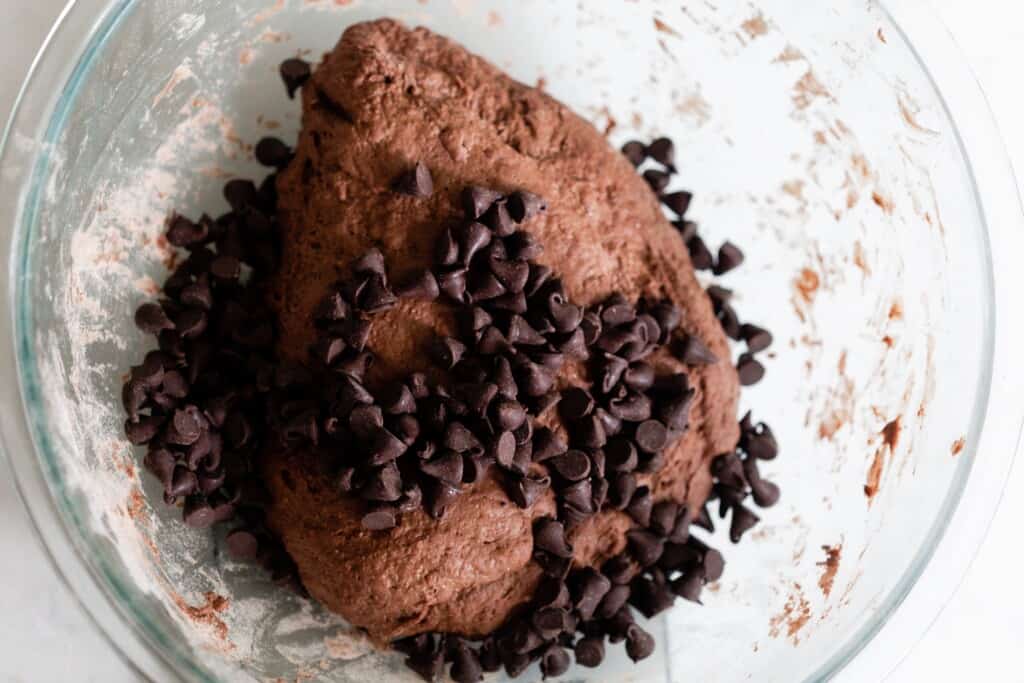
Add in chocolate chips and start the stretch and fold.
This helps develop the gluten protein strands which, in turn, give this bread a nice rise.
Take the dough in the bowl and grab the edge firmly. Pull up, stretching it upwards. Then push the dough into the center. Turn the bowl about a quarter turn and do this stretch and fold again, repeating two more times.
If the dough is too sticky, dip your hand in water.
Every 15 minutes, do this stretch and fold technique. You’re looking for a total of three times.
Every 30 minutes, do another stretch and fold – 3 times.
Bulk Rise
Cover and allow the dough to bulk-ferment until doubled. The timing will vary depending on a lot of factors; temperature of your home, how active and mature your starter is, etc. I usually make this dough in the morning and allow it to rise all day.
Shape. Spin dough and pull it toward you multiple times until a ball forms.
Leave the dough out for 15-20 minutes uncovered so a skin can develop on the surface of the dough.
Turn the dough onto a clean surface and shape by folding the two sides over to the middle, repeating on the other two sides.
Place the dough into a floured banneton or bowl lined with a tea towel, seam side up.
Second rise for one hour at room temperature, or cover with plastic and proof 12-15 hours in refrigerator.
Score and Bake
Preheat dutch oven to 425 degrees for 1 hour.
After the dutch oven has preheated, remove dough from the fridge.
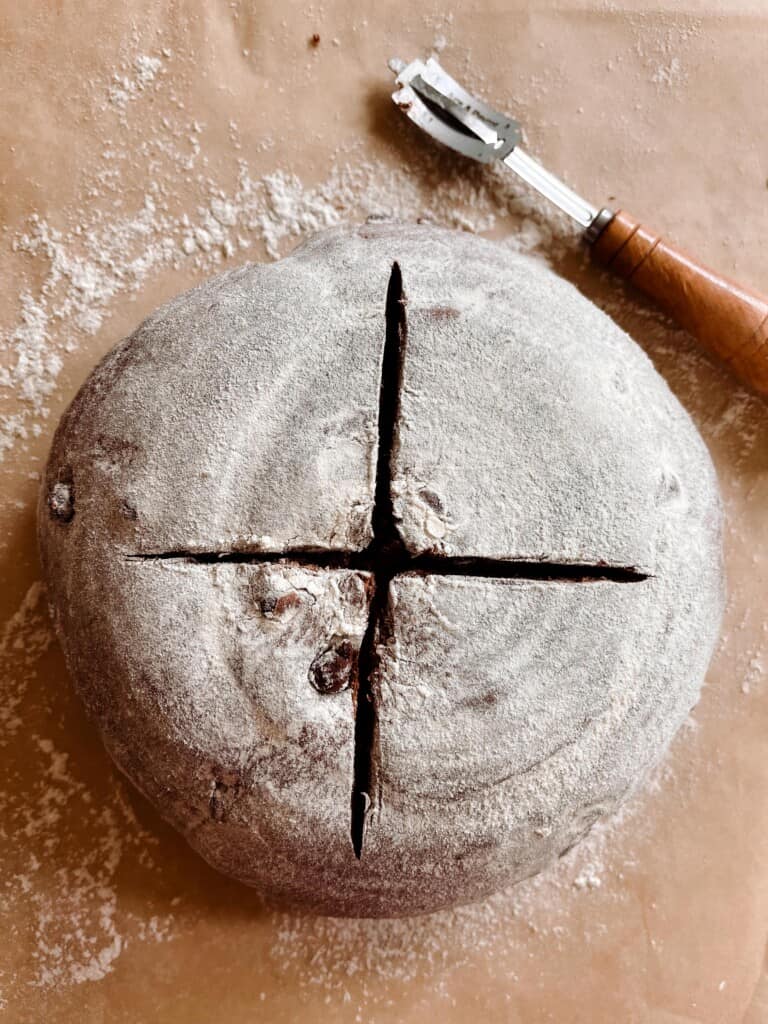
Dust dough with flour on top. Optional, but this makes the scoring pattern stand out more.
Score design with a razor.
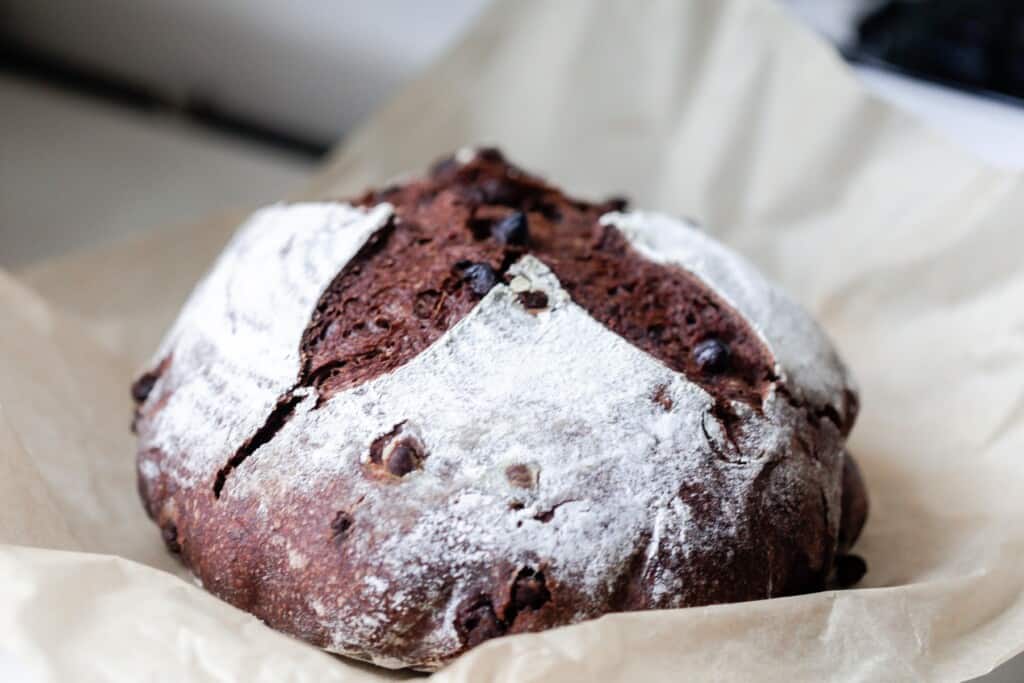
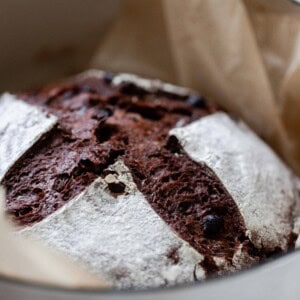
Bake for 20 minutes with the lid on.
Remove the lid and bake for another 30 minutes.
Allow to cool completely before slicing.
How To Serve Chocolate Bread
- Butter and honey
- Peanut butter
- Chocolate nut butter spread – Triple chocolate, anyone? Sounds delightful.
- Topped with cream cheese and strawberries
- Raspberry jam
- Caramel sauce
- Orange marmalade
Bakers Timeline For Chocolate Sourdough Bread
8 pm: Feed sourdough starter with flour and water the night before.
8 am: Create the dough by combining the warm water and flour. Rest for 30 minutes.
8:30-ish am: Add in sourdough starter and dimple in with wet hand. Sprinkle the salt on top. Mix the dough with your hands. Cover and rest for 30 minutes.
9:30ish am: Add chocolate chips and start stretch and fold.
Stretch and fold every 15 minutes, repeating 3 times total.
Cover with a wet towel or plastic wrap and allow the dough to bulk ferment until doubled.
8:00pm (may be much sooner or later): Shape dough.
Sit out 15-20 minutes, uncovered.
Turn over and shape.
8:30pm: Transfer to flour banneton or bowl with tea towel and cover with plastic. Place in the refrigerator for 12-15 hours.
The Next Day
9:00am: Preheat dutch oven on 425 for 1 hour.
10:00am: Take dough out of fridge, dust with flour, score and bake.
Find More Tasty Sourdough Bread Recipes:
- Whole Wheat Sourdough Bread
- Einkorn Sourdough Bread
- Sourdough Sandwich Bread
- Sourdough Banana Bread
- Sourdough Zucchini Bread
If you try this recipe and love it, I would love if you gave it 5 stars! Thank you! Tag me on Instagram @farmhouseonboone.
Chocolate Sourdough Bread
Ingredients
- 250 grams unbleached all purpose
- 100 grams freshly ground whole wheat
- 125 grams bread flour, can omit and just add more to the unbleached all purpose
- 10 grams salt
- 50 grams brown sugar
- 50 grams cocoa powder
- 100 grams mature starter, active and bubbly
- 335 grams water
- 125 grams chocolate chips
Instructions
- Feed a sourdough starter 4-12 hours before with sufficient flour and water. The starter should be super active and bubbly before starting the dough.
- In a large bowl, weigh out dry ingredients (except salt). Mix well.
- Add warm water and sourdough starter. Combine and allow to rest for 30 minutes.
- Sprinkle salt over top.
- With your hands, mix the dough for about 5 minutes until the dough comes together.
- Cover with damp towel or plastic wrap.
- Let rest for 30 minutes.
- Add in chocolate chips and start the stretch and fold.
- Take the dough in the bowl and grab the edge firmly. Pull up, stretching it upwards. Then push the dough into the center. Turn the bowl about a quarter turn and do this stretch and fold again, repeating two more times.
- Every 15 minutes, do this stretch and fold technique. You're looking for a total of three times.
- Every 30 minutes, do another stretch and fold – 3 times.
- Cover and allow the dough to bulk-ferment until doubled. The timing will vary depending on a lot of factors; temperature of your home, how active and mature your starter is, etc. I usually make this dough in the morning and allow it to rise all day.
- Shape. Spin dough and pull it toward you multiple times until a ball forms.
- Leave the dough out for 15-20 minutes uncovered so a skin can develop on the surface of the dough.
- Turn the dough onto a clean surface and shape by folding the two sides over to the middle, repeating on the other two sides.
- Place the dough into a floured banneton or bowl lined with a tea towel, seam side up.
- Second rise for one hour at room temperature, or cover with plastic and proof 12-15 hours in refrigerator.
- Preheat dutch oven to 425 degrees for 1 hour.
- After the dutch oven has preheated, remove dough from the fridge.
- Dust dough with flour on top. Optional.
- Score design with a razor.
- Bake for 20 minutes with the lid on.
- Remove the lid and bake for another 30 minutes.
- Allow to cool completely before slicing.
Notes
- For that nice hard and beautiful crust, use a dutch oven with a lid.
- Weighing your ingredients makes this bread more consistent and easier to get together.
- You will need a nice active sourdough starter to make a loaf of bread. Check out how to make a sourdough starter and learn how to care for one here.
- Cover the dough with a damp towel, beeswax wrap, or plastic wrap to ensure that an unpleasant crust doesn’t develop.
Nutrition
Nutrition information is automatically calculated, so should only be used as an approximation.


This was so fun!! Turned out perfect! Everyone said, “You made what?!!… OMG this is sooo good!” 😁 yay!
I followed your recipe and used Droste Dutch Cocoa Powder. I did add butterscotch mortals. But, the parts that didn’t have butterscotch attached bitter. Any suggestions why?
That’s interesting! If you melt the butterscotch in too high of heat, it can actually make the butterscotch bitter.
We love this recipe at my house! We turn it into French toast with raspberries and whipped cream on top. Super yummy!
We love this recipe at my house! We turn it into French toast with raspberries and whipped cream on top. Super yummy!
I do have a question about the bulk fermenting piece. After about 8 hours I still wasn’t really seeing bubbles even though the size had pretty much doubled. Is it because it was a dense dough or should I have waited longer? Also I didn’t have the option of waiting 12-15 hours due to work but I baked at 8 hours. Could I have waited 20 instead . What would’ve been the difference.
If it has doubled, you should move to the next step!