The day has finally arrived! Come tour the reveal of our Victorian Farmhouse Kitchen. The space is light, bright, and beautiful, with a vintage, collected feel.
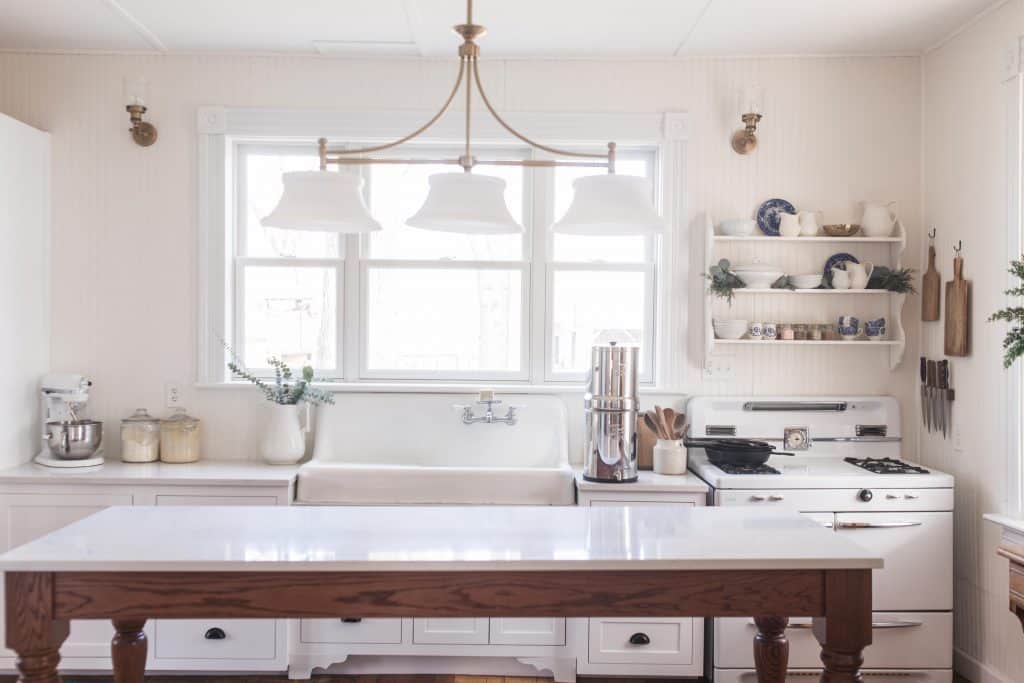
Today, I’m so excited to share our Victorian farmhouse kitchen reveal with you. We started on our kitchen about 6 months ago, and it took way longer to complete than expected.
Looking back, we bought our farmhouse one year ago, and started renovating before we even moved in. We started by refinishing the floors, and brought painters in shortly after.
Over the last six months, we (somehow) lived through not having a kitchen sink. But that is thankfully all behind us, and I now have a kitchen I absolutely love.
The idea behind this kitchen was not to have a pristine, stuffy new kitchen, but rather to create a space where you would feel at home; that you could leave wooden spoons in an old crock, or aprons hanging up, and you would feel comfortable.
I hoped it would have a lived-in, collective feel and I think we’ve done just that.
This post contains affiliate links, which means I make a small commission at no extra cost to you. See my full disclosure here.
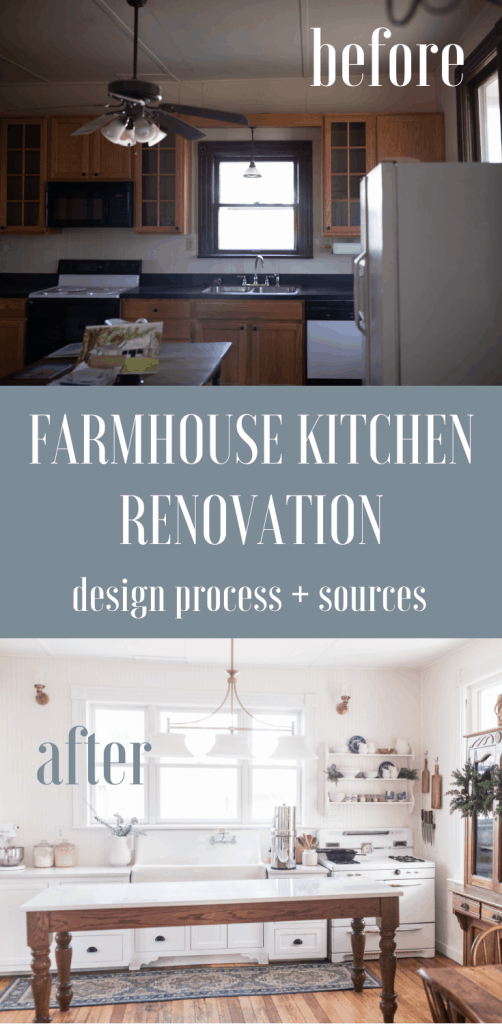
Before The Renovation
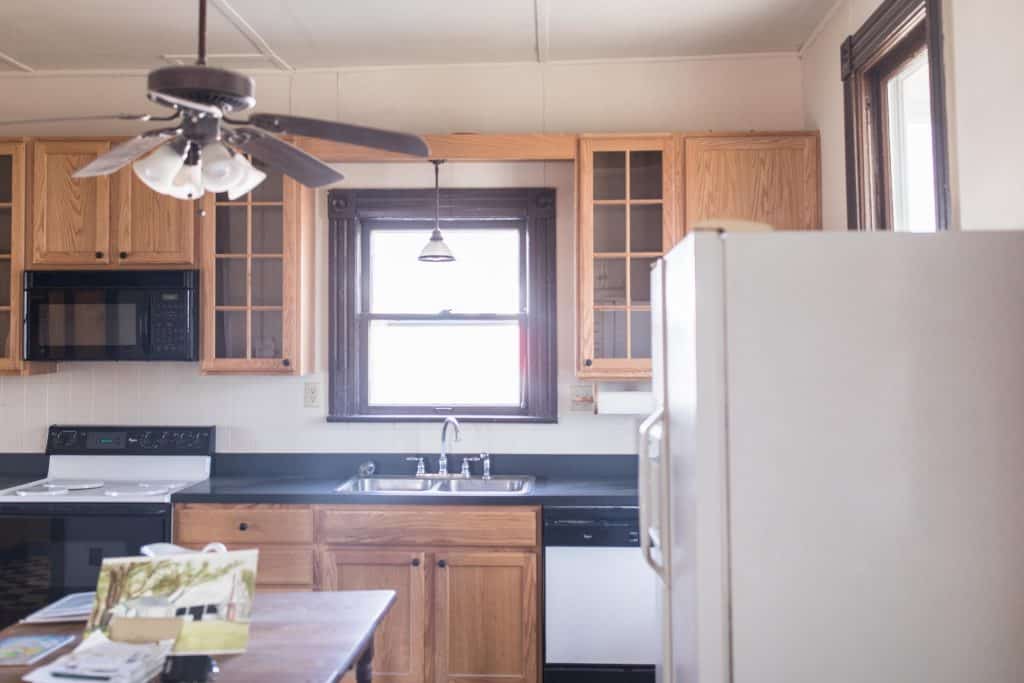
Before, the kitchen was super dark. The trim was all painted a dark, chocolate brown, and all the walls had paneling. The cabinets were nice, but not my favorite color.
The window was super tiny, and didn’t let in much natural light. The window looked out over our property, the barn, and the kids’ playground. It’s a view I want to see, but the window was so small that it didn’t allow much of the view to really shine through.
One of the first things on our list was a much larger window to bring in the view, and brighten up the space.
Victorian Farmhouse Renovation After
You can find the original victorian farmhouse kitchen design plans here.
One of the first purchases we made was a 1940’s antique Caloric stove that we restored, and had a gas line installed for it. Now, I get to cook on this vintage gas stove, and it cooks like a dream.
Over the stove is a wooden antique shelf that I found for $25, which we painted white to match the bead board. I then filled it with a few of my favorite things, like pottery, pretty little mugs, spice jars, and a brass candle a friend of mine made for me. It all ties in.
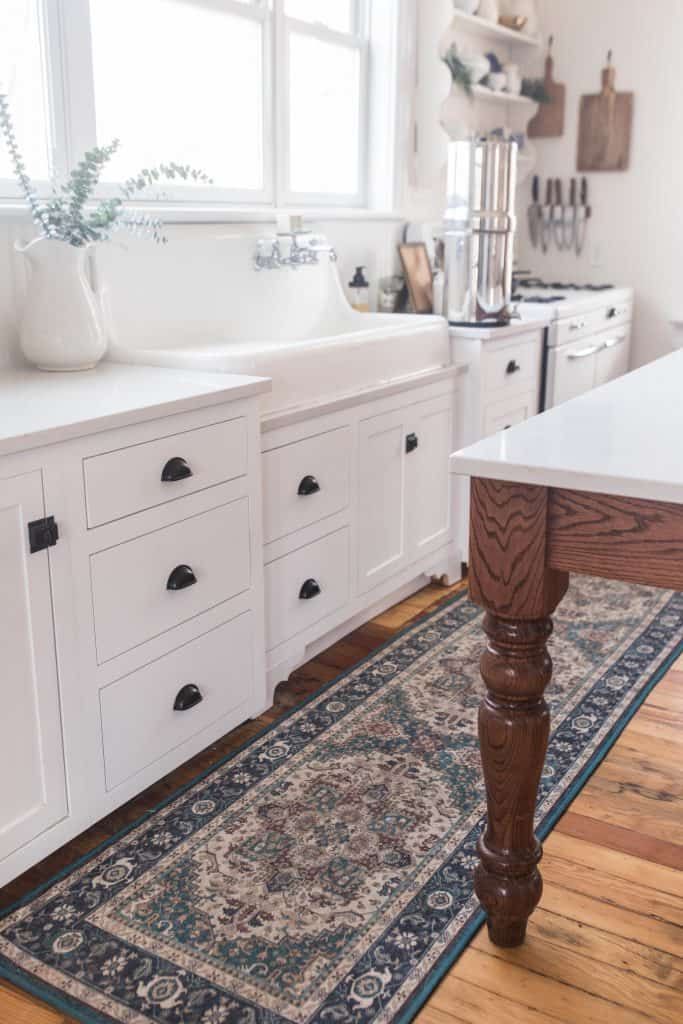
The Sink
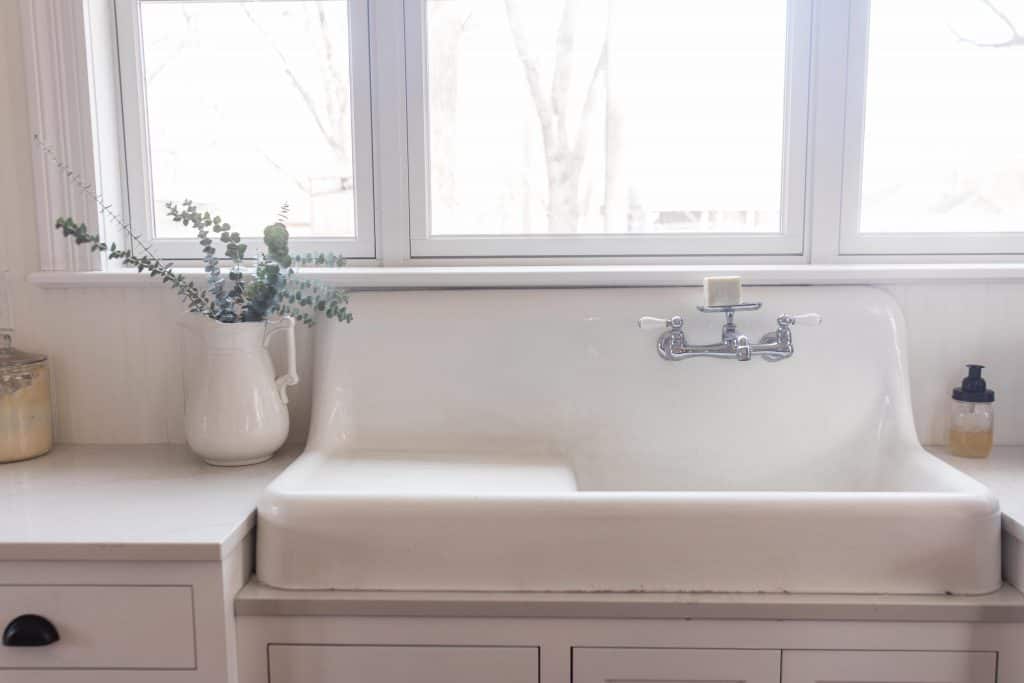
I found a cast iron, high back, apron front farmhouse sink at a salvage shop. It was already in great condition, it just needed to be cleaned up. We used some lime away and a lot of elbow grease to get it into tip-top shape.
We added a beautiful vintage inspired faucet and it turned out amazing.
In our last house we went with the IKEA farmhouse sink, but I wanted something genuinely vintage this time around.
Custom Cabinetry
We tore down all the old cabinetry and added beautiful, white, shaker-style custom cabinetry with inset drawers and doors.
Originally, we were going to do shaker-style drawers, but after a few were installed, I decided that I liked the flat paneled drawers better, so eventually, they will all be flat paneled to match.
My husband and I custom-made feet for the sink cabinet, to make it look more like a piece of furniture. The sink cabinet stands up a little higher off the floor, and it comes up a little lower than the rest of the cabinets, making it really stand alone.
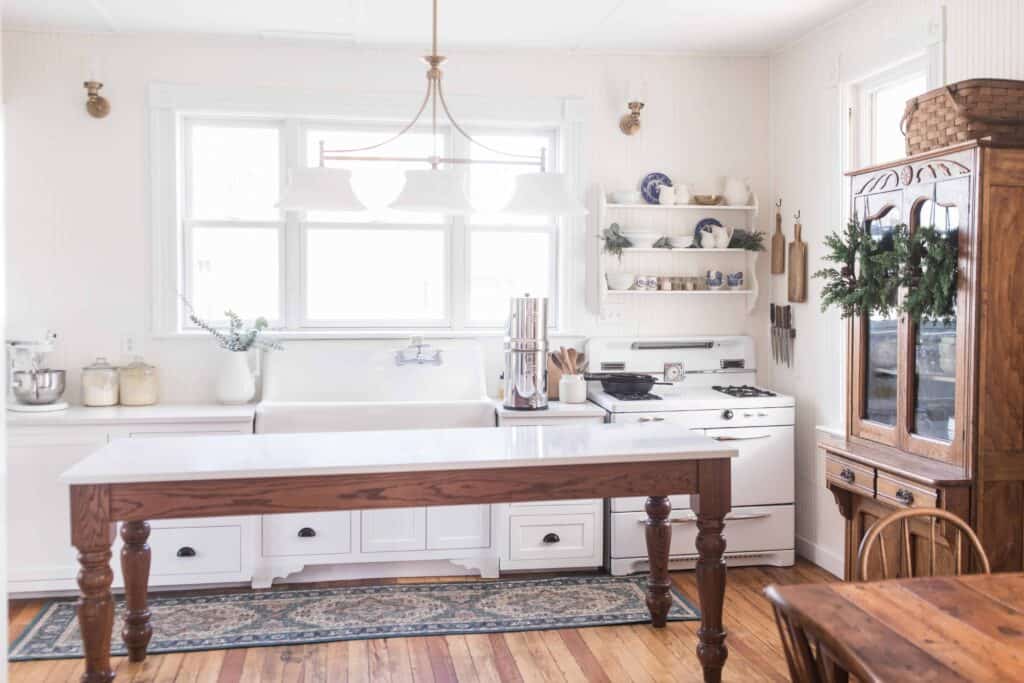
The large Victorian-inspired work table/island measures 90.5” by 32” from the outside of the legs. The countertops hang 1″ over on each side.
Quartz Countertops
For the countertops, we went with a quartz from Allen + Roth in the color Peaceful (from Lowe’s). I really like that it looks like marble, but isn’t really marble.
In our last house we went with IKEA quartz countertops in the color Ocean Foam. It was a beautiful speckle pattern, but marble is more appropriate for the era of this house.
Our cabinet maker also made the island from red oak and legs we found online. It was also topped with the same quartz. It has some large veining that I really love.
Fridge
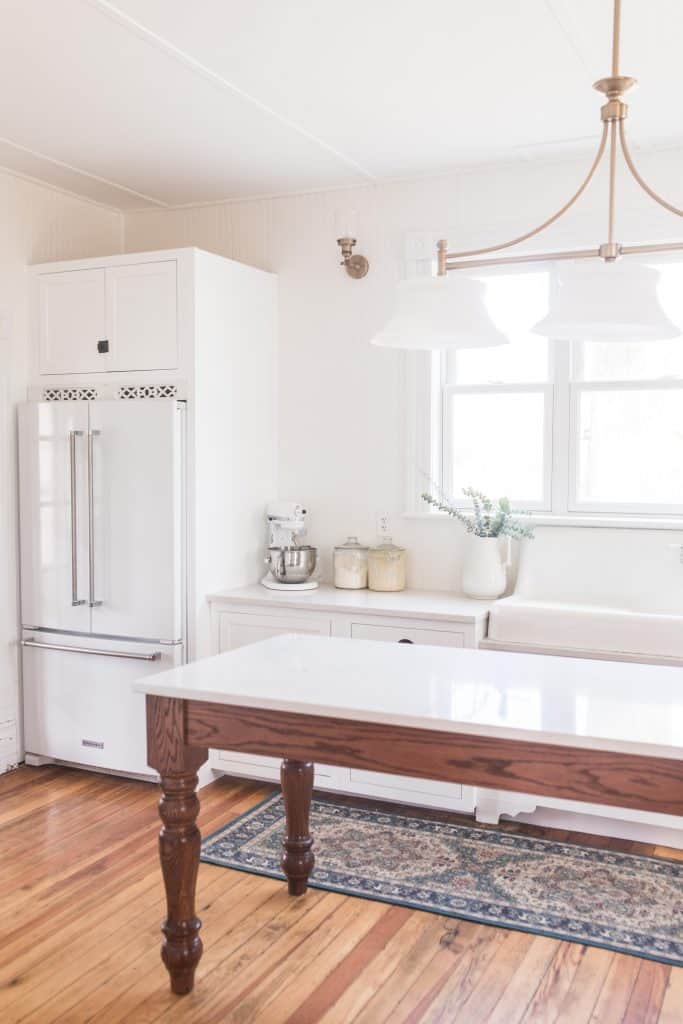
Over the fridge, we needed to have a gap between the fridge and the cabinet above it. I found this beautiful antique piece that I believe was from an old piano.
We cut it down to size and painted it to match the cabinets. It adds such a beautiful touch while still allowing the air flow needed.
Hardware
We went with latches on the doors and bin pulls on the drawers, all in black. I always have a lot of black cast iron sitting on my stove, and I have no intention of moving it from that spot because I use it all the time. So the hardware ties in the black.
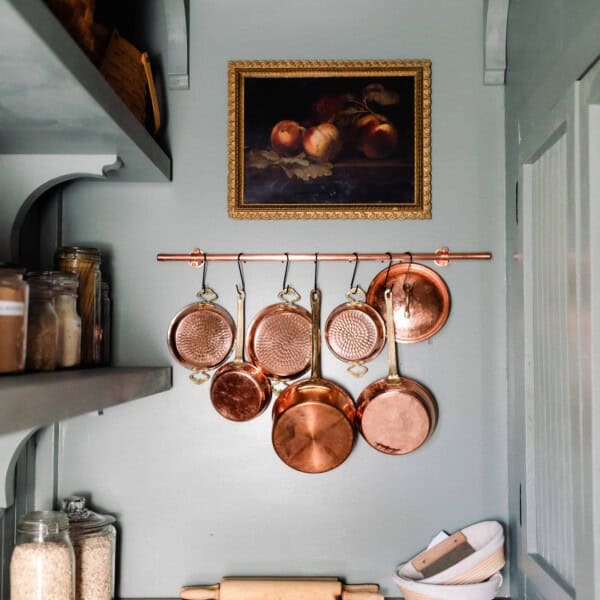
We ended up having to cut some of the bead board to expose an electrical box due to a recommendation from our contractor. I couldn’t find anything to cover it up, and then I got the idea to hang some pretty wooden cutting boards to hide it.
Below that, I put a knife magnet and placed all of our knives on it. So now I have everything I need to cut and prepare food in a handy spot.
Window Trim
To make it tie into the rest of the house, we had some custom trim made by a local woodworker to match the trim throughout the house, and used some rosettes that I found at a local antique shop.
We also did this with our pantry entrance. When we bought the house, it had some cheap trim that tried to mimic the Victorian style, but I actually found the trim at a local salvage shop.
I realize now we could’ve done that for the window, but it hadn’t occurred to me then.
Covered Up Outdated Paneling
In the original kitchen, the walls had this old, weird, outdated paneling. We are not sure why they did it, and didn’t want to rip it all out to see why they did it, so we just covered it up with bead board.
It ended up being a really great solution, and I love how the bead board looks. It adds such a lovely detail all throughout the kitchen, and was just a cheap way to cover up what was under there.
The walls were painted Benjamin Moore White Dove. It’s the same color we have in the eat-in dining room area.
That area has plaster walls, and there is a nice distinction with a large case opening to separate the dining area versus the kitchen with the bead board, while still flowing nicely. 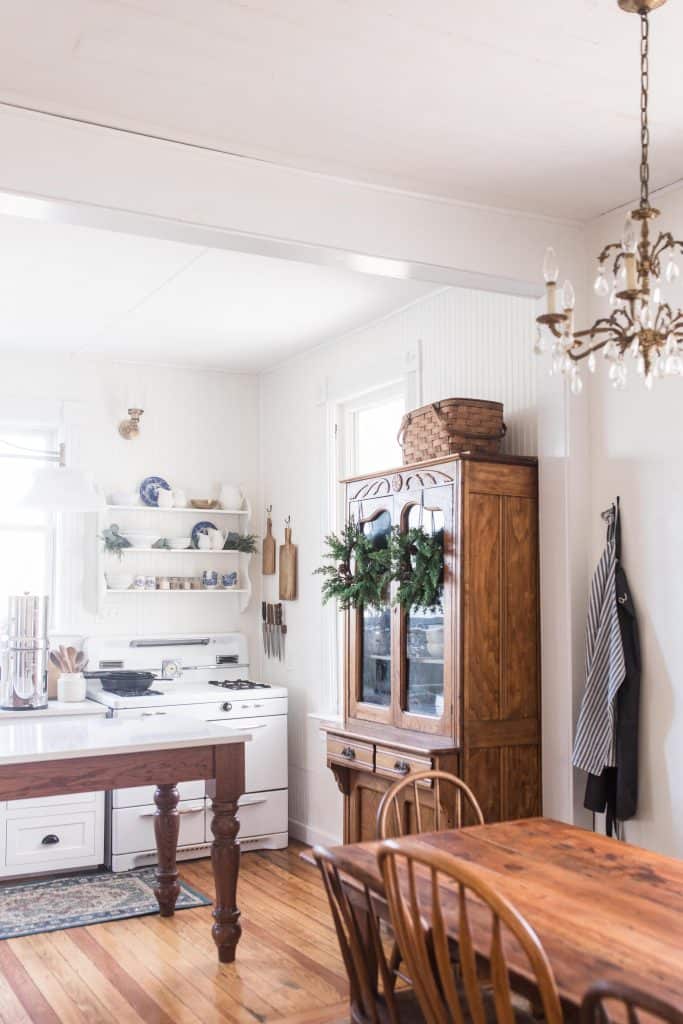
Large Antique Hutch
For extra storage, we brought in a large, antique hutch to store all of our dishes, bowls, and plates that we use regularly. This is where the previous owners had kept their refrigerator.
This kitchen actually provides a ton of storage, and we still have plenty of space. We even have drawers that have nothing in them yet.
In the large cabinet, I store my grains and grain mill with an extension cord, so now I don’t have to lug everything out every time I want to mill fresh grains to bake bread or feed my starter.
If you’ve been following us awhile, you may notice that I got a KitchenAid Stand Mixer. While I loved my Bosch mixer, I didn’t like having to drag it out every time I needed it, and wanted something that was pretty enough to leave on my counter.
A few changes from the Original Victorian Farmhouse Kitchen Design Plans
If you saw our original post and video of the original plans, you’ll notice a few design changes were made.
We had a cabinet built around the KitchenAid refrigerator on our contractor’s recommendation. I really liked the idea, so the side of the refrigerator isn’t showing. It also just helps tuck it away, so you don’t just see the side of the fridge when you first walk into the house.
Farmhouse Lighting
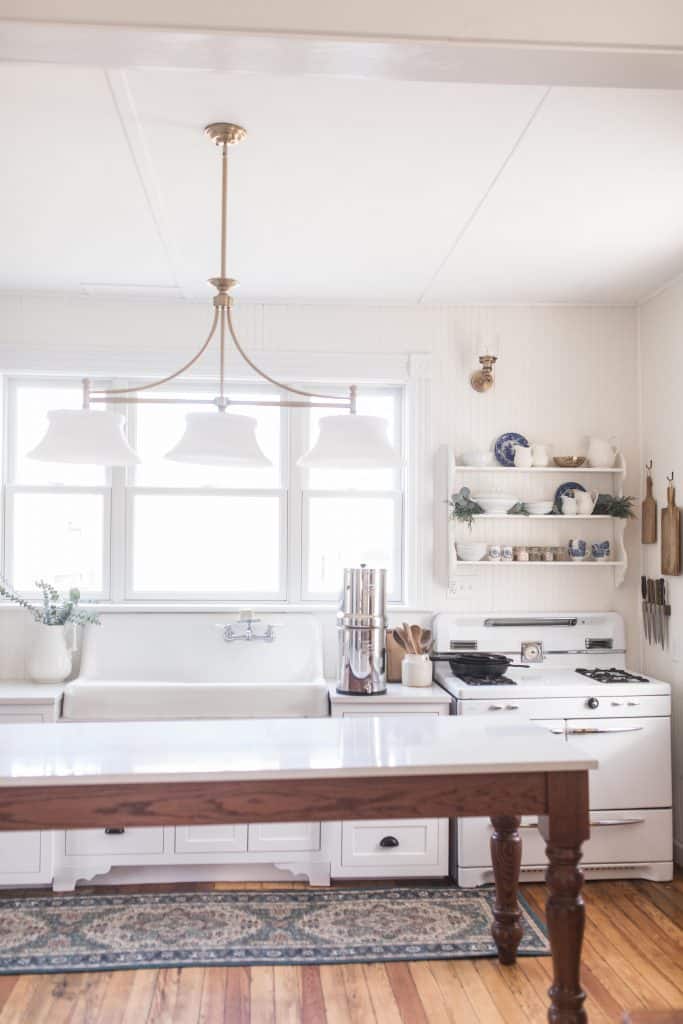
We went with this 3-light pendant brass chandelier that provides so much light over my massive workspace. We’ve had the island for a few weeks now, and I’m just obsessed with the amount of space it provides. Seriously, the island table is amazing.
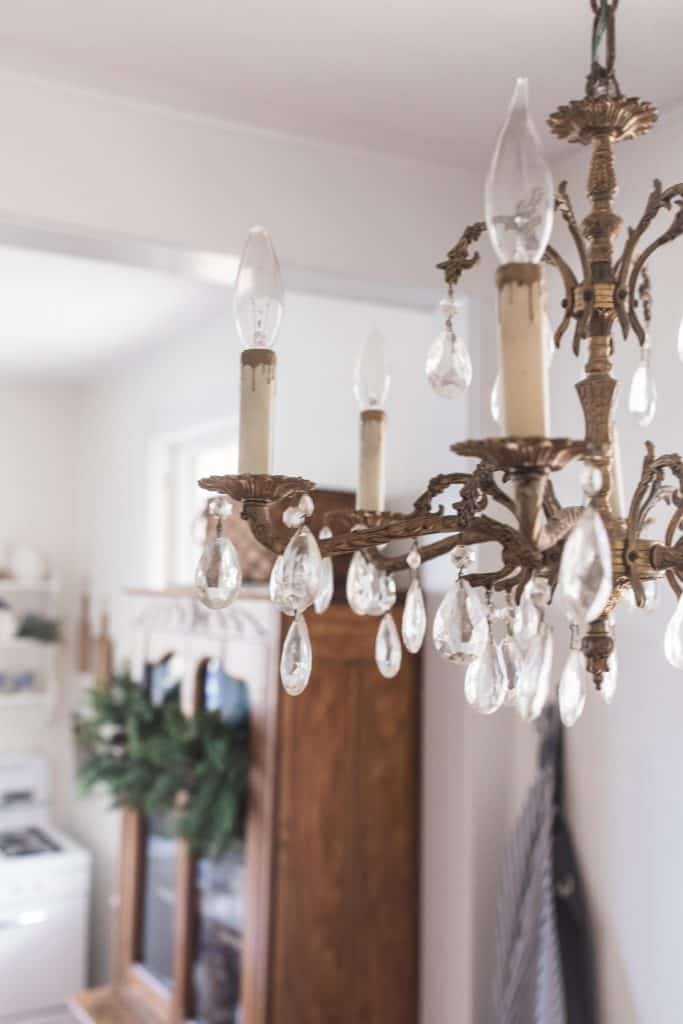
On the back wall, we added some similar-looking brass sconces, and in the eat-in dining area, we have an antique brass chandelier. Everything ties so nicely together, and I am loving the blend of old and new.
Adding Color
To add some color, I brought in a new rug with a vintage vibe. It’s nice and dark, which is perfect for a high-traffic and often-used area.
Our Berkey water filter has a new home right on the counter, to the right of the sink. I also figured out that with the new sink, I can just take the top canister off the Berkey and fill it in the sink, which is a total game changer.
If you want all the details for the eat-in kitchen area and the entryway, you can find them here.
Another project we have planned is our built-in office area right next to the kitchen. That was part of the original plan, and we will be diving into that renovation soon.
When we first did the kitchen area, I didn’t really realize that we have four quadrants: the main kitchen area (the one I’m showing you today), the eat-in area, the office, and the pantry. The last two are on the project list to start next. Until then, I’m trying to just enjoy our newly-updated spaces.
Thanks so much for joining me for our Victorian farmhouse kitchen tour. I hope you love this space as much as we do.
Shop our Farmhouse Kitchen:
Find More Gorgeous Farmhouse Decor:
- Farmhouse Entryway Makeover
- Eat-In Kitchen Reveal
- Victorian Farmhouse Living Room Decor Reveal
- Boys Room Makeover
- Farmhouse Antique Shopping Tips
Pin The Victorian Farmhouse Kitchen Reveal For Later
![]()


What paint did you use on the cabinets and trim? I want to decorate my kitchen very similar to yours.
Thank you!
Absolutely love the transformation! The combination of vintage charm and modern functionality in your Victorian farmhouse kitchen is stunning. The attention to detail, especially in the choices of cabinetry and lighting, really brings the space to life. Can’t wait to try some of the recipes in such a beautiful setting!
I absolutely love the transformation of the kitchen! The mix of vintage charm and modern functionality is perfect. The color palette is so inviting, and those open shelves really showcase your beautiful dishes. Can’t wait to see how you style it for the seasons!
I absolutely love the transformation of the Victorian farmhouse kitchen! The blend of modern convenience with vintage charm is stunning. The color palette is warm and inviting, and those open shelves are a dream! Can’t wait to try some of those decor ideas in my own home. Thank you for sharing this beautiful reveal!