Learn how to build an arbor with these simple arbor plans. You can easily build this in a day or two, giving your garden a beautiful entrance.
It’s the summer of outdoor projects. All things indoors can wait as we create the beautiful homestead we have always dreamed about.
[thrive_leads id=’28019′]
We’ve torn down the garden cottage, expanded and built garden beds, added a picket fence around the garden, added landscaping around the house and barn, built goat fencing and a milking stand, started an orchard and small vineyard, built a window box for herbs and flowers… goodness, that is a lot to accomplish.
I’m tired just thinking about it all.
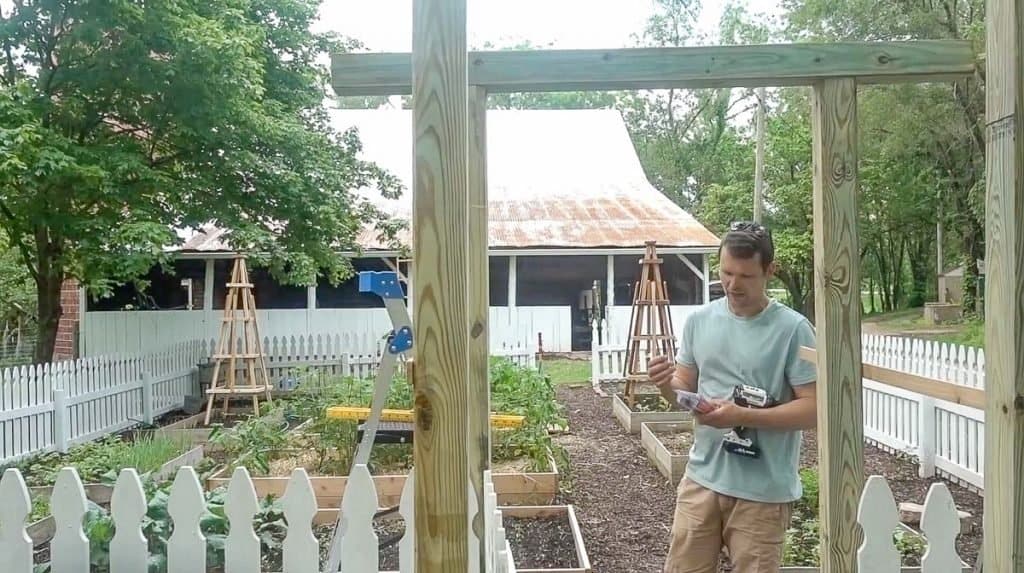
Looking out into the garden, I knew it needed some more vertical height. Using plans from my friend Sarah at She Holds Dearly, Luke and I build some French Tuteuors to grow some of the veggies vertically.
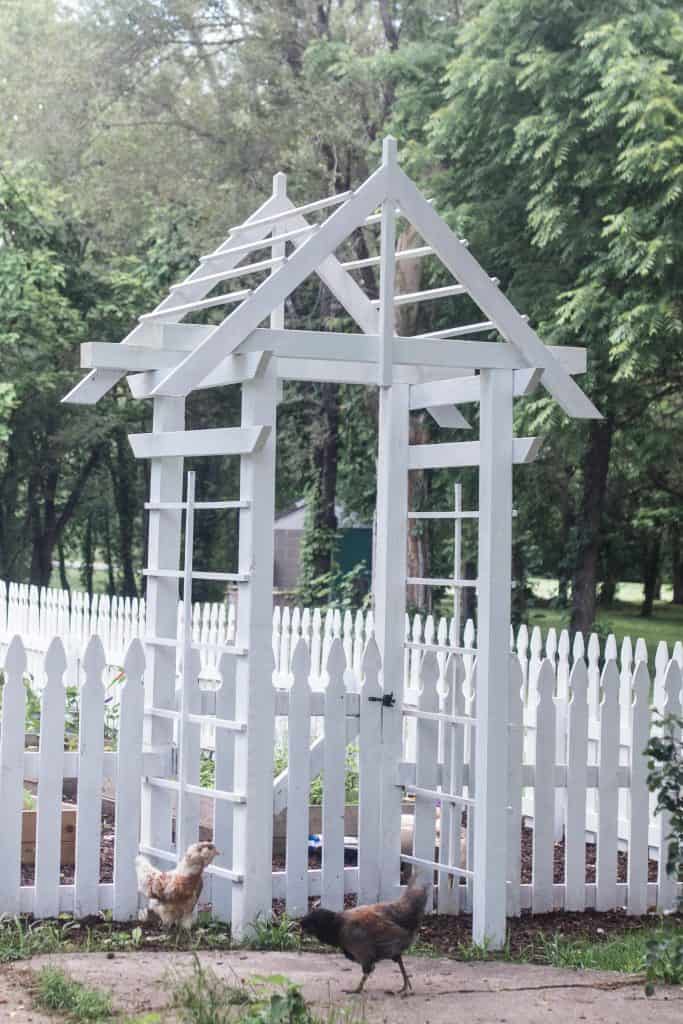
The sweet picket fence still needed something, and the thought of David Austin roses trellising over the entrance was a whimsical dream.
Being welcomed by the beautiful smell and sight of antique roses before entering the garden seemed like the perfect addition to my favorite space in the yard.
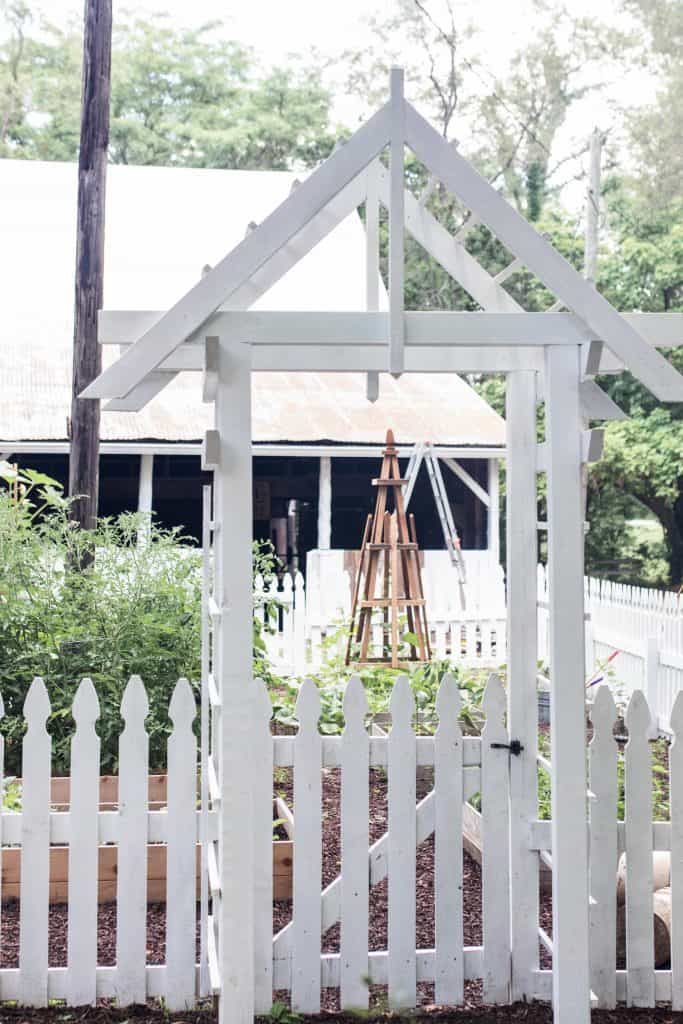
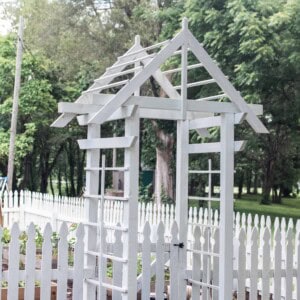
So, the entrance arbor plans were born. We couldn’t be happier. For just winging it, it turned out better than I could imagine.
Tips For Making Your Own Arbor:
- Your plans and size of arbor may change based on your own location, needs, and desires. You can use this as a guide.
- You could add more embellishments, like corbels, lattice work, etc.
- This was a fairly inexpensive project because we tried to repurpose many materials from previous projects, like some of the wood and paint.
- If you don’t want to paint the arbor, I would recommend using cedar so it will last longer in the elements.
This post contains affiliate links, which means I make a small commission at no extra cost to you. See my full disclosure here.
Tools and materials you will need:
6 – 8′ 4x4s
4 – 8’ 2x4s
2 – 8’ 1x4s
Paint or stain
Drill and drill bits
Table saw
Screws
Watch The Tutorial
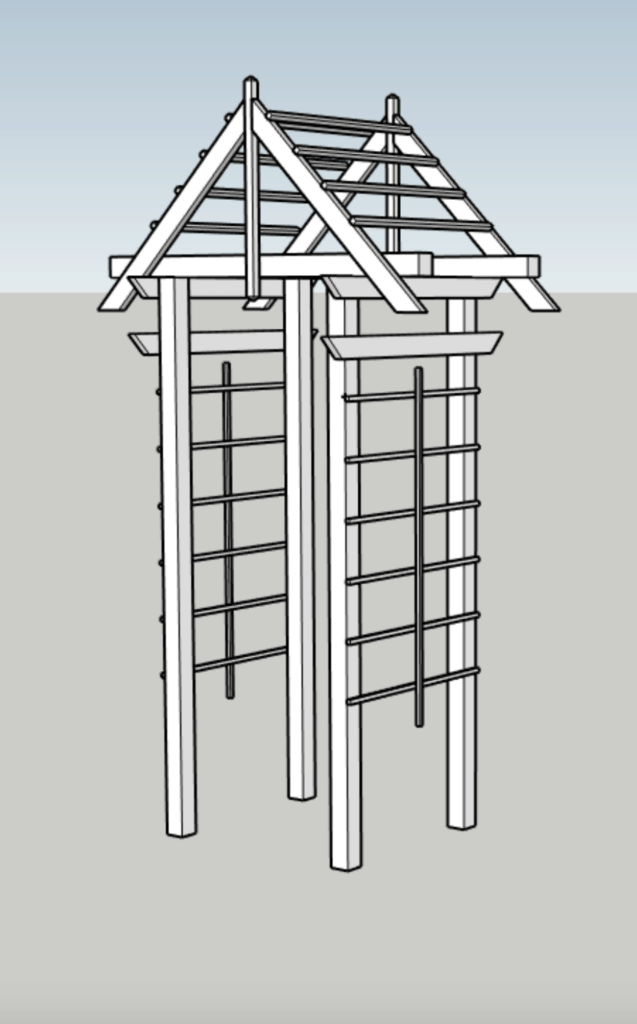
How To Build An Arbor – DIY Arbor Plans
Build The Main frame
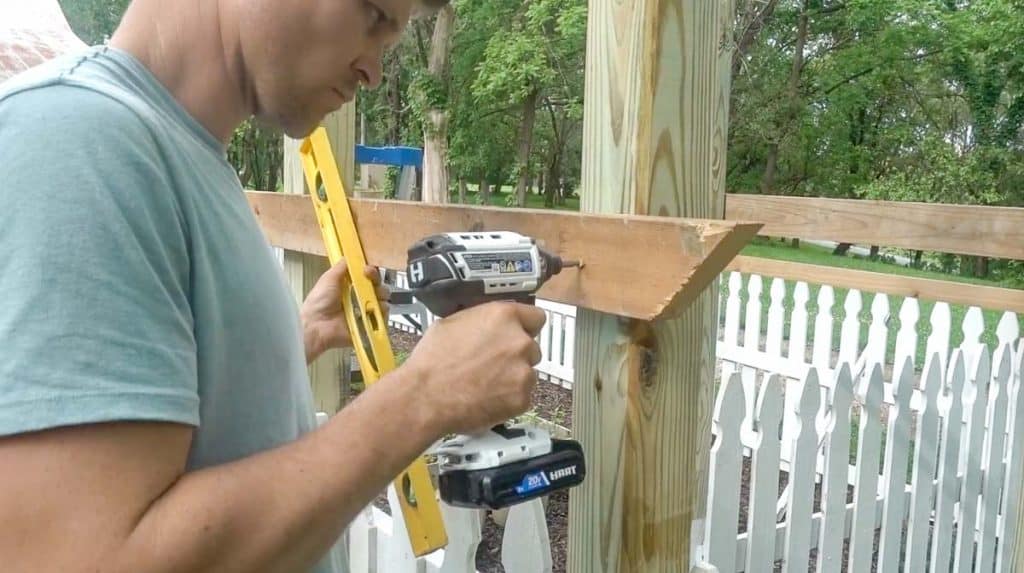
Take four of the 8’ 4×4 posts and sink them in the ground one foot.
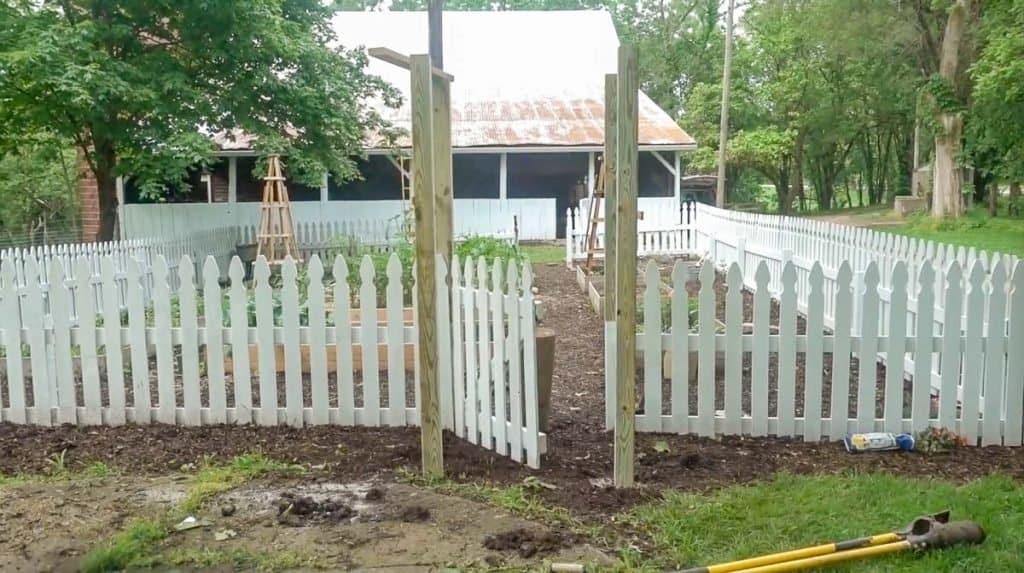
They should be square, 40 inches apart left to right, and 36” from front to back. These are measurements from the outside of the posts.
Cut the other two 4×4’s down to 66” and lay one across the two front posts, and one across the two back posts. Secure with screws.
This will essentially create the frame: the front and the back.
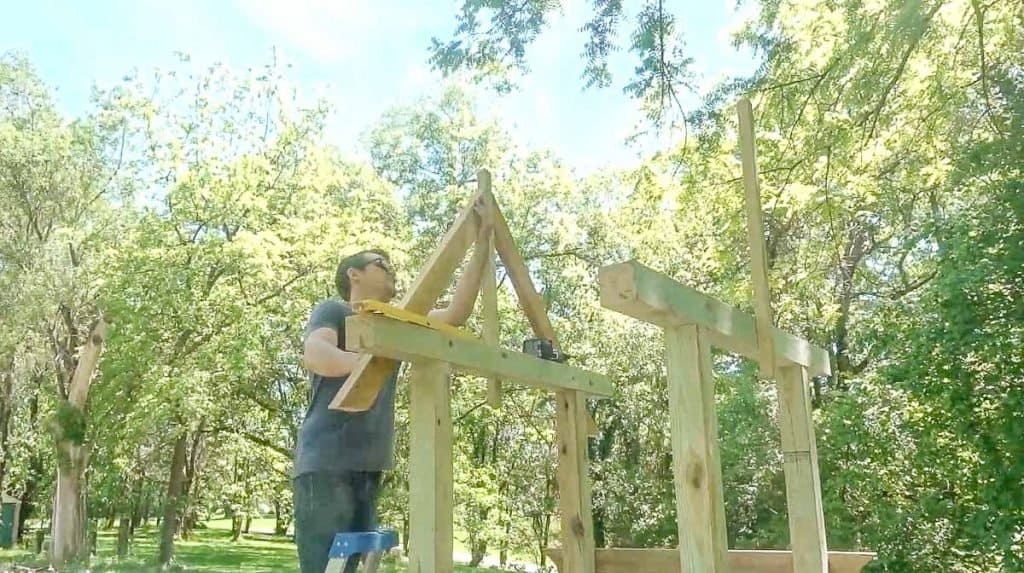
Next, add the points. Rip a 2×4 in half, so you have two 2x2s.
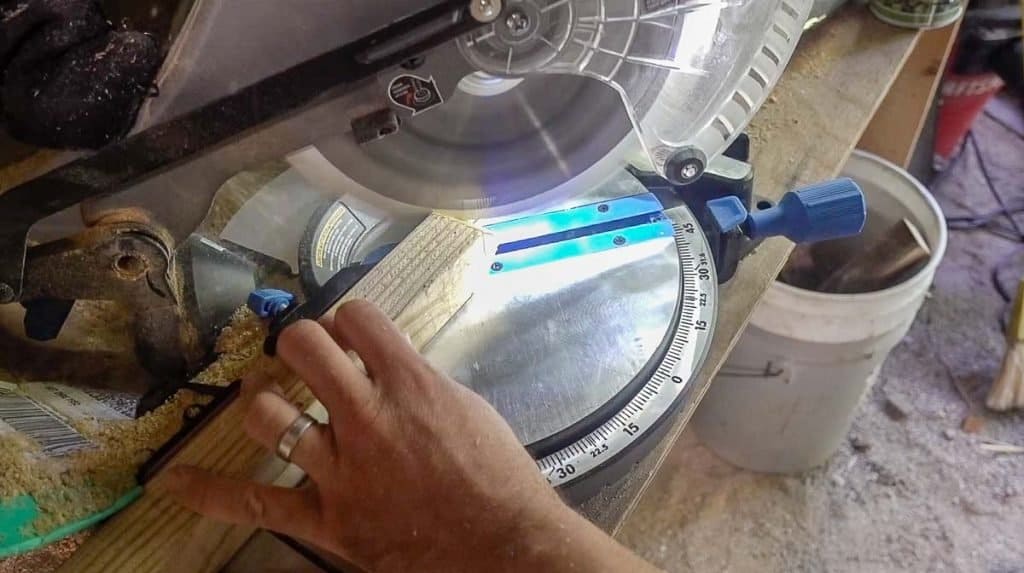
Cut them down to three feet. Use a miter saw set to 45° to create the points on each end (as seen in the video). Luke marked the middle of each side of the end of the 2×2 at 3/4 inch down. Cut at 45° to make a triangle, flip to the flat side and cut 45° angles again on both those sides to create the point.
Center them on the top of the main frame, placing the bottom point 4” from the bottom of the cross post. Screw in place.
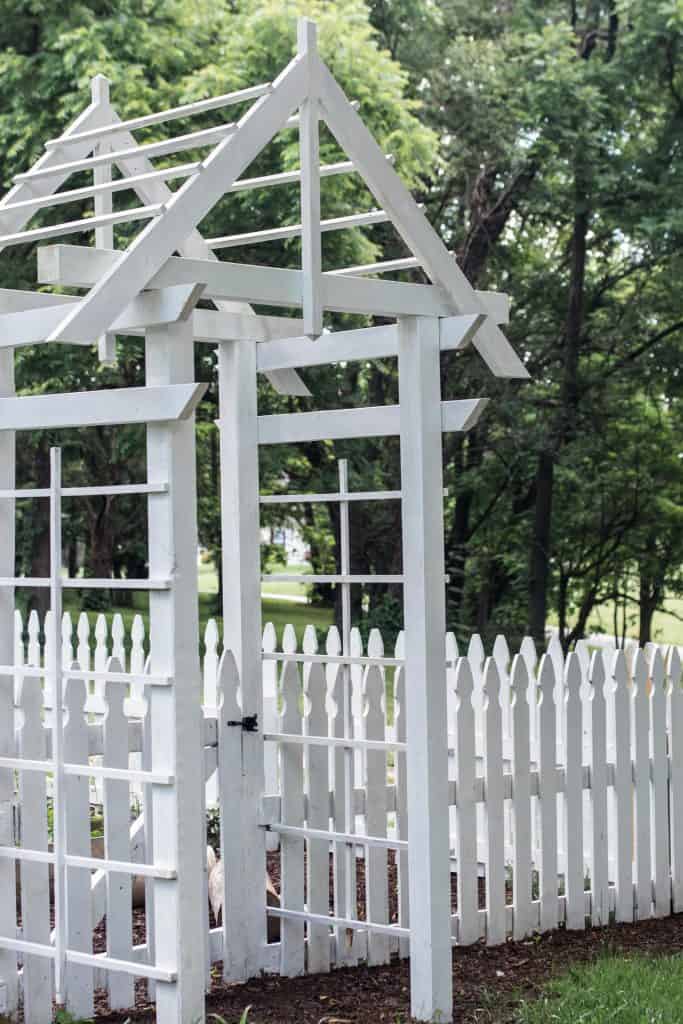
Add Decorative Sides
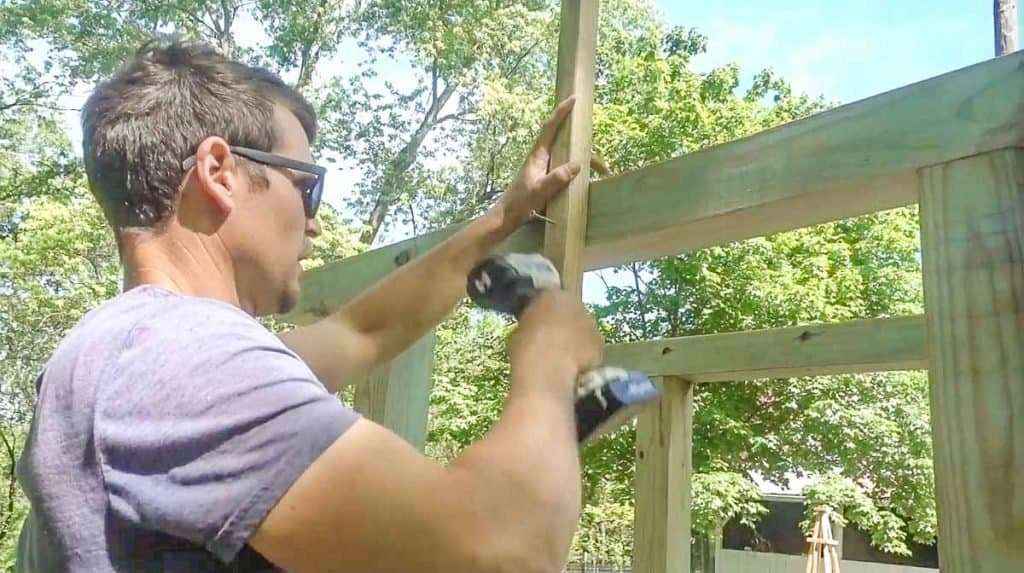
Next, cut the side decorative 2x4s that connect the front to the back. Cut them 48” (or one 8 foot 2×4 cut in half) with 45° at both ends (use a miter saw).
Put one on each side right under the place where the top 4×4 meets the main 4×4 posts, across to attach the front posts to the back posts.
Go down 6” and place another one on each side.
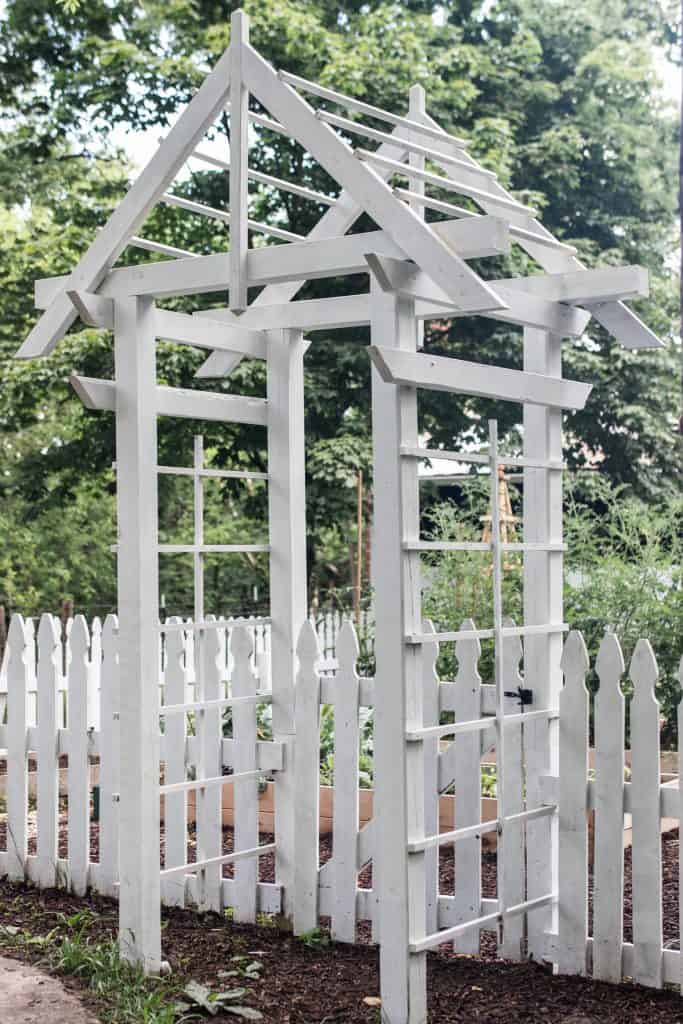
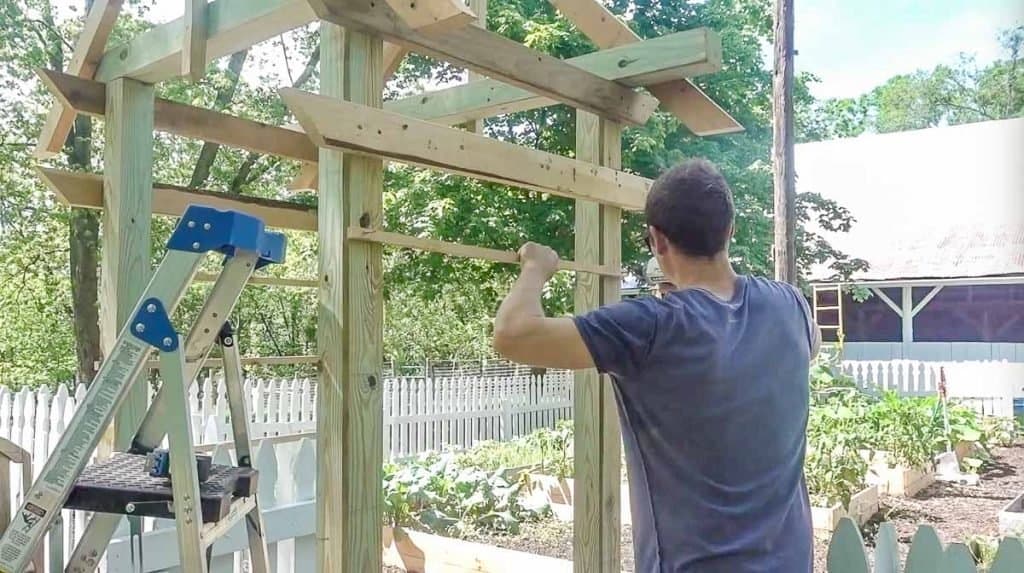
Add The Roof:
Cut four 2x4s to four feet in length with 45° angles at each end. Meet them to the 3’ center posts, leaving 4” above the pitch of the roof.
Drill in from the side of the 2×4 to the center post.
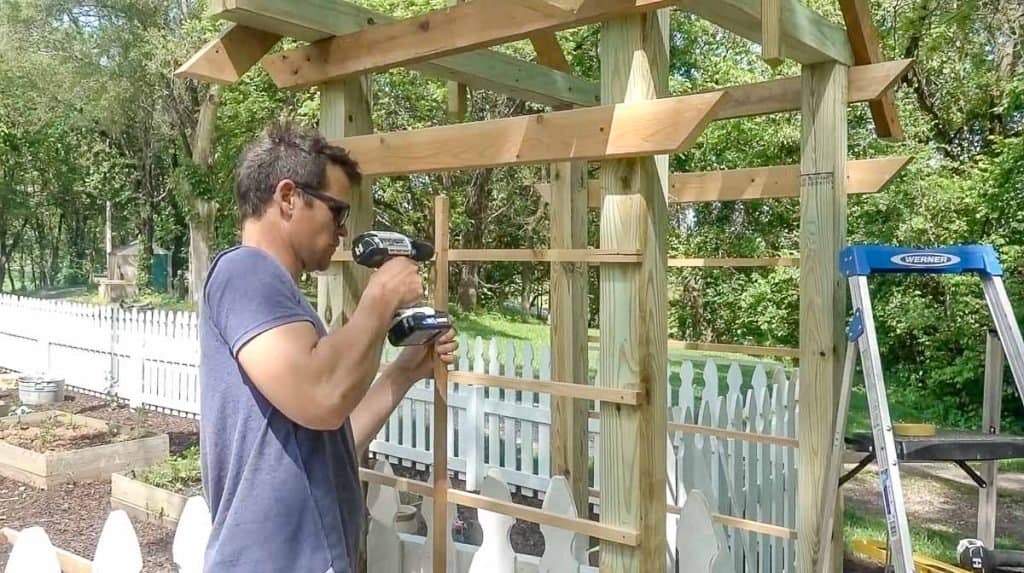
Add Lattice On The Side And Roof
Rip a 1×4 into three-quarter by three-quarter strips (4 per 1×4).
You need 12 at 36” (6 horizontal bars for each side), 9” apart, starting from 6” below the lower side 45° 2×4.
And two at 60” to go down the center of the horizontal lattice.
Flowers Perfect For Trellising An Arbor:
For perennial climbers that come back every year, try climbing roses, jasmine, honeysuckle, and clematis. Grapes also work well on a trellis.
Always check with your zone and varieties that work best for your area.
Grab the printable arbor plans HERE.
Find More Handmade Home Projects:
- Victorian Farmhouse Kitchen Reveal
- DIY Concrete Planter
- DIY Coffee Table Plans
- A-Frame Chicken Tractor
- How To Ship Lap A Wall
If you make this project and love it, I would love if you gave it 5 stars! Tag me on Instagram @farmhouseonboone with your beautiful creation.
DIY Arbor Plans
Equipment
- Drill and drill bits
- Table saw
- Miter saw
- Screws
Ingredients
- 6 – 8′ 4x4s
- 4 – 8’ 2x4s
- 2 – 8’ 1x4s
- Paint or stain
Instructions
- Take four of the 8’ 4×4 posts and sink them in the ground one foot. They should be square, 40 inches apart left to right, and 36” from front to back. These are measurements from the outside of the posts. 4×4 posts laying on top arbor posts Cut the other two 4×4’s down to 66” and lay one across the two front posts and one across the two back posts. Secure with screws.
- This will essentially create the frame, the front and the back. Next, add the points. Rip a 2×4 in half, so you have two 2x2s. Cut them down to three feet. Use a miter saw set to 45° to create the points on each end (as seen in the video). Luke marked the middle of each side of the end of the 2×2 at 3/4 inch down. Cut at 45° to make a triangle, flip to the flat side and cut 45° angles again on both those sides to create the point.
- Center them on the top of the main frame, placing the bottom point 4” from the bottom of the cross post. Screw in place.
ADD DECORATIVE SIDES
- Next, cut the side decorative 2x4s that connect the front to the back. Cut them 48” (or one 8 foot 2×4 cut in half) with 45° at both ends (use a miter saw).
- Put one on each side right under the place where the top 4×4 meets the main 4×4 posts, across to attach the front posts to the back posts. Go down 6” and place another one on each side.
ADD THE ROOF:
- Cut four 2x4s to four feet in length with 45° angles at each end. Meet them to the 3’ center posts, leaving 4” above the pitch of the roof. Drill in from the side of the 2×4 to the center post.
ADD LATTICE ON THE SIDE AND ROOF
- Rip a 1×4 into three-quarter by three-quarter strips (4 per 1×4).You need 12 at 36” (6 horizontal bars for each side), 9” apart, starting from 6” below the lower side 45° 2×4. And two at 60” to go down the center of the horizontal lattice.
Notes
- Your plans and size of arbor may change based on your own location, needs, and desires. You can use this as a guide.
- You could add more embellishments, like corbels, lattice work, etc.
- This was a fairly inexpensive project because we tried to repurpose many materials from previous projects, like some of the wood and paint.
- If you don’t want to paint the arbor, I would recommend using cedar so it will last longer in the elements.
Nutrition information is automatically calculated, so should only be used as an approximation.


Hey am I missing the trellis you made” in “your garden, I thought the link would be at the end of this one. Keep up the good work. Love your content.
Love your blog