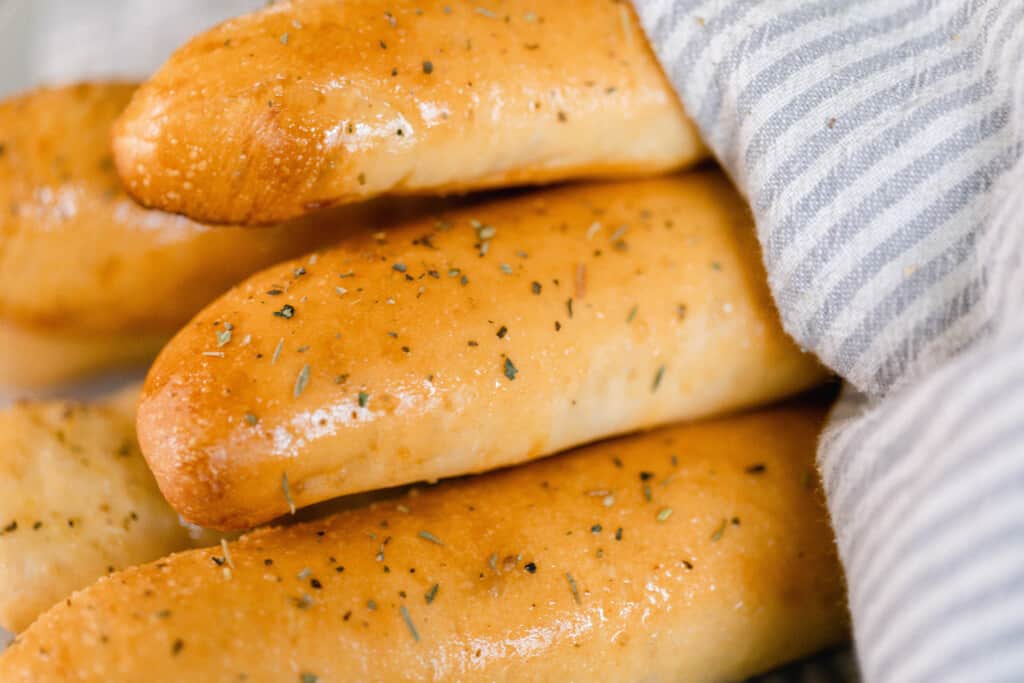
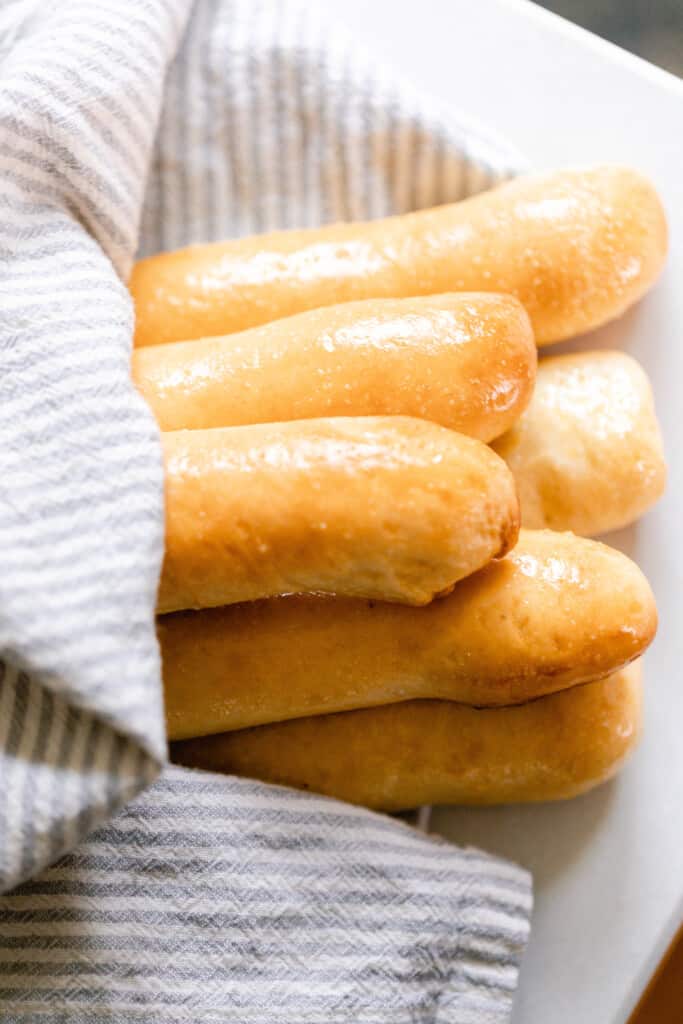
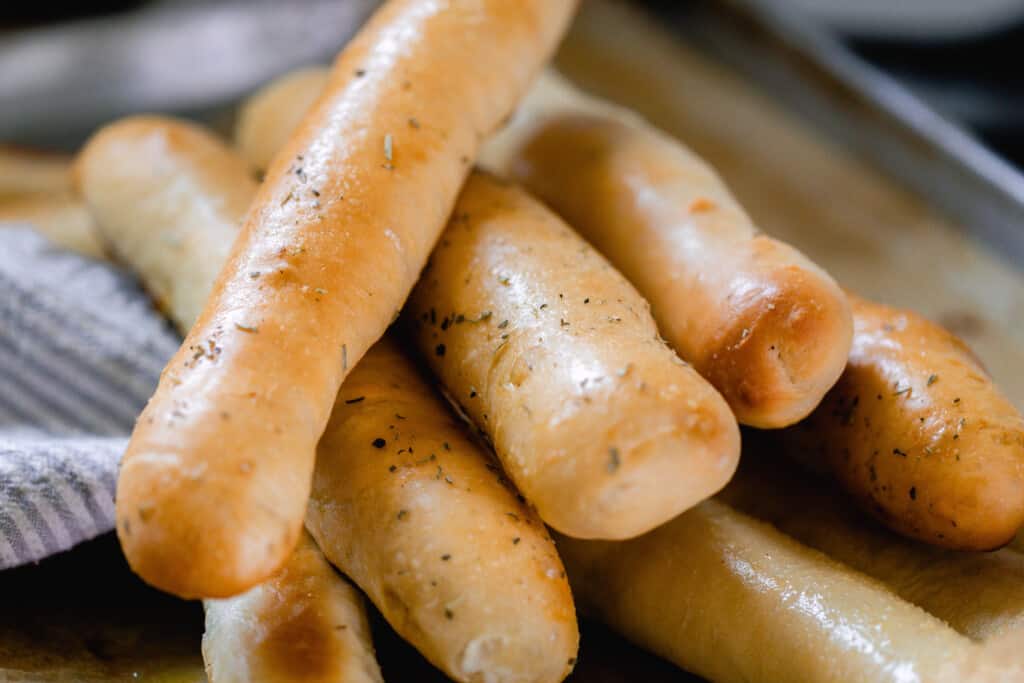
Learn how to make the best sourdough breadsticks with this step-by-step guide! Perfectly fluffy and tender on the inside with a delicious garlic butter on the outside. This easy-to-follow recipe will have your family raving.

We didn’t always live on a homestead. I grew up on a 400 acre farm, but when I got married we lived on a 1/4 acre right in town. And that is where Farmhouse On Boone started. It didn’t start on a bunch of property, when we had the ability to do all the things.
Rather, we cultivated our skills as we were able with what we had. We created a huge garden. I created my first sourdough starter and learned to make sourdough bread. I hung the clothes out to dry.
It was these simple tasks that grew my love for homemaking. Many people find homemaking full of monotonous tasks, but I find beauty in the creativity.
Cooking from scratch meals, shaping a new loaf of sourdough bread, creating new recipes – It never gets old and boring.
This sourdough breadstick recipe was just that – A new creative way to take a traditional sourdough bread recipe, shaped into breadsticks and topped with a garlic butter.
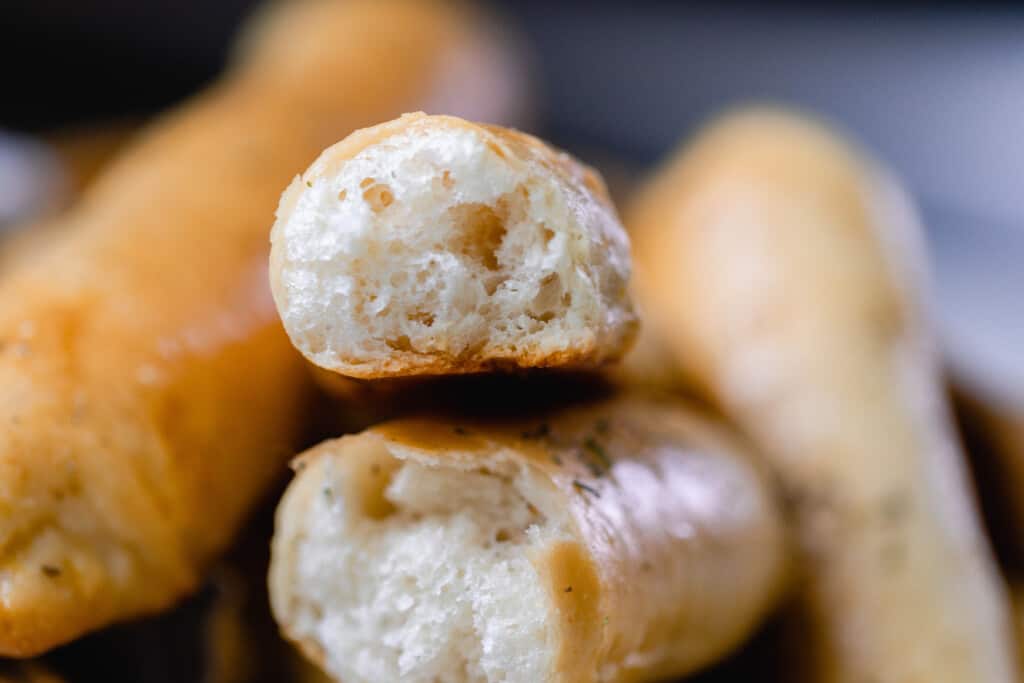
And is there anything like biting into a fluffy breadstick fresh from the oven?

Why you will love this recipe:
Easy: Just mix the ingredients, allow to rise, shape, rise and bake. Super simple with little hands on time.
Easier to digest: The beauty of sourdough is that the flour ferments making it healthier and easier to digest compared to conventional bread.
Delicious: Soft and fluffy breadsticks with a tender crumb.
Tips:
- This recipe uses active sourdough starter rather than commercial yeast to give it rise.
- New to sourdough? Learn how to make your own sourdough starter here.
- If you don’t have a stand mixer use the alternative stretch and fold method.
- For a dairy free version substitute the butter for olive oil.
This post contains affiliate links, which means I make a small commission at no extra cost to you. See my full disclosure here.
Ingredients:
Water: Preferably filtered.
Sourdough starter: Bubbly and active. This is a starter that has been fed 4-12 hours before starting the dough. It should have about doubled since feeding and pass the float test. Take a spoonful of starter and place it in a cup of water. If it floats it is ready.
Sugar
Salt: I prefer sea salt or pink Himalayan salt.
Butter: Unsalted. This allows you to control how much salt goes into the dough. Could also substitute with extra virgin olive oil (or your favorite olive oil) for a dairy free version. Also, swap out the butter in the topping as well.
Bread flour: Higher in protein, bread flour gives the bread a chewy and fluffy interior. I like to use organic flour.
Topping:
Butter
Salt
Garlic powder
Dried herbs of choice: Italian blend, parsley, basil, rosemary (optional)
Tools you may need:
Measuring cups and spoons or kitchen scale
Bench scraper (optional)
How To Make Sourdough Bread Sticks
Feed sourdough starter 4-12 hours before starting the dough. It should be a bubbly starter that passes the float test.
Add all the ingredients to a bowl of a stand mixer with a dough hook attachment.
Knead the dough
Knead on medium speed (KitchenAid stand mixer says not to knead over level 2) until you have a soft, smooth dough that is glossy and elastic. It should past the windowpane test. Take a small amount of dough and stretch it between your fingers into a square. If you can see through the dough without it breaking, it is ready to go.
This can take a long time, 10+ minutes or more with the dough hook on medium speed. Do not get discouraged if at 10 minutes it is not looking glossy and elastic. Keep kneading. It will happen.
Bulk ferment
Place a lid, plastic wrap, damp tea towel, or beeswax wrap over the bowl and allow to rise at room temperature (preferably a warm place) until it doubles in size.
Rising time can be anywhere from 6-12 hours depending on the temperature of your house. The warmer the environment the less time it takes to ferment. Be sure not to over ferment or else you will be left with a soupy mess.
Shape Breadsticks
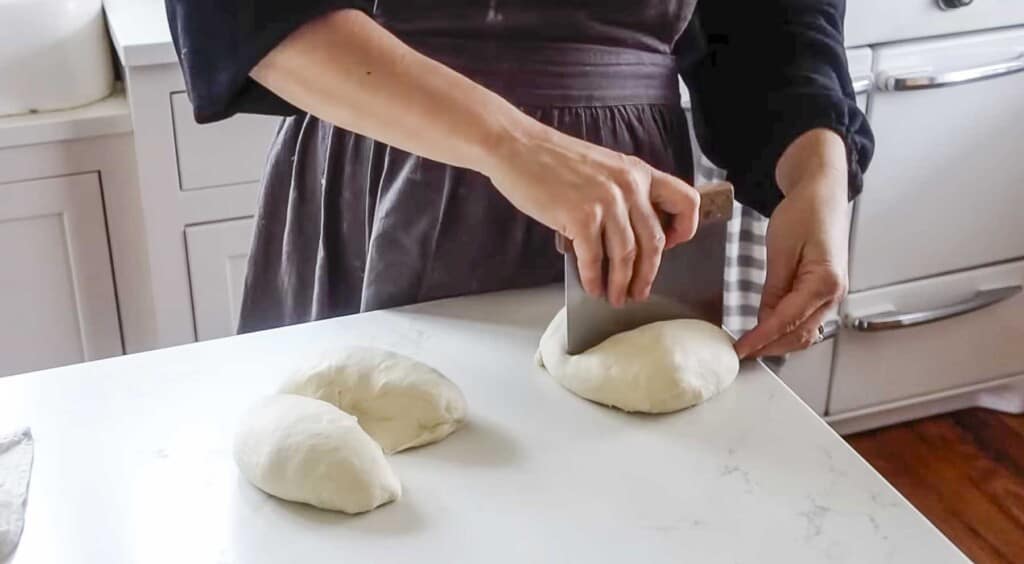
Pour bread dough onto a clean and lightly flour work surface.
Divide into 12 evenly sized balls. I like to use a bench scraper to make this easy, but a sharp knife will also work.
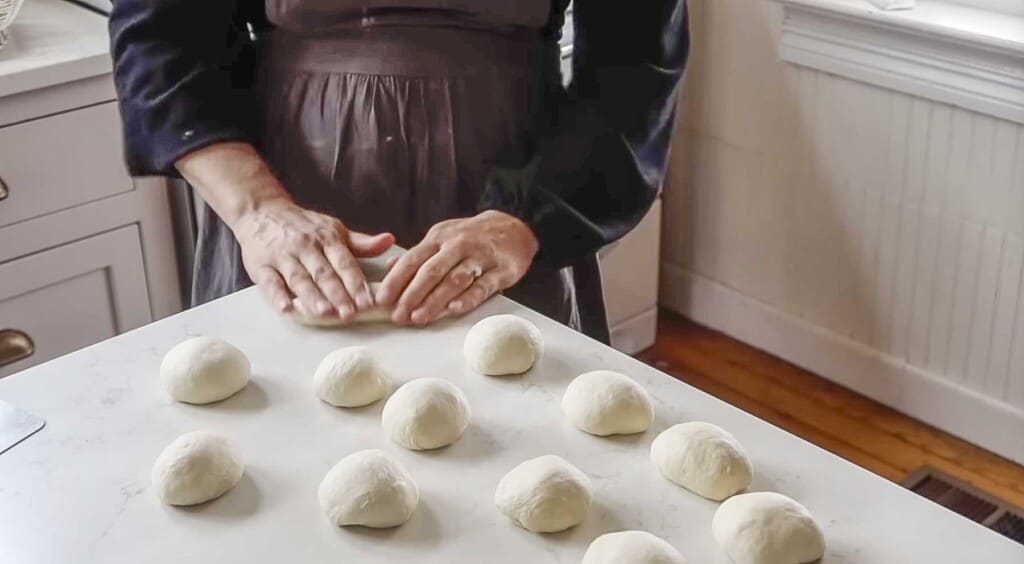
Roll each piece of dough into a log 8” long.
Place parchment paper on a baking sheet. Carefully place the shaped breadstick dough onto the parchment.
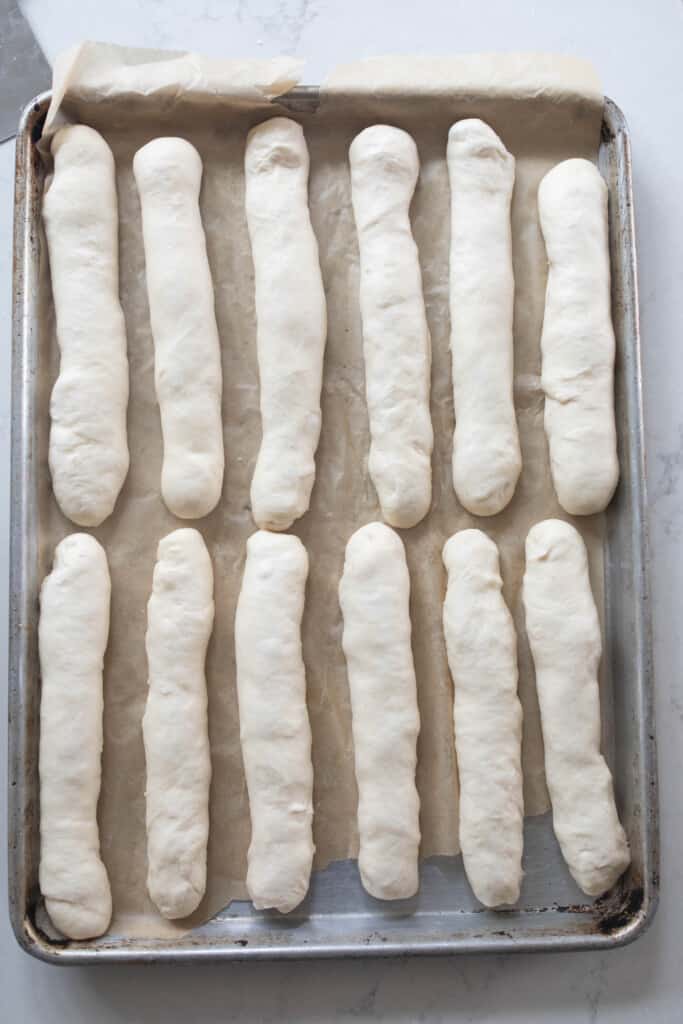
Cover with a towel and allow to rise for 1-2 hours until puffy, about doubled in size. They can also be placed in the fridge at this point and allowed to ferment up to a day.
Bake breadsticks in a preheated oven at 400° for 20 minutes, until golden brown on top.
Make The Topping
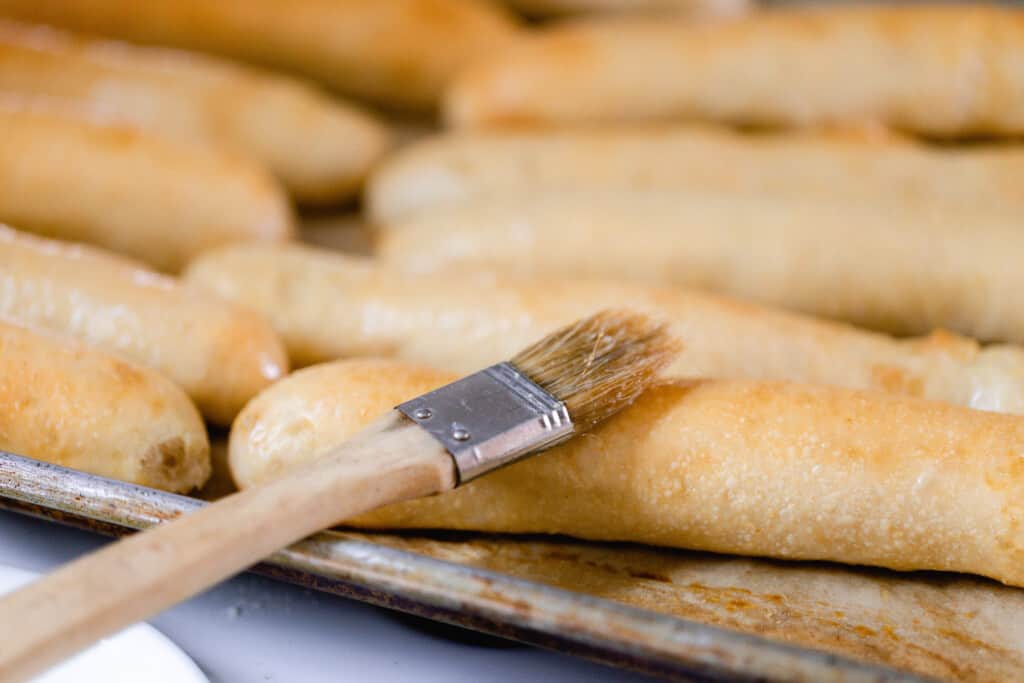
Meanwhile, while the breadsticks are baking, make the topping.
Combine melted butter, garlic powder, and salt.
Brush the topping on the breadsticks as soon as they are done baking and still hot. Sprinkle with herbs
Storage:
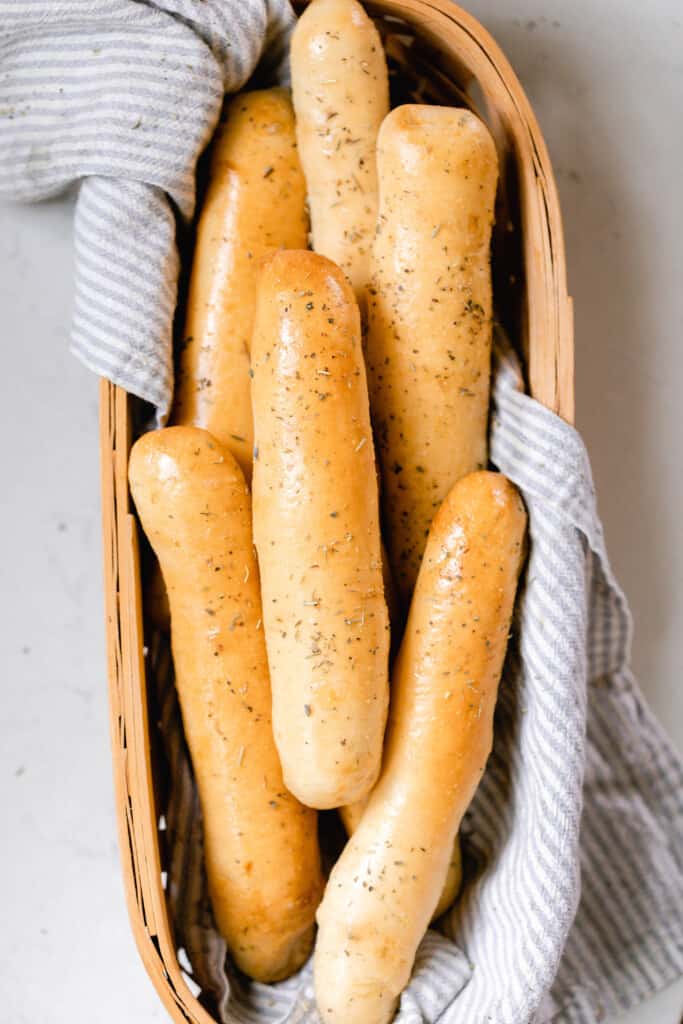
Serve immediately or covered at room temp for 2 days or in the fridge up to a week. Freeze in an airtight container (like a freezer storage bag) for up to 3 months.
How To Serve Sourdough Breadsticks
Variations:
Sprinkle with poppy seeds or sesame seeds
Top with freshly grated parmesan cheese
Italian breadsticks: Top with garlic powder and Italian herbs
Switch up the herbs: parsley, basil, rosemary, oregano, etc.
Baker’s Schedule:
8:00 PM: Feed sourdough starter.
The next day:
8:00 AM: Add ingredients to a stand mixer bowl with dough hook and mix ingredients together until the dough is smooth and glossy. Cover with a tight cover and allow to ferment until doubled.
4:00 PM: Shape and place on pan. Let sit for 1-2 hours until puffy.
5-6:00 PM: Bake.
FAQ:
Why is sourdough bread better for you than yeast bread?
The fermentation process breaks down the gluten and the phytic acid present in the grains. This makes it easier to digest and the nutrients more absorbable.
What makes sourdough bread different from other breads?
Traditional sourdough has a delicious slightly sour and tangy flavor that can only be created by using wild yeast present in a sourdough starter.
Find More Sourdough Recipes:
- Sourdough Crackers
- Soft Multigrain Sourdough Bread
- Sourdough Baguette Recipe
- How To Make Sourdough Breadcrumbs
- Jalapeño Cheddar Sourdough Bread
- Easy Sourdough Pita Bread
If you try this recipe and love it, I would love it if you gave it 5 stars! Thank you! Tag me on Instagram @farmhouseonboone.
Sourdough Breadsticks
Ingredients
- 1 cup water 236 g
- 1/2 cup sourdough starter bubbly and active (113.5 g)
- 2 tablespoons sugar 24 g
- 1 1/2 teaspoon salt 11g
- 3 tablespoons unsalted butter melted (42 g)
- 2 3/4 cups bread flour 413 g
Topping:
- 3 tablespoons unsalted butter melted
- 1/4 teaspoon salt
- 1/4 teaspoon garlic powder
- 1 teaspoon dried herb of choice italian blend, parsley, basil, rosemary (optional)
Instructions
- Feed sourdough starter 4-12 hours before starting the dough. It should be a bubbly starter that passes the float test.
- Add all the ingredients to a bowl of a stand mixer with a dough hook attachment.
Knead the dough
- Knead on medium speed (KitchenAid stand mixer says not to knead over level 2) until you have a soft, smooth dough that is glossy and elastic. It can take over 10 minutes for this to be accomplished. It should past the windowpane test.
- Place a lid, plastic wrap, damp tea towel, or beeswax wrap over the bowl and allow to rise at room temperature (preferably a warm place) until it doubles in size. Rising time can be anywhere from 6-12 hours depending on the temperature of your house.
- Pour bread dough onto a clean and lightly flour work surface.
- Divide into 12 evenly sized balls. I like to use a bench scraper to make this easy, but a sharp knife will also work.
- Roll each piece of dough into a log 8” long.
- Place parchment paper on a baking sheet. Carefully place the shaped breadstick dough onto the parchment.
- Cover with a towel and allow to rise for 1-2 hours until puffy, about doubled in size. They can also be placed in the fridge at this point and allowed to ferment up to a day.
- Bake breadsticks in a preheated oven at 400° for 20 minutes, until golden brown on top.
- Meanwhile, while the breadsticks are baking, make the topping.
- Combine melted butter, garlic powder, and salt.
- Brush the topping on the breadsticks as soon as they are done baking and still hot. Sprinkle with herbs
Notes
- This can take a long time, 10+ minutes or more with the dough hook on medium speed. Do not get discouraged if at 10 minutes it is not looking glossy and elastic. Keep kneading. It will happen.
- To complete the windowpane test take a small amount of dough and stretch it between your fingers into a square. If you can see through the dough without it breaking, it is ready to go.
Tiffany says
It taste amazing I always have to double the recipe, my family loves these. I even freeze them and pull them out when needed. Because of you Lisa, I now have been making all my families bread needs for little over 2 years now. Not only does it save us money but i know all the ingredients. Thank you so much!!!
Lisa says
Wow! That is an amazing accomplishment!
Jacki says
Do you freeze before or after making them?? Looking to gift some to a friend to go with a meal I’m making them, but I need them to be frozen, so they can just pull it out and they’re ready. I tried one recipe, and they were fine, but they didn’t “wow” at all.
Lisa says
Freeze them after baking them!
Briana says
Hey Lisa, do you have to use bread flour? All I have is whole wheat Einkorn berries that I grind up but I’ve noticed majority of your recipes are AP or like this one bread flour. Can I substitute those out for a specific ratio of Einkorn flour?
Thanks!
Lisa says
I have not tested this recipe with einkorn yet. Einkorn is a bit tricky and is going to behave quite differently from modern wheat. There are some tricks for subbing einkorn like using ⅓ less liquid or using more flour, but you’d have to experiment to see what works for you. Let us know if you try it!
Stephanie says
I should have made these for the homemade ravioli last weekend.
Rebecca says
Hi can I use all purpose flour?
Lisa says
Your consistency may be a bit different, but it should be fine.
Nikki says
I want to make these today and put in the fridge to be cooked tomorrow. Do I let them rise before putting in the fridge or should they go directly in the fridge after forming?
Do I let them warm up after cold ferment or do they go from the fridge directly to the oven?
Thank you!
Lisa Bass says
Let them rise before putting them in the fridge and then pull them out for a few hours to let them warm up before you bake them.
Chelsie Newell says
Can I use sourdough discard in this recipe?
Lisa Bass says
It needs to be active starter because there is no added yeast in the recipe.
Rebecca says
After mixed it’s pretty sticky and doesn’t hold shape. Is that normal?
Lisa Bass says
It shouldn’t be that sticky.
Chelle says
Can you refrigerate before the first rise and allow to ferment in the fridge?
Lisa Bass says
Yes, but they won’t rise in the fridge. You’d have to bring them out for awhile to rise on the counter.
Shelly says
Love the breadsticks!
Can these be long fermented? My family has gluten issues and does better with longer fermentation
Thanks!
Lisa Bass says
You could long ferment these, for sure!
Jelena says
Hi Lisa! I really want to try this with cheese somehow incorporated. When would you suggest I add some grated cheese? I guess I’m trying to recreate some cheesy twisted breadsticks I used to get at a bakery that recently closed.
Lisa Bass says
You would want to add the cheese during the kneading phase. If you are doing the stretch and fold method, add it during the second to last set of stretch and folds.